The last, fourth part, in which we will install the rest of the controllers and add a couple of useful little things.
All the parts:
- Terraform: building EKS, part 1 – VPC, Subnets and Endpoints
- Terraform: building EKS, part 2 – an EKS cluster, WorkerNodes, and IAM
- Terraform: building EKS, part 3 – Karpenter installation
- Terraform: building EKS, part 4 – installing controllers (this)
Contents
Planning
What we have to do now:
- install EKS EBS CSI Addon
- install ExternalDNS контролер
- install AWS Load Balancer Controller
- install SecretStore CSI Driver та ASCP
- install Metrics Server
- install Vertical Pod Autoscaler та Horizontal Pod Autoscaler
- add a Subscription Filter to the EKS Cloudwatch Log Group to collect logs in Grafana Loki (see Loki: collecting logs from CloudWatch Logs using Lambda Promtail)
- create a StorageClass with the
ReclaimPolicy=Retainfor PVCs whose EBS disks should be retained when deleting a Deployment/StatefulSet
Files structure now looks like this:
$ tree .
.
├── backend.tf
├── configs
│   └── karpenter-provisioner.yaml.tmpl
├── eks.tf
├── karpenter.tf
├── main.tf
├── outputs.tf
├── providers.tf
├── terraform.tfvars
├── variables.tf
└── vpc.tf
Let’s go.
EBS CSI driver
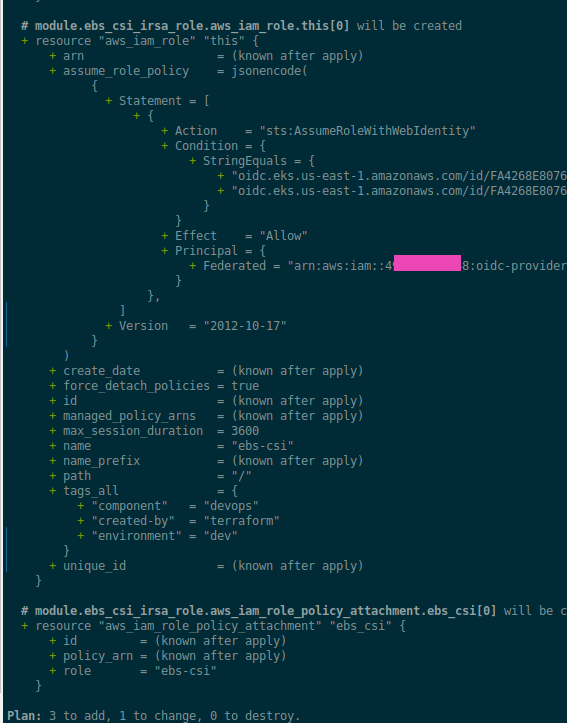
This addon can be installed from the Amazon EKS Blueprints Addons, which we will use later here for the ExternalDNS, but since we are installing addons through cluster_addons in the EKS module, let’s do this one the same way.
For the aws-ebs-csi-driver ServiceAccount, we will need to have a separate IAM Role – create it using the IRSA Terraform Module.
An example of the EBS CSI is available here – ebs_csi_irsa_role.
Create an iam.tf file – here we will keep the individual resources related to AWS IAM:
module "ebs_csi_irsa_role" {
  source = "terraform-aws-modules/iam/aws//modules/iam-role-for-service-accounts-eks"

  role_name             = "${local.env_name}-ebs-csi-role"
  attach_ebs_csi_policy = true

  oidc_providers = {
    ex = {
      provider_arn               = module.eks.oidc_provider_arn
      namespace_service_accounts = ["kube-system:ebs-csi-controller-sa"]
    }
  }
}
Run terraform init and deploy:
Next, find the current version of the addon for EKS 1.27:
$ aws eks describe-addon-versions --addon-name aws-ebs-csi-driver --kubernetes-version 1.27 --query "addons[].addonVersions[].[addonVersion, compatibilities[].defaultVersion]" --output text
v1.22.0-eksbuild.2
True
v1.21.0-eksbuild.1
False
...
In the EKS module, addons are installed using the aws_eks_addon resource, see main.tf.
For versions, we can pass the most_recent or addon_version parameter. It is always better to specify the version explicitly, of course.
Create a new variable for the EKS addon versions – add it to the variables.tf:
...

variable "eks_addons_version" {
  description = "EKS Add-on versions, will be used in the EKS module for the cluster_addons"
  type        = map(string)
}
Add values to the terraform.tfvars:
...

eks_addons_version = {
  coredns            = "v1.10.1-eksbuild.3"
  kube_proxy         = "v1.27.4-eksbuild.2"
  vpc_cni            = "v1.14.1-eksbuild.1"
  aws_ebs_csi_driver = "v1.22.0-eksbuild.2"
}
Add aws-ebs-csi-driver to thecluster_addons in the eks.tf:
module "eks" {
  source  = "terraform-aws-modules/eks/aws"
  version = "~> 19.0"
    ...
    vpc-cni = {
      addon_version = var.eks_addons_version.vpc_cni
    }
    aws-ebs-csi-driver = {
      addon_version            = var.eks_addons_version.aws_ebs_csi_driver
      service_account_role_arn = module.ebs_csi_irsa_role.iam_role_arn
    }
  }
...
Deploy and check the Pods:
$ kk -n kube-system get pod | grep csi
ebs-csi-controller-787874f4dd-nlfn2   5/6     Running   0          19s
ebs-csi-controller-787874f4dd-xqbcs   5/6     Running   0          19s
ebs-csi-node-fvscs                    3/3     Running   0          20s
ebs-csi-node-jz2ln                    3/3     Running   0          20s
Testing EBS CSI
Create a Pod’s manifest with a PVC:
apiVersion: v1
kind: PersistentVolume
metadata:
  name: demo-pv
spec:
  accessModes:
    - ReadWriteOnce
  capacity:
    storage: 1Gi
  storageClassName: standard
  hostPath:
    path: /tmp/demo-pv
---
apiVersion: v1
kind: PersistentVolumeClaim
metadata:
  name: pvc-dynamic
spec:
  accessModes:
    - ReadWriteOnce
  resources:
    requests:
      storage: 1Gi
  storageClassName: gp2
---
apiVersion: v1
kind: Pod
metadata:
  name: pvc-pod
spec:
  containers:
    - name: pvc-pod-container
      image: nginx:latest
      volumeMounts:
        - mountPath: /data
          name: data
  volumes:
    - name: data
      persistentVolumeClaim:
        claimName: pvc-dynamic
Deploy it and check its status:
$ kk get pod
NAME      READY   STATUS    RESTARTS   AGE
pvc-pod   1/1     Running   0          106s

$ kk get pvc
NAME          STATUS   VOLUME                                     CAPACITY   ACCESS MODES   STORAGECLASS   AGE
pvc-dynamic   Bound    pvc-a83b3021-03d8-458f-ad84-98805ec4963d   1Gi        RWO            gp2            119s

$ kk get pv pvc-a83b3021-03d8-458f-ad84-98805ec4963d
NAME                                       CAPACITY   ACCESS MODES   RECLAIM POLICY   STATUS   CLAIM                 STORAGECLASS   REASON   AGE
pvc-a83b3021-03d8-458f-ad84-98805ec4963d   1Gi        RWO            Delete           Bound    default/pvc-dynamic   gp2                     116s
Done with this.
Terraform and ExternalDNS
For the ExternalDNS, let’s try to use Amazon EKS Blueprints Addons. In contrast to how we did with the EBS CSI, for the ExternalDNS we won’t need to create an IAM Role separately, because the module will create it for us.
Examples can be found in the tests/complete/main.tf file.
However, for some reason, the documentation tells passing parameters for the chart with the external_dns_helm_config parameter (UPD – while writing this post, the page has already been removed altogether), although in reality, this leads to the “An argument named “external_dns_helm_config” is not expected here” error.
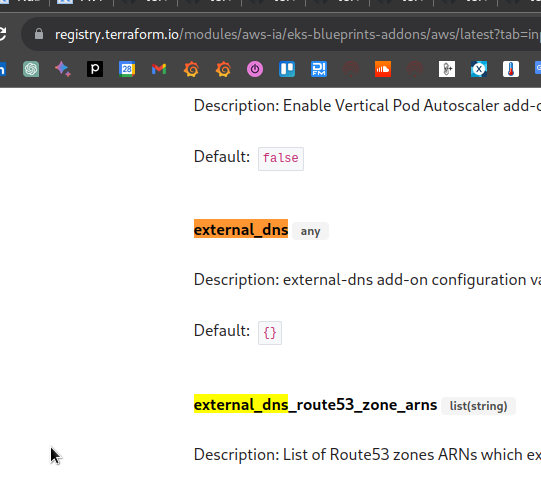
To find out how to pass the parameters, go to the module’s page in eks-blueprints-addons and see what inputs are available for the external_dns:
Next, check the main.tf file of the module, where you can see the var.external_dns variable, where you can pass all the parameters.
The default versions of the charts are set in the same file, but they are sometimes outdated, so let’s set our own.
Find the latest version for ExternalDNS:
$ helm repo add external-dns https://kubernetes-sigs.github.io/external-dns/
"external-dns" has been added to your repositories

$ helm search repo external-dns/external-dns --versions
NAME                            CHART VERSION   APP VERSION     DESCRIPTION
external-dns/external-dns       1.13.1          0.13.6          ExternalDNS synchronizes exposed Kubernetes Ser...
...
Add a variable for chart versions:
variable "helm_release_versions" {
  description = "Helm Chart versions to be deployed into the EKS cluster"
  type        = map(string)
}
Add values to the terraform.tfvars file:
...

helm_release_versions = {
  karpenter    = "v0.30.0"
  external_dns = "1.13.1"
}
We have one dedicated zone for each environment, so we just set it in the varables.tf as a string:
...

variable "external_dns_zone" {
  type        = string
  description = "AWS Route53 zone to be used by ExternalDNS in domainFilters and its IAM Policy"
}
And a value in the tfvars:
...

external_dns_zone = "dev.example.co"
Create a controllers.tf file, and describe the ExternalDNS deployment.
With the data "aws_route53_zone" get information about our Route53 Hosted Zone, and pass its ARN to the external_dns_route53_zone_arns parameter.
Since we are using a VPC Endpoint for the AWS STS, we need to pass the eks.amazonaws.com/sts-regional-endpoints="true" in the ServiceAccount’s annotation – similar to how we did for the Karpenter in the previous part.
In the external_dns.values, set the desired parameters – policy, our domain in the domainFilters, and set the tolerations to run on our default Nodes:
data "aws_route53_zone" "example" {
  name = var.external_dns_zone
}

module "eks_blueprints_addons" {
  source  = "aws-ia/eks-blueprints-addons/aws"
  version = "~> 1.7.2"

  cluster_name      = module.eks.cluster_name
  cluster_endpoint  = module.eks.cluster_endpoint
  cluster_version   = module.eks.cluster_version
  oidc_provider_arn = module.eks.oidc_provider_arn

  enable_external_dns = true
  external_dns = {
    namespace     = "kube-system"
    chart_version = var.helm_release_versions.external_dns
    values = [
      <<-EOT
        policy: upsert-only
        domainFilters: [ ${data.aws_route53_zone.example.name} ]
        tolerations:
        - key: CriticalAddonsOnly
          value: "true"
          operator: Equal
          effect: NoExecute
        - key: CriticalAddonsOnly
          value: "true"
          operator: Equal
          effect: NoSchedule
      EOT
    ]
    set = [
      {
        name  = "serviceAccount.annotations.eks\\.amazonaws\\.com/sts-regional-endpoints"
        value = "true"
        type  = "string"
      }
    ]
  }
  external_dns_route53_zone_arns = [
    data.aws_route53_zone.example.arn
  ]
}
Deploy it and check the Pod:
$ kk get pod -l app.kubernetes.io/instance=external-dns
NAME                            READY   STATUS    RESTARTS   AGE
external-dns-597988f847-rxqds   1/1     Running   0          66s
Testing ExternalDNS
Create a Kubernetes Service with the LoadBalancer type:
apiVersion: v1
kind: Service
metadata:
  name: mywebapp
  labels:
    service: nginx
  annotations:
    external-dns.alpha.kubernetes.io/hostname: test-dns.dev.example.co
spec:
  selector:
    service: nginx
  type: LoadBalancer
  ports:
    - port: 80
      targetPort: 80
Deploy it and check the ExternalDNS logs:
...
time="2023-09-13T12:01:39Z" level=info msg="Desired change: CREATE cname-test-dns.dev.example.co TXT [Id: /hostedzone/Z09***BL9]"
time="2023-09-13T12:01:39Z" level=info msg="Desired change: CREATE test-dns.dev.example.co A [Id: /hostedzone/Z09***BL9]"
time="2023-09-13T12:01:39Z" level=info msg="Desired change: CREATE test-dns.dev.example.co TXT [Id: /hostedzone/Z09***BL9]"
time="2023-09-13T12:01:39Z" level=info msg="3 record(s) in zone dev.example.co. [Id: /hostedzone/Z09***BL9] were successfully updated
Done here.
Terraform and AWS Load Balancer Controller
Let’s do it in the same way as we just did with the ExternalDNS – using the Amazon EKS Blueprints Addons module.
First, we need to tag our Public and Private subnets – see the Subnet Auto Discovery.
Also, check that they have the kubernetes.io/cluster/${cluster-name} = owned tag (it should be if you deployed them with the Terraform EKS module, as we did in the first part).
Add tags using public_subnet_tags and private_subnet_tags:
...
module "vpc" {
  source  = "terraform-aws-modules/vpc/aws"
  version = "~> 5.1.1"
  ...
  public_subnet_tags = {
    "kubernetes.io/role/elb" = 1
  }

  private_subnet_tags = {
    "karpenter.sh/discovery"          = local.eks_cluster_name
    "kubernetes.io/role/internal-elb" = 1
  }
  ...
}
...
The module creation is described here>>>.
Find the current version of the chart:
$ helm repo add aws-eks-charts https://aws.github.io/eks-charts
"aws-eks-charts" has been added to your repositories

$ helm search repo aws-eks-chart/aws-load-balancer-controller --versions
NAME                                            CHART VERSION   APP VERSION     DESCRIPTION
aws-eks-chart/aws-load-balancer-controller      1.6.1           v2.6.1          AWS Load Balancer Controller Helm chart for Kub...
aws-eks-chart/aws-load-balancer-controller      1.6.0           v2.6.0          AWS Load Balancer Controller Helm chart for Kub...
...
Add the chart version to the helm_release_versions variable:
...

helm_release_versions = {
  karpenter                             = "0.16.3"
  external_dns                          = "1.13.1"
  aws_load_balancer_controller          = "1.6.1"
}
Add the aws_load_balancer_controller resource to the controllers.tf file:
...

  enable_aws_load_balancer_controller = true
  aws_load_balancer_controller = {
    namespace     = "kube-system"
    chart_version = var.helm_release_versions.aws_load_balancer_controller
    values = [
      <<-EOT
        tolerations:
        - key: CriticalAddonsOnly
          value: "true"
          operator: Equal
          effect: NoExecute
        - key: CriticalAddonsOnly
          value: "true"
          operator: Equal
          effect: NoSchedule
      EOT
    ]
    set = [
      {
        name  = "serviceAccount.annotations.eks\\.amazonaws\\.com/sts-regional-endpoints"
        value = "true"
        type  = "string"
      }
    ]
  }
}
Deploy, and check the Pod:
$ kk get pod | grep aws
aws-load-balancer-controller-7bb9d7d8-4m4kz   1/1     Running   0          99s
aws-load-balancer-controller-7bb9d7d8-8l58n   1/1     Running   0          99s
Testing AWS Load Balancer Controller
Add a Pod, Service, and an Ingress:
---
apiVersion: v1
kind: Pod
metadata:
  name: hello-pod
  labels:
    app: hello
spec:
  containers:
    - name: hello-container
      image: nginxdemos/hello
      ports:
        - containerPort: 80
---
apiVersion: v1
kind: Service
metadata:
  name: hello-service
spec:
  type: NodePort
  selector:
    app: hello
  ports:
    - protocol: TCP
      port: 80
      targetPort: 80
---
apiVersion: networking.k8s.io/v1
kind: Ingress
metadata:
  name: hello-ingress
  annotations:
    alb.ingress.kubernetes.io/scheme: internet-facing
spec:
  ingressClassName: alb
  rules:
    - host: test-dns.dev.example.co
      http:
        paths:
          - path: /
            pathType: Prefix
            backend:
              service:
                name: hello-service
                port:
                  number: 80
Deploy, and check the Ingress to see if a corresponding AWS Load Balancer has been added to it:
$ kk get ingress
NAME            CLASS   HOSTS                     ADDRESS                                                 PORTS   AGE
hello-ingress   alb     test-dns.dev.example.co   k8s-kubesyst-helloing-***.us-east-1.elb.amazonaws.com   80      45s
Done here too.
Terraform and SecretStore CSI Driver with ASCP
SecretStore CSI Driver and AWS Secrets and Configuration Provider (ASCP) are needed to connect to the AWS Secrets Manager and Parameter Store into a Kubernetes cluster, see AWS: Kubernetes – AWS Secrets Manager and Parameter Store integration.
Here, we will also use the Amazon EKS Blueprints Addons – see secrets_store_csi_driver and secrets_store_csi_driver_provider_aws.
No settings are required here – just add Tolerations.
Find versions:
$ helm repo add secrets-store-csi-driver https://kubernetes-sigs.github.io/secrets-store-csi-driver/charts
"secrets-store-csi-driver" has been added to your repositories

$ helm repo add secrets-store-csi-driver-provider-aws https://aws.github.io/secrets-store-csi-driver-provider-aws
"secrets-store-csi-driver-provider-aws" has been added to your repositories

$ helm search repo secrets-store-csi-driver/secrets-store-csi-driver
NAME                                                    CHART VERSION   APP VERSION     DESCRIPTION
secrets-store-csi-driver/secrets-store-csi-driver       1.3.4           1.3.4           A Helm chart to install the SecretsStore CSI Dr...

$ helm search repo secrets-store-csi-driver-provider-aws/secrets-store-csi-driver-provider-aws
NAME                                                    CHART VERSION   APP VERSION     DESCRIPTION
secrets-store-csi-driver-provider-aws/secrets-s...      0.3.4                           A Helm chart for the AWS Secrets Manager and Co...
Add new values to the helm_release_versions variable in the terraform.tfvars:
...

helm_release_versions = {
  karpenter                             = "0.16.3"
  external_dns                          = "1.13.1"
  aws_load_balancer_controller          = "1.6.1"
  secrets_store_csi_driver              = "1.3.4"
  secrets_store_csi_driver_provider_aws = "0.3.4"
}
Add the modules to the controllers.tf:
...

  enable_secrets_store_csi_driver = true
  secrets_store_csi_driver = {
    namespace     = "kube-system"
    chart_version = var.helm_release_versions.secrets_store_csi_driver
    values = [
      <<-EOT
        syncSecret:
          enabled: true
        tolerations:
        - key: CriticalAddonsOnly
          value: "true"
          operator: Equal
          effect: NoExecute
        - key: CriticalAddonsOnly
          value: "true"
          operator: Equal
          effect: NoSchedule
      EOT
    ]
  }

  enable_secrets_store_csi_driver_provider_aws = true
  secrets_store_csi_driver_provider_aws = {
    namespace     = "kube-system"
    chart_version = var.helm_release_versions.secrets_store_csi_driver_provider_aws
    values = [
      <<-EOT
        tolerations:
        - key: CriticalAddonsOnly
          value: "true"
          operator: Equal
          effect: NoExecute
        - key: CriticalAddonsOnly
          value: "true"
          operator: Equal
          effect: NoSchedule
      EOT
    ]
  }
}
IAM Policy
For IAM Roles, which we will then add to services that need access to AWS SecretsManager/ParameterStore, you will need to connect an IAM Policy that allows access to the corresponding AWS API calls.
Let’s create it together with EKS in our file iam.tf:
resource "aws_iam_policy" "sm_param_access" {
  name        = "sm-and-param-store-ro-access-policy"
  description = "Additional policy to access Serets Manager and Parameter Store"

  policy = jsonencode({
    Version = "2012-10-17"
    Statement = [
      {
        Action = [
          "secretsmanager:DescribeSecret",
          "secretsmanager:GetSecretValue",
          "ssm:DescribeParameters",
          "ssm:GetParameter",
          "ssm:GetParameters",
          "ssm:GetParametersByPath"
        ]
        Effect   = "Allow"
        Resource = "*"
      },
    ]
  })
}
Deploy it and check the Pods:
$ kk -n kube-system get pod | grep secret
secrets-store-csi-driver-bl6s5                3/3     Running   0          86s
secrets-store-csi-driver-krzvp                3/3     Running   0          86s
secrets-store-csi-driver-provider-aws-7v7jq   1/1     Running   0          102s
secrets-store-csi-driver-provider-aws-nz5sz   1/1     Running   0          102s
secrets-store-csi-driver-provider-aws-rpr54   1/1     Running   0          102s
secrets-store-csi-driver-provider-aws-vhkwl   1/1     Running   0          102s
secrets-store-csi-driver-r4rrr                3/3     Running   0          86s
secrets-store-csi-driver-r9428                3/3     Running   0          86s
Testing SecretStore CSI Driver
To access the SecretStore, you need to add a ServiceAccount with an IAM role for a Kubernetes Pod.
The policy has already been created – let’s add an IAM Role.
Here is a description of its Trust policy:
{
  "Version": "2012-10-17",
  "Statement": [
    {
      "Effect": "Allow",
      "Action": "sts:AssumeRoleWithWebIdentity",
      "Principal": {
        "Federated": "arn:aws:iam::492***148:oidc-provider/oidc.eks.us-east-1.amazonaws.com/id/268***3CE"
      },
      "Condition": {
        "StringEquals": {
          "oidc.eks.us-east-1.amazonaws.com/id/268***3CE:aud": "sts.amazonaws.com",
          "oidc.eks.us-east-1.amazonaws.com/id/268***3CE:sub": "system:serviceaccount:default:ascp-test-serviceaccount"
        }
      }
    }
  ]
}
Create the Role:
$ aws iam create-role --role-name ascp-iam-role --assume-role-policy-document file://ascp-trust.json
Attach the policy:
$ aws iam attach-role-policy --role-name ascp-iam-role --policy-arn=arn:aws:iam::492***148:policy/sm-and-param-store-ro-access-policy
Create an entry in the AWS Parameter Store:
$ aws ssm put-parameter --name eks-test-param --value 'paramLine' --type "String"
{
    "Version": 1,
    "Tier": "Standard"
}
Add a manifest with the SecretProviderClass:
---
apiVersion: secrets-store.csi.x-k8s.io/v1
kind: SecretProviderClass
metadata:
  name: eks-test-secret-provider-class
spec:
  provider: aws
  parameters:
    objects: |
        - objectName: "eks-test-param"
          objectType: "ssmparameter"
---
apiVersion: v1
kind: ServiceAccount
metadata:
  name: ascp-test-serviceaccount
  annotations:
    eks.amazonaws.com/role-arn: arn:aws:iam::492***148:role/ascp-iam-role
    eks.amazonaws.com/sts-regional-endpoints: "true"
---
apiVersion: v1
kind: Pod
metadata:
  name: ascp-test-pod
spec:
  containers:
    - name: ubuntu
      image: ubuntu
      command: ['sleep', '36000']
      volumeMounts:
      - name: ascp-test-secret-volume
        mountPath: /mnt/ascp-secret
        readOnly: true
  restartPolicy: Never
  serviceAccountName: ascp-test-serviceaccount
  volumes:
  - name: ascp-test-secret-volume
    csi:
      driver: secrets-store.csi.k8s.io
      readOnly: true
      volumeAttributes:
        secretProviderClass: eks-test-secret-provider-class
Deploy it (to the default namespace, because in the Trust policy, we have a check of the subject for the "system:serviceaccount:default:ascp-test-serviceaccount"), and check the file in the Pod:
$ kk exec -ti pod/ascp-test-pod -- cat /mnt/ascp-secret/eks-test-param
paramLine
Terraform and Metrics Server
Here, we will also use the Amazon EKS Blueprints Addons – see metrics_server.
You don’t need any additional settings either – just turn it on and check it. You don’t even have to specify a version, just tolerations.
Add to the controllers.tf:
...

  enable_metrics_server = true
  metrics_server = {
    values = [
      <<-EOT
        tolerations:
        - key: CriticalAddonsOnly
          value: "true"
          operator: Equal
          effect: NoExecute
        - key: CriticalAddonsOnly
          value: "true"
          operator: Equal
          effect: NoSchedule
      EOT
    ]
  }
}
Deploy, check the Pod:
$ kk get pod | grep metr
metrics-server-76c55fc4fc-b9wdb               1/1     Running   0          33s
And check with the kubectl top:
$ kk top node
NAME                          CPU(cores)   CPU%   MEMORY(bytes)   MEMORY%
ip-10-1-32-148.ec2.internal   53m          2%     656Mi           19%
ip-10-1-49-103.ec2.internal   56m          2%     788Mi           23%
...
Terraform and Vertical Pod Autoscaler
I forgot that the Horizontal Pod Autoscaler does not require a separate controller, so here we only need to add the Vertical Pod Autoscaler.
We take it again from the Amazon EKS Blueprints Addons, see vpa.
Find the version:
$ helm repo add vpa https://charts.fairwinds.com/stable
"vpa" has been added to your repositories

$ helm search repo vpa/vpa
NAME    CHART VERSION   APP VERSION     DESCRIPTION
vpa/vpa 2.5.1           0.14.0          A Helm chart for Kubernetes Vertical Pod Autosc...
Add to the terraform.tfvars:
helm_release_versions = {
  ...
  vpa                                   = "2.5.1"
}
Add to the controllers.tf:
...

  enable_vpa = true
  vpa = {
    namespace = "kube-system"
    values = [
      <<-EOT
        tolerations:
        - key: CriticalAddonsOnly
          value: "true"
          operator: Equal
          effect: NoExecute
        - key: CriticalAddonsOnly
          value: "true"
          operator: Equal
          effect: NoSchedule
      EOT
    ]
  }
}
Deploy, check the Pods:
$ kk get pod | grep vpa
vpa-admission-controller-697d87b47f-tlzmb     1/1     Running             0          70s
vpa-recommender-6fd945b759-6xdm6              1/1     Running             0          70s
vpa-updater-bbf597fdd-m8pjg                   1/1     Running             0          70s
And a CRD:
$ kk get crd | grep vertic
verticalpodautoscalercheckpoints.autoscaling.k8s.io         2023-09-14T11:18:06Z
verticalpodautoscalers.autoscaling.k8s.io                   2023-09-14T11:18:06Z
Testing Vertical Pod Autoscaler
Describe a Deployment and a VPA:
apiVersion: apps/v1
kind: Deployment
metadata:
  name: hamster
spec:
  selector:
    matchLabels:
      app: hamster
  replicas: 2
  template:
    metadata:
      labels:
        app: hamster
    spec:
      securityContext:
        runAsNonRoot: true
        runAsUser: 65534 # nobody
      containers:
        - name: hamster
          image: registry.k8s.io/ubuntu-slim:0.1
          resources:
            requests:
              cpu: 100m
              memory: 50Mi
          command: ["/bin/sh"]
          args:
            - "-c"
            - "while true; do timeout 0.5s yes >/dev/null; sleep 0.5s; done"
---
apiVersion: "autoscaling.k8s.io/v1"
kind: VerticalPodAutoscaler
metadata:
  name: hamster-vpa
spec:
  targetRef:
    apiVersion: "apps/v1"
    kind: Deployment
    name: hamster
  resourcePolicy:
    containerPolicies:
      - containerName: '*'
        minAllowed:
          cpu: 100m
          memory: 50Mi
        maxAllowed:
          cpu: 1
          memory: 500Mi
        controlledResources: ["cpu", "memory"]
Deploy it, and in a minute or two, check the VPA:
$ kk get vpa
NAME          MODE   CPU    MEM         PROVIDED   AGE
hamster-vpa          100m   104857600   True       61s
And Pods statutes:
$ kk get pod
NAME                       READY   STATUS        RESTARTS   AGE
hamster-8688cd95f9-hswm6   1/1     Running       0          60s
hamster-8688cd95f9-tl8bd   1/1     Terminating   0          90s
Done here.
Add a Subscription Filter to the EKS Cloudwatch Log Group with Terraform
Almost everything is done. There are two small things left.
First, add the forwarding of logs from EKS Cloudwatch Log Groups to the Lambda function with a Promtail instance, which will forward these logs to a Grafana Loki instance.
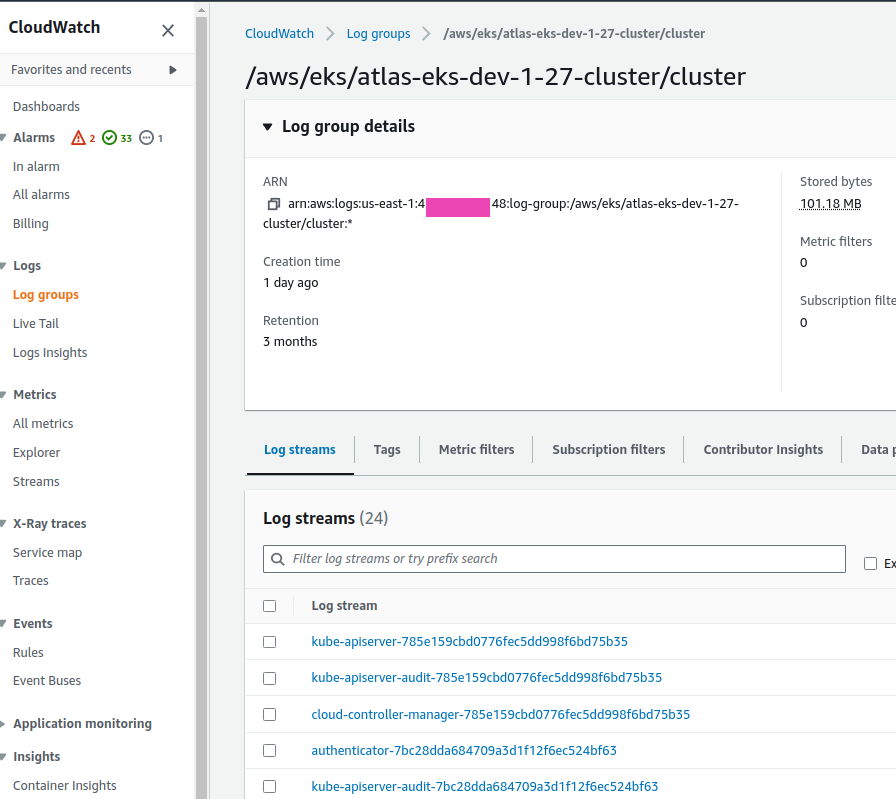
Our EKS module creates a CloudWatch Log Group /aws/eks/atlas-eks-dev-1-27-cluster/cluster with streams:
It returns the name of this group through the cloudwatch_log_group_name output, which we can use in the aws_cloudwatch_log_subscription_filter to add a filter to this log group, in which we need to pass the destination_arn from our Lambda’s ARN.
We already have a Lambda function, that is created from a separate automation for the monitoring stack (see VictoriaMetrics: deploying a Kubernetes monitoring stack). To get its ARN, use data "aws_lambda_function", to which we pass the name of the function, and put the name itself in variables:
variable "promtail_lambda_logger_function_name" {
  type        = string
  description = "Monitoring Stack's Lambda Function with Promtail to collect logs to Grafana Loki"
}
The value is in the tfvars:
...

promtail_lambda_logger_function_name  = "grafana-dev-1-26-loki-logger-eks"
For our Subscription Filter to be able to call this function, we need to add the aws_lambda_permission, where we’ll pass the ARN of our log group to the source_arn. Here, note that the ARN is passed as arn::name:*.
In the principal you need to specify logs.AWS_REGION.amazonaws.com – AWS_REGION can be obtained from the data "aws_region".
Describe resources in the eks.tf:
...

data "aws_lambda_function" "promtail_logger" {
  function_name = var.promtail_lambda_logger_function_name
}

data "aws_region" "current" {}

resource "aws_lambda_permission" "allow_cloudwatch_for_promtail" {
  statement_id  = "AllowExecutionFromCloudWatch"
  action        = "lambda:InvokeFunction"
  function_name = var.promtail_lambda_logger_function_name
  principal     = "logs.${data.aws_region.current.name}.amazonaws.com"
  source_arn    = "${module.eks.cloudwatch_log_group_arn}:*"
}

resource "aws_cloudwatch_log_subscription_filter" "eks_promtail_logger" {
  name            = "eks_promtail"
  log_group_name  = module.eks.cloudwatch_log_group_name
  filter_pattern  = ""
  destination_arn = data.aws_lambda_function.promtail_logger.arn
}
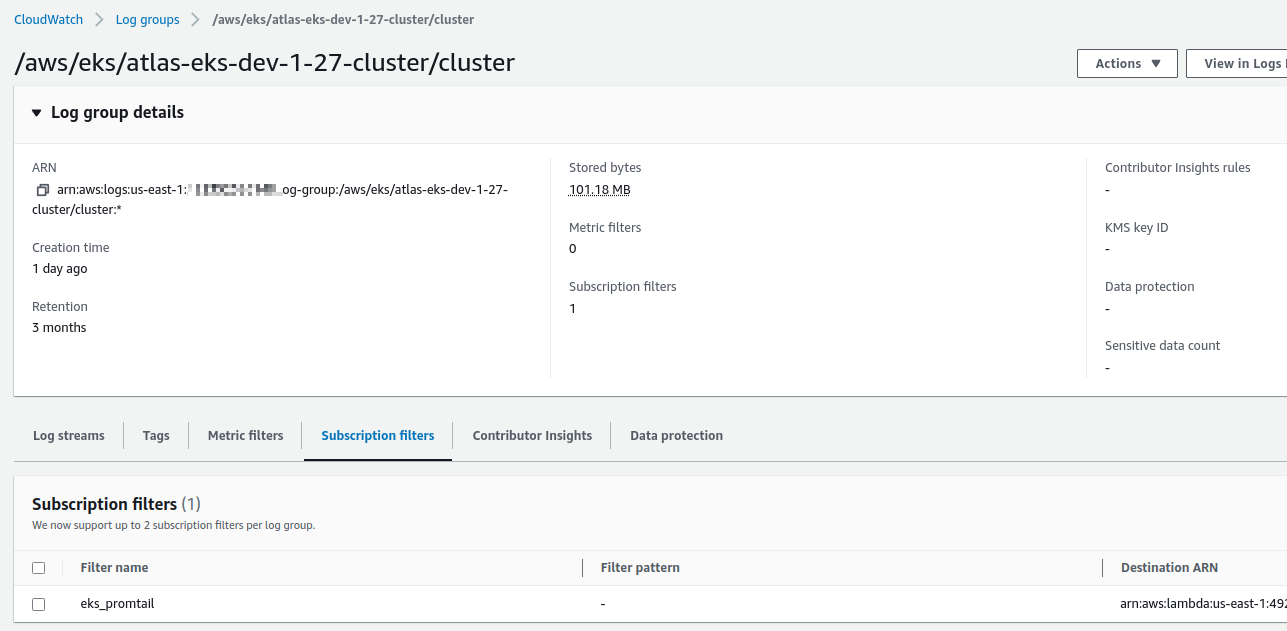
Deploy it and check the Log Group:
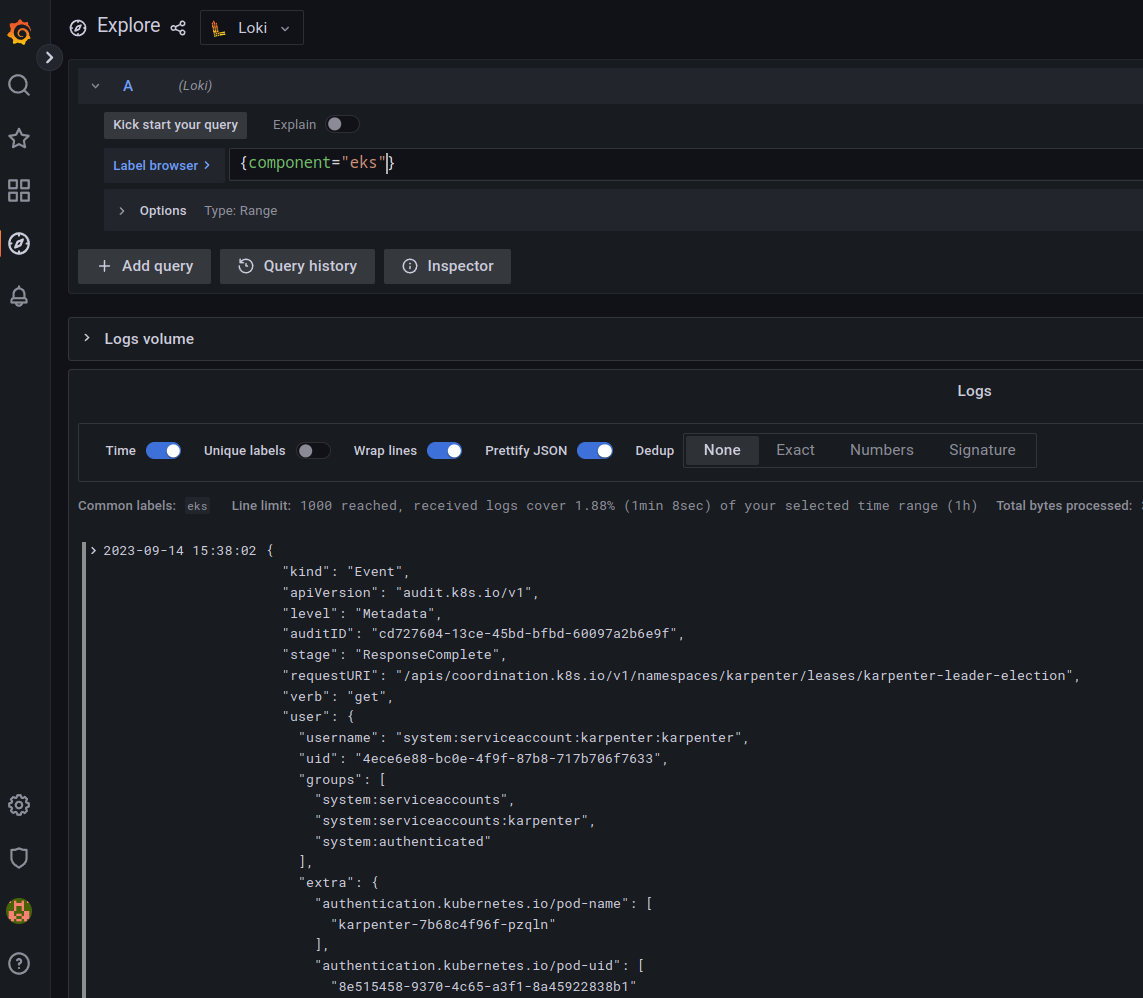
And logs in the Grafana Loki:
Creating a Kubernetes StorageClass with Terraform
In another EKS module for Terraform – cookpad/terraform-aws-eks – this could be done through the storage_classes.yaml.tmpl template file, but our module does not have it.
However, this is done in one manifest, so we add it to our eks.tf:
...

resource "kubectl_manifest" "storageclass_gp2_retain" {

  yaml_body = <<YAML
    apiVersion: storage.k8s.io/v1
    kind: StorageClass
    metadata:
      name: gp2-retain
    provisioner: kubernetes.io/aws-ebs
    reclaimPolicy: Retain
    allowVolumeExpansion: true
    volumeBindingMode: WaitForFirstConsumer
  YAML
}
Deploy it and check the available StorageClasses:
$ kk get storageclass
NAME            PROVISIONER             RECLAIMPOLICY   VOLUMEBINDINGMODE      ALLOWVOLUMEEXPANSION   AGE
gp2 (default)   kubernetes.io/aws-ebs   Delete          WaitForFirstConsumer   false                  27h
gp2-retain      kubernetes.io/aws-ebs   Retain          WaitForFirstConsumer   true                   5m46s
And finally, that’s it.
It’s like I’ve added everything I need for a full-fledged AWS Elastic Kubernetes Service cluster.
