AWS WAF (Web Application Firewall) is an AWS service for monitoring incoming traffic to secure a web application for suspicious activity like SQL injections. Can be attached to an AWS Application LoadBalancer, AWS CloudFront distribution, Amazon API Gateway, and AWS AppSync GraphQL API.
In case of finding any request that sits WAF’s rules, it will be blocked, and its sender will get a 403 response.
AWS WAF consist of four main components:
- Web ACL: Access Control Lists, which holds a list of rules to check incoming requests
- IP Sets: list of IP ranges, that can be attached to an ACL
- Rules: the rules themselves, describing which requests and how to check. Those rules can be to block an IP set, headers checks, checks for a request body content, etc.
- Rules groups: such rules also can be grouped to be used in ACLs, also, AWS provides a set of already predefined groups – AWS Managed Rules, plus groups from its Marketplace
AWS WAF has a capacity for its ACLs: each List can hold up to 1500 WCU (WAF Capacity Unit). We will speak about WAF’s limits in the AWS WAF limitations. Also, check the AWS WAF Web ACL capacity units (WCU).
The most inconvenient limit is that one Application Load Balancer can have only one ACL attached.
Also, I asked the AWS team about performance – will attaching a WAF ACL to an ALB/CloudFront will affect its response time, but no ACL or number of rules in it will affect a target anyway.
So, in this post we will spin up a test application in Kubernetes, will go through main WAF concepts, will see how Rules can be configured for an ACL, will create such an ACL, and will configure its monitoring with CloudWatch and с Prometheus.
Contents
A testing application
Let’s use a simple Kubernetes Deployment that will create a Kubernetes Pod with Nginx, Service, and an Ingress resource. This Ingress with AWS Load Balancer Controller will create an AWS Application LoadBalancer.
---
apiVersion: v1
kind: Namespace
metadata:
  name: test-namespace
---
apiVersion: apps/v1
kind: Deployment
metadata:
  name: test-deployment
  namespace: test-namespace
  labels:
    app: test
    version: v1
spec:
  replicas: 1
  selector:
    matchLabels:
      app: test
  template:
    metadata:
      labels:
        app: test
        version: v1
    spec:
      containers:
      - name: web
        image: nginxdemos/hello
        ports:
        - containerPort: 80
        resources:
          requests:
            cpu: 100m
            memory: 100Mi
        readinessProbe:
          httpGet:
            path: /
            port: 80
---
apiVersion: v1
kind: Service
metadata:
  name: test-svc
  namespace: test-namespace
spec:
  type: NodePort
  selector:
    app: test
  ports:
    - name: http
      protocol: TCP
      port: 80
      targetPort: 80
---
apiVersion: extensions/v1beta1
kind: Ingress
metadata:
  name: test-ingress
  namespace: test-namespace
  annotations:
    kubernetes.io/ingress.class: alb
    alb.ingress.kubernetes.io/scheme: internet-facing
    alb.ingress.kubernetes.io/listen-ports: '[{"HTTP": 80}]'
    alb.ingress.kubernetes.io/inbound-cidrs: 0.0.0.0/0
    external-dns.alpha.kubernetes.io/hostname: "testapp.dev.example.com"
spec:
  rules:
  - http:
      paths:
      - backend:
          serviceName: test-svc
          servicePort: 80
Deploy it, and check the Ingress and its ALB:
[simterm]
$ kubectl -n test-namespace get ingress
NAME           CLASS    HOSTS   ADDRESS                                    PORTS   AGE
test-ingress   <none>   *       aadca942-***.us-east-2.elb.amazonaws.com   80      46s
[/simterm]
Check for the response of this ALB:
[simterm]
$ curl -I testapp.dev.example.com
HTTP/1.1 200 OK
[/simterm]
Everything works here, let’s go to the AWS WAF.
AWS WAF configuration
Create a Web ACL
Go to the AWS Console > WAF, click on the Create web ACL:
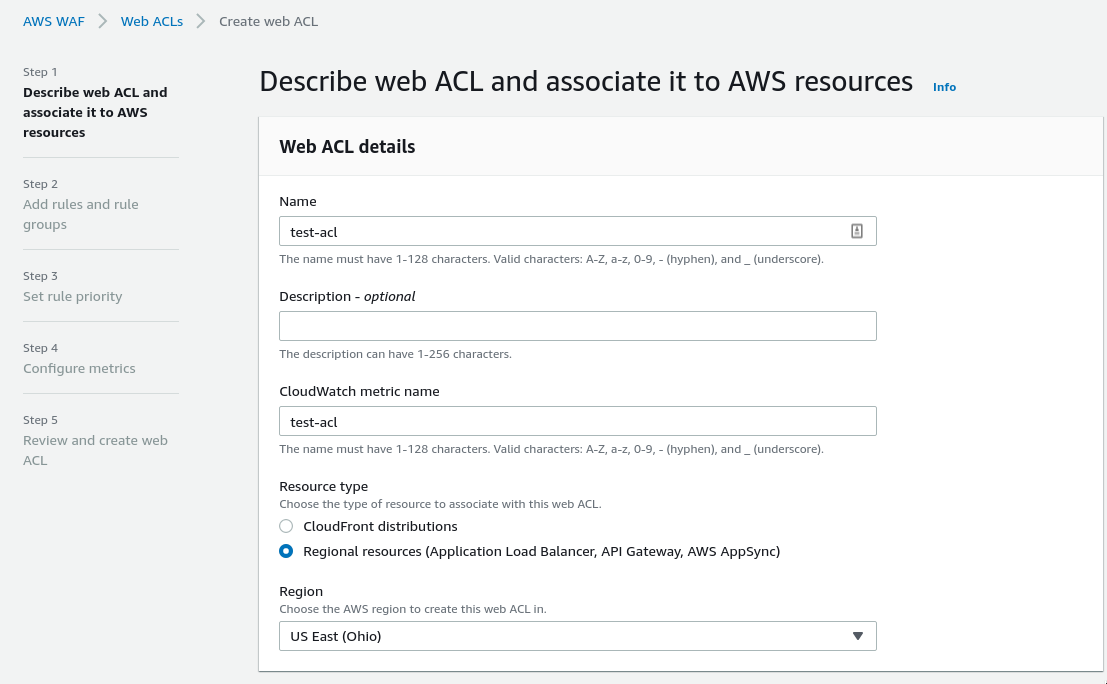
In this case, we will attach an AWS ALB, so at first (!) chose a necessary AWS Region, then set an ACL’s name which also will be used for CloudWatch metrics, they will be discussed below in the AWS CloudWatch metrics, and Prometheus topic:
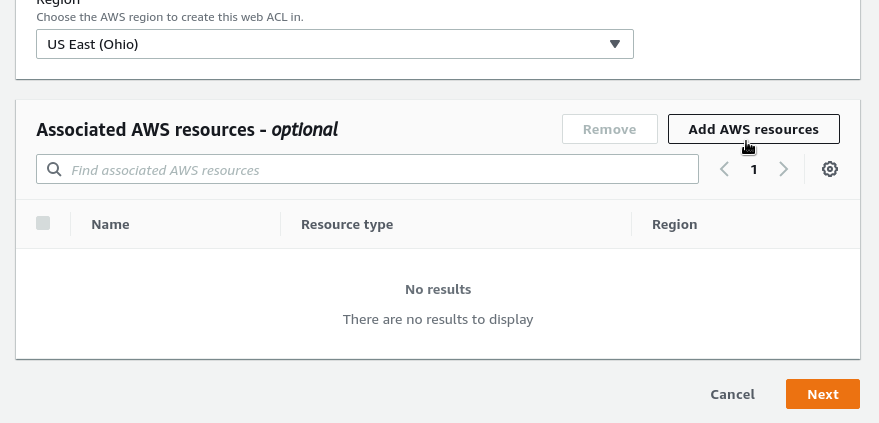
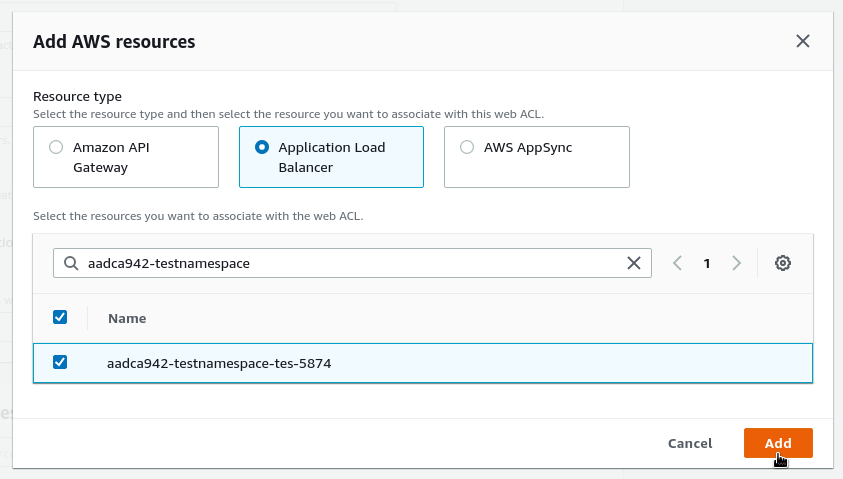
Next, find an ALB to be protected:
And from now, every request sent to this AWS ALB first will be sent over a chain of the ACL’s rules, and then it will be or declined with the 403 error, or will be passed to an application behind this load balancer.
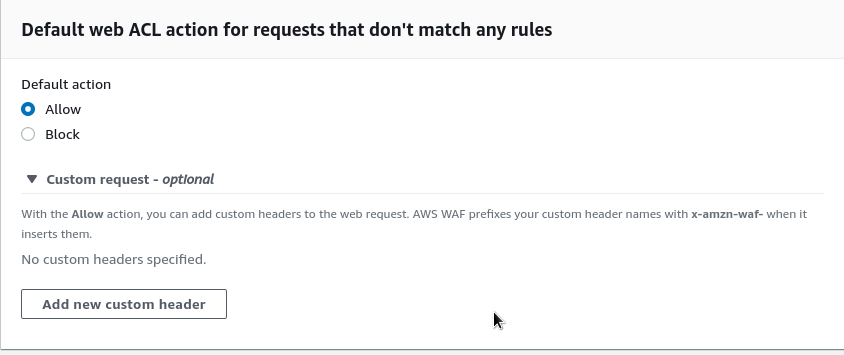
We will add rules later, for now just leave the default action set to the Allow:
Here, you can also configure additional actions:
- for the Allow: add a custom header that will be attached to all requests that are passed all checks and were sent to an application
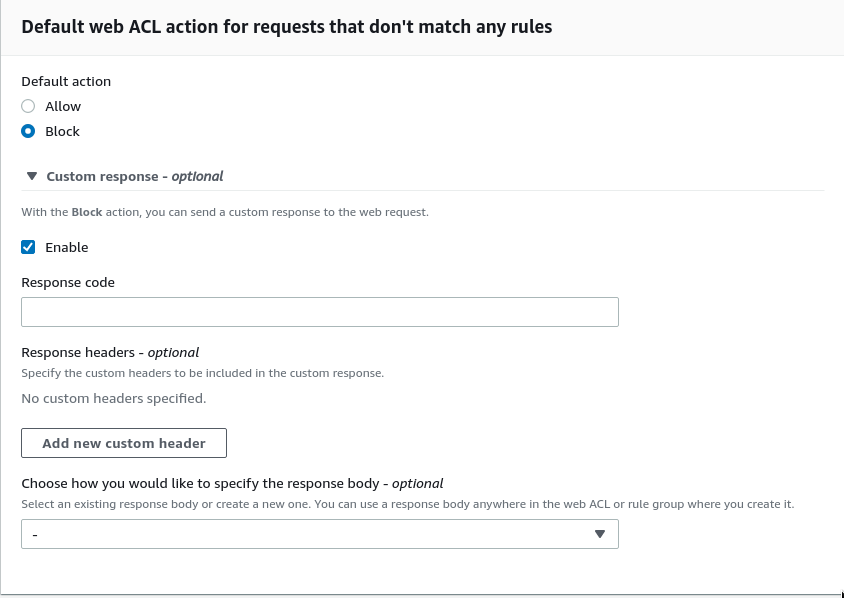
- for the Block: here, we can set a custom response code that will be returned to all blocked clients, or can specify a custom header and/or response body:
And again, for now just leave everything by default here, as this can be configured later.
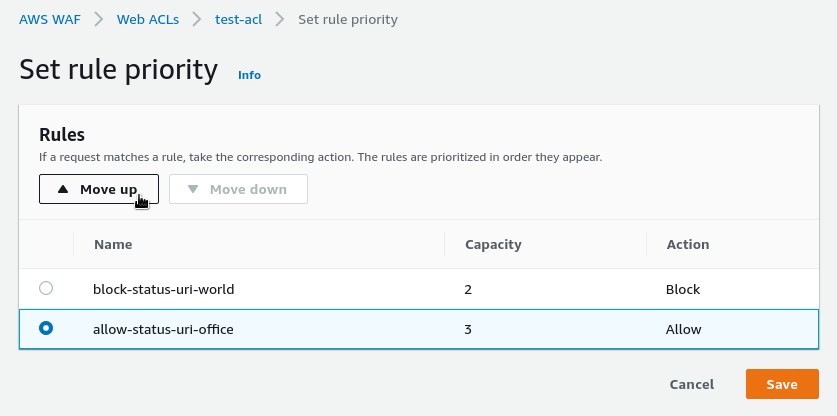
Similarly to common firewalls, you can configure rules priority in an ACL: the first rule matching a request will be applied:
Skip for now too.
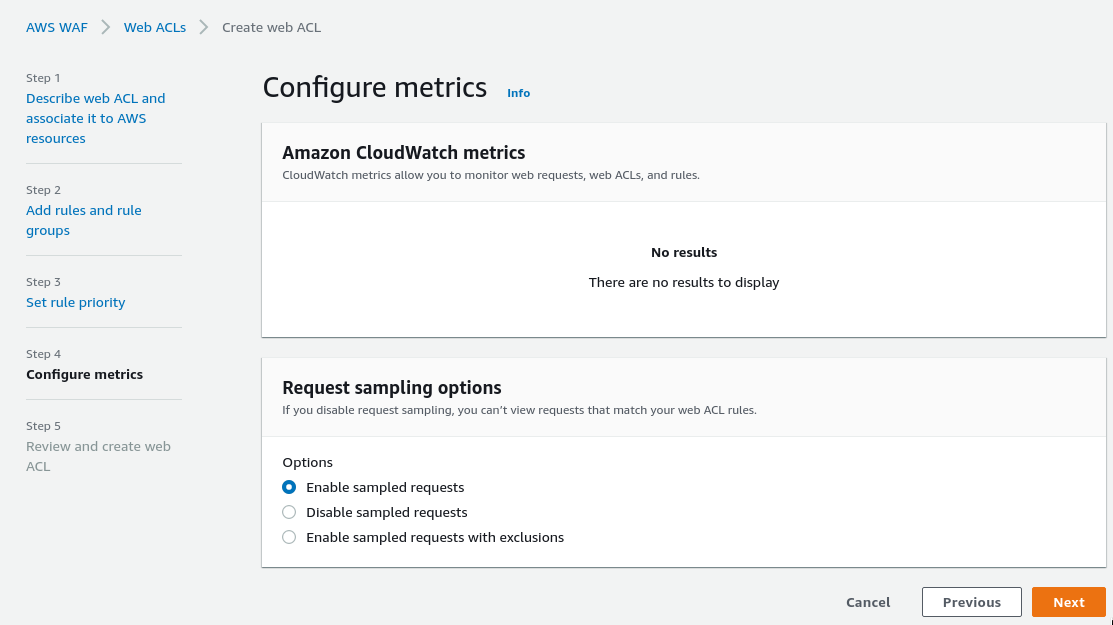
CloudWatch will be configured a bit later, so skip it as well:
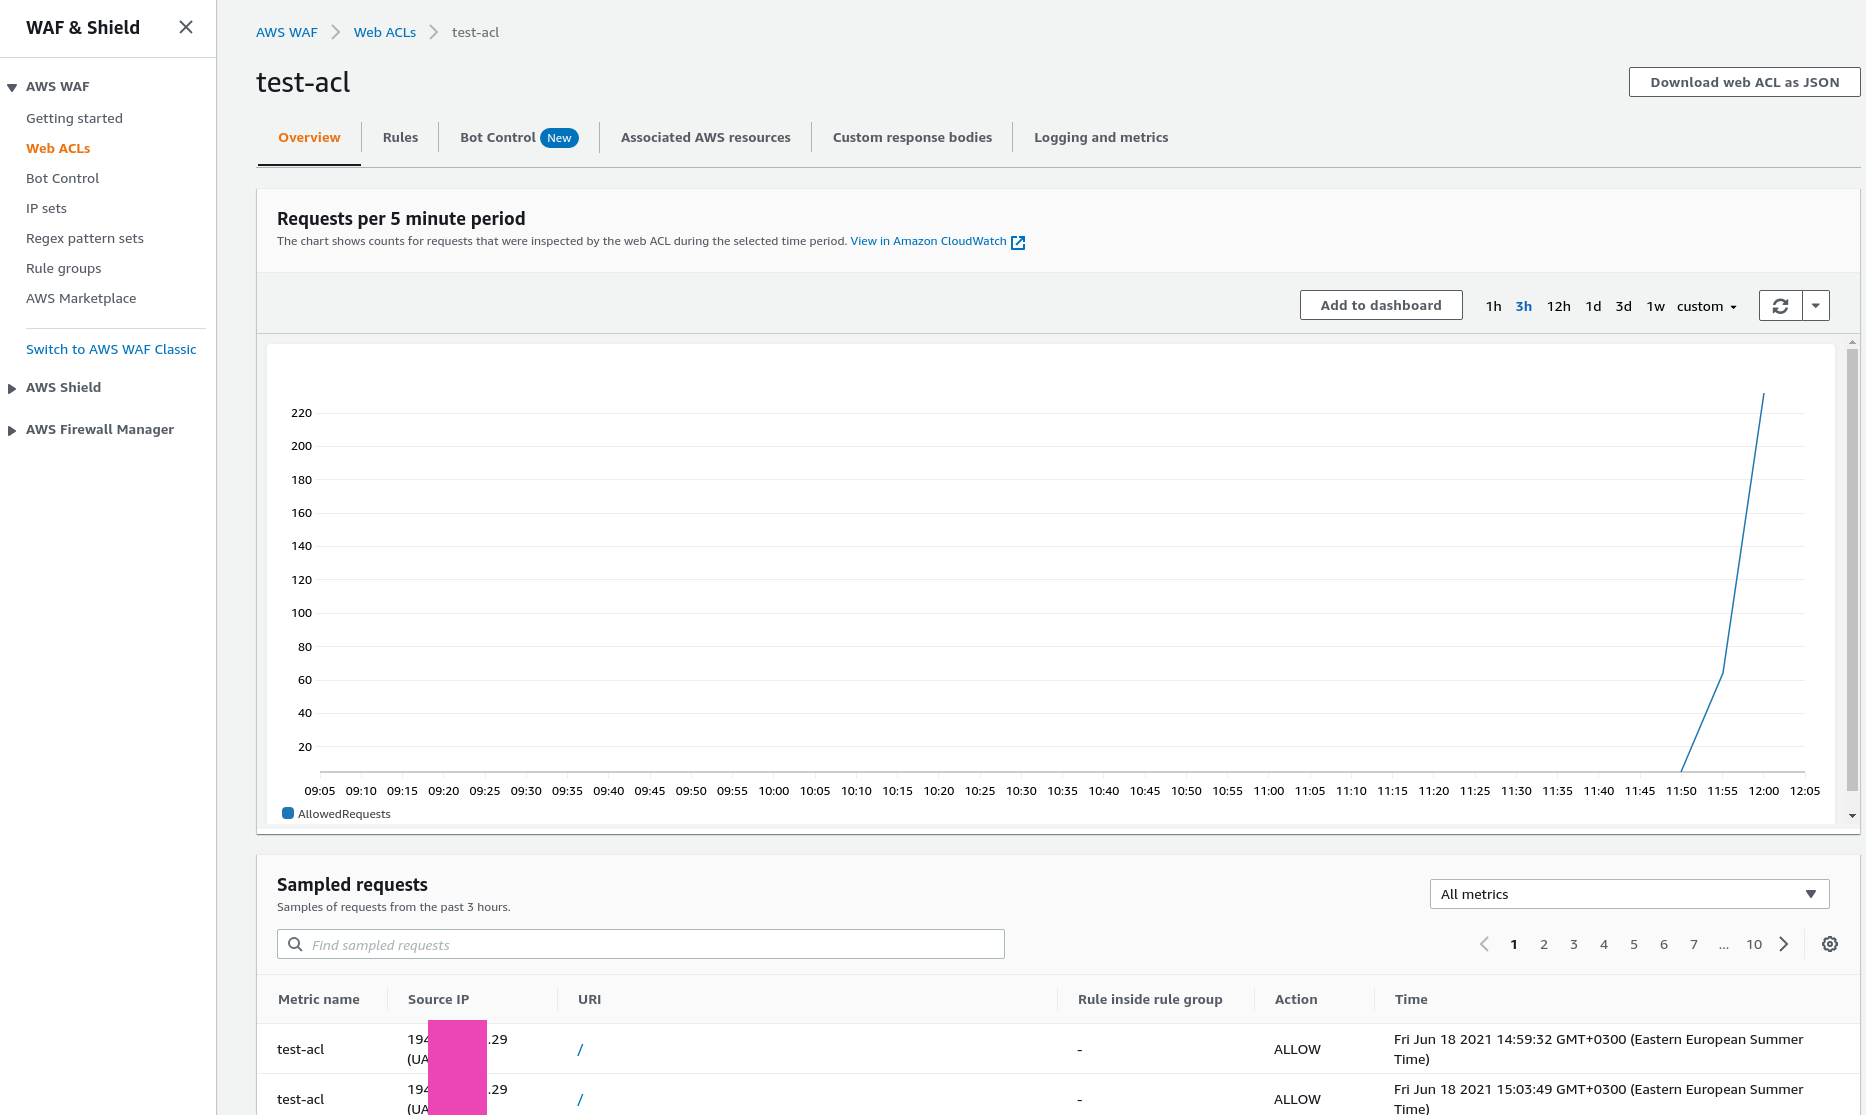
Run curl to the testing ALB to get some traffic and graphs:
[simterm]
$ watch -n 1 curl -I testapp.dev.example.com
IP set
The IP set allows the creation of a set of IPs or IP ranges that can be used later in rules.
For example, we can create a set of our office IPs to make an Allow rule. See Creating an IP set:
Pay attention to the AWS Regions here: for a CloudFront, you have to choose the CloudFront (Global), for all others – a region, where a secured resource is located.
Get your current IP (my office):
[simterm]
$ curl ifconfig.me
194.***.***.29
[/simterm]
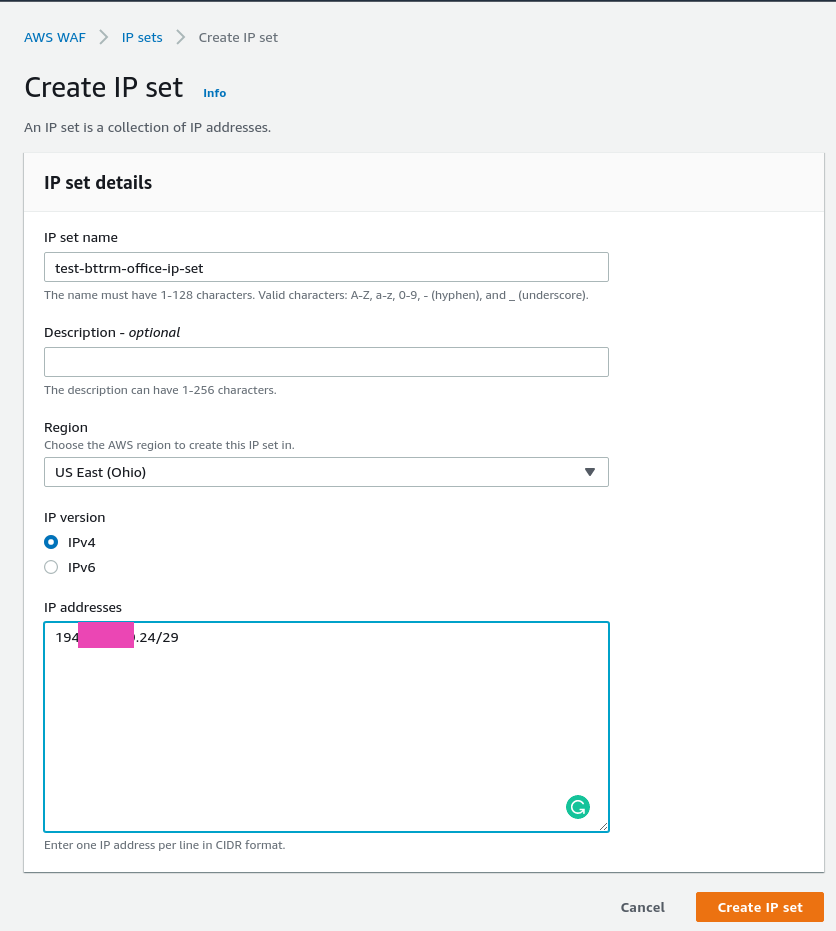
Create an IP Set, use the /29 mask to include all our office IPs:
And now, let’s go to the Rules.
Create ACL Rules
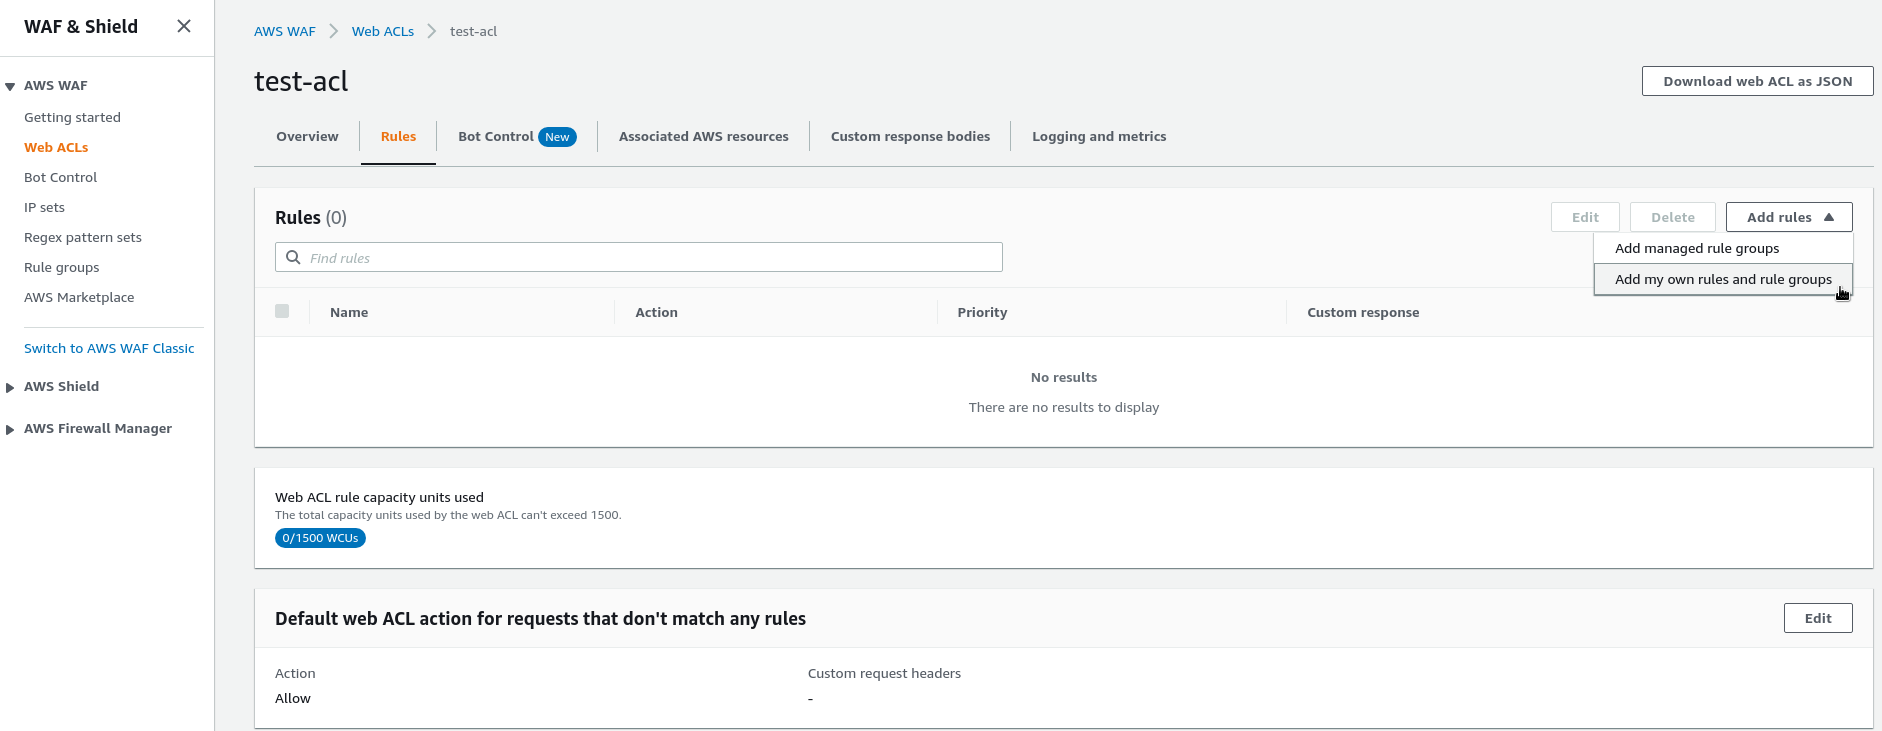
Select the ACL created above, click on the Add Rules, сhoose the Add my own rules:
Let’s add a simple rule: block all requests that originated from our office.
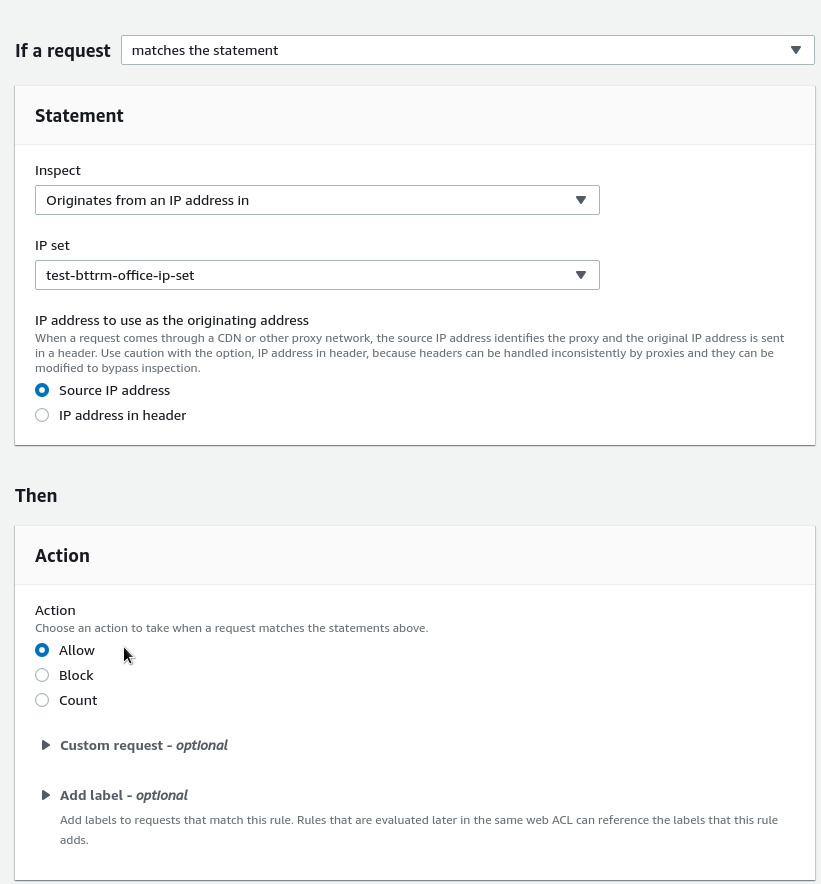
Choose the Rule type == IP Set as we will use the IP set created before, set the rule’s name, select your IP Set, use the Source IP address, and the default action – Block:
If set the action to the Count, WAF will just count requests that matched the rule without aby blocking activities. Can be used for testing before applying a rule:
And in a few seconds we will get the 403 responses:
[simterm]
$ curl -I testapp.dev.example.com
HTTP/1.1 403 Forbidden
[/simterm]
Now, let’s try to make something more interesting: allow traffic only from the office, but block all other requests from the world.
As there is no way to create an IP Set with the 0.0.0.0/0 CIDR, so let’s make it in a different way: change the Default Action of the ACL to the Block, and use office’ IP set to the Allowed rule.
Edit the Default web ACL action:
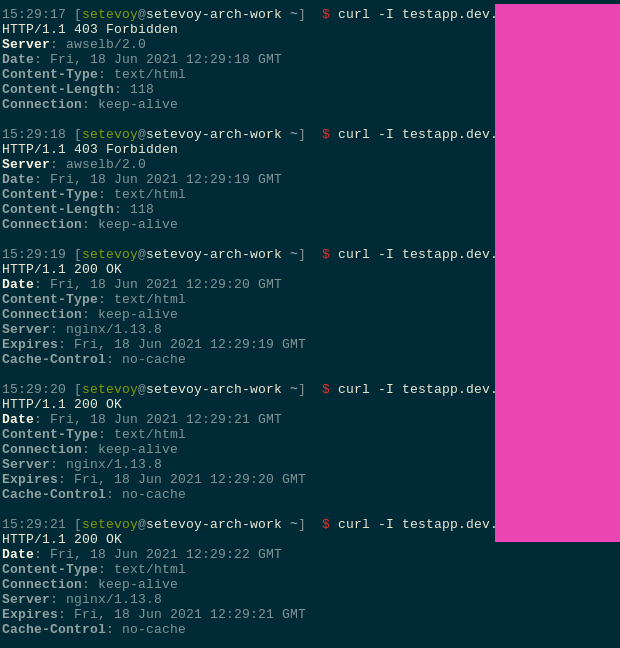
Check the access from something different than the office, for example from a server where is the rtfm.co.ua hosted. In 15-20 new settings will be applied:
Go back to the ACL test-office-rule, and change Block to the Allow from the office:
Check if it’s working now from the office:
Limiting access by a URI and rules priority
Okay, but what if we want to block public access only to a specific URI, let’s say /status, but allow its access from the office?
To do so, we need to:
- set back the default action to the Allow
- add a rule to allow the /status URI from the office
- add a rule to block the /status URI from the world
Go back to the default action of the ACL, and change it back to the Allow, thus allowing access to the ALB from anywhere:
Now, we need two additional rules: one to allow from the office, and one to block from the world. Let’s start with the blocking rule.
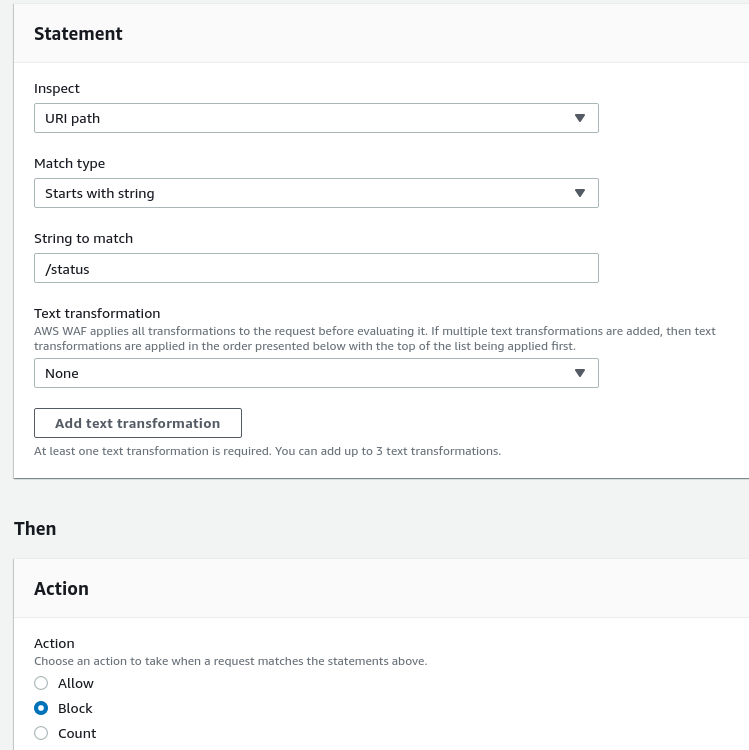
At this time, use the Rule builder, call the rule as block-status-uri-world, in the Statement choose the URI Path, set a value as /status, in the Action set the Block:
Check the access now.
From the office to the /:
[simterm]
15:33:29 [setevoy@setevoy-arch-work ~]  $ curl -I testapp.dev.example.com
HTTP/1.1 200 OK
[/simterm]
And from an another IP to the /:
[simterm]
root@rtfm-do-production-d10:~# curl -I testapp.dev.example.com
HTTP/1.1 200 OK
[/simterm]
From the office to the /status:
[simterm]
16:08:42 [setevoy@setevoy-arch-work ~]  $ curl -I testapp.dev.example.com/status
HTTP/1.1 403 Forbidden
[/simterm]
And from the world:
[simterm]
root@rtfm-do-production-d10:~# curl -I testapp.dev.example.com/status
HTTP/1.1 403 Forbidden
[/simterm]
Good: now we’ve granted access to the root of the website from anywhere, and the /status is blocked from anywhere. Now, let’s allow the /status access from the office.
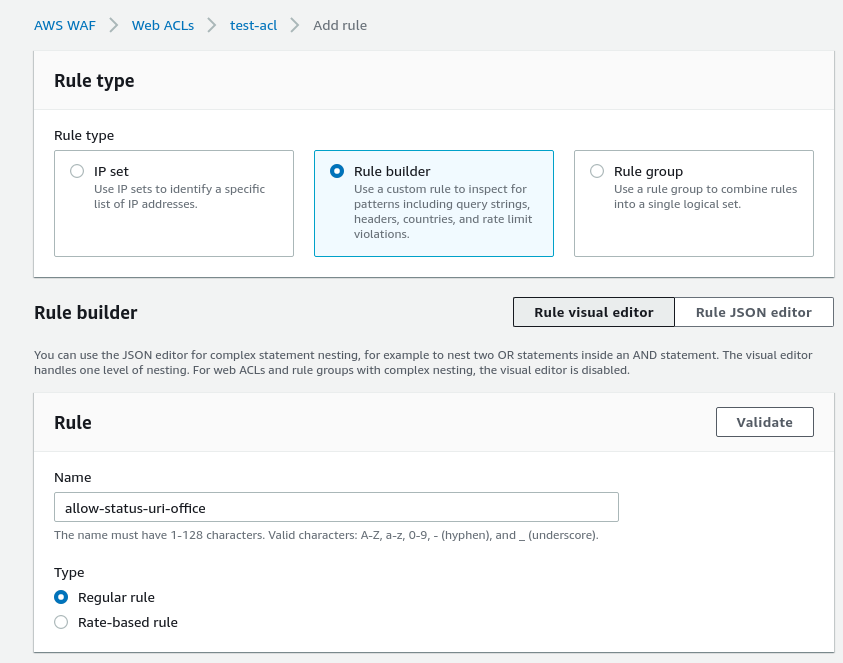
Go back to the Rules, and add another rule, let’s call it allow-status-uri-office:
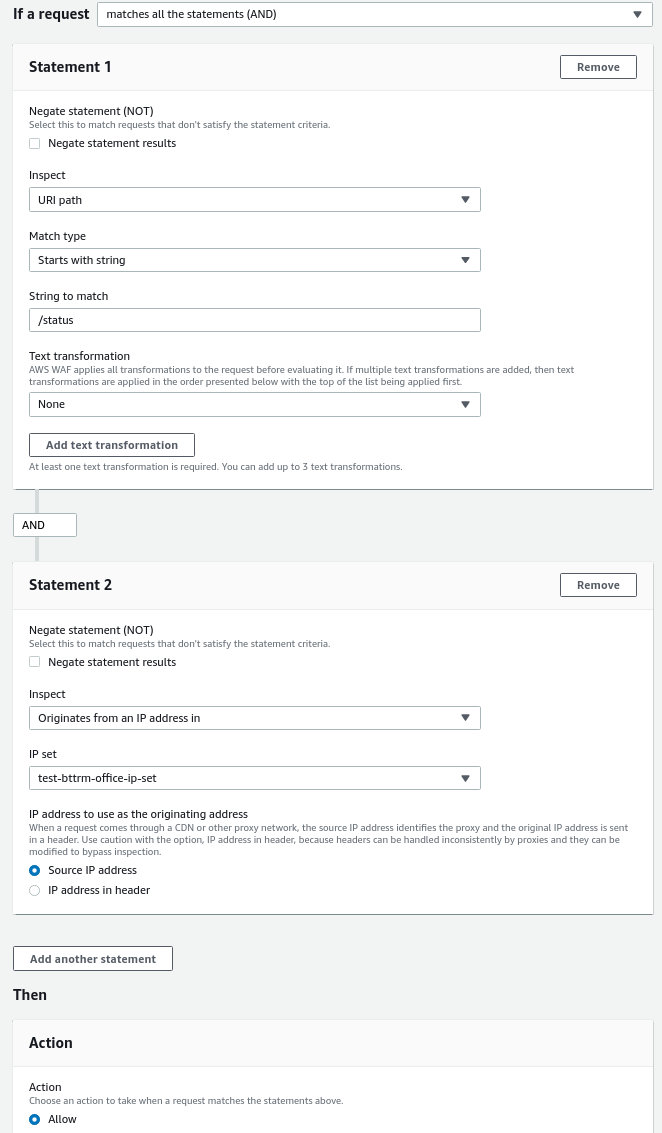
Build the rule’s condition:
- if an URI == /status
- AND if an IP == test-bttrm-office-ip-set
- then Allow
By the way, pay attention to the Capacity field: here we can see how many WCUs will be consumed by the rule from the total 1500 available for us in the ACL.
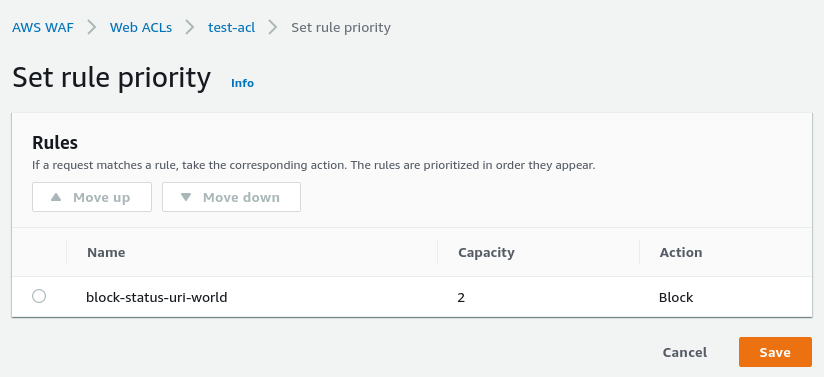
So, we’ve added an allow rule, but now it will not work as we have the first rule block-status-uri-world, and it will block all requests to the /status, even from the office:
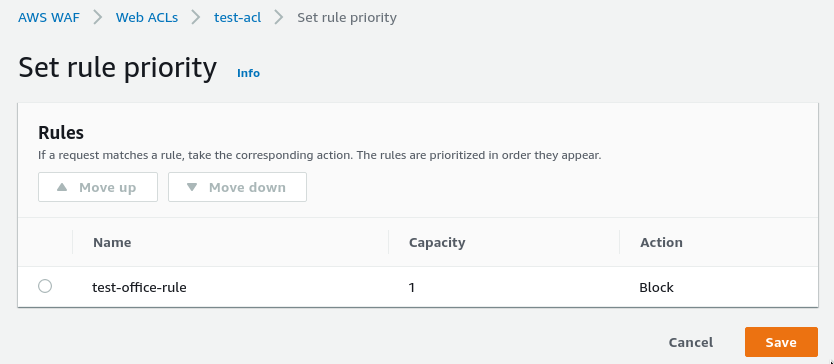
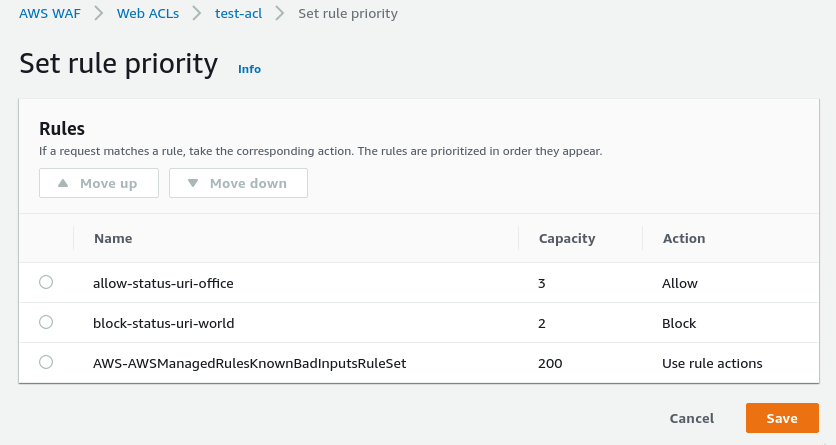
To fix this, move the allow-status-uri-office to the beginning of the list:
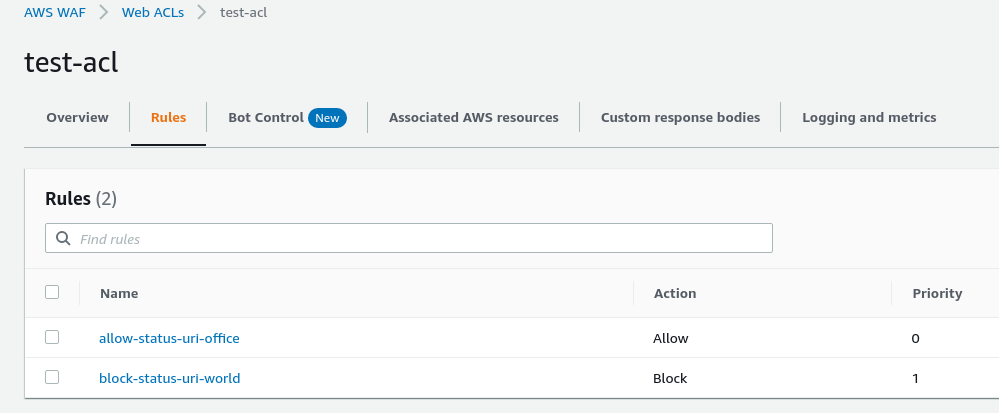
So now priorities will be the next:
Check access from outside of the office:
[simterm]
root@rtfm-do-production-d10:~# curl -I testapp.dev.example.com/status
HTTP/1.1 403 Forbidden
[/simterm]
Good, it was blocked. Now, from the office:
[simterm]
16:18:00 [setevoy@setevoy-arch-work ~]  $ curl -I testapp.dev.example.com/status
HTTP/1.1 200 OK
[/simterm]
And it works.
SQL injection block
One of the nastiest types of attacks is SQL injection which definitely worth being banned.
In the AWS WAF Managed rules we have a list of predefined rules from the AWS itself and its partners, and also you can create such a block on your own.
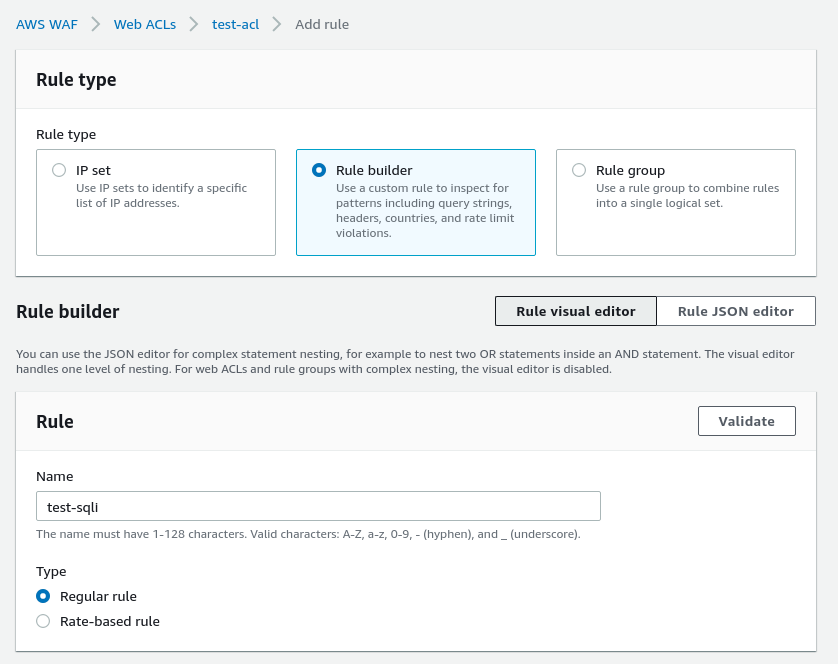
Create a new rule called sqli-test:
Define its conditions:
- check the Query
- in the Match type, choose the Contains SQL Injection attack
In the Actions leave the default Block, and in the Custom response let’s set the 405 – Method not allowed, to confuse an attacker (although it might be even more fun to set the 200 here 🙂 ):
Save the rule, and check it with a request products?category=Gifts'-- googled in here:
[simterm]
$ curl -I "http://testapp.dev.example.com/products?category=Gifts'--"
HTTP/1.1 405 Not Allowed
[/simterm]
Yay! We’ve blocked an SQL injection attempt to our application!
Managed Rule groups
Let’s take a look at what AWS and its partners suggest to use in their existing rules.
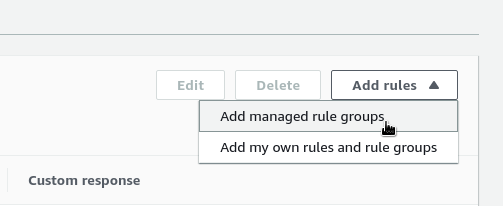
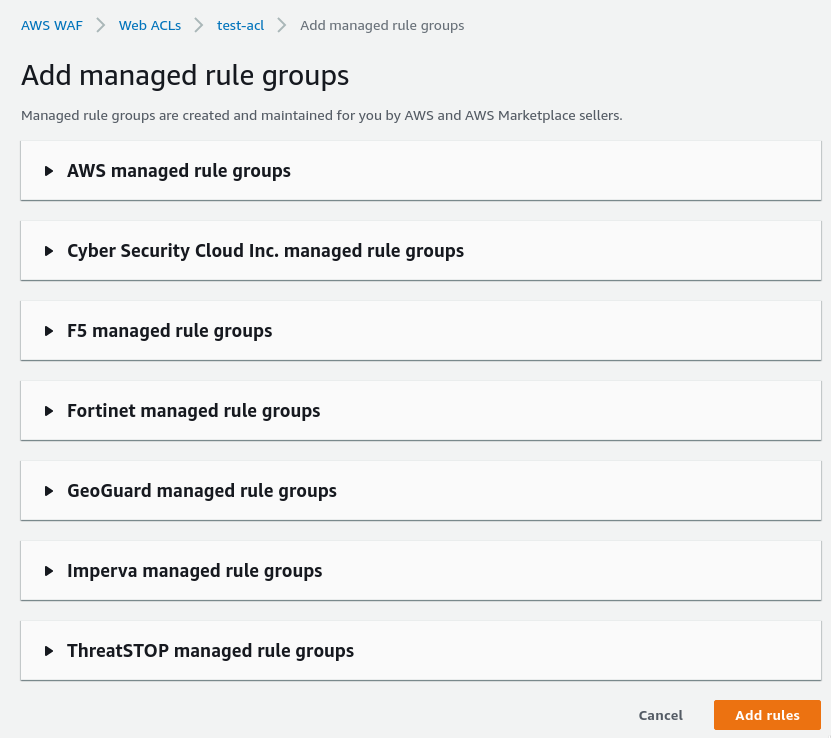
Chose the Add managed rule groups:
In the AWS managed rule groups you can find a list of rules from the AWS, and the rest is paid rules that can be purchased on the AWS Marketplace.
Check the documentation for the rules description – AWS Managed Rules rule groups list.
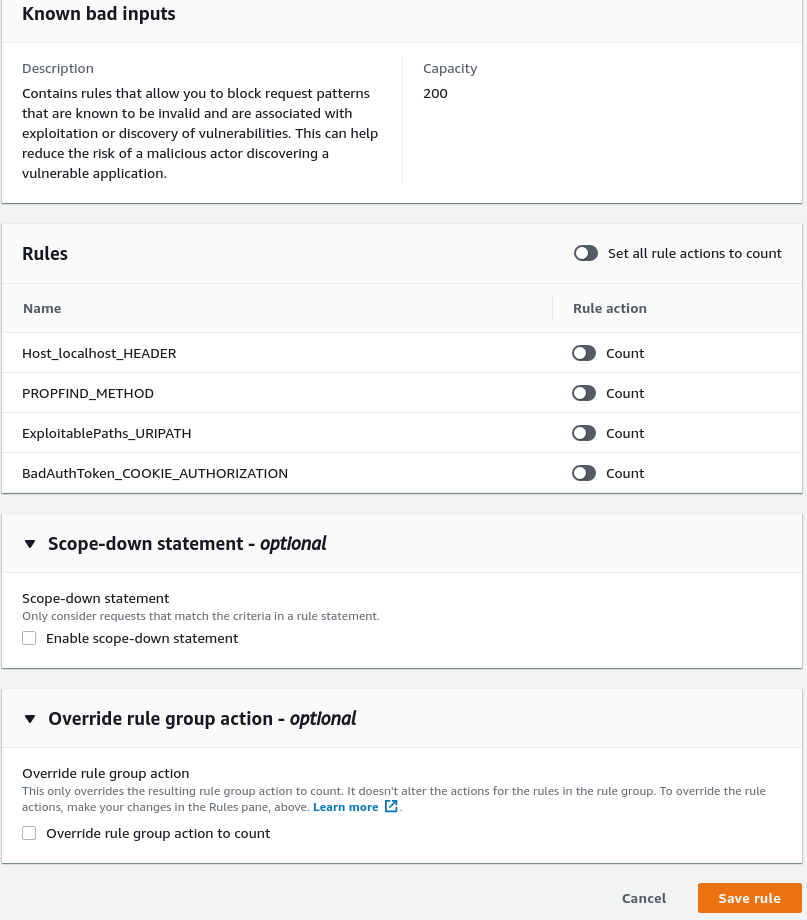
For example, the Known bad inputs rule will inspect the Host header of a request, and if it contains localhost, then such a request from the Internet will be blocked as a valid request can not contain it.
Add it to the ACL:
Also, here you can configure a default action for the group, or add a filter to select only some of the requests:
And again – pay attention to the Capacity, as this group will use the whole 200 WCUs from the 1500 limit of an ACL.
Save, check priorities:
Check access:
[simterm]
$ curl -I testapp.dev.example.com
HTTP/1.1 200 OK
[/simterm]
And add the non-valid value for the Host header – localhost:
[simterm]
$ curl -H "Host: localhost" -I testapp.dev.example.com
HTTP/1.1 403 Forbidden
[/simterm]
And now it’s blocked.
Rule groups and an ACL deletion
There is one thing to be noted: if a rule was created directly from an ACL, and when this ACL will be deleted, the rule will be deleted as well.
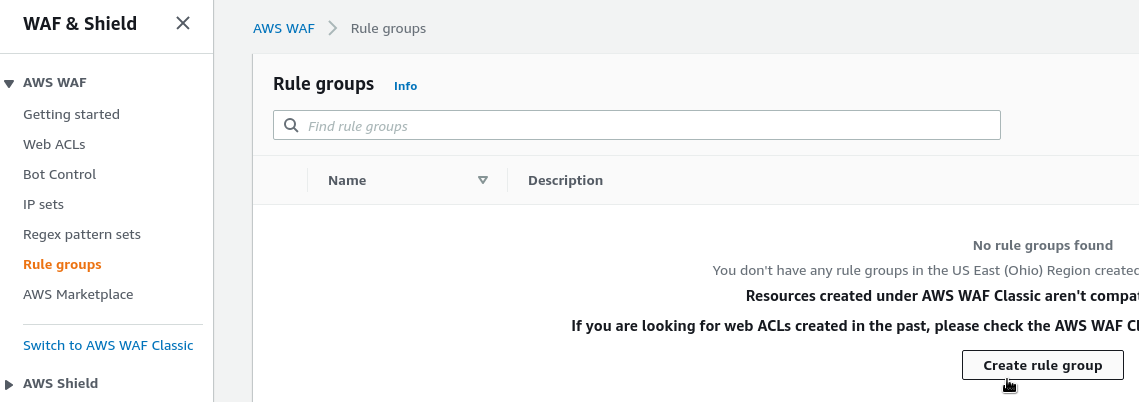
To save your own rules persistently, use the Rule groups:
Then, create your rules in a Group, and attach this Group to your ACL.
AWS WAF limitations
See all limits – AWS WAF quotas.
From the main, as forme:
- one ACL per one Load Balancer: keep it in mind when planning your ACLs.
- WCU’s limit per ACL: 1500, but can be increased via Tech Support requests, but this will affect its cost:
- If you have a web ACL that uses between 0 to 1,500 WCU, then all your requests will be charged at $0.60 per million requests (regular rate)
- If you have a web ACL that uses between 1,501 to 2,000 WCU, then all your requests will be charged at $0.80 per million requests
- If you have a web ACL that uses between 2,001 to 2,500 WCU, then all your requests will be charged at $1.00 per million requests.
- maximum IP sets per account: 100
- max requests per second that can be passed via WAF ACL (for ALB): 25.000
- max body size that can be checked: 8 kb
- max API-calls to the AWS for the (
AssociateWebACLandDisassociateWebACL): 2 per second
AWS WAF monitoring
Okay, so we’ve seen how to block requests, created an ACL, tested it. All works.
But it’s good to monitor its activities, and even send alerts when something goes weird.
AWS CloudWatch metrics, and Prometheus
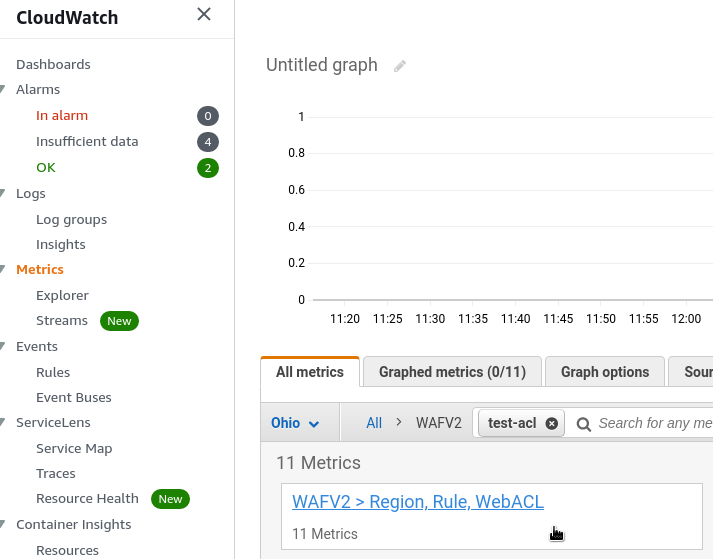
The very first place where we can go is CloudWatch and WAFV2 metrics:
Choose our ACL here or a specific rule:
Here are our blocked requests.
Next, we can collect them to a Prometheus instance with the cloudwatch-exporter:
region: us-east-2

metrics:

 - aws_namespace: AWS/WAFV2
   aws_metric_name: BlockedRequests
   aws_dimensions: [Region,Rule,WebACL]
Run our test requests with SQL injection, or even run it in a loop:
[simterm]
$ while true; do curl -I "http://testapp.dev.example.com/products?category=Gifts'--"; sleep 1; done
[/simterm]
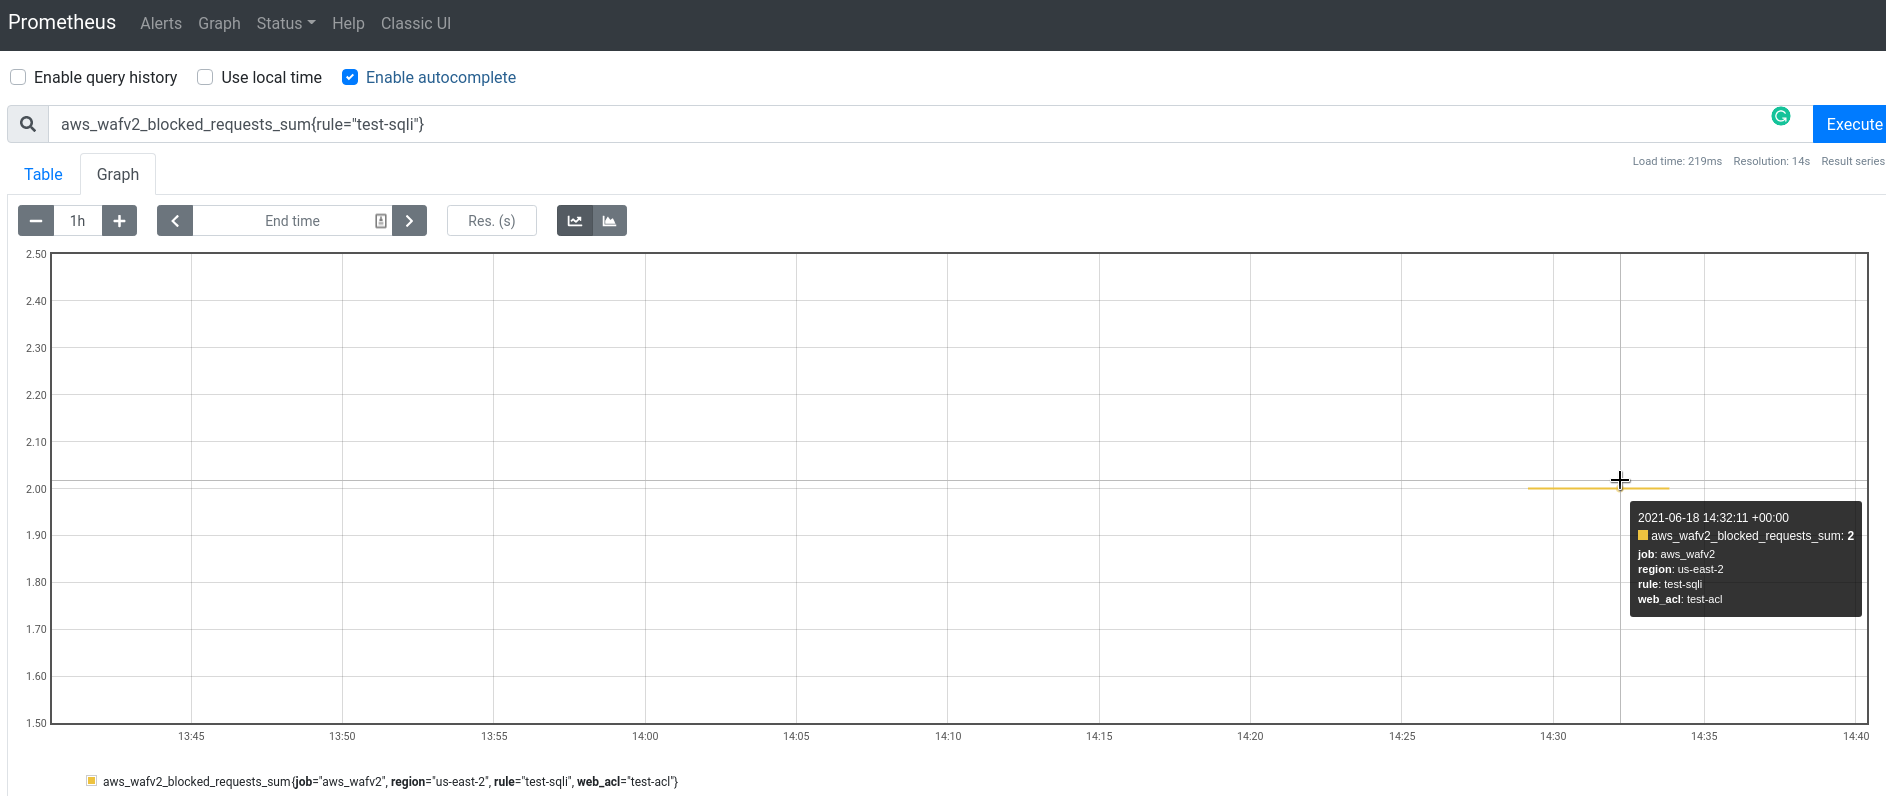
Check graphs in the Prometheus:
And now we can see blocked requests here too.
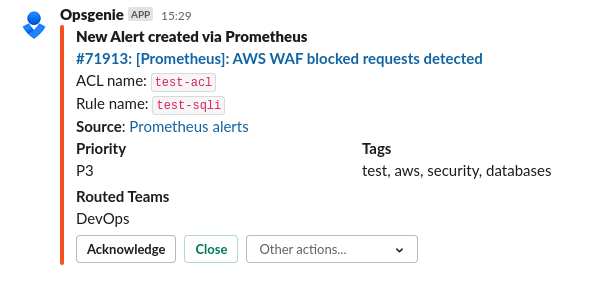
Let’s add a test alert: check an average increase per second for the aws_wafv2_blocked_requests_sum metric during last 5 minutes:
- alert: "WAFBlockedRequestsAlert"
  expr: rate(aws_wafv2_blocked_requests_sum{rule!="ALL"}[5m]) > 0
  for: 1s
  labels:
    severity: warning
  annotations:
    summary: "AWS WAF blocked requests detected"
    description: "ACL name: `{{ $labels.web_acl }}`\nRule name: `{{ $labels.rule }}"
    tags: test, aws, security, databases
If its value will be greater than zero, then WAF blocked someone, and we will be notified about it:
AWS WAF logs
See Managing logging for a web ACL.
To log WAF activity, we need to have an AWS S3 bucket, and an AWS Kinesis Data Firehose delivery stream.
AWS Kinesis Data Firehose delivery stream
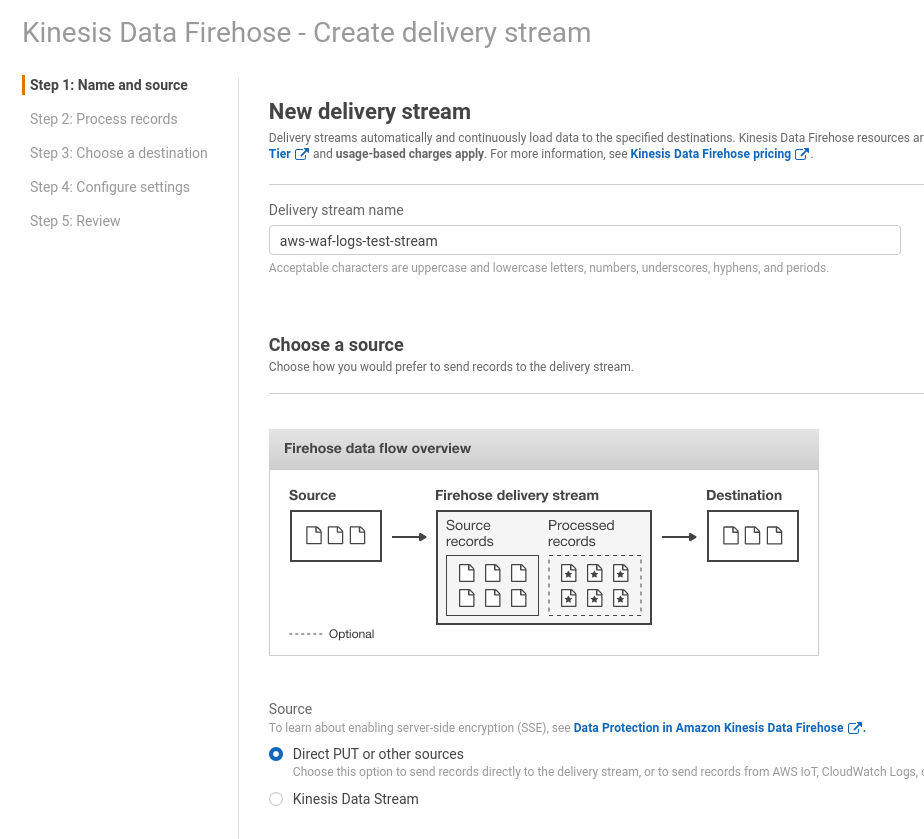
Go to the Kinesis, create a new Data Firehouse stream:
Its name must be started with the aws-waf-logs- prefix, also set the Direct PUT or other sources, and click Next:
Skip everything on the following page, on the next page for the Destination select S3, chose existing, or create a new S3 bucket:
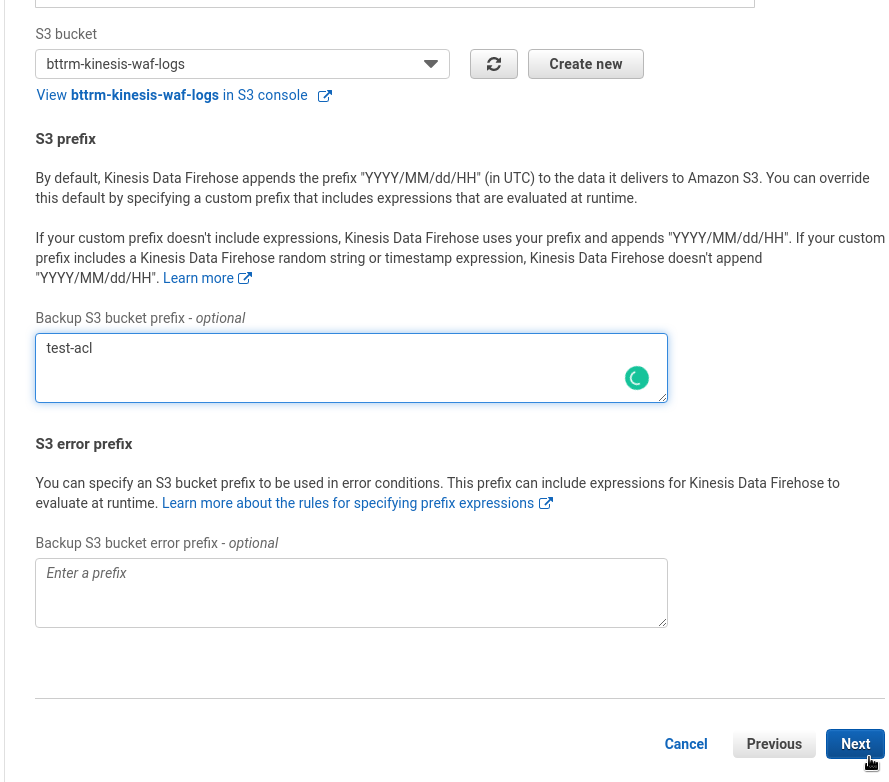
Here, you also can set a prefix to keep logs from various ACLs in the same S3 bucket:
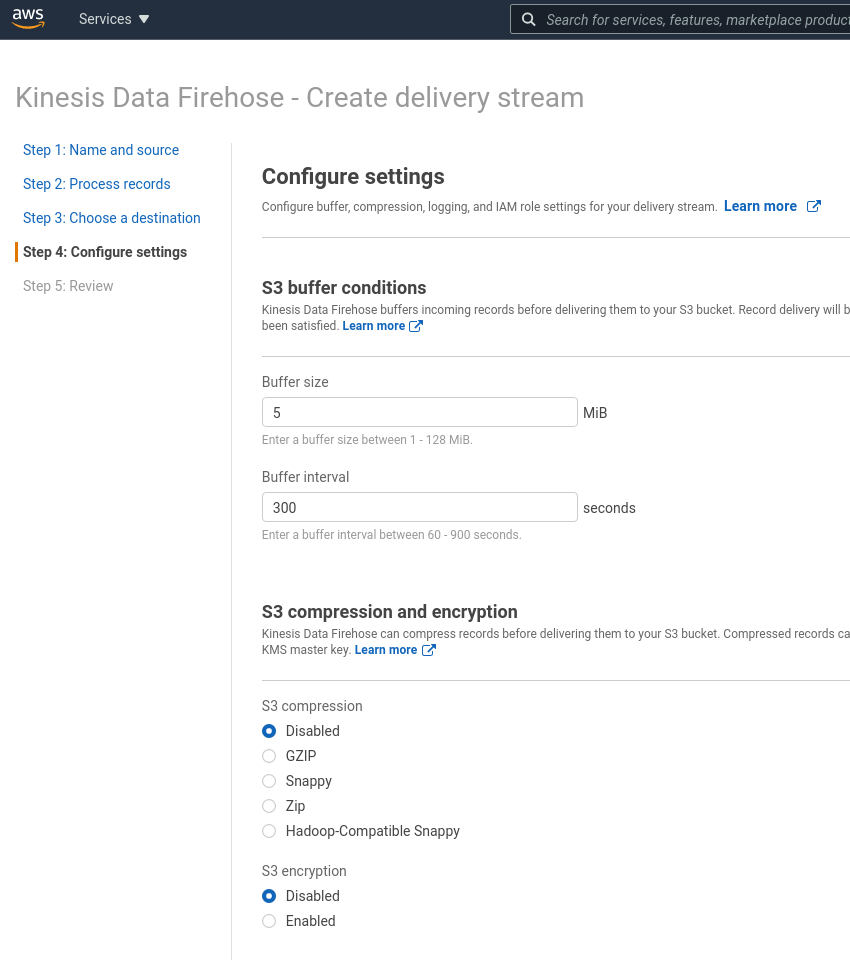
On the next page, for now, can leave everything with default values:
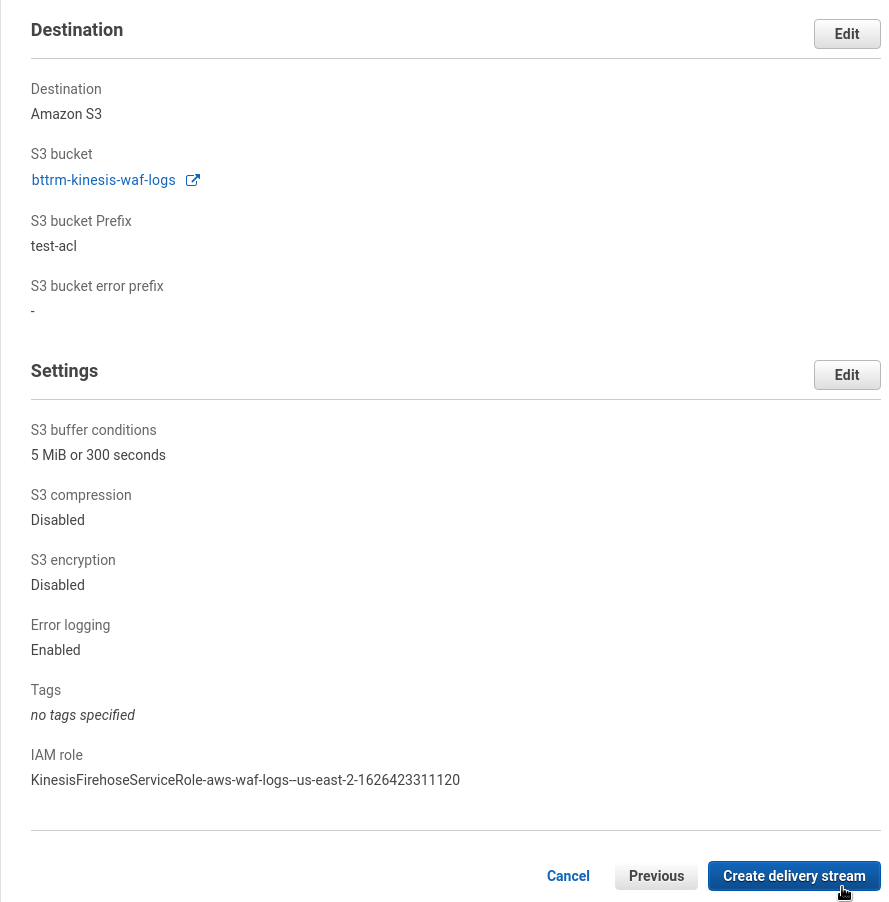
Check settings and click Create delivery stream:
WAF ACL logging
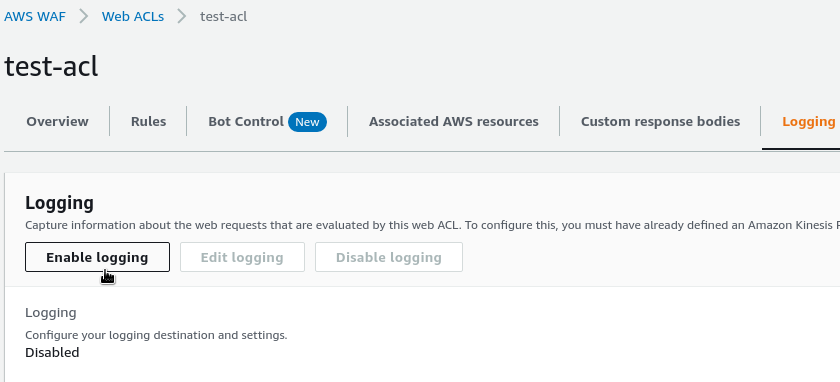
Go back to the WAF ACL to the Logging and metrics tab, click on the Enable logging:
Select the stream you created above, optionally configure filters for fields:
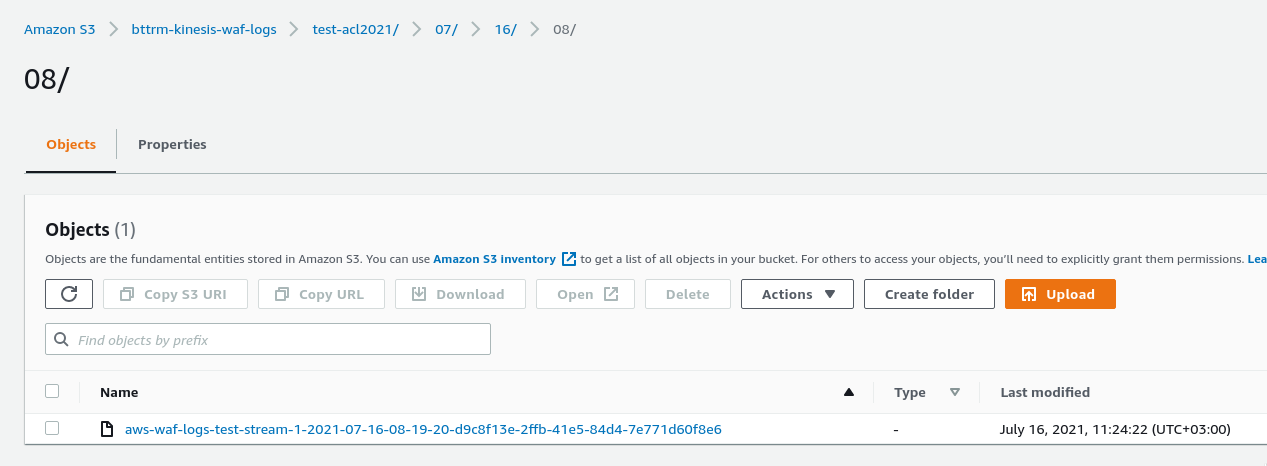
Wait for 5-10 minutes, and you’ll get your logs delivered to the bucket:
And its content:
[simterm]
$ tail -5 aws-waf-logs-test-stream-1-2021-07-16-08-19-20-d9c8f13e-2ffb-41e5-84d4-7e771d60f8e6
{"timestamp":1626423836381,"formatVersion":1,"webaclId":"arn:aws:wafv2:us-east-2:534***385:regional/webacl/test-acl/36d796cd-4767-45b3-9f03-711f6ac4ca08","terminatingRuleId":"test-sqli","terminatingRuleType":"REGULAR","action":"BLOCK","terminatingRuleMatchDetails":[{"conditionType":"SQL_INJECTION","location":"QUERY_STRING","matchedData":["category=Gifts","--"]}],"httpSourceName":"ALB","httpSourceId":"534***385-app/k8s-testname-testingr-ce71203b0d/ca9edcc886933ca9","ruleGroupList":[{"ruleGroupId":"AWS#AWSManagedRulesKnownBadInputsRuleSet","terminatingRule":null,"nonTerminatingMatchingRules":[],"excludedRules":null}],"rateBasedRuleList":[],"nonTerminatingMatchingRules":[],"requestHeadersInserted":null,"responseCodeSent":405,"httpRequest":{"clientIp":"194.***.***.29","country":"UA","headers":[{"name":"Host","value":"testapp.dev.example.com"},{"name":"User-Agent","value":"curl/7.77.0"},{"name":"Accept","value":"*/*"}],"uri":"/products","args":"category=Gifts'--","httpVersion":"HTTP/1.1","httpMethod":"HEAD","requestId":"1-60f1421c-1ab92f9f5bc7be7f39a70c08"}}
[/simterm]
Now, you can collect them to services like Logz.io, see Configure Logz.io to fetch logs from an S3 bucket.
CloudWatch Logs isn’t supported yet, but it’s planned to be added.
AWS ALB, Kubernetes Ingress, and AWS WAF
So, we have an ACL:
And we need to attach this ACL to an ALB, created from a Kubernetes Ingress with the AWS Load Balancer Controller.
To do so, we can use its alb.ingress.kubernetes.io/wafv2-acl-arn.
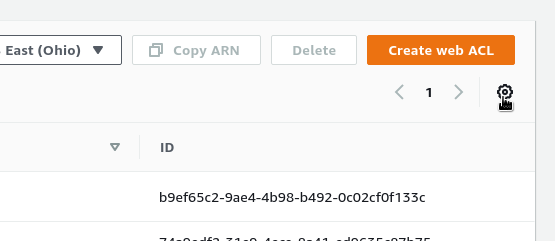
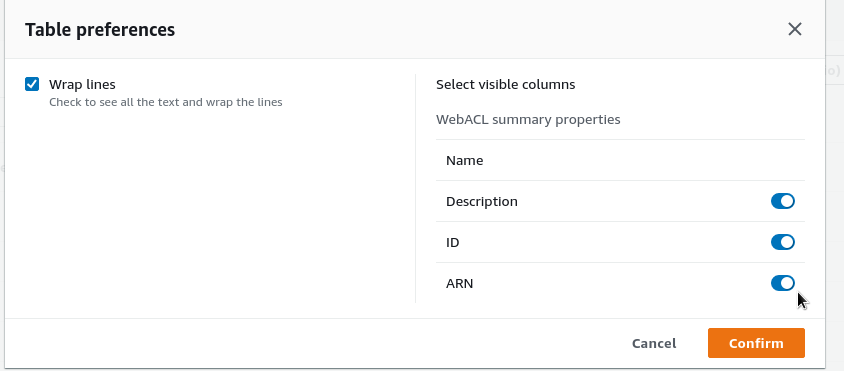
Enable ARNs display for your ACLs:
Update your Ingress:
apiVersion: extensions/v1beta1
kind: Ingress
metadata:
  name: test-ingress
  namespace: test-namespace
  annotations:
    kubernetes.io/ingress.class: alb
    alb.ingress.kubernetes.io/scheme: internet-facing
    alb.ingress.kubernetes.io/listen-ports: '[{"HTTP": 80}]'
    alb.ingress.kubernetes.io/inbound-cidrs: 0.0.0.0/0
    alb.ingress.kubernetes.io/wafv2-acl-arn: "arn:aws:wafv2:us-east-2:534***385:regional/webacl/test-acl/36d796cd-4767-45b3-9f03-711f6ac4ca08"
...
Apply:
[simterm]
$ kubectl apply -f test-deployment.yaml
[/simterm]
Check the ACL – Associated AWS resources:
Done.
Useful links
- AWS WAF Security Automations
- Prevention of SQL Injection Attacks using AWS WAF
- Deep Dive Into The AWS Web Application Firewall (WAF)
- Examples of sets of rules for the AWS WAF
- Analyzing AWS WAF logs with Amazon ES, Amazon Athena, and Amazon QuickSight

