 Let’s proceed with our Kubernetes journey.
Previous parts:
- Kubernetes: part 1 – architecture and main components overview
- Kubernetes: part 2 – a cluster set up on AWS with AWS cloud-provider and AWS LoadBalancer
In this part we will start working with AWS Elastic Kuberneters Service (EKS) – its short overview, then will create Kubernetes Control Plane, CloudFormation stack with Worker Nodes, will spin up a simple web-services and will add a LoadBalancer.
Contents
Elastic Kubernetes Service – an overview
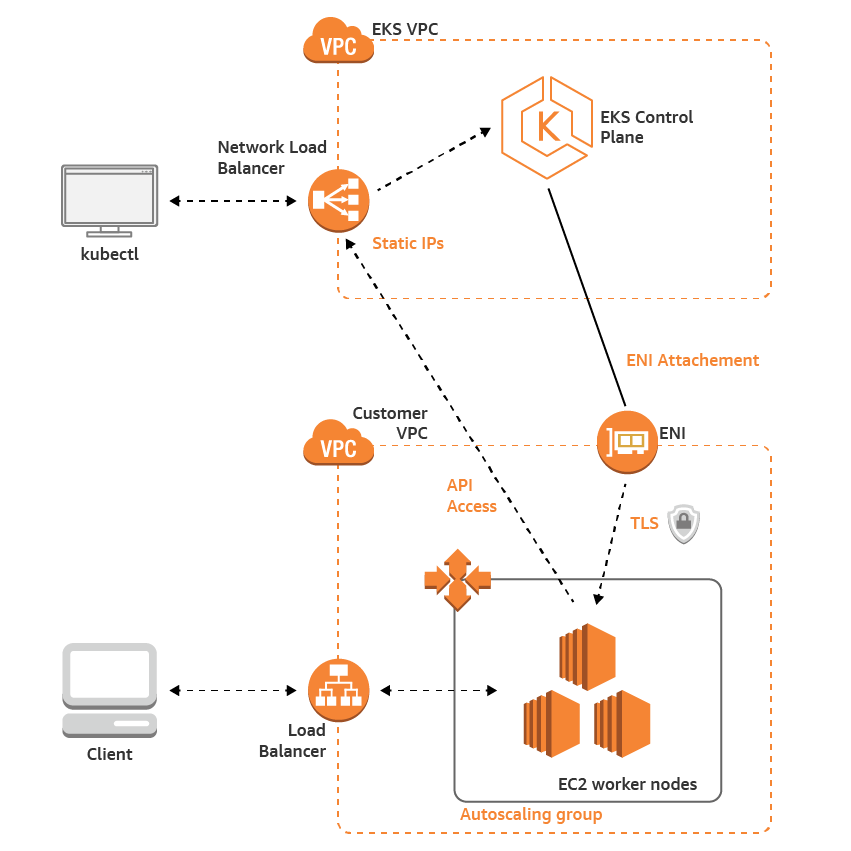
AWS EKS is a Kubernetes cluster where its core – Control Plane – will be managed by AWS itself thus freeing a user from needless headache.
- Control Plane: managed by AWS, consists of three EC2 in different Availability Zones
- Worker Nodes: a common ЕС2 in AutoScaling group, in a customer’s VPC, managed by the user
A network overview:
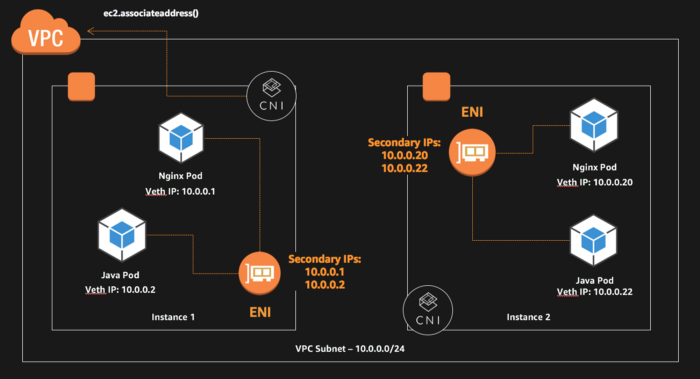
For networking – the amazon-vpc-cni-k8s plugin is used which allows using of AWS ENI (Elastic Network Interface) and a VPC’s network space inside of a cluster.
For authorization – the aws-iam-authenticator is used which allows authenticating Kubernetes objects against AWS IAM roles and policies (see Managing Users or IAM Roles for your Cluster)
Also, AWS will manage Kubernetes minor upgrades, i.e. 1.11.5 to 1.11.8, but major upgrades still must be done by a user.
Preparing AWS environment
To create an EKS cluster firt we need to create a dedicated VPC with subnets, configure routing and add an IAM role for a cluster authorization.
IAM role
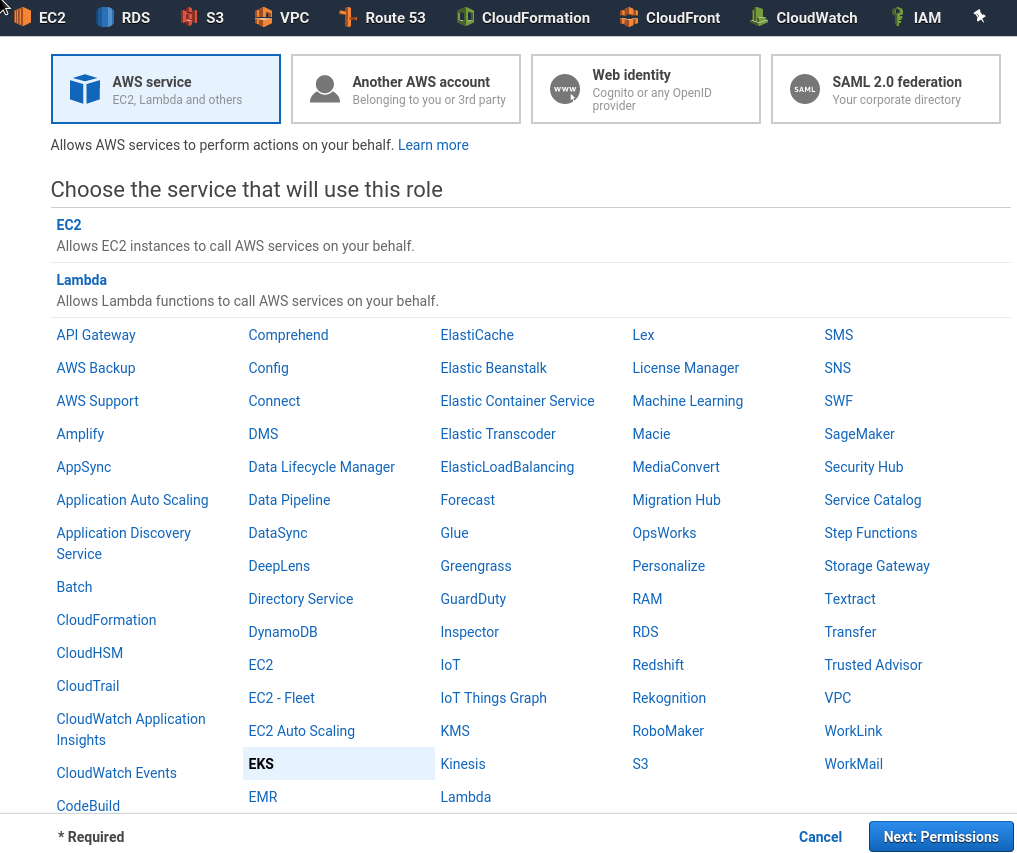
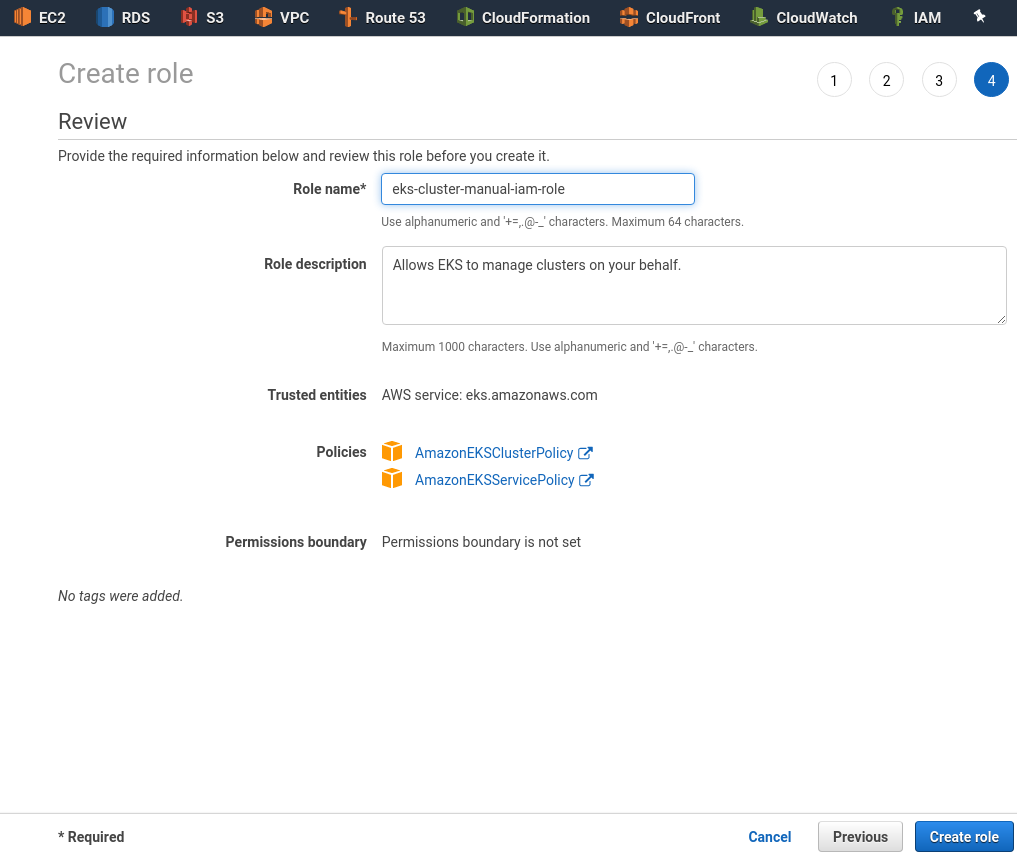
Go to the IAM, create a new role with EKS type:
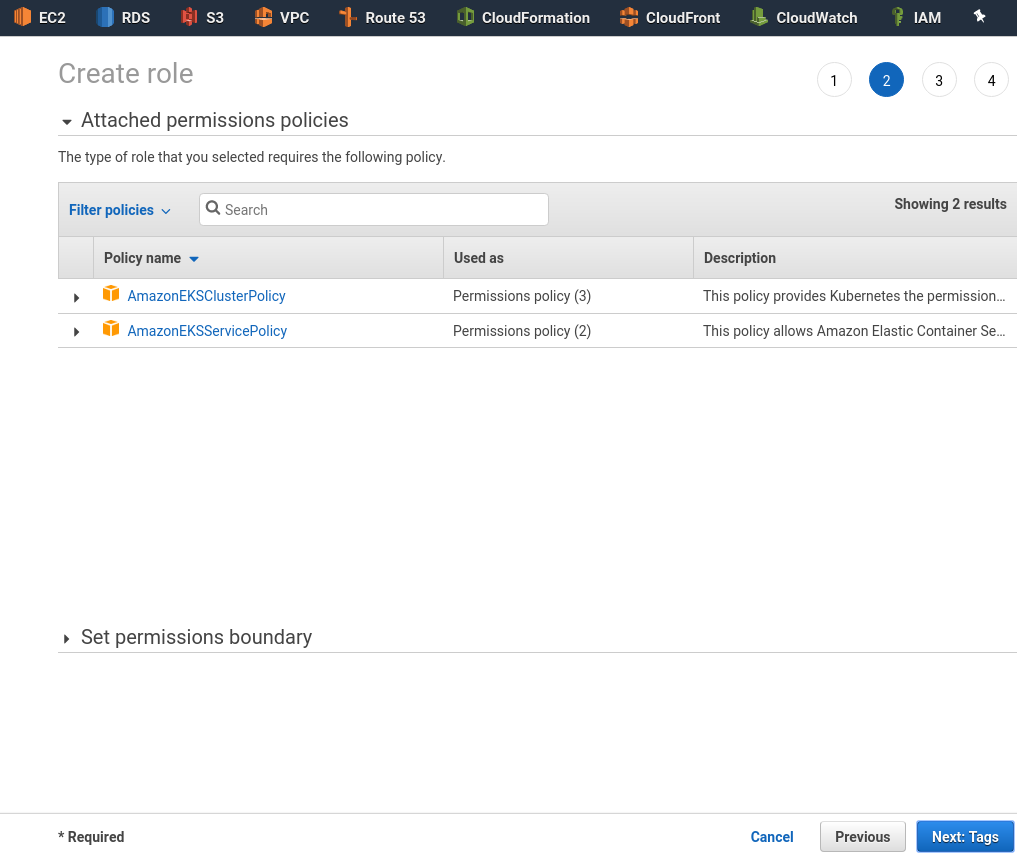
Permissions will be filled by AWS itself:
Save it:
VPC
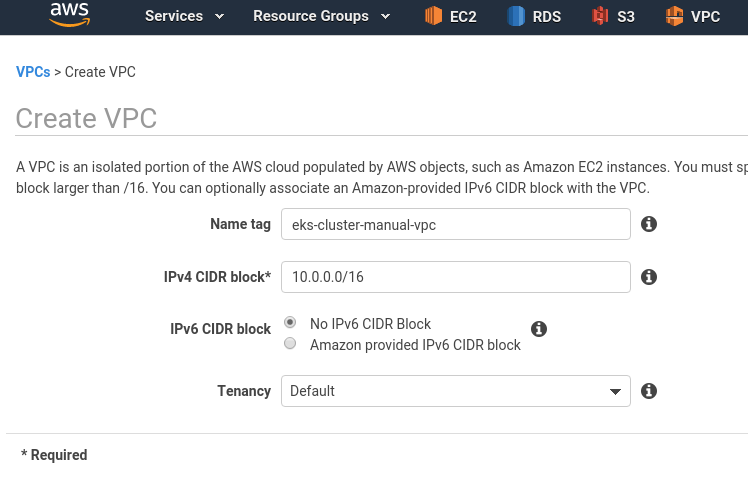
Next, have to create VPC with 4 subnets – two public for LoadBalacner and two private – for Worker Nodes.
Create a VPC:
SecurityGroup
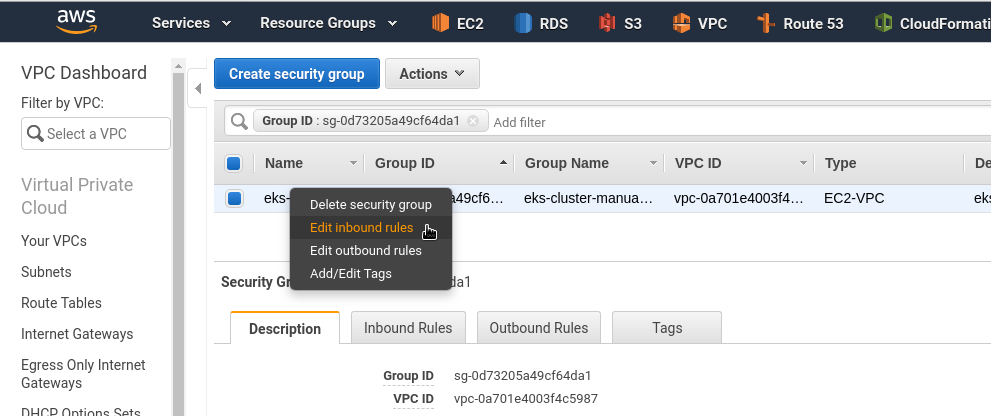
Go to the SecurityGroups, create a new one for the cluster:
Add desired rules, here just an Allow All to All example:
Internet Gateway
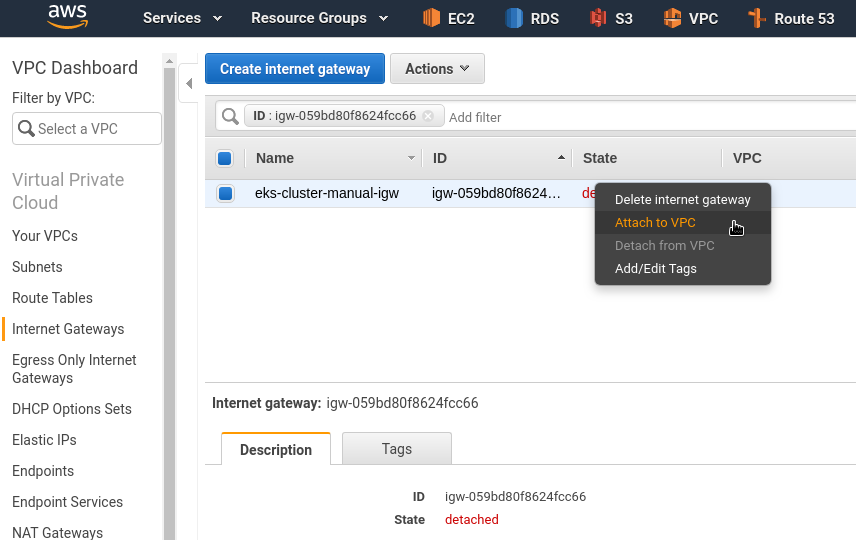
Create an IGW which will be used to route traffic from public subnets:
Attach it to the VPC:
Subnets
Pods will use IPs from a subnet allocated (see the amazon-vpc-cni-k8s), thus those subnets have to have enough address space.
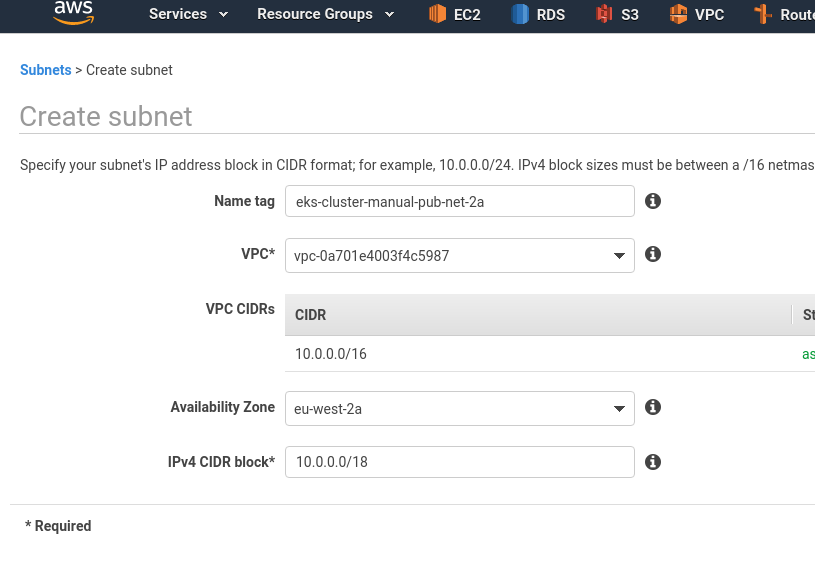
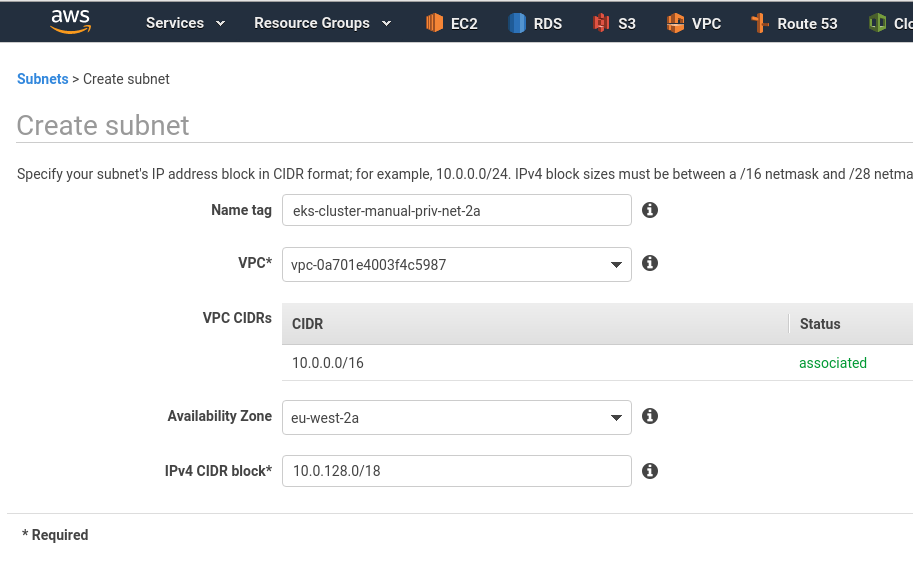
Create a first public subnet using 10.0.0.0/18 block (16384 addresses):
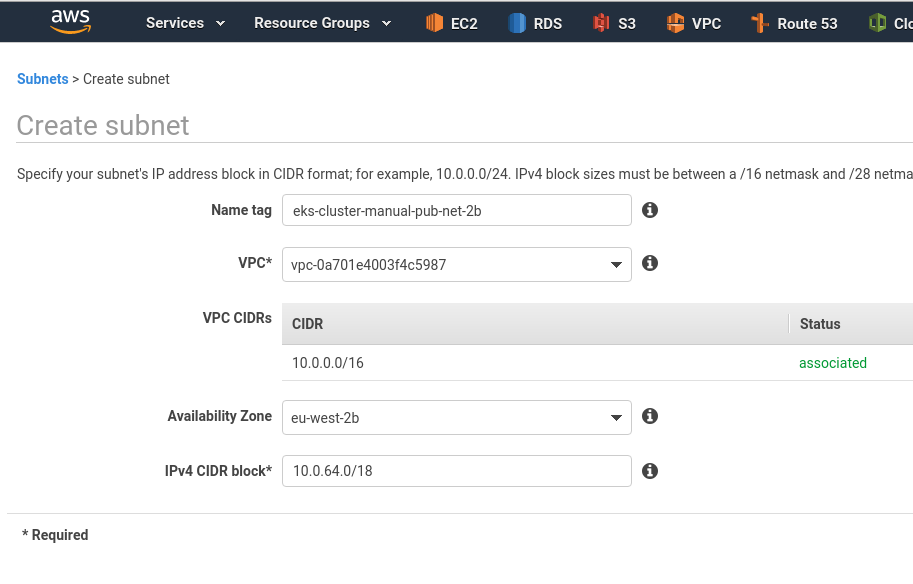
A second public subnet using 10.0.64.0/18 block:
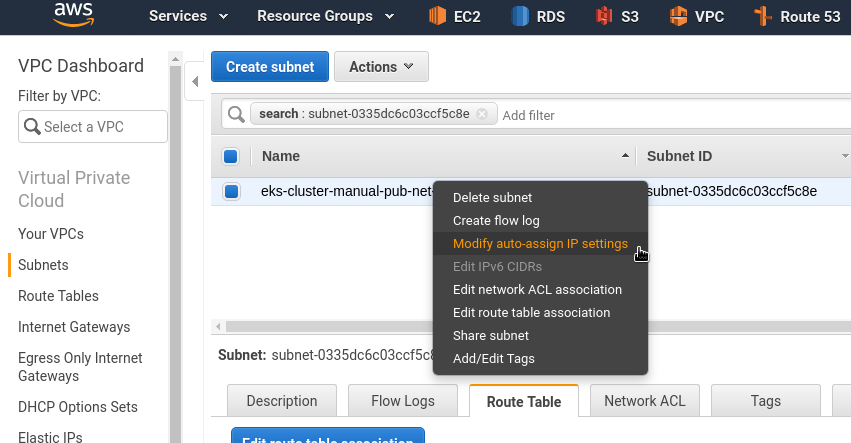
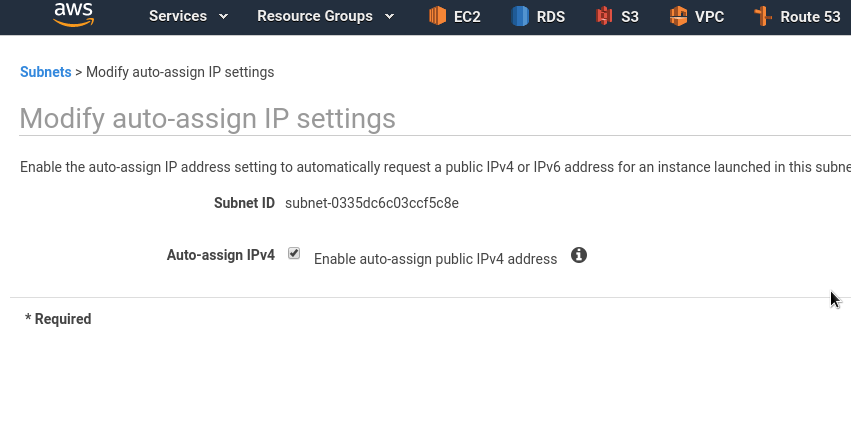
In public subnets – enable auto-assign public IPs to EC2s:
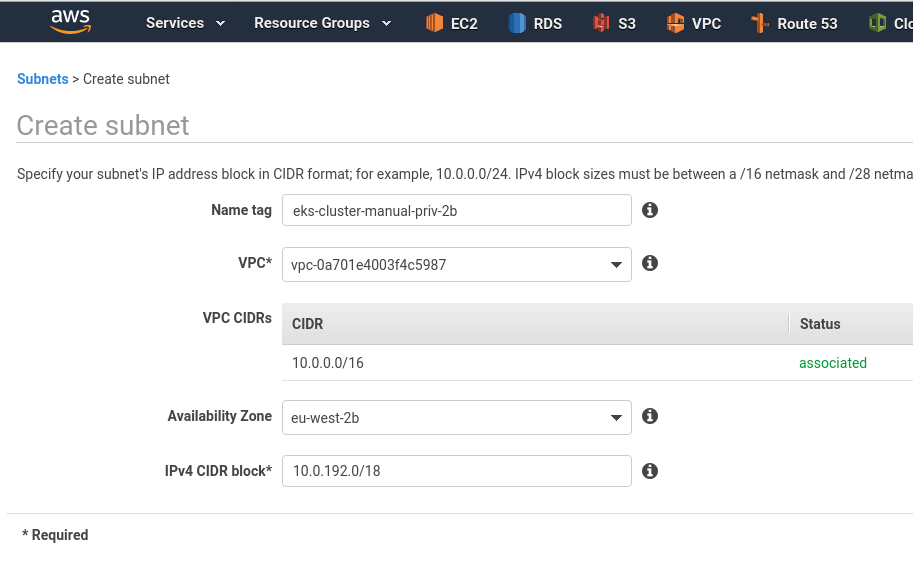
Similarly, add two private subnets:
NAT Gateway
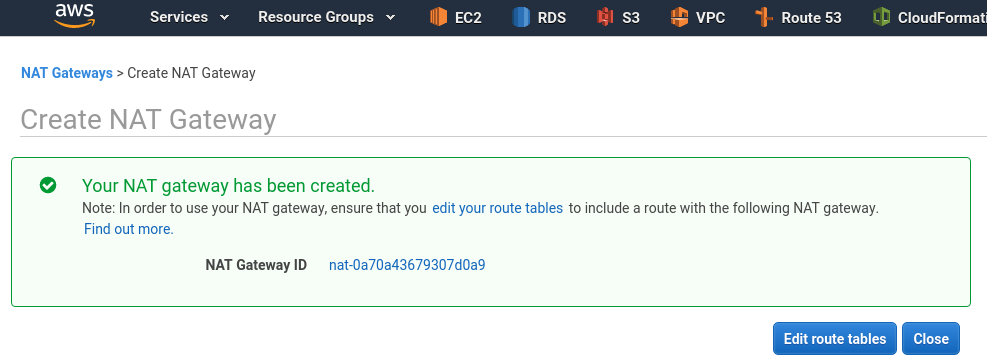
In a public subnet create a NAT Gateway – it will be used to route traffic from private subnets:
And configure routing here:
Route tables
Now, need to create two Route tables – for public and for private subnets.
Public route table
Create public subnets route table:
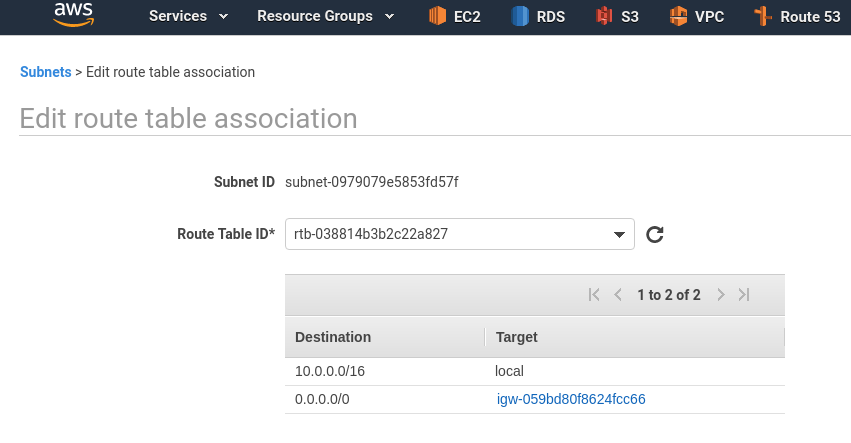
Edit routes – set route to the 0.0.0.0/0 via IGW created above:
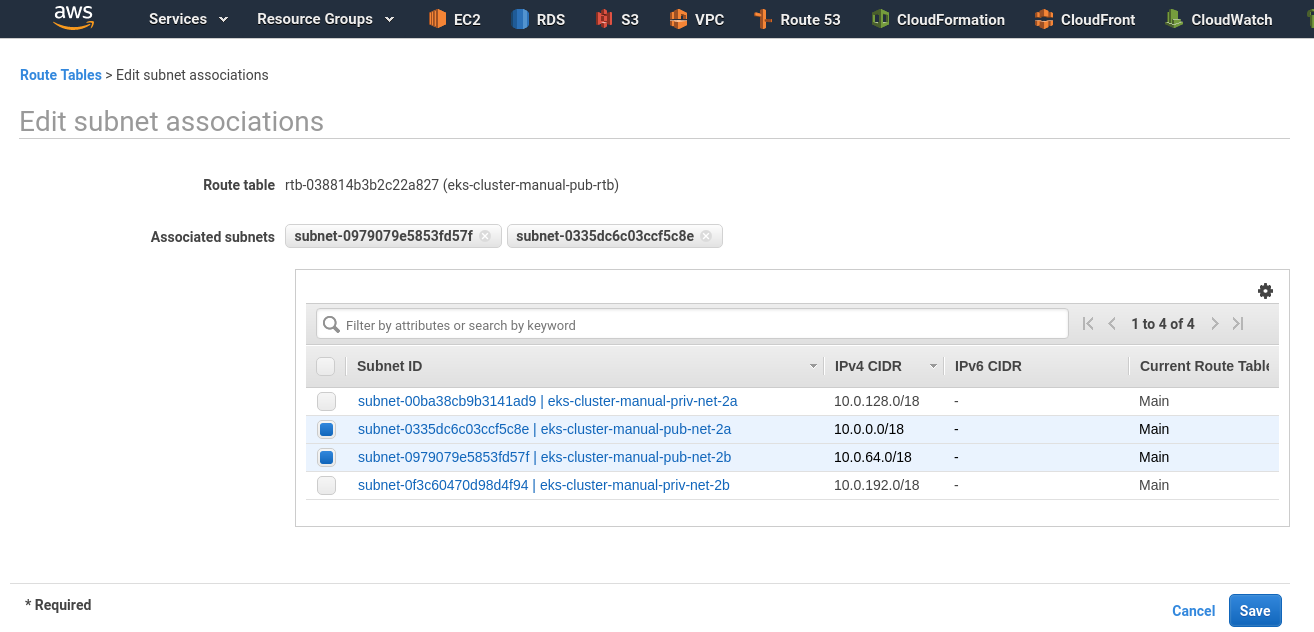
Switch to the Subnet association – attach two public subnets to this RTB:
Private route table
In the same way, create RTB for private subnets:
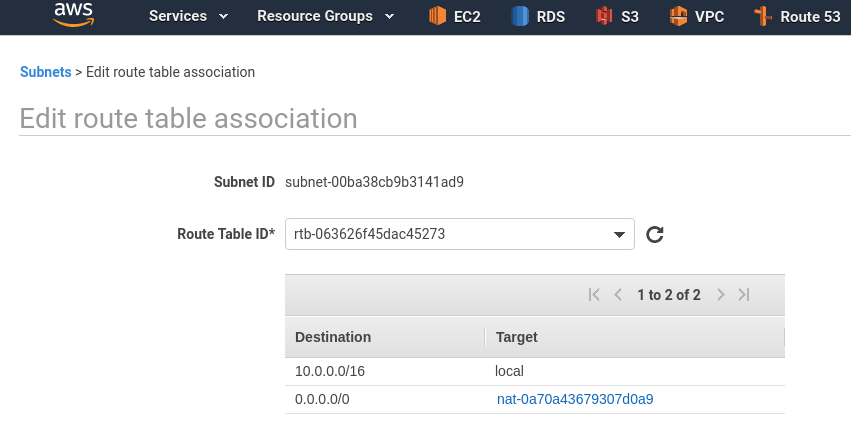
Add another route to the 0.0.0.0/0 but via NAT GW instead of IGW:
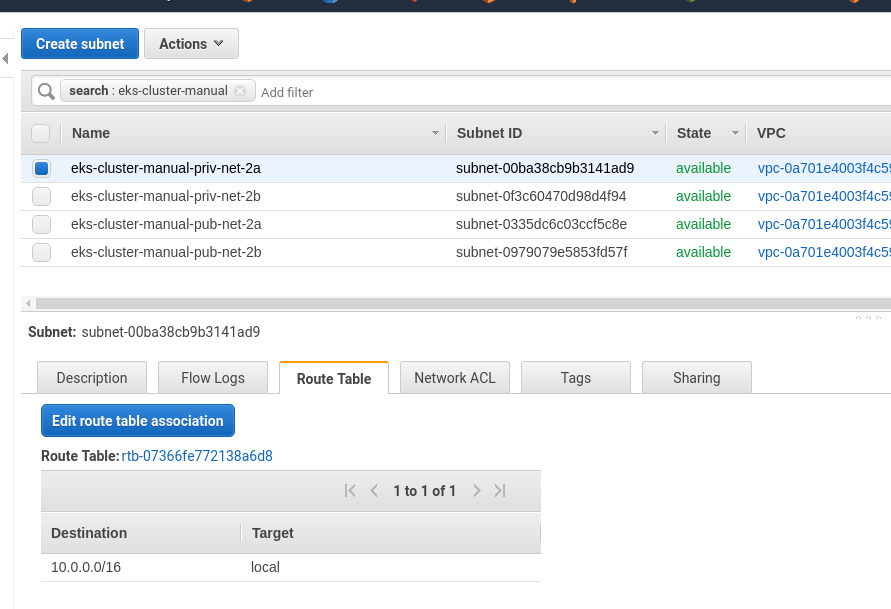
Go back to your subnets – Edit route table association:
Attach our private RTB to the private subnets so they will use NAT GW:
Attach our public RTB to the private subnets so they will use Internet GW:
Check
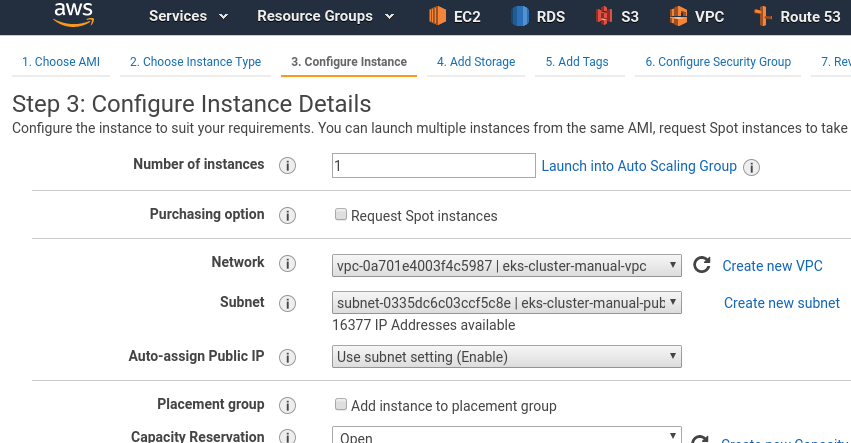
To test if this VPC is working – run two EC2 instances.
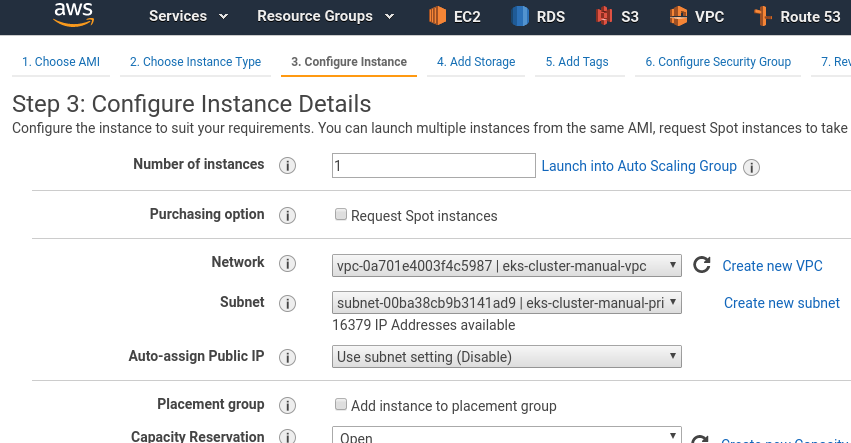
First in the public subnet:
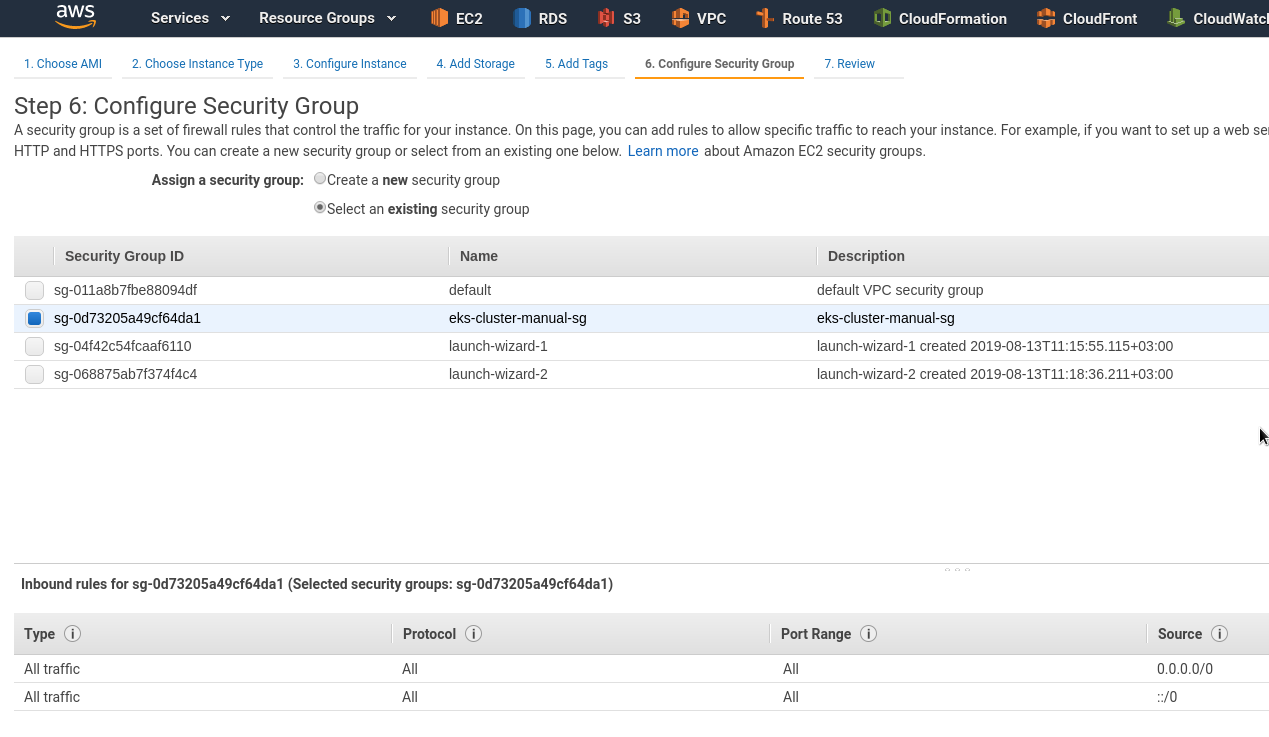
Set Security Group:
Check networking:
[simterm]
[setevoy@setevoy-arch-work ~] $ ssh -i setevoy-testing-eu-west-2.pem [email protected] 'ping -c 1 8.8.8.8'
PING 8.8.8.8 (8.8.8.8) 56(84) bytes of data.
64 bytes from 8.8.8.8: icmp_seq=1 ttl=51 time=1.33 ms

--- 8.8.8.8 ping statistics ---
1 packets transmitted, 1 received, 0% packet loss, time 0ms
rtt min/avg/max/mdev = 1.331/1.331/1.331/0.000 ms
[/simterm]
Add another EC2, in the private subnet:
Do not forget about SG.
And try to ping it from the first instance (as we can’t ping instances in a private networks from the Internet):
[simterm]
[setevoy@setevoy-arch-work ~] $ ssh -i setevoy-testing-eu-west-2.pem [email protected] 'ping -c 1 10.0.184.21'
PING 10.0.184.21 (10.0.184.21) 56(84) bytes of data.
64 bytes from 10.0.184.21: icmp_seq=1 ttl=64 time=0.357 ms

--- 10.0.184.21 ping statistics ---
1 packets transmitted, 1 received, 0% packet loss, time 0ms
rtt min/avg/max/mdev = 0.357/0.357/0.357/0.000 ms
[/simterm]
If no reply to the ping – check you Security Groups and Route tables at first.
And we are done here – time to start with EKS itself.
Elastic Kubernetes Service
Create a Control Plane
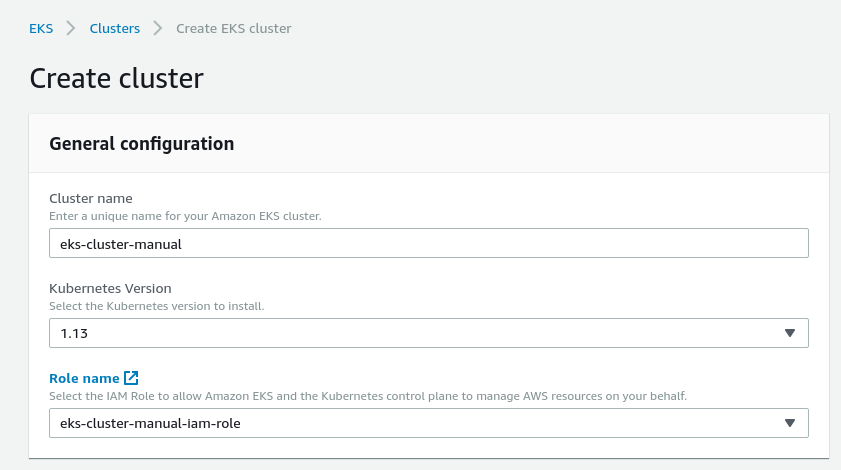
Go to the EKS and create master-nodes – click the Create cluster:
Set name, chose IAM role created at the very beginning:
In subnets chose private subnets only and set SecurityGroup created above:
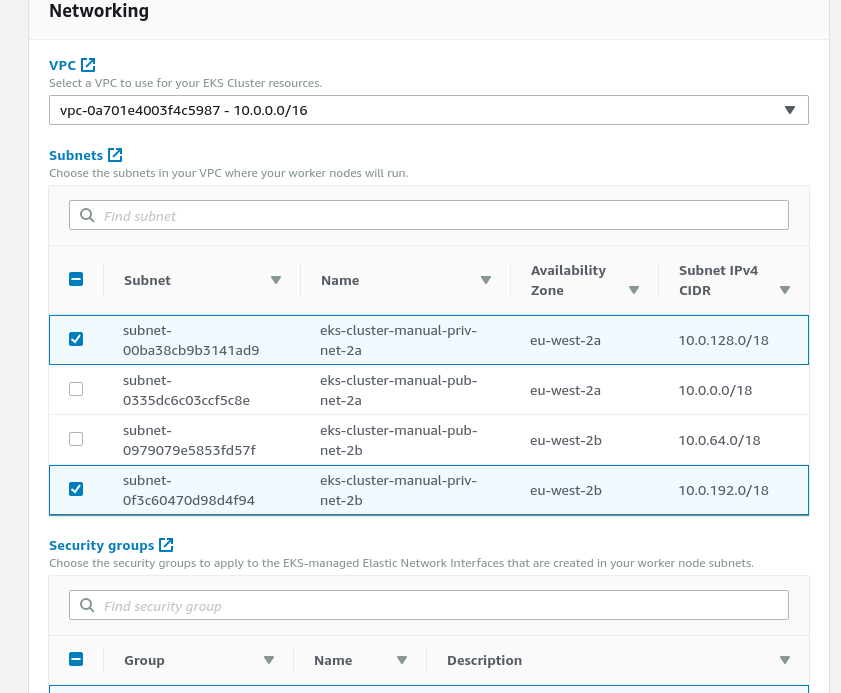 Note: actually, despite the fact that EKS says “subnets for your Worker Nodes – they also will be used in case of using services like AWS Load Balancer, which needs to use Public subnets. So – you can chose all subnets here: EKS will choose Public subnets for ALB, and Private – for EC2.
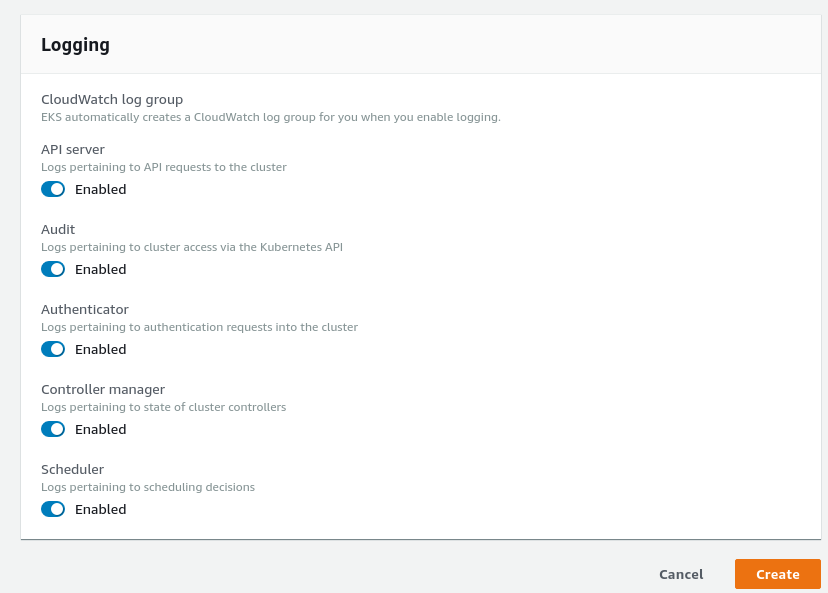
Enable logs if need:
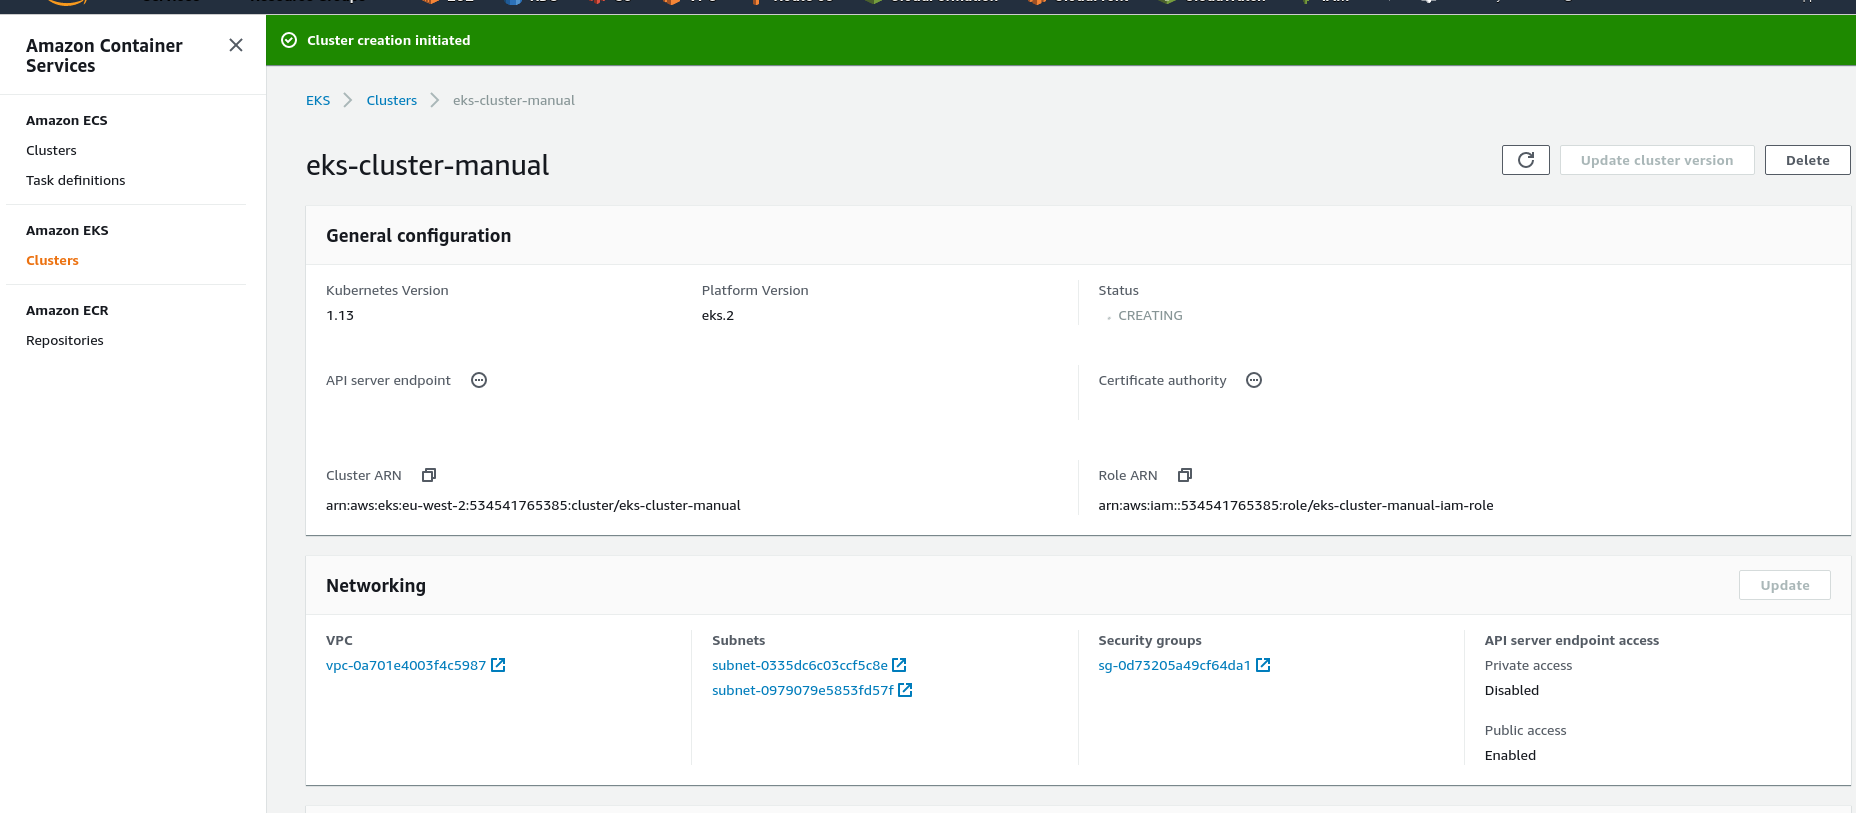
And create the cluster:
Create Worker Nodes
While the Control Plane is in the provisioning state – let’s create a CloudFormation stack for the Worker Nodes.
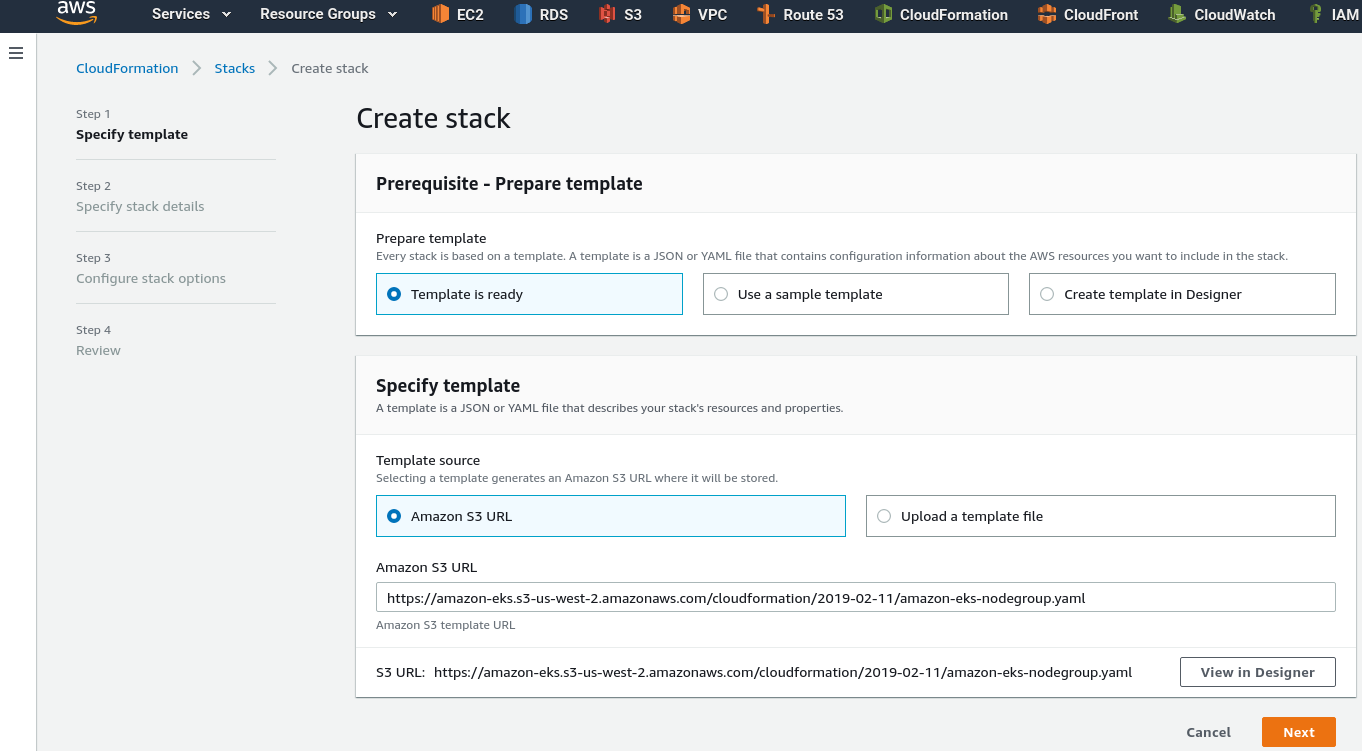
Can take an existing template from AWS – https://amazon-eks.s3-us-west-2.amazonaws.com/cloudformation/2019-02-11/amazon-eks-nodegroup.yaml.
Go to the CloudFormation > Create stack:
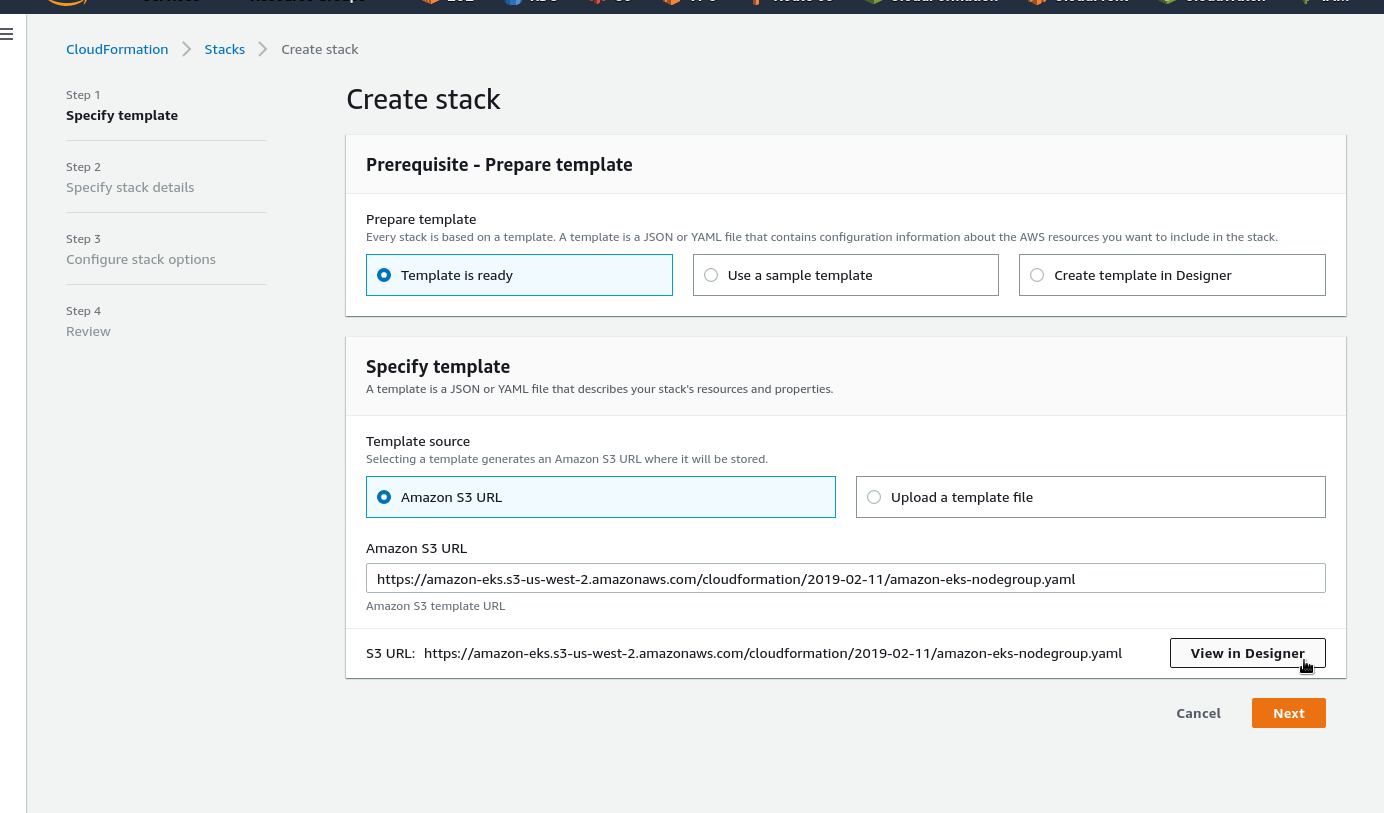
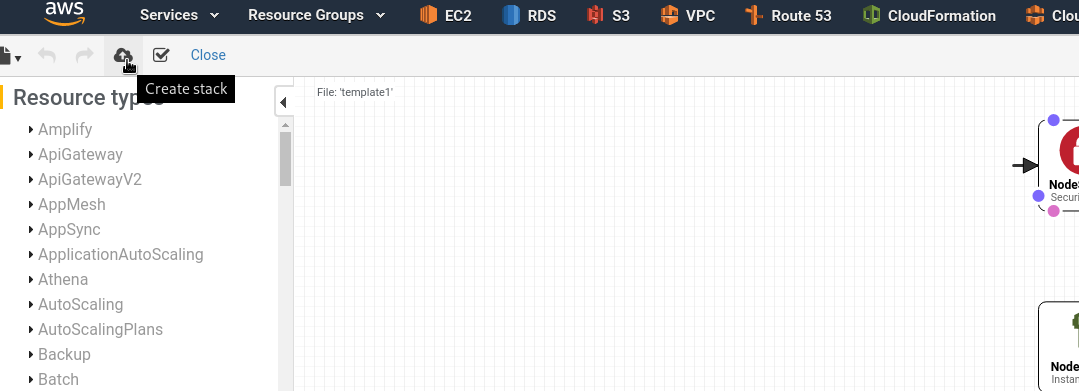
As our Worker Nodes will be placed in the private subnets open this template in the Designer:
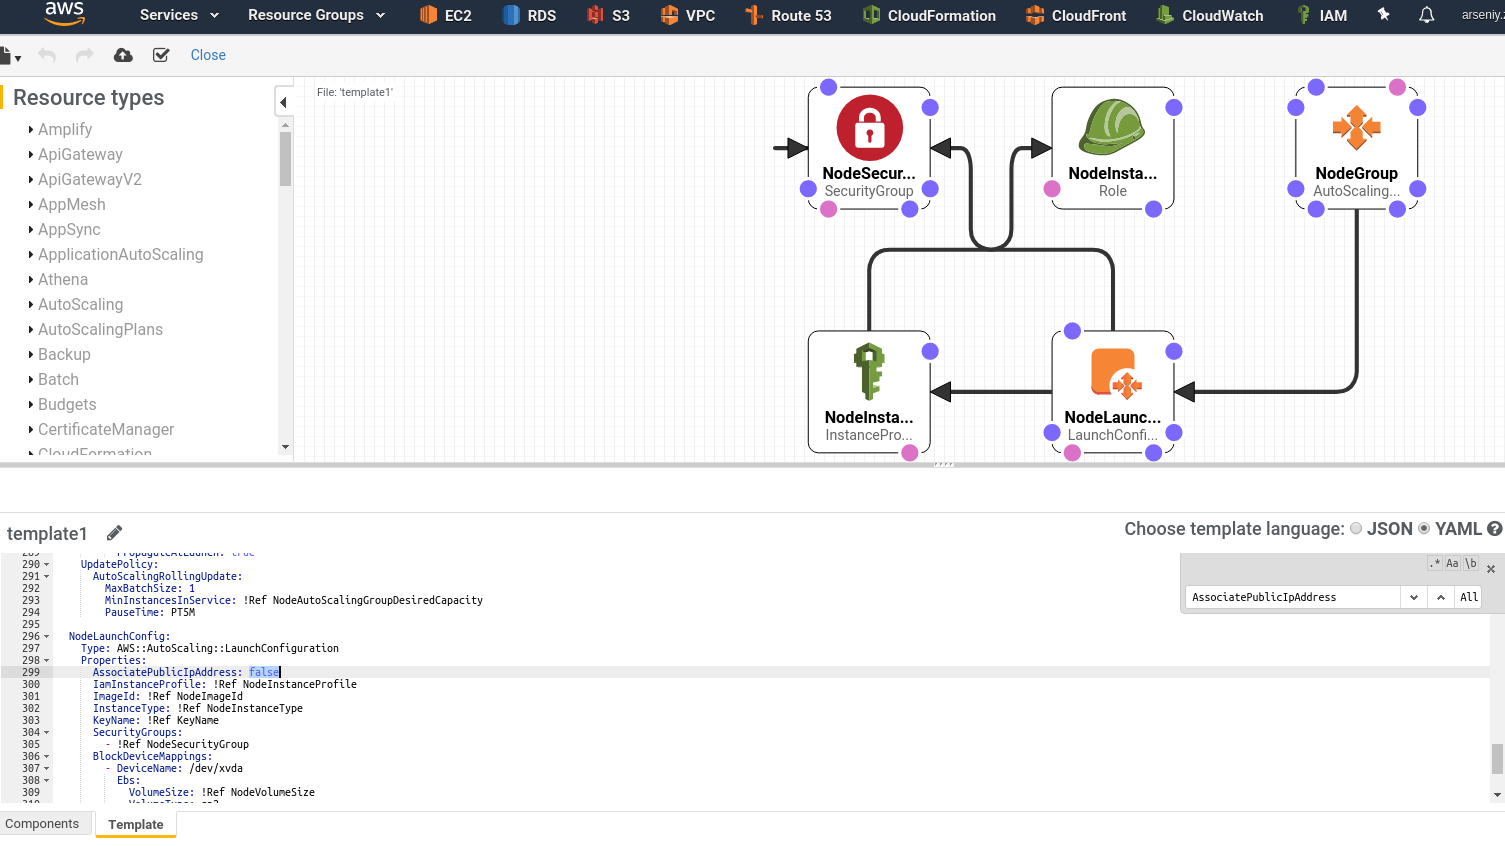
Find the AssociatePublicIpAddress parameter and change its value from the true to false:
Click Create stack:
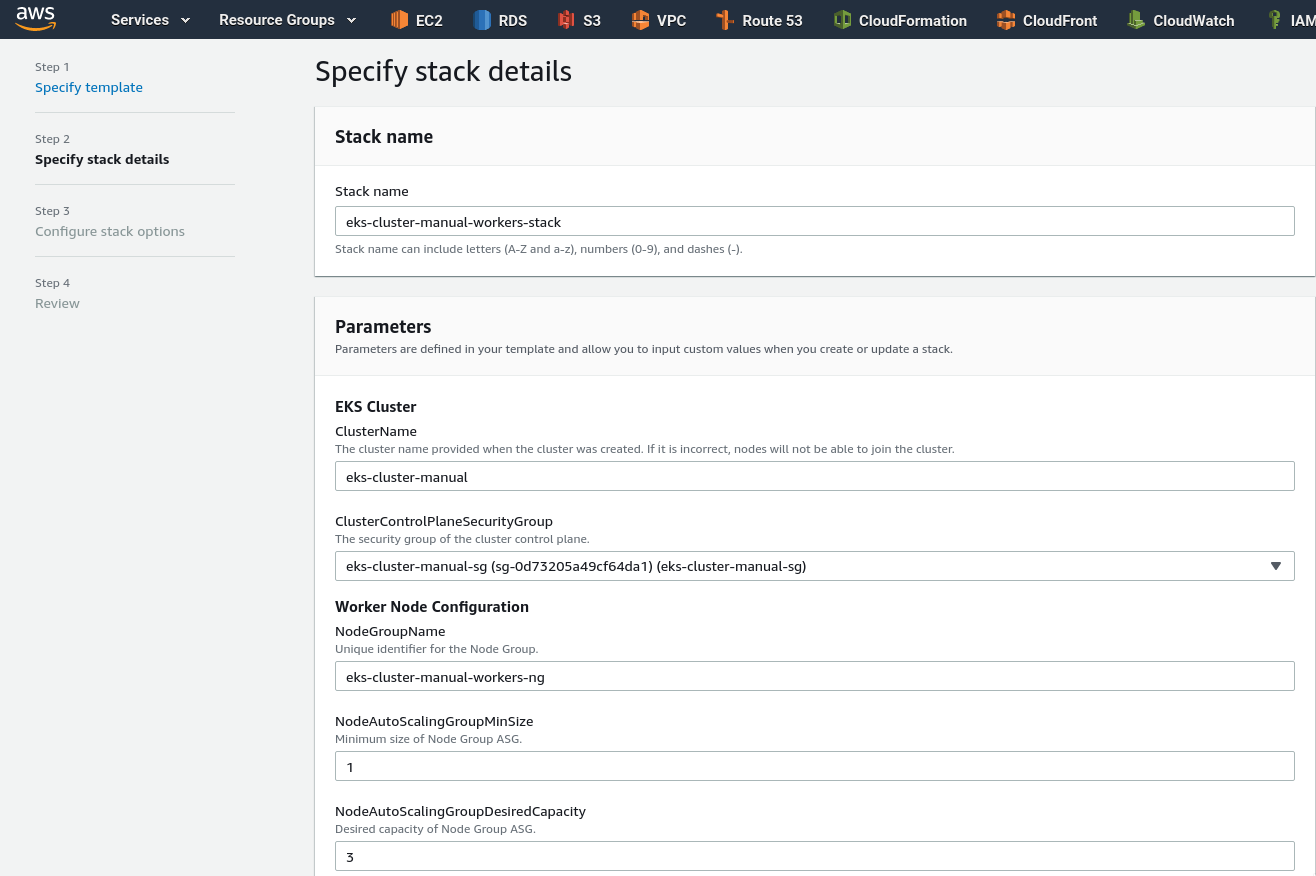
Set the stack’s name, can be any, and cluster name – same, as we did it when created Master nodes, e.g. eks-cluster-manual in this example, chose SecurityGroup, fill AutoScale settings:
Find an NodeImageId depending on a region (check the documentation for an up-to-date list):
| Region | Amazon EKS-optimized AMI | with GPU support |
|---|---|---|
US East (Ohio) (us-east-2) |
ami-0485258c2d1c3608f |
ami-0ccac9d9b57864000 |
US East (N. Virginia) (us-east-1) |
ami-0f2e8e5663e16b436 |
ami-0017d945a10387606 |
US West (Oregon) (us-west-2) |
ami-03a55127c613349a7 |
ami-08335952e837d087b |
Asia Pacific (Hong Kong) (ap-east-1) |
ami-032850771ac6f8ae2 |
N/A* |
Asia Pacific (Mumbai) (ap-south-1) |
ami-0a9b1c1807b1a40ab |
ami-005b754faac73f0cc |
Asia Pacific (Tokyo) (ap-northeast-1) |
ami-0fde798d17145fae1 |
ami-04cf69bbd6c0fae0b |
Asia Pacific (Seoul) (ap-northeast-2) |
ami-07fd7609df6c8e39b |
ami-0730e699ed0118737 |
Asia Pacific (Singapore) (ap-southeast-1) |
ami-0361e14efd56a71c7 |
ami-07be5e97a529cd146 |
Asia Pacific (Sydney) (ap-southeast-2) |
ami-0237d87bc27daba65 |
ami-0a2f4c3aeb596aa7e |
EU (Frankfurt) (eu-central-1) |
ami-0b7127e7a2a38802a |
ami-0fbbd205f797ecccd |
EU (Ireland) (eu-west-1) |
ami-00ac2e6b3cb38a9b9 |
ami-0f9571a3e65dc4e20 |
EU (London) (eu-west-2) |
ami-0147919d2ff9a6ad5 |
ami-032348bd69c5dd665 |
EU (Paris) (eu-west-3) |
ami-0537ee9329c1628a2 |
ami-053962359d6859fec |
EU (Stockholm) (eu-north-1) |
ami-0fd05922165907b85 |
ami-0641def7f02a4cac5 |
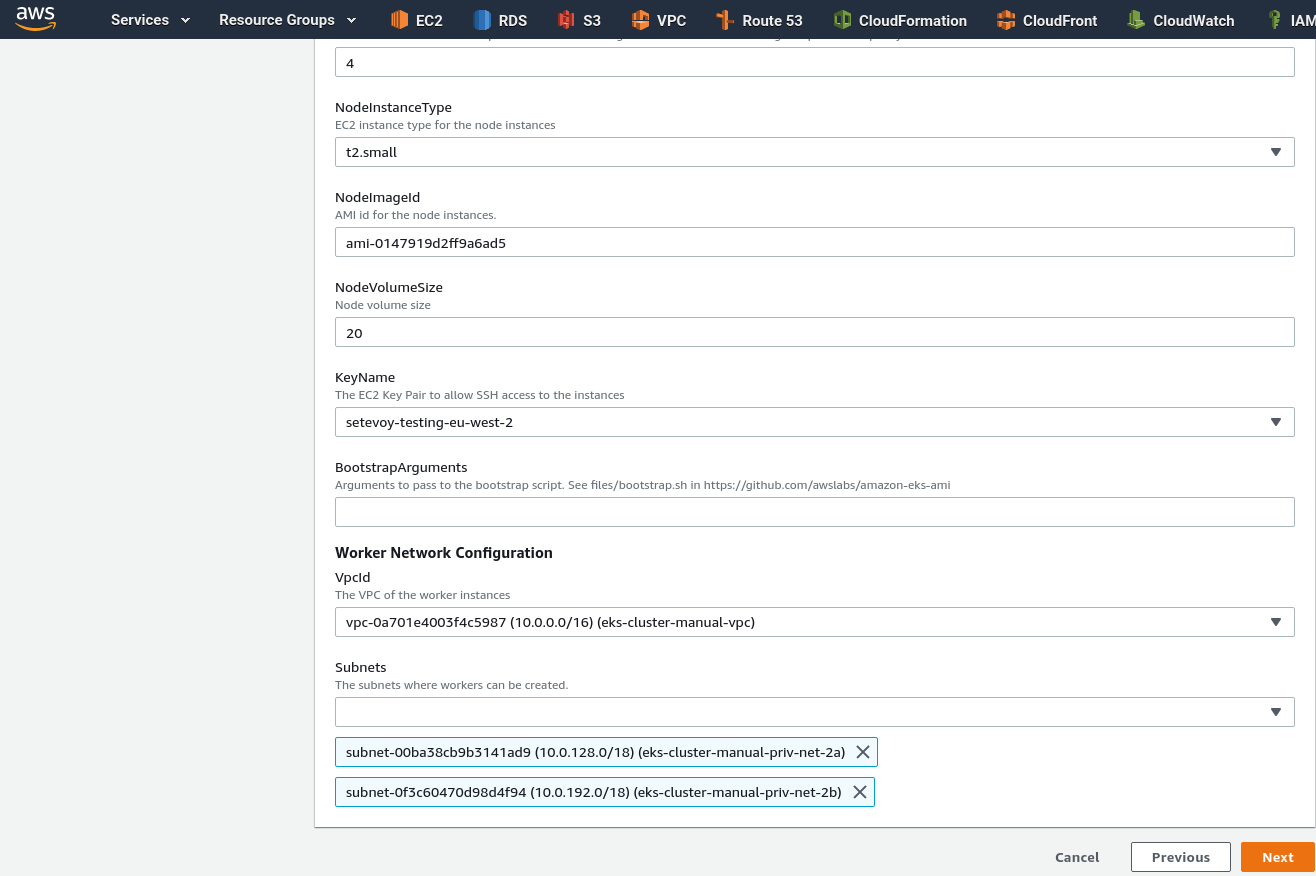
Currently the stack is creating in the London/eu-west-2, no need in GPU, thus – ami-0147919d2ff9a6ad5 (Amazon Linux).
Set this AMI ID, select VPC and two subnets:
Click Next, skip the next page and click Create stack:
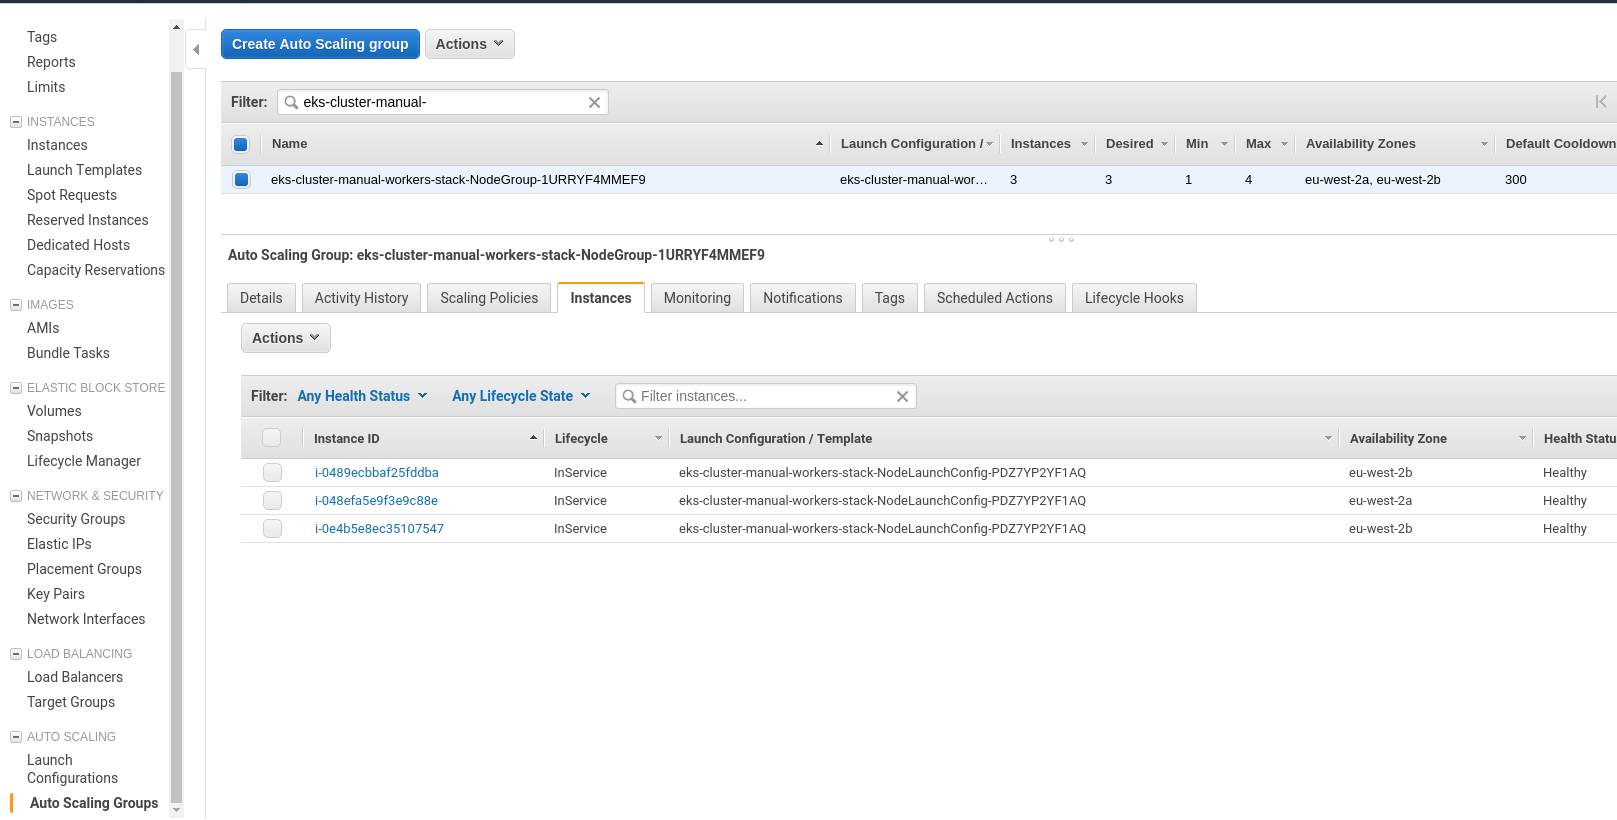
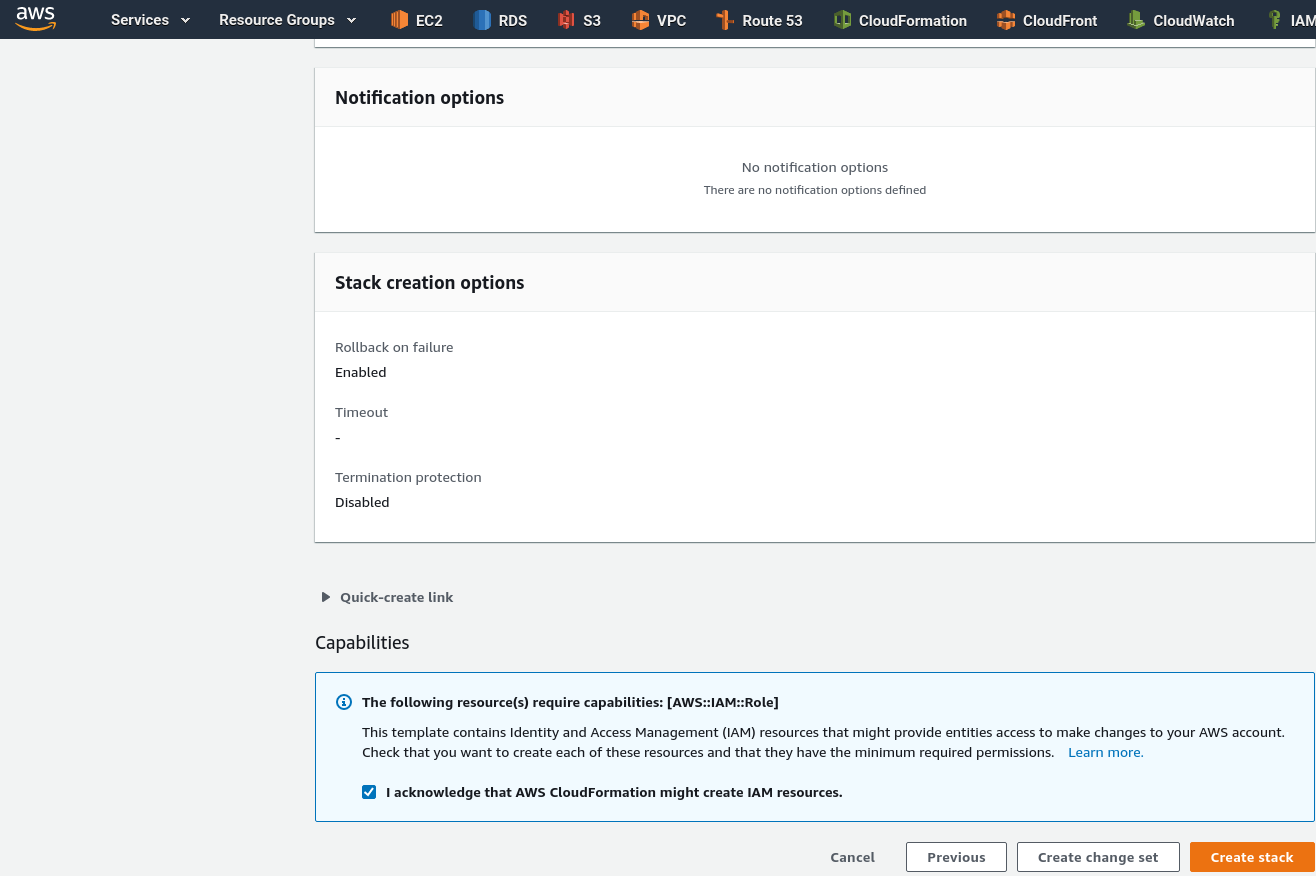 After the stack creation complete – check the AutoScaling groups:
kubectl installation
While we were working with the Worker Nodes – our EKS cluster was provisioned and we can install kubectl on a working machine.
Download an executable file:
[simterm]
[setevoy@setevoy-arch-work ~] $ curl -o kubectl https://amazon-eks.s3-us-west-2.amazonaws.com/1.13.7/2019-06-11/bin/linux/amd64/kubectl
[setevoy@setevoy-arch-work ~] $ chmod +x kubectl
[setevoy@setevoy-arch-work ~] $ sudo mv kubectl /usr/local/bin/
[/simterm]
Check:
[simterm]
[setevoy@setevoy-arch-work ~] $ kubectl version --short --client
Client Version: v1.13.7-eks-fa4c70
[/simterm]
To create its config file – use AWS CLI:
[simterm]
[setevoy@setevoy-arch-work ~] $ aws eks --region eu-west-2 --profile arseniy update-kubeconfig --name eks-cluster-manual
Added new context arn:aws:eks:eu-west-2:534***385:cluster/eks-cluster-manual to /home/setevoy/.kube/config
[/simterm]
Add an alias just to make work simpler:
[simterm]
[setevoy@setevoy-arch-work ~] $ echo "alias kk=\"kubectl\"" >> ~/.bashrc
[setevoy@setevoy-arch-work ~] $ bash
[/simterm]
Check it:
[simterm]
[setevoy@setevoy-arch-work ~] $ kk get svc
NAME         TYPE        CLUSTER-IP   EXTERNAL-IP   PORT(S)   AGE
kubernetes   ClusterIP   172.20.0.1   <none>        443/TCP   20m
[/simterm]
AWS authenticator
Although CloudFormation for Worker Nodes already ready, and EC2 instances are up and running – but we still can’t’ see them as Nodes in the Kubernetes cluster:
[simterm]
[setevoy@setevoy-arch-work ~] $ kk get node
No resources found.
Download AWS authenticator:
[simterm]
[setevoy@setevoy-arch-work ~] $ cd Temp/
[setevoy@setevoy-arch-work ~] $ curl -so aws-auth-cm.yaml https://amazon-eks.s3-us-west-2.amazonaws.com/cloudformation/2019-02-11/aws-auth-cm.yaml
[/simterm]
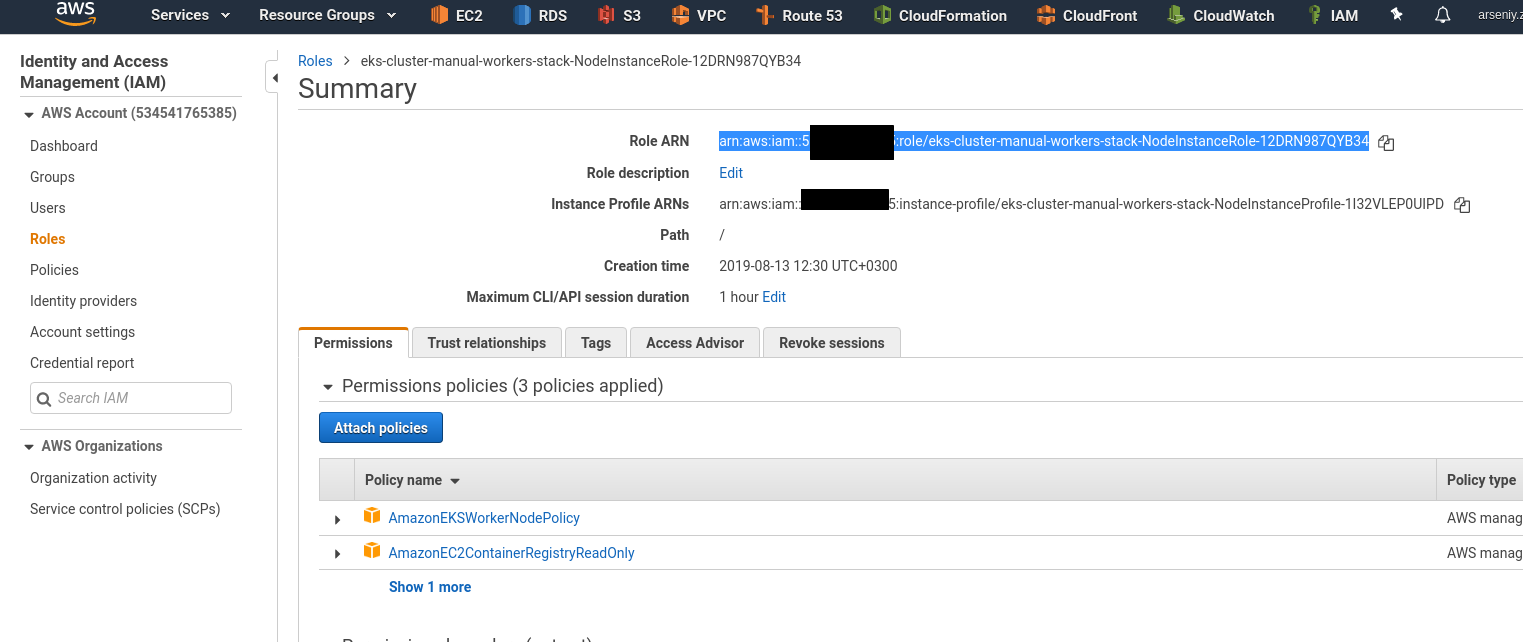
Go to the в IAM > Roles, find ARN (Amazon Resource Name) of the role (NodeInstanceRole):
Edit file aws-auth-cm.yaml, set rolearn:
Create a ConfigMap:
[simterm]
[setevoy@setevoy-arch-work ~/Temp]  $ kk apply -f aws-auth-cm.yaml
configmap/aws-auth created
[/simterm]
Check:
[simterm]
[setevoy@setevoy-arch-work ~/Temp]  $ kubectl get nodes -o wide
NAME                                         STATUS   ROLES    AGE   VERSION              INTERNAL-IP    EXTERNAL-IP   OS-IMAGE         KERNEL-VERSION                  CONTAINER-RUNTIME
ip-10-0-153-7.eu-west-2.compute.internal     Ready    <none>   47s   v1.13.7-eks-c57ff8   10.0.153.7     <none>        Amazon Linux 2   4.14.128-112.105.amzn2.x86_64   docker://18.6.1
ip-10-0-196-123.eu-west-2.compute.internal   Ready    <none>   50s   v1.13.7-eks-c57ff8   10.0.196.123   <none>        Amazon Linux 2   4.14.128-112.105.amzn2.x86_64   docker://18.6.1
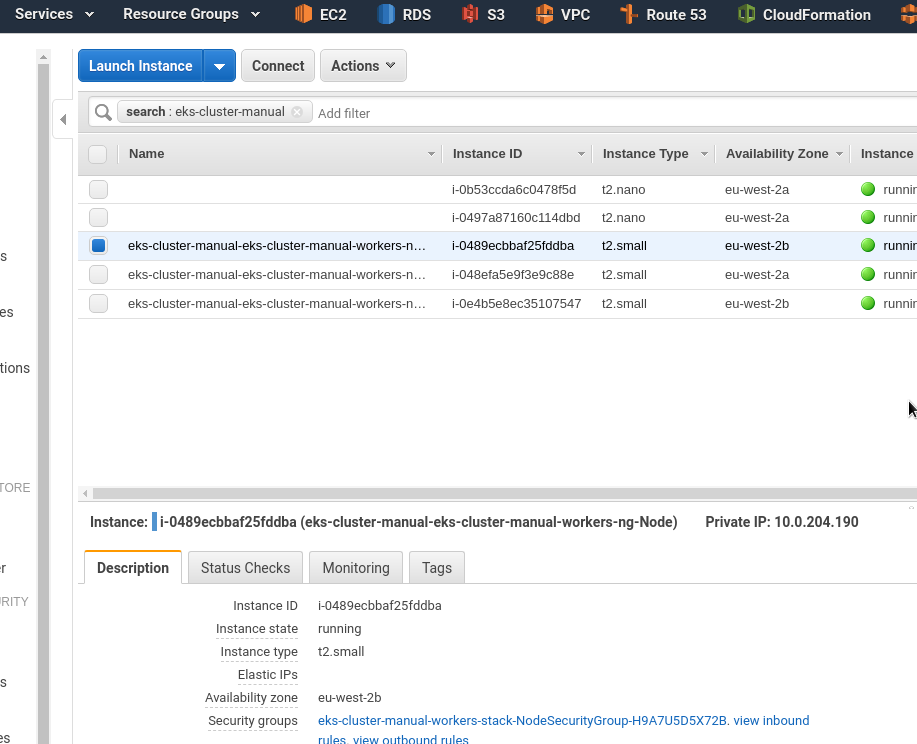
ip-10-0-204-190.eu-west-2.compute.internal   Ready    <none>   52s   v1.13.7-eks-c57ff8   10.0.204.190   <none>        Amazon Linux 2   4.14.128-112.105.amzn2.x86_64   docker://18.6.1
[/simterm]
Nodes were added to the cluster – great.
Web-app && LoadBalancer
And for testing purpose – let’s create a simple web-services, for example, a common NGINX, as in the previous chapter.
To access NGINX – let’s also create a LoadBalancer in Kubernetes and AWS, which will proxy requests to the Worker Nodes:
kind: Service
apiVersion: v1
metadata:
  name: eks-cluster-manual-elb
spec:
  type: LoadBalancer
  selector:
    app: eks-cluster-manual-pod
  ports:
    - name: http
      protocol: TCP
      # ELB's port
      port: 80
      # container's port
      targetPort: 80
---
apiVersion: apps/v1
kind: Deployment
metadata:
  name: eks-cluster-manual-deploy
spec:
  # ReplicaSet pods config
  replicas: 1
  # pods selector
  selector:
    matchLabels:
      app: eks-cluster-manual-pod
  # Pod template
  template:
    metadata:
      # a pod's labeles
      labels:
        app: eks-cluster-manual-pod
    spec:
      containers:
        - name: eks-cluster-manual-app
          image: nginx
Deploy them:
[simterm]
[setevoy@setevoy-arch-work ~/Temp]  $ kk apply -f eks-cluster-manual-elb-nginx.yml
service/eks-cluster-manual-elb created
deployment.apps/eks-cluster-manual-deploy created
[/simterm]
Check services:
[simterm]
[setevoy@setevoy-arch-work ~/Temp]  $ kk get svc
NAME                     TYPE           CLUSTER-IP     EXTERNAL-IP                                                               PORT(S)        AGE
eks-cluster-manual-elb   LoadBalancer   172.20.17.42   a05***405.eu-west-2.elb.amazonaws.com   80:32680/TCP   5m23s
[/simterm]
A Pod:
[simterm]
$ kk get po -o wide -l app=eks-cluster-manual-pod
NAME                                         READY   STATUS    RESTARTS   AGE     IP            NODE                                       NOMINATED NODE   READINESS GATES
eks-cluster-manual-deploy-698b8f6df7-jg55x   1/1     Running   0          6m17s   10.0.130.54   ip-10-0-153-7.eu-west-2.compute.internal   <none>           <none>
[/simterm]
And the ConfigMap itself:
[simterm]
$ kubectl describe configmap -n kube-system aws-auth
Name:         aws-auth
Namespace:    kube-system
Labels:       <none>
Annotations:  kubectl.kubernetes.io/last-applied-configuration:
                {"apiVersion":"v1","data":{"mapRoles":"- rolearn: arn:aws:iam::534***385:role/eks-cluster-manual-workers-stack-NodeInstanceRole-12DRN98...

Data
====
mapRoles:
----
- rolearn: arn:aws:iam::534***385:role/eks-cluster-manual-workers-stack-NodeInstanceRole-12DRN987QYB34
  username: system:node:{{EC2PrivateDNSName}}
  groups:
    - system:bootstrappers
    - system:nodes

Events:  <none>
[/simterm]
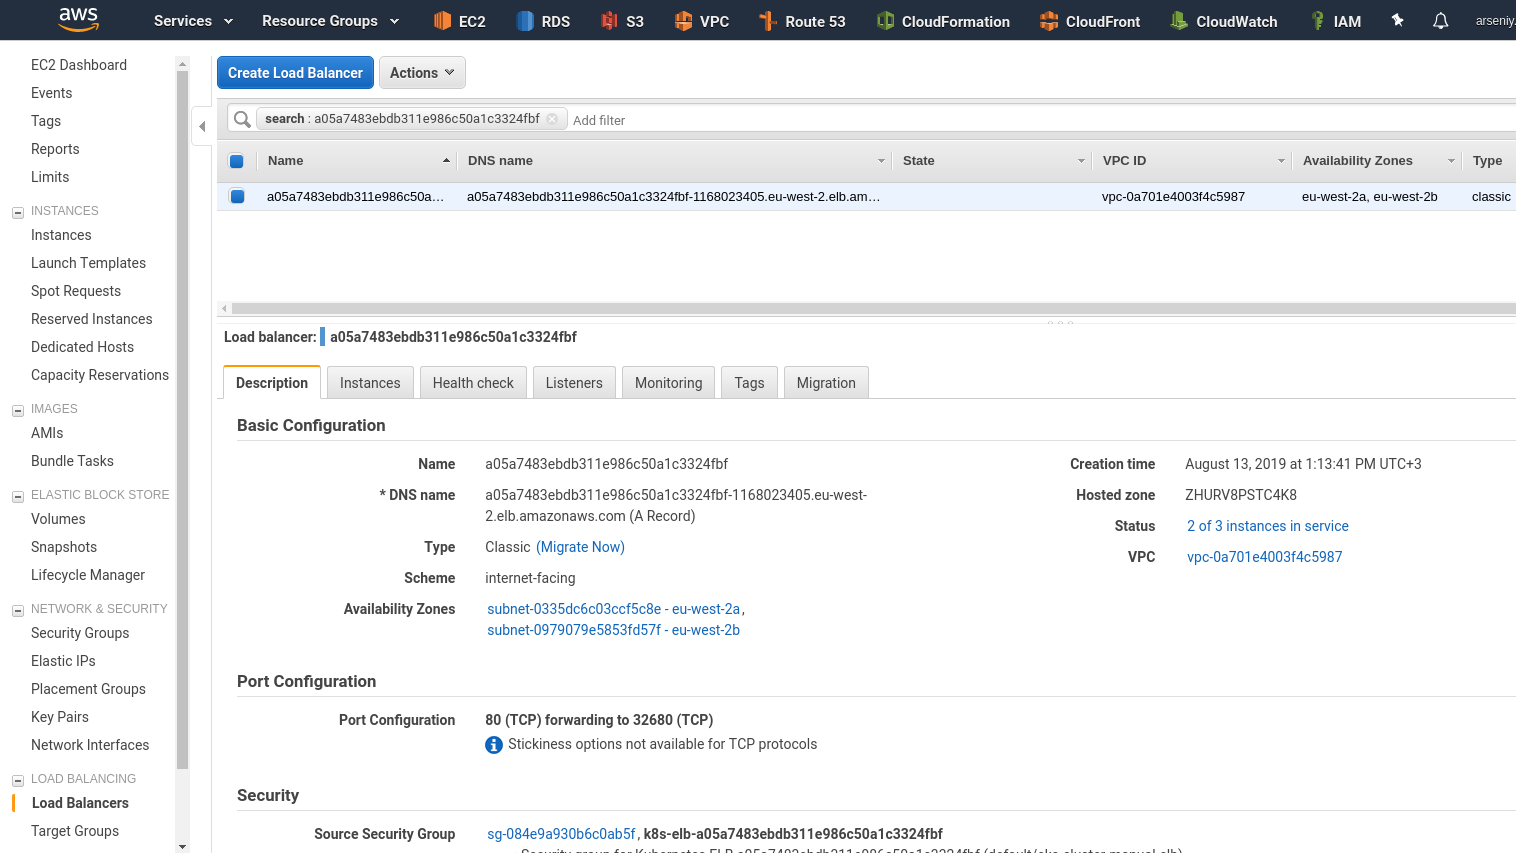
LoadBalancer in the AWS (need to wait about 5 minutes to spin up Pods and attach Nodes to the ELB):
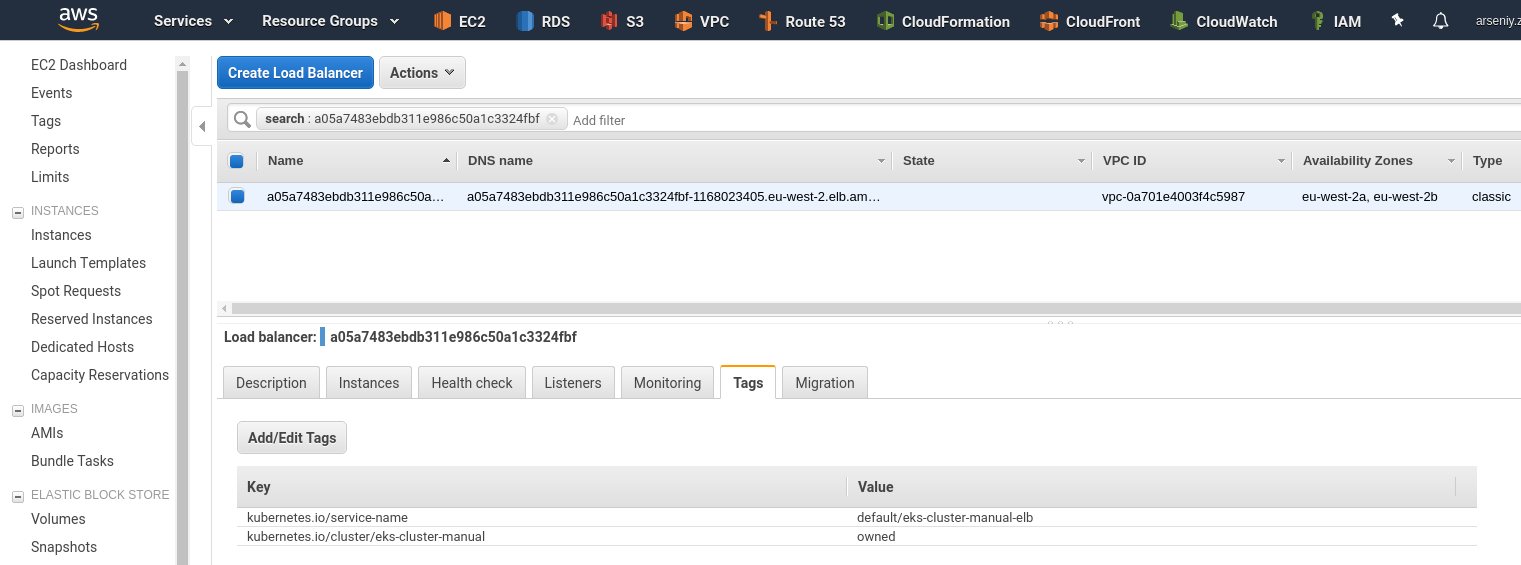
Its tags:
And test the URL provided by AWS or by kubectl get svc command:
[simterm]
[setevoy@setevoy-arch-work ~/Temp]  $ curl a05***405.eu-west-2.elb.amazonaws.com
<!DOCTYPE html>
<html>
<head>
<title>Welcome to nginx!</title>
...
[/simterm]
Done.
Useful links
- What Is Amazon EKS?
- Getting Started with Amazon EKS
- Managing Users or IAM Roles for your Cluster
- Kubernetes ConfigMap
- Amazon EKS Workshop
- Ten things to know about Kubernetes on Amazon (EKS)
- EKS Review
- My First Kubernetes Cluster: A Review of Amazon EKS
- Troubleshoot Kubernetes Deployments
- matchLabels, labels, and selectors explained in detail, for beginners

