 Finally got time to migrate the RTFM.CO.UA blog to a new server with Debian 10. This time manually, without any automation will set up a LEMP stack
Wrote a similar at 2016 – Debian: установка LEMP — NGINX + PHP-FPM + MariaDB (Rus), but in time the post is more complete of the process and tools used to spin up a ready-for-use Linux server for hosting a website, actually – a WordPress blog.
And again, it was planned as a quick note on installing NGINX + PHP + MySQL, but as a result, I’ve described LEMP, Linux monitoring, logs, emailing, etc set up process and configuration.
So, what we will do in this post:
- create a droplet in DigitalOcean
- SSL from Let’s Encrypt
- NGINX
- PHP-FPM
- MySQL (MariaDB) as a database server
- NGINX Amplify agent – monitoring and alerting (I’ve tried Grafana и Loki but they used too many resources, still it was a really interesting setup with automation, check the Prometheus: RTFM blog monitoring set up with Ansible – Grafana, Loki, and promtail)
- WordPress backup script – a self-written Python script, check the Python: скрипт бекапа файлов и баз MySQL в AWS S3 (Rus)
- Logz.io – collect logs to the ELK-stack
unattended-upgrades– Debian and installed packages auto upgradeslogrotate– logs rotation
Contents
DigitalOceal: create a droplet
The RTFM blog was hosted on AWS but then I moved it to the DigitalOcean last year because of the lower price.
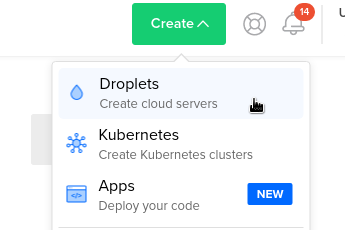
Create a new droplet:
Will use Debian 10 on the 2 CPU, 2 GB RAM virtual server.
For example, on the currently used droplet with the same configuration CPU and memory usage is the following (the graph from the NGINX Amplify):
Choose an OS and the instance type:
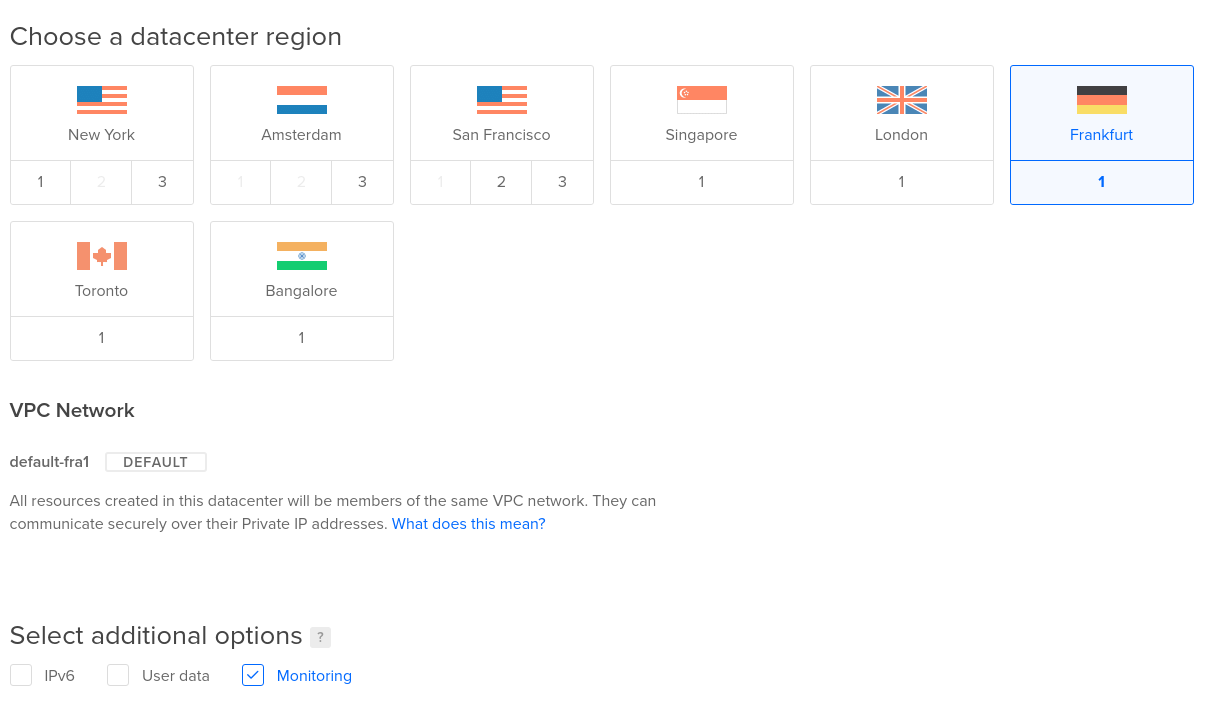
I’m using Frankfurt region, and will enable the Monitoring on the droplet – it will be created with the DigitalOcean agent to have more graphs in the DO’s control panel:
Create an RSA key for SSH
On the work station create a ket pair:
[simterm]
$ ssh-keygen -f ~/Dropbox/AWS/setevoy-do-nextcloud-production-d10-03-11
Generating public/private rsa key pair.
Enter passphrase (empty for no passphrase):
Enter same passphrase again:
Your identification has been saved in /home/setevoy/Dropbox/AWS/setevoy-do-nextcloud-production-d10-03-11
Your public key has been saved in /home/setevoy/Dropbox/AWS/setevoy-do-nextcloud-production-d10-03-11.pub
...
[/simterm]
Copy its public part:
[simterm]
$ cat /home/setevoy/Dropbox/AWS/setevoy-do-nextcloud-production-d10-03-11.pub
ssh-rsa AAAAB3NzaC1***Ht3UEYuGtdQgc0= setevoy@setevoy-arch-work
[/simterm]
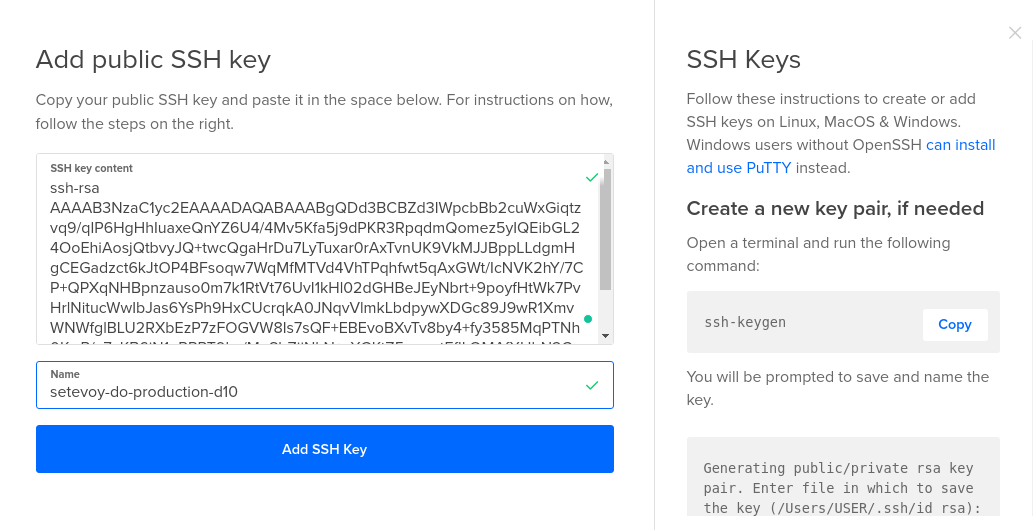
Create a new SSH key in the DO:
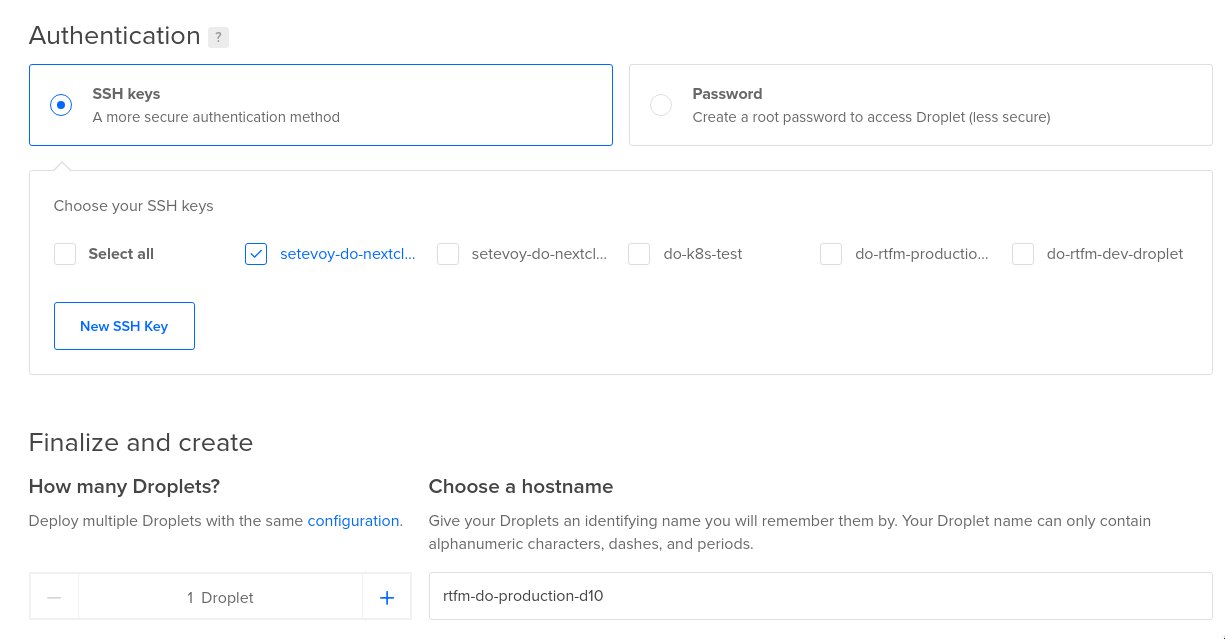
Chose droplets number – one, and set its hostname to the rtfm-do-production-d10:
Optionally, enable backups and create the droplet:
Firewall
While the droplet is creating, let’s configure a firewall fo it:
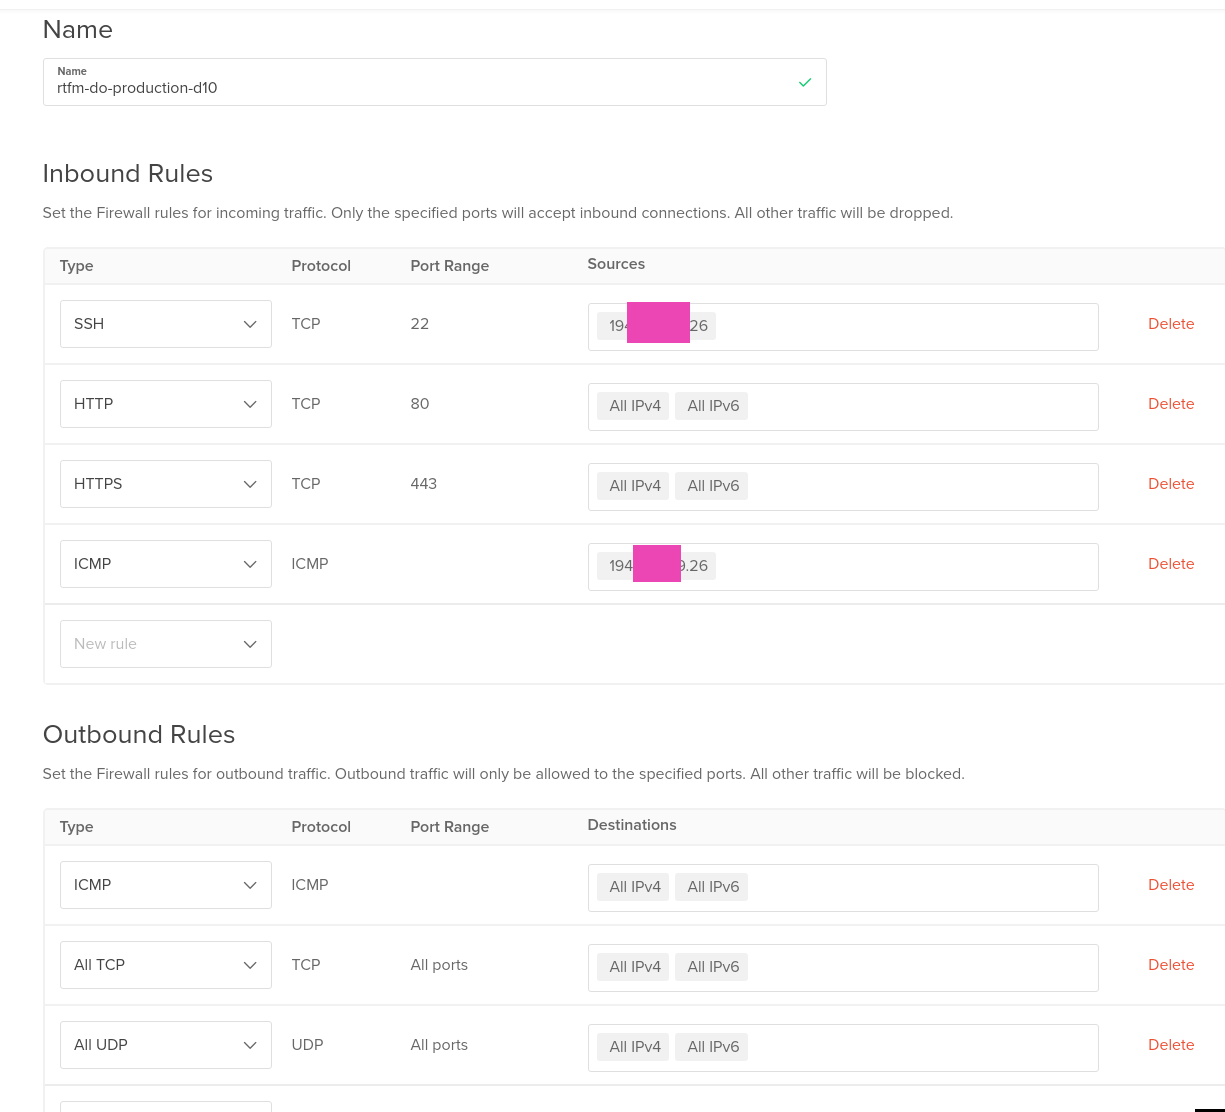
Add rules: SSH, ICMP – limited by my current IP, and HTTP/S from anywhere, although it might be a good idea to limit it too, so Google will not index the blog during migration as a copy of the original site:
Connect the firewall to the droplet:
Floating IP
Analog of the Elastic IP in AWS, create a new one for the new server:
Actually, that’s all here.
Let’s go to the server configuration.
LEMP – Linux, NGINX, PHP, MySQL
Okay, once again – what do we need here?
- nginx
- php-fpm
- lets encrypt
- mysql
- amplify agent – мониторинг
- backup script
- logz.io – has a free tier, but will store the logs only for one day, still, it’s enough for me as I need only for a nice web-UI to check them
- unattended-upgrades – OS and packages auto upgrades
- logrotate – already installed on Debian by default, just will check its configs
- msmtp – to send emails
Connect to the host:
[simterm]
$ chmod 400 Dropbox/AWS/setevoy-do-nextcloud-production-d10-03-11
$ ssh -i Dropbox/AWS/setevoy-do-nextcloud-production-d10-03-11 [email protected]
root@rtfm-do-production-d10:~#
[/simterm]
Update the system and reboot:
[simterm]
root@rtfm-do-production-d10:~# apt update && apt -y upgrade
root@rtfm-do-production-d10:~# reboot
[/simterm]
Install packages for LEMP:
[simterm]
root@rtfm-do-production-d10:~# apt -y install certbot nginx php php-xml php-curl php-gd php-zip php-mysql php-mbstring php-fpm mariadb-server
[/simterm]
Check if NGINX is working:
[simterm]
root@rtfm-do-production-d10:~# curl localhost
<!DOCTYPE html>
<html>
<head>
<title>Welcome to nginx!</title>
...
[/simterm]
Install additional necessary packages:
[simterm]
root@rtfm-do-production-d10:/data# apt -y install htop git wget unzip unattended-upgrades apt-listchanges dnsutils telnet python-pip python-boto3 mailutils
[/simterm]
The mailutils has an issue when using mailx with msmtp, so I had to replace it with bsd-mailx, see the mailx and msmtp – sending emails from the server.
Let’s Encrypt SSL
Will use Let’s Encrypt to get the SSL certificate for the blog.
Let’s Encrypt DNS validation
Here is a question with the validation process, as the rtfm.co.ua domain is still pointed to the old server and we can not use the common approach with the .well-known directory.
What we can do here, is to use the DNS validation when obtaining a new certificate, and then when we will have already configured NGINX and PHP – will reconfigure certbotto use the webroot validation, as the DNS validation seems does not support certificates renew (but I’m not sure about this).
Get the certificate:
[simterm]
root@rtfm-do-production-d10:~# certbot certonly --preferred-challenges dns -d rtfm.co.ua --manual --email [email protected] --agree-tos
Saving debug log to /var/log/letsencrypt/letsencrypt.log
Plugins selected: Authenticator manual, Installer None
Obtaining a new certificate
Performing the following challenges:
dns-01 challenge for rtfm.co.ua

- - - - - - - - - - - - - - - - - - - - - - - - - - - - - - - - - - - - - - - -
NOTE: The IP of this machine will be publicly logged as having requested this
certificate. If you're running certbot in manual mode on a machine that is not
your server, please ensure you're okay with that.

Are you OK with your IP being logged?
- - - - - - - - - - - - - - - - - - - - - - - - - - - - - - - - - - - - - - - -
(Y)es/(N)o: Y

- - - - - - - - - - - - - - - - - - - - - - - - - - - - - - - - - - - - - - - -
Please deploy a DNS TXT record under the name
_acme-challenge.rtfm.co.ua with the following value:

ORWOP6KR4C3csx-ngoSWbqVAJuVo8kFDgV8AqNFUemg

Before continuing, verify the record is deployed.
- - - - - - - - - - - - - - - - - - - - - - - - - - - - - - - - - - - - - - - -
Press Enter to Continue
[/simterm]
Add a new record on the DNS of the domain:
Check it:
[simterm]
$ dig _acme-challenge.rtfm.co.ua TXT +short
"ORWOP6KR4C3csx-ngoSWbqVAJuVo8kFDgV8AqNFUemg"
[/simterm]
Go back to the server, press Enter – and it’s done:
[simterm]
...
Press Enter to Continue
Waiting for verification...
Cleaning up challenges

IMPORTANT NOTES:
 - Congratulations! Your certificate and chain have been saved at:
   /etc/letsencrypt/live/rtfm.co.ua/fullchain.pem
   Your key file has been saved at:
   /etc/letsencrypt/live/rtfm.co.ua/privkey.pem
   Your cert will expire on 2021-02-01. To obtain a new or tweaked
   version of this certificate in the future, simply run certbot
   again. To non-interactively renew *all* of your certificates, run
   "certbot renew"
[/simterm]
NGINX
Generate the Diffie-Hellman key (check the ClientKeyExchange) for NGINX:
[simterm]
root@rtfm-do-production-d10:~# openssl dhparam -out /etc/nginx/dhparams.pem 2048
[/simterm]
Remove the default config – here the RTFM will be the default host:
[simterm]
root@rtfm-do-production-d10:~# rm /etc/nginx/sites-enabled/default
[/simterm]
Create a config file for the RTFM virtualhost – /etc/nginx/conf.d/rtfm.co.ua.conf. I’m just coping it from the old server.
It’s long enough and I didn’t change it for the last few years, just some SLS settings.
The last check on the https://www.ssllabs.com still gives me the A+ level, so it can be used.
Also, take a look at the NGINX configs generators, for example, https://www.serverion.com/nginx-config or SSL Configuration Generator from Mozilla.
In my config, I’m limiting access to the /wp-admin and wp-login.php as I’m the only one person who uses it:
server {

    listen 80 default_server;
    server_name rtfm.co.ua www.rtfm.co.ua;

    server_tokens off;
    return 301 https://rtfm.co.ua$request_uri;
}

server {

    listen 443 ssl default_server;
    server_name rtfm.co.ua;

    root /data/www/rtfm/rtfm.co.ua;

    add_header Strict-Transport-Security "max-age=31536000; includeSubdomains" always;
    server_tokens off;

#    access_log /var/log/nginx/rtfm.co.ua-access.log main_ext;
    error_log /var/log/nginx/rtfm.co.ua-error.log warn;

    ssl_certificate /etc/letsencrypt/live/rtfm.co.ua/fullchain.pem;
    ssl_certificate_key /etc/letsencrypt/live/rtfm.co.ua/privkey.pem;

    ssl_protocols TLSv1.2;
    ssl_prefer_server_ciphers on;
    ssl_dhparam /etc/nginx/dhparams.pem;
    ssl_ciphers "EECDH+AESGCM:EDH+AESGCM:ECDHE-RSA-AES128-GCM-SHA256:AES256+EECDH:DHE-RSA-AES128-GCM-SHA256:AES256+EDH:ECDHE-RSA-AES256-GCM-SHA384:DHE-RSA-AES256-GCM-SHA384:ECDHE-RSA-AES256-SHA384:ECDHE-RSA-AES128-SHA256:ECDHE-RSA-AES256-SHA:ECDHE-RSA-AES128-SHA:DHE-RSA-AES256-SHA256:DHE-RSA-AES128-SHA256:DHE-RSA-AES256-SHA:DHE-RSA-AES128-SHA:ECDHE-RSA-DES-CBC3-SHA:EDH-RSA-DES-CBC3-SHA:AES256-GCM-SHA384:AES128-GCM-SHA256:AES256-SHA256:AES128-SHA256:AES256-SHA:AES128-SHA:DES-CBC3-SHA:HIGH:!aNULL:!eNULL:!EXPORT:!DES:!MD5:!PSK:!RC4";
    ssl_session_timeout 1d;
    ssl_session_cache shared:SSL:50m;
    ssl_stapling on;
    ssl_stapling_verify on;

    error_page 500 502 503 504 /50x.html;
        location = /50x.html {
        root /usr/share/nginx/html;
    }

    client_max_body_size 1024m;

    location ~ /\.ht {
        deny all;
    }

    location ~* \.(jpg|swf|jpeg|gif|png|css|js|ico)$ {
        root /data/www/rtfm/rtfm.co.ua;
        expires 24h;
    }

    location /wp-admin/admin-ajax.php {

    location ~ \.php$ {
        include /etc/nginx/fastcgi_params;
        fastcgi_pass unix:/var/run/rtfm.co.ua-php-fpm.sock;
        fastcgi_index index.php;
        fastcgi_param SCRIPT_FILENAME $document_root$fastcgi_script_name;
        }
    }

    location /wp-admin/ {

        index index.php, index.html;

        auth_basic_user_file /data/www/rtfm/.htpasswd_rtfm;
        auth_basic "Password-protected Area";

        # office
        allow 194.***.***.24/29;
        # home 397 LocalNet
        allow 31.***.***.117/32;
        # home 397 Lanet
        allow 176.***.***.237;
        deny all;

        location ~ \.php$ {
            include /etc/nginx/fastcgi_params;
            fastcgi_pass unix:/var/run/rtfm.co.ua-php-fpm.sock;
            fastcgi_index index.php;
            fastcgi_param SCRIPT_FILENAME $document_root$fastcgi_script_name;
        }
    }

    location /wp-config.php {
        deny all;
    }

    location /.user.ini {
        deny all;
    }

    location /wp-login.php {

        auth_basic_user_file /data/www/rtfm/.htpasswd_rtfm;
        auth_basic "Password-protected Area";

        # office
        allow 194.***.***.24/29;
        # home 397 LocalNet
        allow 31.***.***.117/32;
        # home 397 Lanet
        allow 176.***.***.237;
        deny all;

        location ~ \.php$ {
            include /etc/nginx/fastcgi_params;
            fastcgi_pass unix:/var/run/rtfm.co.ua-php-fpm.sock;
            fastcgi_index index.php;
            fastcgi_param SCRIPT_FILENAME $document_root$fastcgi_script_name;
        }
    }

    location /uploads/noindex {
        auth_basic_user_file /data/www/rtfm/.htpasswd_rtfm;
        auth_basic "Password-protected Area";
    }

    location = /favicon.ico {
        access_log     off;
        log_not_found  off;
    }

    location / {

        try_files $uri =404;

        index index.php;
        proxy_read_timeout 3000;

        rewrite ^/sitemap(-+([a-zA-Z0-9_-]+))?\.xml$ "/index.php?xml_sitemap=params=$2" last;
        rewrite ^/sitemap(-+([a-zA-Z0-9_-]+))?\.xml\.gz$ "/index.php?xml_sitemap=params=$2;zip=true" last;
        rewrite ^/sitemap(-+([a-zA-Z0-9_-]+))?\.html$ "/index.php?xml_sitemap=params=$2;html=true" last;
        rewrite ^/sitemap(-+([a-zA-Z0-9_-]+))?\.html.gz$ "/index.php?xml_sitemap=params=$2;html=true;zip=true" last;

        if (!-f $request_filename){
            set $rule_1 1$rule_1;
        }

        if (!-d $request_filename){
            set $rule_1 2$rule_1;
        }

        if ($rule_1 = "21"){
            rewrite /. /index.php last;
       }
    }

    location ~ \.php$ {

        try_files $uri =404;

        proxy_read_timeout 3000;
        include /etc/nginx/fastcgi_params;
        fastcgi_pass unix:/var/run/rtfm.co.ua-php-fpm.sock;
        fastcgi_index index.php;
        fastcgi_param SCRIPT_FILENAME $document_root$fastcgi_script_name;
    }

    location /nginx_status {
        stub_status on;
        access_log   off;
        allow 127.0.0.1;
        deny all;
    }
}
Check it and reload:
[simterm]
root@rtfm-do-production-d10:~# nginx -t && systemctl reload nginx
nginx: the configuration file /etc/nginx/nginx.conf syntax is ok
nginx: configuration file /etc/nginx/nginx.conf test is successful
[/simterm]
Let’s check.
On the working laptop update the /etc/hosts to set the new droplet’s IP for the rtfm.co.ua domain:
139.59.205.180 rtfm.co.ua
Try to open it:
Good – SSL is working, NGINX is running.
PHP-FPM
Similarly to the NGINX config, I’ll copy the PHP-FPM config from my old server.
Here are FPM-pools used, each running under its own system user.
See also PHP-FPM: Process Manager — dynamic vs ondemand vs static (Rus).
Linux: non-login user
Add a non-login user:
[simterm]
root@rtfm-do-production-d10:~# adduser --system --no-create-home --group rtfm
Adding system user `rtfm' (UID 109) ...
Adding new group `rtfm' (GID 115) ...
Adding new user `rtfm' (UID 109) with group `rtfm' ...
Not creating home directory `/home/rtfm'.
[/simterm]
Create a /etc/php/7.3/fpm/pool.d/rtfm.co.ua.conf file:
[rtfm.co.ua]

user = rtfm
group = rtfm

listen = /var/run/rtfm.co.ua-php-fpm.sock

listen.owner = www-data
listen.group = www-data

pm = dynamic
pm.max_children = 5
pm.start_servers = 2
pm.min_spare_servers = 1
pm.max_spare_servers = 3
;pm.process_idle_timeout = 10s;
;pm.max_requests = 500
catch_workers_output = yes
chdir = /
pm.status_path = /status

slowlog = /var/log/nginx/rtfm.co.ua-slow.log
php_flag[display_errors] = off
;php_admin_value[display_errors] = 'stderr'
php_admin_value[display_errors] = off
php_admin_value[error_log] = /var/log/nginx/rtfm.co.ua-php-error.log
php_admin_flag[log_errors] = on
php_admin_value[session.save_path] = /var/lib/php/session/rtfm
php_value[session.save_handler] = files
php_value[session.save_path] = /var/lib/php/session
php_admin_value[upload_max_filesize] = 128M
php_admin_value[post_max_size] = 128M
Check the PHP-FPM config:
[simterm]
root@rtfm-do-production-d10:~# php-fpm7.3 -t
[03-Nov-2020 11:45:24] NOTICE: configuration file /etc/php/7.3/fpm/php-fpm.conf test is successful
[/simterm]
Reload configs:
[simterm]
root@rtfm-do-production-d10:~# systemctl reload php7.3-fpm.service
[/simterm]
Find the NIGNX root directory for the blog:
...
root /data/www/rtfm/rtfm.co.ua;
...
Create the directory:
[simterm]
root@rtfm-do-production-d10:~# mkdir -p /data/www/rtfm/rtfm.co.ua
[/simterm]
Add a test file with the phpinfo() function the check the NGINX + PHP:
[simterm]
root@rtfm-do-production-d10:~# echo "<?php phpinfo(); ?>" > /data/www/rtfm/rtfm.co.ua/info.php
[/simterm]
Check it (again by updating the /etc/hosts):
Nice – everything is working.
MySQL
Debian have MariaDB by default instead of MySQL. Not a big difference in the configuration, and actually MariaDB works faster.
Run the initial configuration script:
[simterm]
root@rtfm-do-production-d10:~# mysql_secure_installation
...
Set root password? [Y/n] y
New password:
Re-enter new password:
Password updated successfully!
Reloading privilege tables..
 ... Success!
...
Remove anonymous users? [Y/n] y
 ... Success!
...
Disallow root login remotely? [Y/n] y
 ... Success!
...
Remove test database and access to it? [Y/n] y
 - Dropping test database...
 ... Success!
 - Removing privileges on test database...
 ... Success!
...
Reload privilege tables now? [Y/n] y
 ... Success!

Cleaning up...

All done!  If you've completed all of the above steps, your MariaDB
installation should now be secure.

Thanks for using MariaDB!
[/simterm]
Create a database for the RTFM:
[simterm]
MariaDB [(none)]> create database rtfm_db1_production;
Query OK, 1 row affected (0.000 sec)
[/simterm]
Create a user rtfm with access to the rtfm_db1_production database only from the localhost with the password password:
[simterm]
MariaDB [(none)]> GRANT ALL PRIVILEGES ON rtfm_db1_production.* TO 'rtfm'@'localhost' IDENTIFIED BY 'password';
Query OK, 0 rows affected (0.001 sec)
[/simterm]
Check it:
[simterm]
root@rtfm-do-production-d10:~# mysql -u rtfm -p -e 'show databases;'
Enter password:
+--------------------+
| Database           |
+--------------------+
| information_schema |
| rtfm_db1_production|
+--------------------+
[/simterm]
Now everything is ready for the migration.
WordPress blog migration
Here I have to pause in this post writing to create the database’ dump and move blog’s files.
After the migration will proceed from the new server.
What needs to be done:
- crate files archive
- database dump
- move them to the new host
- change the DNS entry to point the domain to the new IP
Save the post as a Draft – WordPress will save it in its database which I’ll dump and will move to the new server to proceed writing right from this place.
Archiving files
Create an archive with the blog’s files, check them:
[simterm]
root@rtfm-do-production:/home/setevoy# cd /data/www/rtfm/
root@rtfm-do-production:/data/www/rtfm# ll
total 20
drwxr-xr-x 8 rtfm rtfm 20480 Nov 3 12:11 rtfm.co.ua
[/simterm]
Create a TAR-archive with compression:
[simterm]
root@rtfm-do-production:/data/www/rtfm# tar cvpfz rtfm.co.ua.tar.gz rtfm.co.ua/
[/simterm]
Check the file:
[simterm]
root@rtfm-do-production:/data/www/rtfm# ls -lh
total 2.4G
drwxr-xr-x 8 rtfm rtfm 20K Nov 3 12:11 rtfm.co.ua
-rw-r--r-- 1 root root 2.4G Nov 3 14:05 rtfm.co.ua.tar.gz
[/simterm]
MySQL database dump
Create the dump (first, read the WordPress: Error establishing a database connection about the -d option) :
[simterm]
root@rtfm-do-production:/data/www/rtfm# mysqldump -u rtfm -p -d rtfm_db1_production > rtfm_db1_production.sql
Enter password:
[/simterm]
Check it:
[simterm]
root@rtfm-do-production:/data/www/rtfm# head rtfm_db1_production.sql
-- MySQL dump 10.16 Distrib 10.1.47-MariaDB, for debian-linux-gnu (x86_64)
--
-- Host: localhost   Database: rtfm_db1_production
-- ------------------------------------------------------
-- Server version      10.1.47-MariaDB-0+deb9u1

/*!40101 SET @OLD_CHARACTER_SET_CLIENT=@@CHARACTER_SET_CLIENT */;
/*!40101 SET @OLD_CHARACTER_SET_RESULTS=@@CHARACTER_SET_RESULTS */;
/*!40101 SET @OLD_COLLATION_CONNECTION=@@COLLATION_CONNECTION */;
/*!40101 SET NAMES utf8mb4 */;
[/simterm]
On the firewall of the old server open the port for the SSH connection from the new server and copy the files:
[simterm]
root@rtfm-do-production-d10:/data# scp -i /root/.ssh/rtfm-do-old [email protected]:/data/www/rtfm/rtfm.co.ua.tar.gz .
[email protected]'s password:
rtfm.co.ua.tar.gz                                                                                                                                                                                         100% 2409MB 101.3MB/s  00:23
root@rtfm-do-production-d10:/data# scp -i /root/.ssh/rtfm-do-old [email protected]:/data/www/rtfm/rtfm_db1_production.sql .
[email protected]'s password:
rtfm_db1_production.sql
[/simterm]
Unpack the files:
[simterm]
root@rtfm-do-production-d10:/data# tar xfpzv rtfm.co.ua.tar.gz
[/simterm]
Check them:
[simterm]
root@rtfm-do-production-d10:/data# ll
total 2466844
drwxr-xr-x 8 rtfm rtfm      4096 Nov 3 10:11 rtfm.co.ua
-rw-r--r-- 1 root root 2525973949 Nov 3 12:14 rtfm.co.ua.tar.gz
-rw-r--r-- 1 root root     59424 Nov 3 12:14 rtfm_db1_production.sql
drwxr-xr-x 3 root root      4096 Nov 3 11:47 www
[/simterm]
Move the rtfm.co.ua directory to the /data/www/rtfm catalog:
[simterm]
root@rtfm-do-production-d10:/data# rm -rf www/rtfm/rtfm.co.ua/
root@rtfm-do-production-d10:/data# mv rtfm.co.ua www/rtfm/
[/simterm]
Check files:
[simterm]
root@rtfm-do-production-d10:/data# ll www/rtfm/rtfm.co.ua/
total 388
-rw-r--r-- 1 rtfm rtfm   64 Nov 6 2018 1a24c4e2948b4047d3d1ed8516b5ca39e452ccfdb2f81a46a8984b921261bd1e.txt
-rw-r--r-- 1 rtfm rtfm   24 Nov 6 2018 404.html
-rw-r--r-- 1 root root   58 Jul 25 2019 ads.txt
-rw-r--r-- 1 rtfm rtfm 28522 Nov 6 2018 bin_dec.html
-rw-r--r-- 1 rtfm rtfm 30682 Nov 6 2018 favicon.ico
-rw-r--r-- 1 rtfm rtfm  405 Apr 1 2020 index.php
-rw-r--r-- 1 rtfm rtfm 3080 Nov 6 2018 keybase.txt
-rw-r--r-- 1 rtfm rtfm 19915 Aug 12 07:46 license.txt
-rw-r--r-- 1 rtfm rtfm   20 Nov 6 2018 live-4d939769.tx
...
[/simterm]
Upload the dump to the new database:
[simterm]
root@rtfm-do-production-d10:/data# mysql -u rtfm -p rtfm_db1_production < rtfm_db1_production.sql
Enter password:
[/simterm]
Обновляем локальный /etc/hosts – и:
Er… WTF?
WordPress: Error establishing a database connection
Check the data in the database – seems like everything is in its place:
[simterm]
MariaDB [rtfm_db1_production]> show tables;
+--------------------------------+
| Tables_in_rtfm_db1_production |
+--------------------------------+
| b2s_posts                     |
| b2s_posts_network_details     |
| b2s_posts_sched_details       |
| b2s_user                      |
| b2s_user_contact              |
| b2s_user_network_settings     |
...
[/simterm]
PHP: check MySQL connection
Let’s use a simple script to check if PHP<->MySQL is working and we have all necessary libs installed:
<?php

$link = @mysqli_connect('localhost', 'rtfm', 'Ta6paidie7Ie');

if(!$link) {
   die("Failed to connect to the server: " . mysqli_connect_error());
} else {
   echo "Connected\n";
}


if(!@mysqli_select_db($link, 'rtfm_db1_production')) {
   die("Failed to connect to the database: " . mysqli_error($link));
} else {
   echo "DB found\n";
}

?>
Run it:
[simterm]
root@rtfm-do-production-d10:/data/www/rtfm/rtfm.co.ua# php mysql.php
Connected
DB found
[/simterm]
All good too.
WordPress: WP_ALLOW_REPAIR
Try to use the WordPress database repair – in the wp-config.php before the “‘That’s all, stop editing! Happy blogging’” line add the following:
define('WP_ALLOW_REPAIR', true);
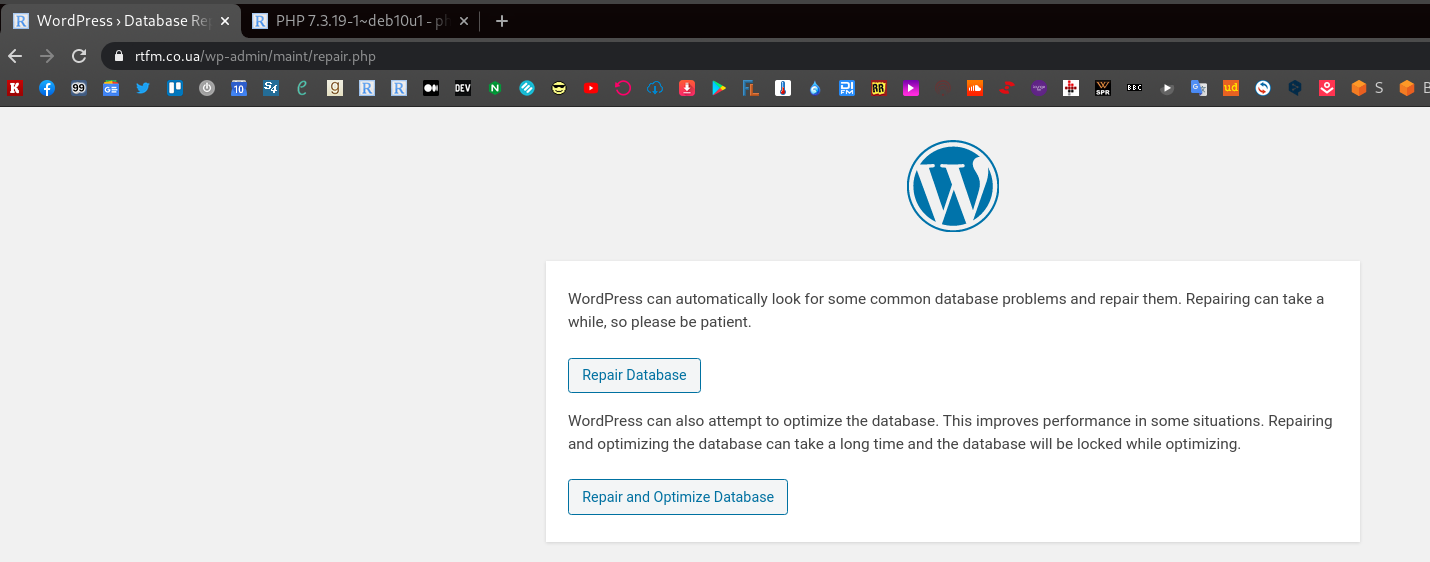
And open the https://rtfm.co.ua/wp-admin/maint/repair.php URL:
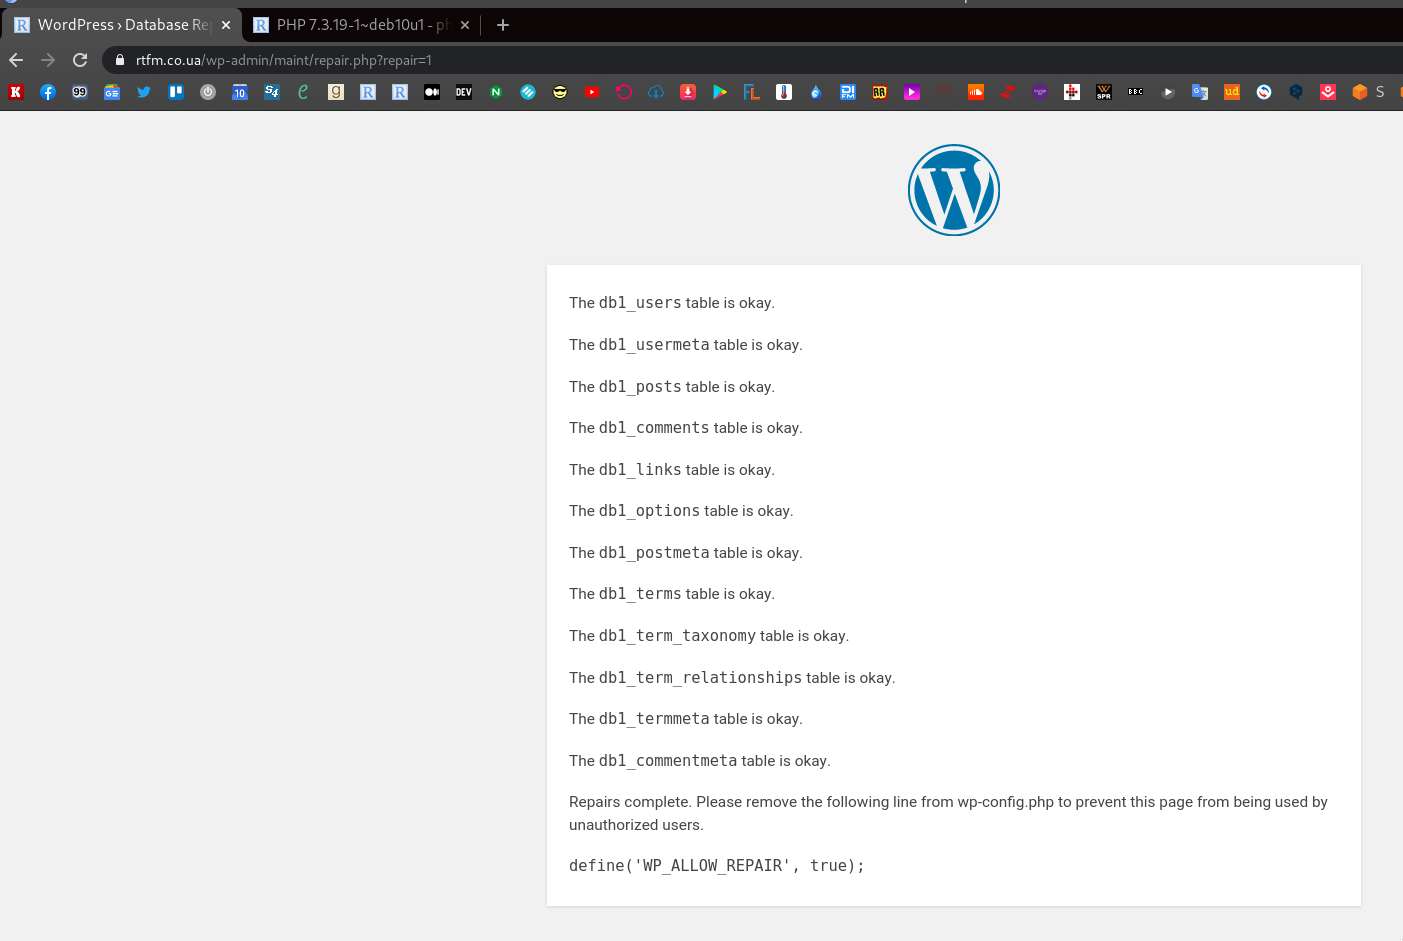
Seems to be OK, but still no:
The last thing was to install a clean WordPress installation, and it worked fine
So, it’s really something wrong with the dump itself – but what?
The “Error establishing a database connection” cause
So, I went to check the mysqldump options and finally got the issue:
-d, --no-data |
Do not write any table row information (that is, do not dump table contents). This is useful if you want to dump only the CREATE TABLE statement for the table (for example, to create an empty copy of the table by loading the dump file). See also –ignore-table-data . |
😀
Not sure why I’ve added the -d when created the dump, maybe it’s after the AWS Database Migration Service struggling, where I had to create a clean database’ scheme, without data.
So, create the dump again without the -d this time:
[simterm]
root@rtfm-do-production:/home/setevoy# mysqldump -u rtfm -p rtfm_db1_production > rtfm_db1_production.sql
Enter password:
[/simterm]
Repeat all the operations, and now everything is working – now writing this post from the new server:
[simterm]
13:59:52 [setevoy@setevoy-arch-work ~]  $ dig rtfm.co.ua +short
139.59.205.180
[/simterm]
What’s next?
Need to configure the certbot for the webroot validation for future renewals, and add it to the cron for auto-updates.
The finish with the rest of the services:
- amplify agent
- backup script
- logz.io
- unattended-upgrades
- msmtp
SSL: webroot validation
So, we already have a certificate but it was validated via a DNS record.
As far as I know, this will not work during the renew so need to change it to the webroot.
Let’s Encrypt: webroot validation
Call the certbot for the rtfm.co.ua, set the --webroot-path instead of the dns – it must find an already existing certificate and ask to use it or create a new one.
On the first question “How would you like to authenticate with the ACME CA?” answer “Place files in webroot directory (webroot)“, on the second – “You have an existing certificate […]” – “Renew & replace the cert (limit ~5 per 7 days)“, to generate a new Let’s Encrypt config file for the domain:
[simterm]
root@rtfm-do-production-d10:/data# certbot certonly -d rtfm.co.ua --email [email protected] --agree-tos --webroot-path /data/www/rtfm/rtfm.co.ua/.well-known/
Saving debug log to /var/log/letsencrypt/letsencrypt.log

How would you like to authenticate with the ACME CA?
- - - - - - - - - - - - - - - - - - - - - - - - - - - - - - - - - - - - - - - -
1: Spin up a temporary webserver (standalone)
2: Place files in webroot directory (webroot)
- - - - - - - - - - - - - - - - - - - - - - - - - - - - - - - - - - - - - - - -
Select the appropriate number [1-2] then [enter] (press 'c' to cancel): 2
Plugins selected: Authenticator webroot, Installer None
Cert not yet due for renewal

You have an existing certificate that has exactly the same domains or certificate name you requested and isn't close to expiry.
(ref: /etc/letsencrypt/renewal/rtfm.co.ua.conf)

What would you like to do?
- - - - - - - - - - - - - - - - - - - - - - - - - - - - - - - - - - - - - - - -
1: Keep the existing certificate for now
2: Renew & replace the cert (limit ~5 per 7 days)
- - - - - - - - - - - - - - - - - - - - - - - - - - - - - - - - - - - - - - - -
Select the appropriate number [1-2] then [enter] (press 'c' to cancel): 2
Renewing an existing certificate

IMPORTANT NOTES:
 - Congratulations! Your certificate and chain have been saved at:
   /etc/letsencrypt/live/rtfm.co.ua/fullchain.pem
   Your key file has been saved at:
   /etc/letsencrypt/live/rtfm.co.ua/privkey.pem
...
[/simterm]
Okay, all good, now check the config file which will be used during the renewal:
[simterm]
root@rtfm-do-production-d10:/data# cat /etc/letsencrypt/renewal/rtfm.co.ua.conf
# renew_before_expiry = 30 days
version = 0.31.0
archive_dir = /etc/letsencrypt/archive/rtfm.co.ua
cert = /etc/letsencrypt/live/rtfm.co.ua/cert.pem
privkey = /etc/letsencrypt/live/rtfm.co.ua/privkey.pem
chain = /etc/letsencrypt/live/rtfm.co.ua/chain.pem
fullchain = /etc/letsencrypt/live/rtfm.co.ua/fullchain.pem

# Options used in the renewal process
[renewalparams]
account = 868c8164304408984fefbbff845d4f48
authenticator = webroot
server = https://acme-v02.api.letsencrypt.org/directory
webroot_path = /data/www/rtfm/rtfm.co.ua/.well-known,
[[webroot_map]]
[/simterm]
Nice – here we can add a cronjob.
certbot renew – auto-update certificates
Add a crontask to run certbot renew once per week.
Edit the crontab:
[simterm]
root@rtfm-do-production-d10:/data# crontab -e
[/simterm]
Add:
@weekly certbot renew &> /var/log/letsencrypt/letsencrypt.log
Let’s Encrypt hook – NGINX reload
The last thing here is to reload NGINX after the certificate was updated.
It can be added directly to the crontask like the next:
@weekly certbot renew &> /var/log/letsencrypt/letsencrypt.log && service nginx reload
But in this case, if any of the certificates will not be updated, then NGINX will be reloaded at all.
So the better way is to use a hook for the domain – add it to the /etc/letsencrypt/renewal/rtfm.co.ua.conf.
In the renewalparams add the renew_hook, so it will look like the following:
[renewalparams]
account = 868c8164304408984fefbbff845d4f48
authenticator = webroot
server = https://acme-v02.api.letsencrypt.org/directory
webroot_path = /data/www/rtfm/rtfm.co.ua/.well-known,
renew_hook = systemctl reload nginx
Собственно, с SSL мы закончили.
Amplify – NGINX, PHP, and server monitoring
Base-level monitoring, but with a nice web-UI and can be added in a couple of minutes, see the NGINX: Amplify — SaaS мониторинг от NGINX (Rus).
The official documentation is here>>>.
Download the installation script:
Set you API-key in a variable and run the script:
[simterm]
root@rtfm-do-production-d10:/tmp# API_KEY='967***e31' sh ./install.sh
[/simterm]
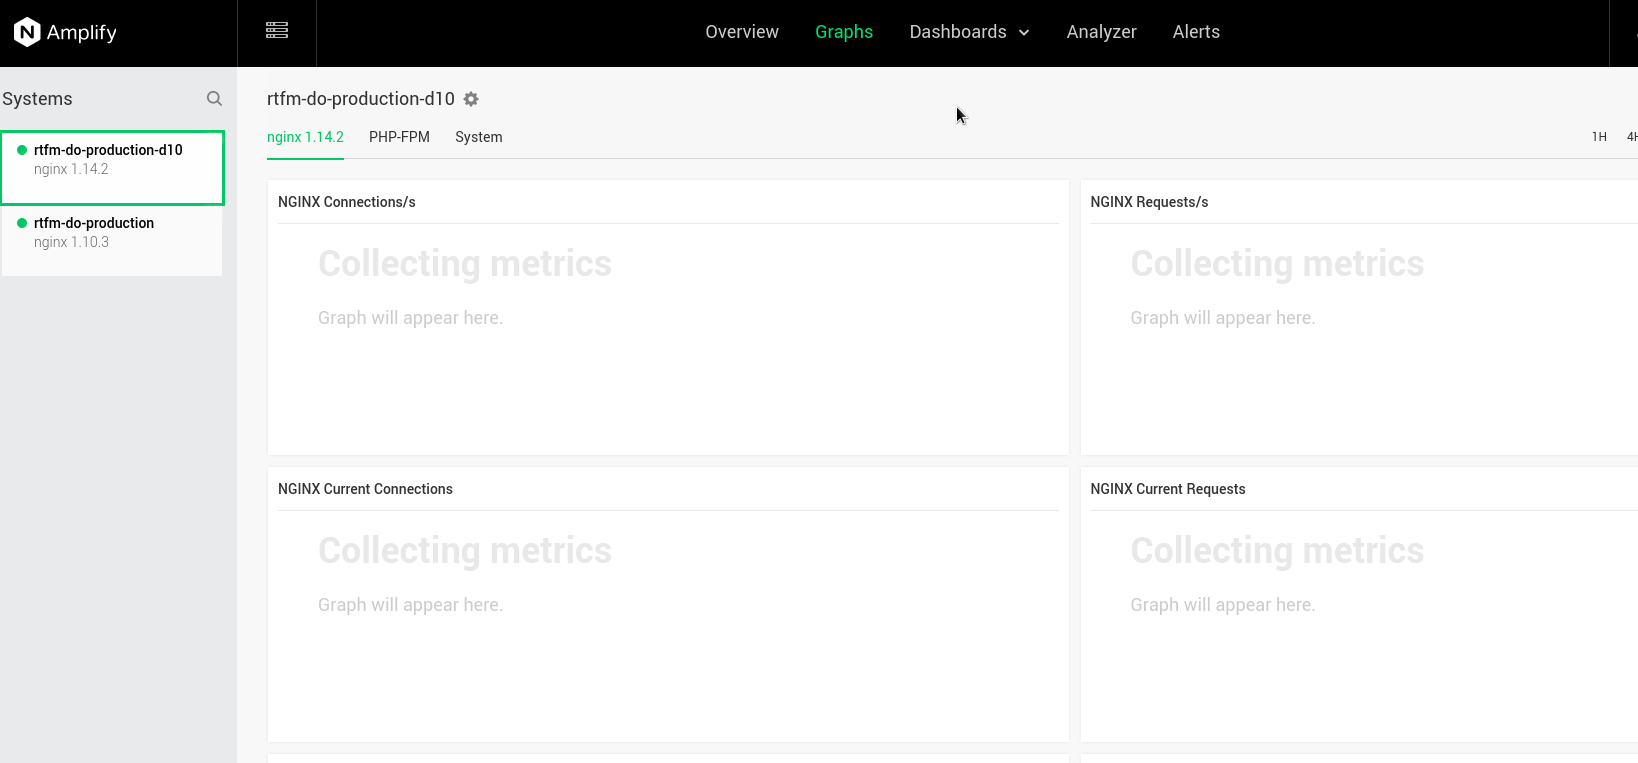
A few minutes – and the new host is on the Amplify dashboard:
For the sake of interest – load on the old host after the rtfm.co.ua domain was switched to the new host:
Backup script for websites
I’m using my own Python script which was written three years ago – https://github.com/setevoy2/simple-backup. It will archive files, create database dump, and can upload them to an AWS S3 bucket.
Actually, for WordPress, there are a lot of plugins for the backups, but I still have no time to check them, so will do it in my old-fashion way.
Clone the tool:
[simterm]
root@rtfm-do-production-d10:/tmp# cd /opt/
root@rtfm-do-production-d10:/opt# git clone https://github.com/setevoy2/simple-backup
[/simterm]
Still, not sure if the copy in the Github is still working…
I remember, that the AWS S3 upload was broken at some moment, and I didn’t fix it.
Let’s try as-is:
[simterm]
root@rtfm-do-production-d10:/opt# python simple-backup/sitebackup.py -h
usage: sitebackup.py [-h] [-c CONFIG]

optional arguments:
  -h, --help            show this help message and exit
  -c CONFIG, --config CONFIG
[/simterm]
Well, maybe will work.
For the backup data, it uses a /backups directory that is mounted as a dedicated disk and a config-file.
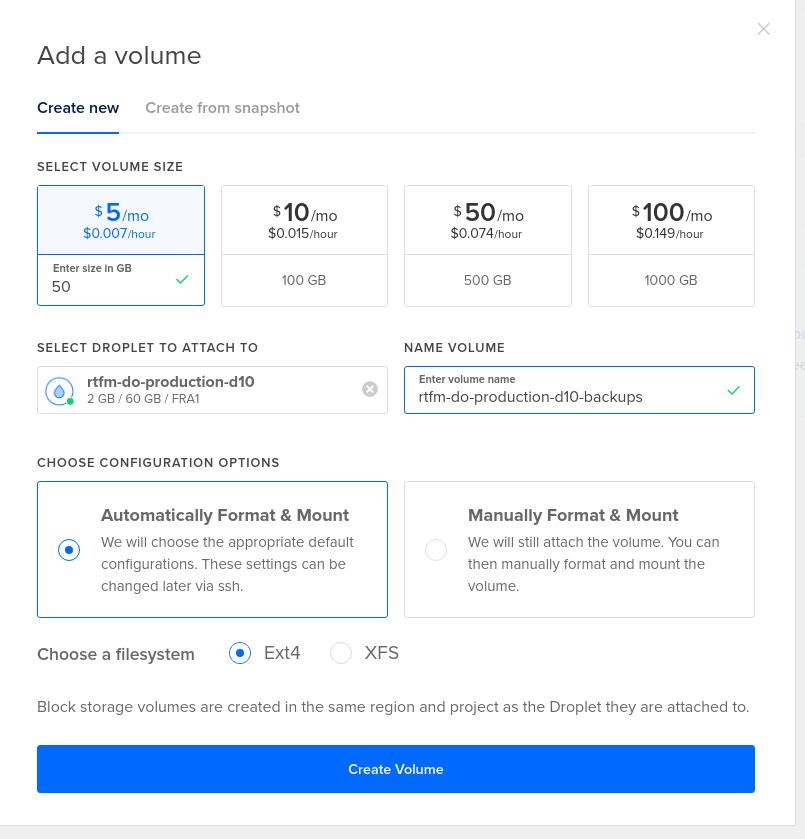
First, add a new volume.
Disks and partitions on the host now:
[simterm]
root@rtfm-do-production-d10:/opt# lsblk
NAME   MAJ:MIN RM  SIZE RO TYPE MOUNTPOINT
vda    254:0    0   60G  0 disk
├─vda1 254:1    0   60G  0 part /
└─vda2 254:2    0    2M  0 part
vdb    254:16   0  466K  1 disk
[/simterm]
DigitalOcean Volume
Go to the DigitalOcean, create a Volume:
Check it on the host:
[simterm]
root@rtfm-do-production-d10:/opt# lsblk
NAME   MAJ:MIN RM  SIZE RO TYPE MOUNTPOINT
sda      8:0    0   50G  0 disk /mnt/rtfm_do_production_d10_backups
vda    254:0    0   60G  0 disk
├─vda1 254:1    0   60G  0 part /
└─vda2 254:2    0    2M  0 part
vdb    254:16   0  466K  1 disk
[/simterm]
Linux: mount a volume
DigitalOcean Volume by default is mounted to the /mnt/rtfm_do_production_d10_backups, and didn’t create a record in the fstab:
[simterm]
root@rtfm-do-production-d10:/opt# cat /etc/fstab
# /etc/fstab: static file system information.
UUID=4e8b8101-6a06-429a-aaca-0ccd7ff14aa1       /       ext4    errors=remount-ro       0       1
[/simterm]
Unmount it:
[simterm]
root@rtfm-do-production-d10:/opt# umount /mnt/rtfm_do_production_d10_backups
[/simterm]
Create the /backups drectory:
[simterm]
root@rtfm-do-production-d10:/opt# mkdir /backups
[/simterm]
Get the UUID of the new disk:
[simterm]
root@rtfm-do-production-d10:/opt# blkid /dev/sda
/dev/sda: UUID="a6e27193-4079-4d9d-812e-6ba29c702b75" TYPE="ext4"
[/simterm]
Update the /etc/fstab – add this volume mount into the /backups, and in the opts with the nofail option set that this disk is not necessary to be present, so the system can boot without it if any:
# /etc/fstab: static file system information.
UUID=4e8b8101-6a06-429a-aaca-0ccd7ff14aa1   /   ext4    errors=remount-ro   0   1
UUID=a6e27193-4079-4d9d-812e-6ba29c702b75   /backups ext4 nofail 0 0
Try to mount all the volumes specified in the /etc/fstab:
[simterm]
root@rtfm-do-production-d10:/opt# mount -a
[/simterm]
Check:
[simterm]
root@rtfm-do-production-d10:/opt# lsblk
NAME   MAJ:MIN RM  SIZE RO TYPE MOUNTPOINT
sda      8:0    0   50G  0 disk /backups
vda    254:0    0   60G  0 disk
├─vda1 254:1    0   60G  0 part /
└─vda2 254:2    0    2M  0 part
vdb    254:16   0  466K  1 disk
[/simterm]
Seems good and the data is here:
[simterm]
root@rtfm-do-production-d10:/opt# ll /backups/
total 16
drwx------ 2 root root 16384 Nov  4 12:44 lost+found
[/simterm]
Also good to reboot the server to make sure everything is working but will do it later after will finish this post.
The config-file for the simple-backupcan be taken from the old host, let’s try to run it:
[simterm]
root@rtfm-do-production-d10:/opt# /opt/simple-backup/sitebackup.py -c /usr/local/etc/production-simple-backup.ini

Got own settings:

backup_root_path = /backups
backup_files_dir = /backups/files
backup_db_dir = /backups/databases

Checking directories:

/backups - found, OK.
/backups/files - found, OK.
/backups/databases - found, OK.

Creating WWW backup for:
site: rtfm
from: /data/www/rtfm/rtfm.co.ua/
to: /backups/files/04-11-2020-12-58_rtfm_rtfm.co.ua.gz

WWW backup done.

Creating DB backup for:
site: rtfm
host: localhost
database: rtfm_db1_production
user: rtfm
to: /backups/databases/04-11-2020-12-58_rtfm_rtfm_db1_production.sql

DB backup done.

Checking for dependencies:
boto3 library already installed - OK.

Uploading /backups/files/04-11-2020-12-58_rtfm_rtfm.co.ua.gz to S3 bucket setevoy-rtfm-simple-backups-production as 04-11-2020-12-58_rtfm_rtfm.co.ua.gz
Uploading /backups/databases/04-11-2020-12-58_rtfm_rtfm_db1_production.sql to S3 bucket setevoy-rtfm-simple-backups-production as 04-11-2020-12-58_rtfm_rtfm_db1_production.sql

Existing data in the setevoy-rtfm-simple-backups-production bucket:

04-11-2020-12-58_rtfm_rtfm.co.ua.gz
04-11-2020-12-58_rtfm_rtfm_db1_production.sql
...

Starting local backups storage cleanup...

Keeping local data: /backups/files/04-11-2020-12-52_rtfm_rtfm.co.ua.gz
Keeping local data: /backups/files/04-11-2020-12-58_rtfm_rtfm.co.ua.gz
Keeping local data: /backups/databases/04-11-2020-12-58_rtfm_rtfm_db1_production.sql
Keeping local data: /backups/databases/04-11-2020-12-52_rtfm_rtfm_db1_production.sql
[/simterm]
Ha!
And even AWS S4 upload is working again!
Great, so we are done here.
What’s next?
- logz.io
- unattended-upgrades
- logrotate
- msmtp
Logz.io, Filebeat и логи NGINX
Let’s add NGINX logs collecting to the Logz.io.
Register an account, and go to the documentation – https://app.logz.io/#/dashboard/data-sources/nginx.
Need to install the Filebeat, add it:
[simterm]
root@rtfm-do-production-d10:/opt# cd /tmp/
root@rtfm-do-production-d10:/tmp# curl -L -O https://artifacts.elastic.co/downloads/beats/filebeat/filebeat-7.9.3-amd64.deb
root@rtfm-do-production-d10:/tmp# dpkg -i filebeat-7.9.3-amd64.deb
[/simterm]
Get a public certificate for the Logz.io:
[simterm]
root@rtfm-do-production-d10:/tmp# sudo curl https://raw.githubusercontent.com/logzio/public-certificates/master/AAACertificateServices.crt --create-dirs -o /etc/pki/tls/certs/COMODORSADomainValidationSecureServerCA.crt
[/simterm]
Configure the Filebeat.
Backup the config:
[simterm]
root@rtfm-do-production-d10:/tmp# cp /etc/filebeat/filebeat.yml /etc/filebeat/filebeat.yml-origin
[/simterm]
Update it as per documentation – just copy-paste:
...
- type: log
  paths:
  - /var/log/nginx/access.log
  - /var/log/nginx/rtfm.co.ua-access.log
  fields:
    logzio_codec: plain
    token: JzR***ZmW
    type: nginx_access
  fields_under_root: true
  encoding: utf-8
  ignore_older: 3h
- type: log
  paths:
  - /var/log/nginx/error.log
  - /var/log/nginx/rtfm.co.ua-error.log
  fields:
    logzio_codec: plain
    token: JzR***ZmW
    type: nginx_error
  fields_under_root: true
  encoding: utf-8
  ignore_older: 3h

...
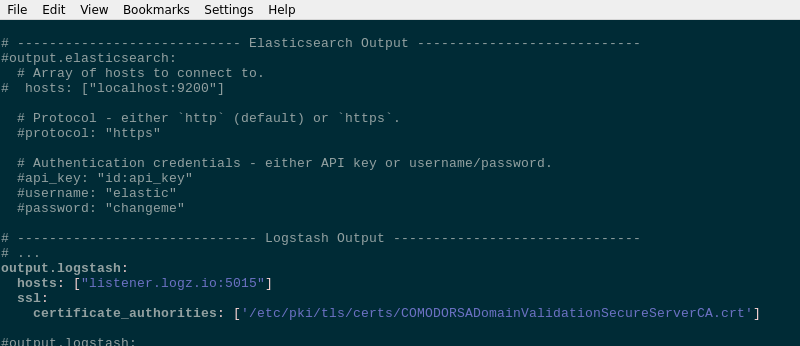
In the outputs comment out the output.elasticsearch block, and add the output.logstash:
...
# ------------------------------ Logstash Output -------------------------------
# ...
output.logstash:
  hosts: ["listener.logz.io:5015"]
  ssl:
    certificate_authorities: ['/etc/pki/tls/certs/COMODORSADomainValidationSecureServerCA.crt'
...
Check its syntax:
[simterm]
root@rtfm-do-production-d10:/tmp# filebeat test config
Config OK
[/simterm]
Check the connection to the Logz.io:
[simterm]
root@rtfm-do-production-d10:/tmp# filebeat test output
logstash: listener.logz.io:5015...
  connection...
    parse host... OK
    dns lookup... OK
    addresses: 23.22.183.192
    dial up... OK
  TLS...
    security: server's certificate chain verification is enabled
    handshake... OK
    TLS version: TLSv1.2
    dial up... OK
  talk to server... OK
[/simterm]
Restart the service:
[simterm]
root@rtfm-do-production-d10:/tmp# systemctl restart filebeat
[/simterm]
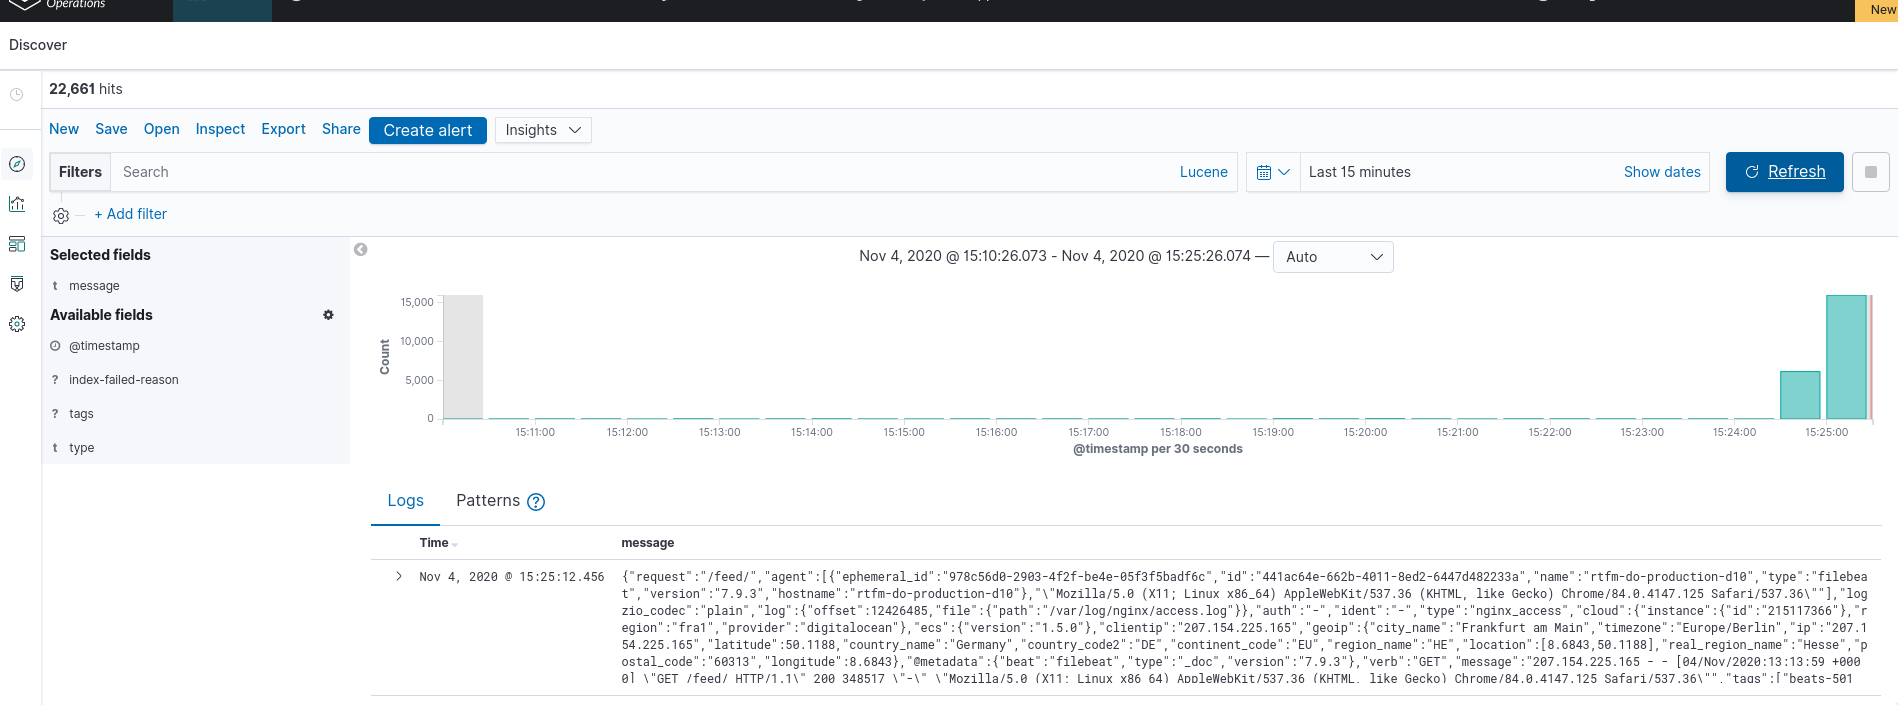
Check logs:
Data is here.
So, left only the unattended-upgrades, logrotate, and msmtp.
Install unattended-upgrades
Already described in the Debian: автоматические обновления с помощью unattended-upgrades и отправка почты через AWS SES (Rus), let’s do do it here just without the AWS SES.
Documentation is here>>>.
unattended-upgrades and apt-listchanges already installed, just need to configure it.
Run the dpkg-reconfigure unattended-upgrades:
Answer Yes.
Check the /etc/apt/apt.conf.d/20auto-upgrades:
APT::Periodic::Update-Package-Lists "1";
APT::Periodic::Unattended-Upgrade "1";
Now the is no need in the APT::Periodic::Enable option to enable the updates, those two lines are enough.
Next, check the /etc/apt/apt.conf.d/50unattended-upgrades.
In general, you can leave everything with the default values here, but worth to set:
Unattended-Upgrade::Mail– get emails about updates installedUnattended-Upgrade::Automatic-Reboot– up to you, for now, can leave it to the false, and enable laterUnattended-Upgrade::Automatic-Reboot-Time– if the previous option will be enabled, worth to set the rebooting time
Run test upgrade:
[simterm]
root@rtfm-do-production-d10:/tmp# unattended-upgrade -v -d --dry-run
...
No packages found that can be upgraded unattended and no pending auto-removals
[/simterm]
Okay.
Now, let go to see the logrotate configs.
logrotate
Actually, there is also everything is ready for use.
All logrotate configuration files:
[simterm]
root@rtfm-do-production-d10:/tmp# ll /etc/logrotate.d/
total 60
-rw-r--r-- 1 root root 120 Apr 19  2019 alternatives
-rw-r--r-- 1 root root 122 Sep 23  2019 amplify-agent
-rw-r--r-- 1 root root 173 May 12 09:57 apt
-rw-r--r-- 1 root root  79 Feb 13  2019 aptitude
-rw-r--r-- 1 root root 130 Aug 28  2018 btmp
-rw-r--r-- 1 root root  82 May 26  2018 certbot
-rw-r--r-- 1 root root 112 Apr 19  2019 dpkg
-rw-r--r-- 1 root root 146 May 13 16:01 exim4-base
-rw-r--r-- 1 root root 126 May 13 16:01 exim4-paniclog
-rw-r--r-- 1 root root 802 Oct 12 17:46 mysql-server
-rw-r--r-- 1 root root 329 Aug 24 10:18 nginx
-rw-r--r-- 1 root root 155 Jul  5 06:46 php7.3-fpm
-rw-r--r-- 1 root root 501 Feb 26  2019 rsyslog
-rw-r--r-- 1 root root 235 Jun  8  2019 unattended-upgrades
-rw-r--r-- 1 root root 145 Feb 19  2018 wtmp
[/simterm]
NGINX logs rotation config:
[simterm]
root@rtfm-do-production-d10:/tmp# cat /etc/logrotate.d/nginx
/var/log/nginx/*.log {
        daily
        missingok
        rotate 14
        compress
        delaycompress
        notifempty
        create 0640 www-data adm
        sharedscripts
        prerotate
                if [ -d /etc/logrotate.d/httpd-prerotate ]; then \
                        run-parts /etc/logrotate.d/httpd-prerotate; \
                fi \
        endscript
        postrotate
                invoke-rc.d nginx rotate >/dev/null 2>&1
        endscript
}
[/simterm]
Maybe, will add the size parameter later.
Check its work:
[simterm]
root@rtfm-do-production-d10:/tmp# logrotate -f -v /etc/logrotate.conf
...
considering log /var/log/kern.log
  Now: 2020-11-04 14:25
  Last rotated at 2020-11-04 00:00
  log needs rotating
...
[/simterm]
Some logs already can be rotated.
mailx and msmtp – sending emails from the server
The root user will get emails about the server’s status, and it will be good to receive them on an external email box.
First, check the /etc/aliases to know which email is used for the root user:
[simterm]
root@rtfm-do-production-d10:/tmp# cat /etc/aliases
# /etc/aliases
mailer-daemon: postmaster
postmaster: root
nobody: root
hostmaster: root
usenet: root
news: root
webmaster: root
www: root
ftp: root
abuse: root
noc: root
security: root
root: [email protected]
[/simterm]
If doing any updates here – run the:
[simterm]
root@rtfm-do-production-d10:/tmp# newaliases
[/simterm]
550 001.RDNS/PTR error. Rejected
So, the emails to the root will be sent to the [email protected], but if try to send an email now – it will not be delivered:
[simterm]
root@rtfm-do-production-d10:/tmp# echo Test | mailx -s Test [email protected]
[/simterm]
This is because it sends via Exim MTA, check its log:
[simterm]
root@rtfm-do-production-d10:/tmp# tail /var/log/exim4/mainlog
...
2020-11-04 14:38:16 1kaJvU-00032w-7q <= root@rtfm-do-production-d10 U=root P=local S=405
...
2020-11-04 14:39:08 1kaJvI-00032T-Dx ** [email protected] <root@rtfm-do-production-d10> R=dnslookup T=remote_smtp H=mx1.mail7.freehost.com.ua [194.0.200.210] X=TLS1.2:ECDHE_RSA_AES_256_GCM_SHA384:256 CV=no DN="CN=*.freehost.com.ua": SMTP error from remote mail server after RCPT TO:<[email protected]>: 550 001.RDNS/PTR error. Rejected
[/simterm]
“550 001.RDNS/PTR error. Rejected” – this is because we haven’t PTR record configured for our FloatinIP of the server, and on the DigitalOcean we can’t easily update it.
To mitigate this issue install the msmtp, so we will send emails via an external SMTP-server instead of the local:
[simterm]
root@rtfm-do-production-d10:/tmp# apt -y install msmtp msmtp-mta
[/simterm]
Themsmtp-mta will create a symlink from the /usr/sbin/sendmail, and when mailx will try to send an email via the sendmail, it will actually use the msmtp:
[simterm]
root@rtfm-do-production-d10:/tmp# ls -l /usr/sbin/sendmail
lrwxrwxrwx 1 root root 12 Feb 15  2019 /usr/sbin/sendmail -> ../bin/msmtp
[/simterm]
Configure the /etc/msmtprc:
defaults
port 25
tls on
tls_trust_file /etc/ssl/certs/ca-certificates.crt

account freehost
host freemail.freehost.com.ua
from [email protected]
auth on
user [email protected]
password password

# Set a default account
account default : freehost
Check it:
[simterm]
root@rtfm-do-production-d10:/tmp# echo "test username." | msmtp -a default [email protected]
[/simterm]
mailx: cannot send message: process exited with a non-zero status
To send an email with the mailx via the msmtp – install the bsd-mailx instead of the mailutils:
[simterm]
root@rtfm-do-production-d10:/tmp# apt -y purge mailutils
root@rtfm-do-production-d10:/tmp# apt -y install bsd-mailx
[/simterm]
Otherwise, you get the “mailx: cannot send message: process exited with a non-zero status” and “msmtp: no recipients found” errors.
Try sending with the mailx:
[simterm]
root@rtfm-do-production-d10:/tmp# echo Test | mailx -s Test [email protected]
[/simterm]
Now, emails from the unattended-upgradesmust be delivered to the mailbox, specified in the Unattended-Upgrade::Mail.
Well, that’s all.
