We have an AWS EKS cluster with WorkerNodes/EC2 created with Karpenter.
The process of creating the infrastructure, cluster, and launching Karpenter is described in previous posts:
- Terraform: Building EKS, part 1 – VPC, Subnets and Endpoints
- Terraform: Building EKS, part 2 – an EKS cluster, WorkerNodes, and IAM
- Terraform: Building EKS, part 3 – Karpenter installation
What this system really lacks, is access to servers via SSH, without which you feel like… Well, like DevOps, not Infrastructure Engineer. In short, SSH access is sometimes necessary, but – surprise – Karpenter does not allow you to add a key to the WorkerNodes it manages out of the box.
Although, what’s the problem to add in the EC2NodeClass a way to pass an SSH key, as it is done in the Terraform’s resource "aws_instance" with the parameter key_name?
But it’s okay. If it’s not there, it’s not there. Maybe they will add it later.
Instead, Karpenter’s documentation Can I add SSH keys to a NodePool? suggests using either AWS Systems Manager Session Manager or AWS EC2 Instance Connect, or “the old school way” – add the public part of the key via AWS EC2 User Data, and connect via a bastion host or a VPN.
So what we’re going to do today is:
- try all three solutions one by one
- first we’ll do each one by hand, then we’ll see how to add it to our automation with Terraform
- and then we’ll decide which option will be the easiest
Contents
Option 1: AWS Systems Manager Session Manager and SSH on EC2
AWS Systems Manager Session Manager is used to manage EC2 instances. In general, it can do quite a lot, for example, keep track of patches and updates for packages that are installed on instances.
Currently, we are only interested in it as a system that will allow us to have an SSH to a Kubernetes WorkerNode.
It requires an SSM agent, which is installed by default on all instances with Amazon Linux AMI.
Find nodes created by Karpenter (we have a dedicated label for them):
$ kubectl get node -l created-by=karpenter
NAME                          STATUS   ROLES    AGE     VERSION
ip-10-0-34-239.ec2.internal   Ready    <none>   21h     v1.28.8-eks-ae9a62a
ip-10-0-35-100.ec2.internal   Ready    <none>   9m28s   v1.28.8-eks-ae9a62a
ip-10-0-39-0.ec2.internal     Ready    <none>   78m     v1.28.8-eks-ae9a62a
...
Find an Instance ID:
$ kubectl get node ip-10-0-34-239.ec2.internal -o json | jq -r ".spec.providerID" | cut -d \/ -f5
i-011b1c0b5857b0d92
AWS CLI: TargetNotConnected when calling the StartSession operation
Try to connect and get the error “TargetNotConnected“:
$ aws --profile work ssm start-session --target i-011b1c0b5857b0d92

An error occurred (TargetNotConnected) when calling the StartSession operation: i-011b1c0b5857b0d92 is not connected.
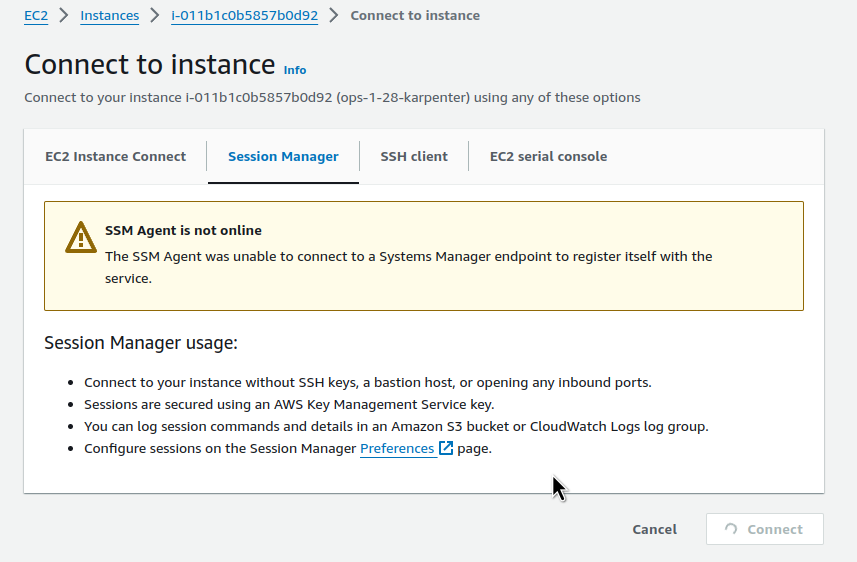
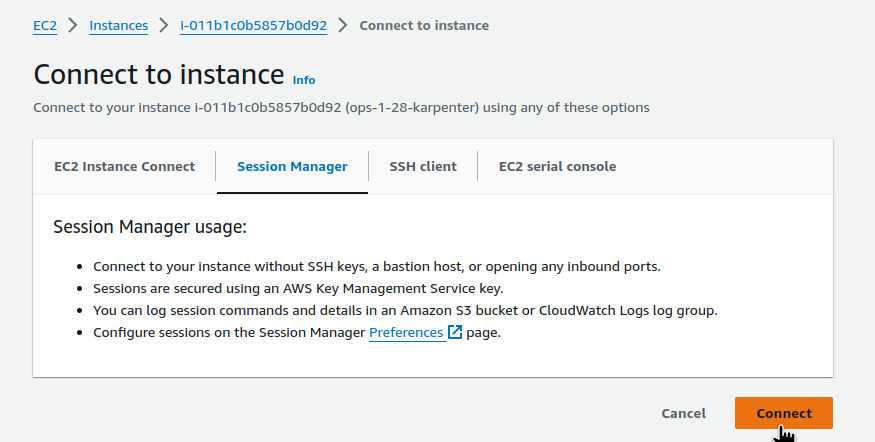
Or through the AWS Console:
But here, too, we have the connection error – “SSM Agent is not online“:
The error occurs because:
- either the IAM role that is connected to the instance does not have SSM permissions
- or EC2 is running on a private network and the agent cannot connect to an external endpoint
SessionManager and IAM Policy
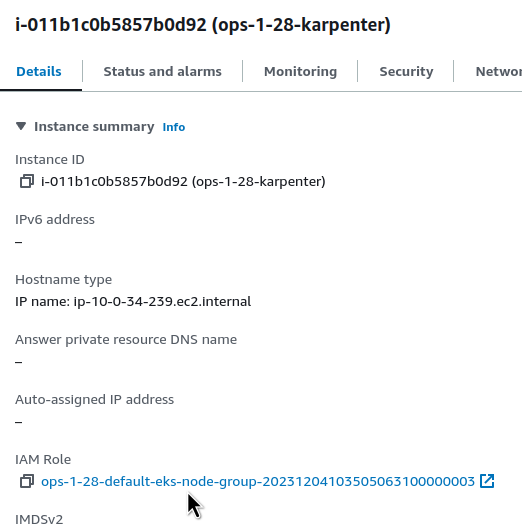
Let’s check. Find the IAM Role attached to this EC2:
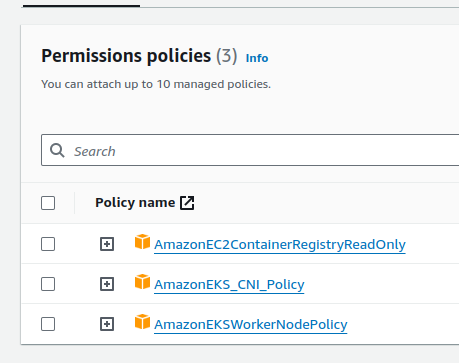
And the policies connected to it – there is nothing about SSM:
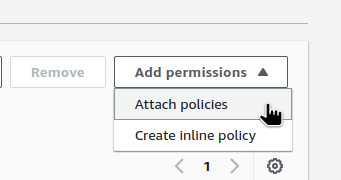
Edit the Role by hand for now, then we will do it in Terraform code:
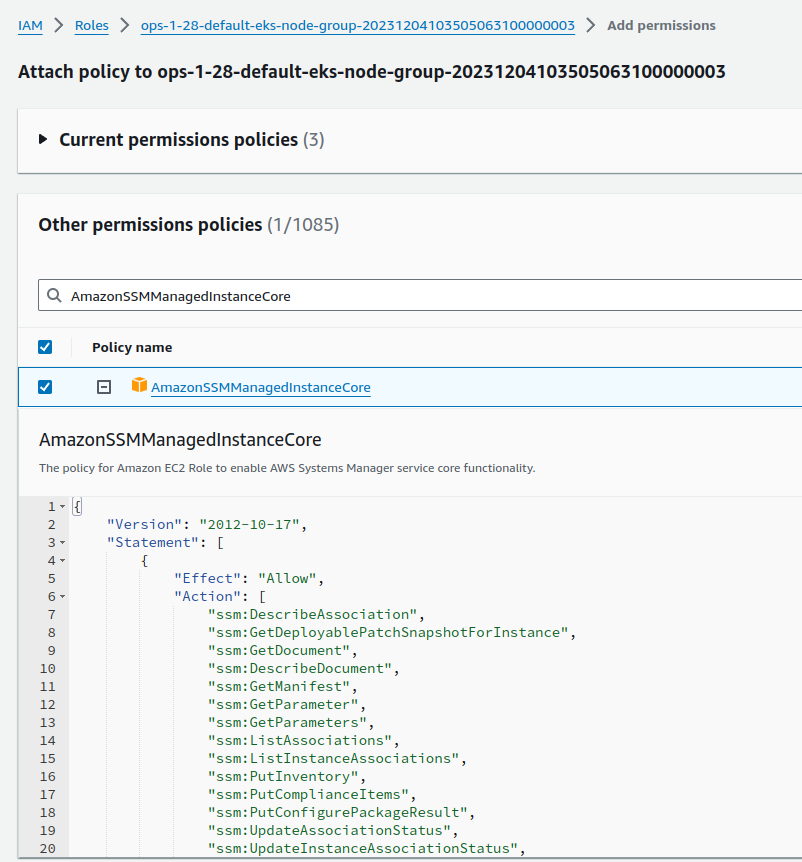
Attach the AmazonSSMManagedInstanceCore:
And in a minute or two, try again:
SessionManager and VPC Endpoint
Another possible reason for the problems connecting the SSM agent to AWS is that the instance does not have access to SSM endpoints:
- ssm.region.amazonaws.com
- ssmmessages.region.amazonaws.com
- ec2messages.region.amazonaws.com
If the subnet is private, and has limits on external connections, then you may need to create a VPC Endpoint for SSM.
See SSM Agent is not online and Troubleshooting Session Manager.
AWS CLI: SessionManagerPlugin is not found
However, after the IAM fix, when connecting from a workstation using the AWS CLI, we can get the “SessionManagerPlugin is not found” error:
$ aws --profile work ssm start-session --target i-011b1c0b5857b0d92

SessionManagerPlugin is not found. Please refer to SessionManager Documentation here: http://docs.aws.amazon.com/console/systems-manager/session-manager-plugin-not-found
Install it locally – see the documentation Installing the Session Manager Plugin for the AWS CLI.
For Arch Linux there is a aws-session-manager-plugin package in AUR:
$ yay -S aws-session-manager-plugin
And now we can connect:
$ aws --profile work ssm start-session --target i-011b1c0b5857b0d92

Starting session with SessionId: arseny-33ahofrlx7bwlecul2mkvq46gy
sh-4.2$
All that’s left is to add it to the automation.
Terraform: EKS module, and adding an IAM Policy
For the Terraform EKS module from Anton Babenko, we can add a policy through the iam_role_additional_policies parameter – see the node_groups.tf, and in the examples of the AWS EKS Terraform module.
In the 20.0 module, the parameter name has changed – iam_role_additional_policies => node_iam_role_additional_policies, but we are still using version 19.21.0, and the role is added in this way:
...
module "eks" {
  source  = "terraform-aws-modules/eks/aws"
  version = "~> 19.21.0"

  cluster_name    = local.env_name
  cluster_version = var.eks_version
  ...
  vpc_id                   = local.vpc_out.vpc_id
  subnet_ids               = data.aws_subnets.private.ids
  control_plane_subnet_ids = data.aws_subnets.intra.ids

  manage_aws_auth_configmap = true

  eks_managed_node_groups = {
      ...
      # allow SSM
      iam_role_additional_policies = {
        AmazonSSMManagedInstanceCore = "arn:aws:iam::aws:policy/AmazonSSMManagedInstanceCore"
      }
...
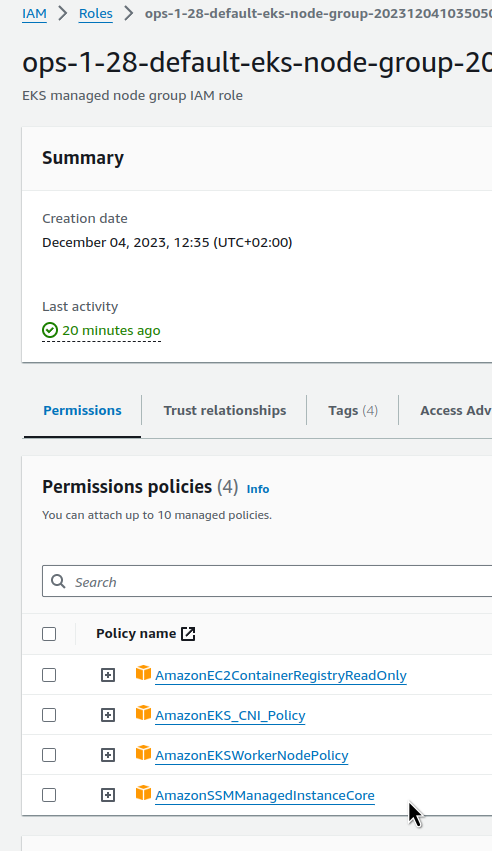
Remove what we did manually, deploy the Terraform code, and check that the Policy has been added:
And the connection is working:
$ aws --profile work ssm start-session --target i-011b1c0b5857b0d92

Starting session with SessionId: arseny-pt7d44xp6ibvqcezj2oqjaxv5q
sh-4.2$ bash
[ssm-user@ip-10-0-34-239 bin]$ pwd
/usr/bin
Option 2: AWS EC2 Instance Connect and SSH on EC2
Another way to connect is through EC2 Instance Connect. Documentation – Connect to your Linux instance with EC2 Instance Connect.
It also requires an agent, which is also installed by default on the Amazon Linux.
For instances on private networks, EC2 Instance Connect VPC Endpoint is required for connection.
SecurityGroup and SSH
Instance Connect through the endpoint requires access to port 22, SSH (as opposed to SSM, which opens a connection through the agent itself).
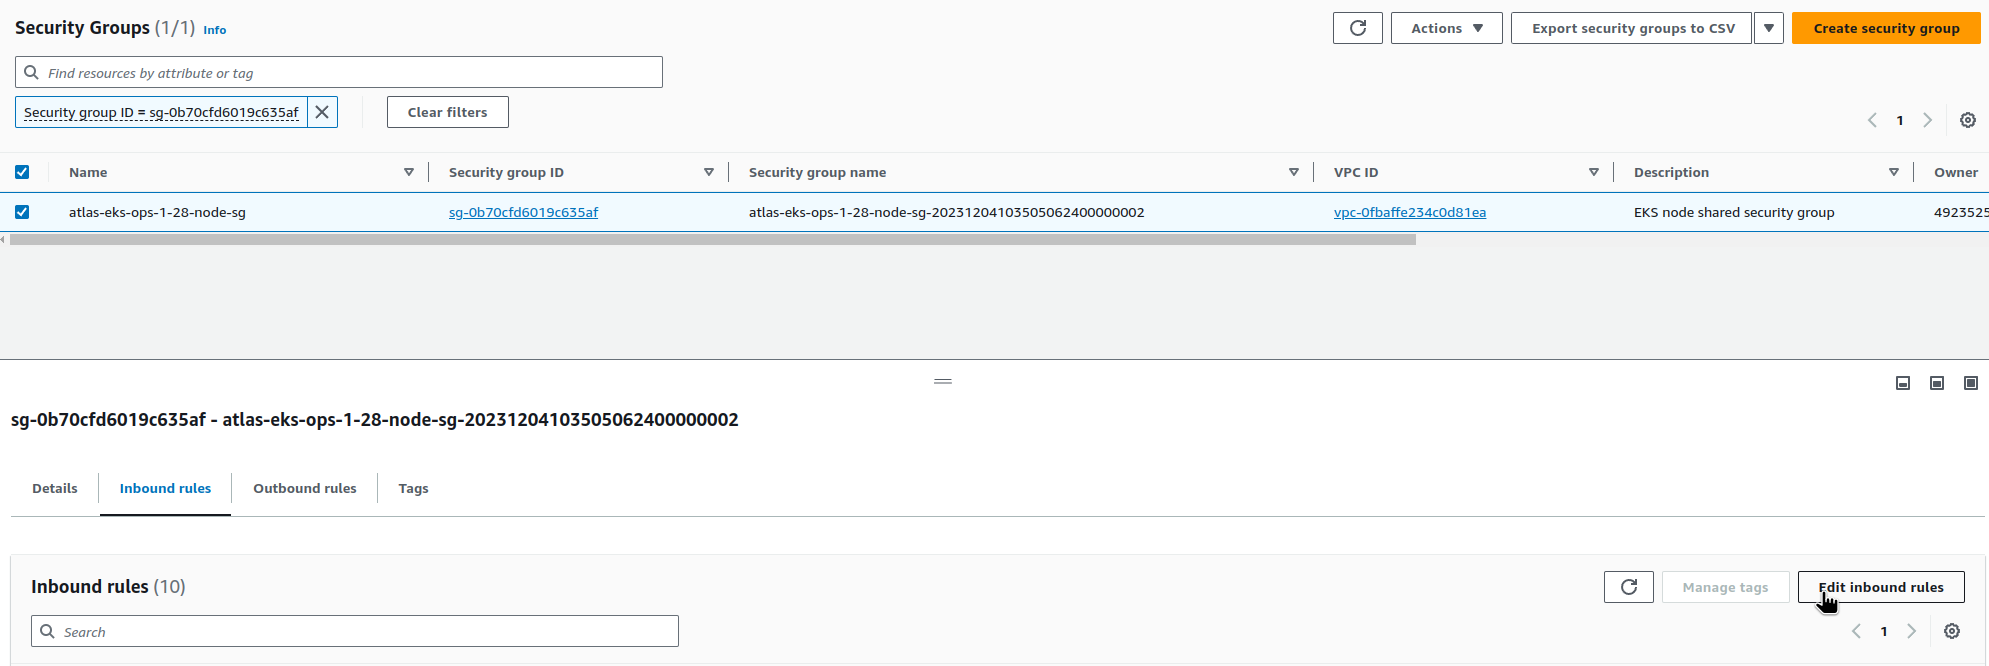
Open the port for all addresses in the VPC:
EC2 Instance Connect VPC Endpoint
Go to the VPC Endpoints and create an endpoint:
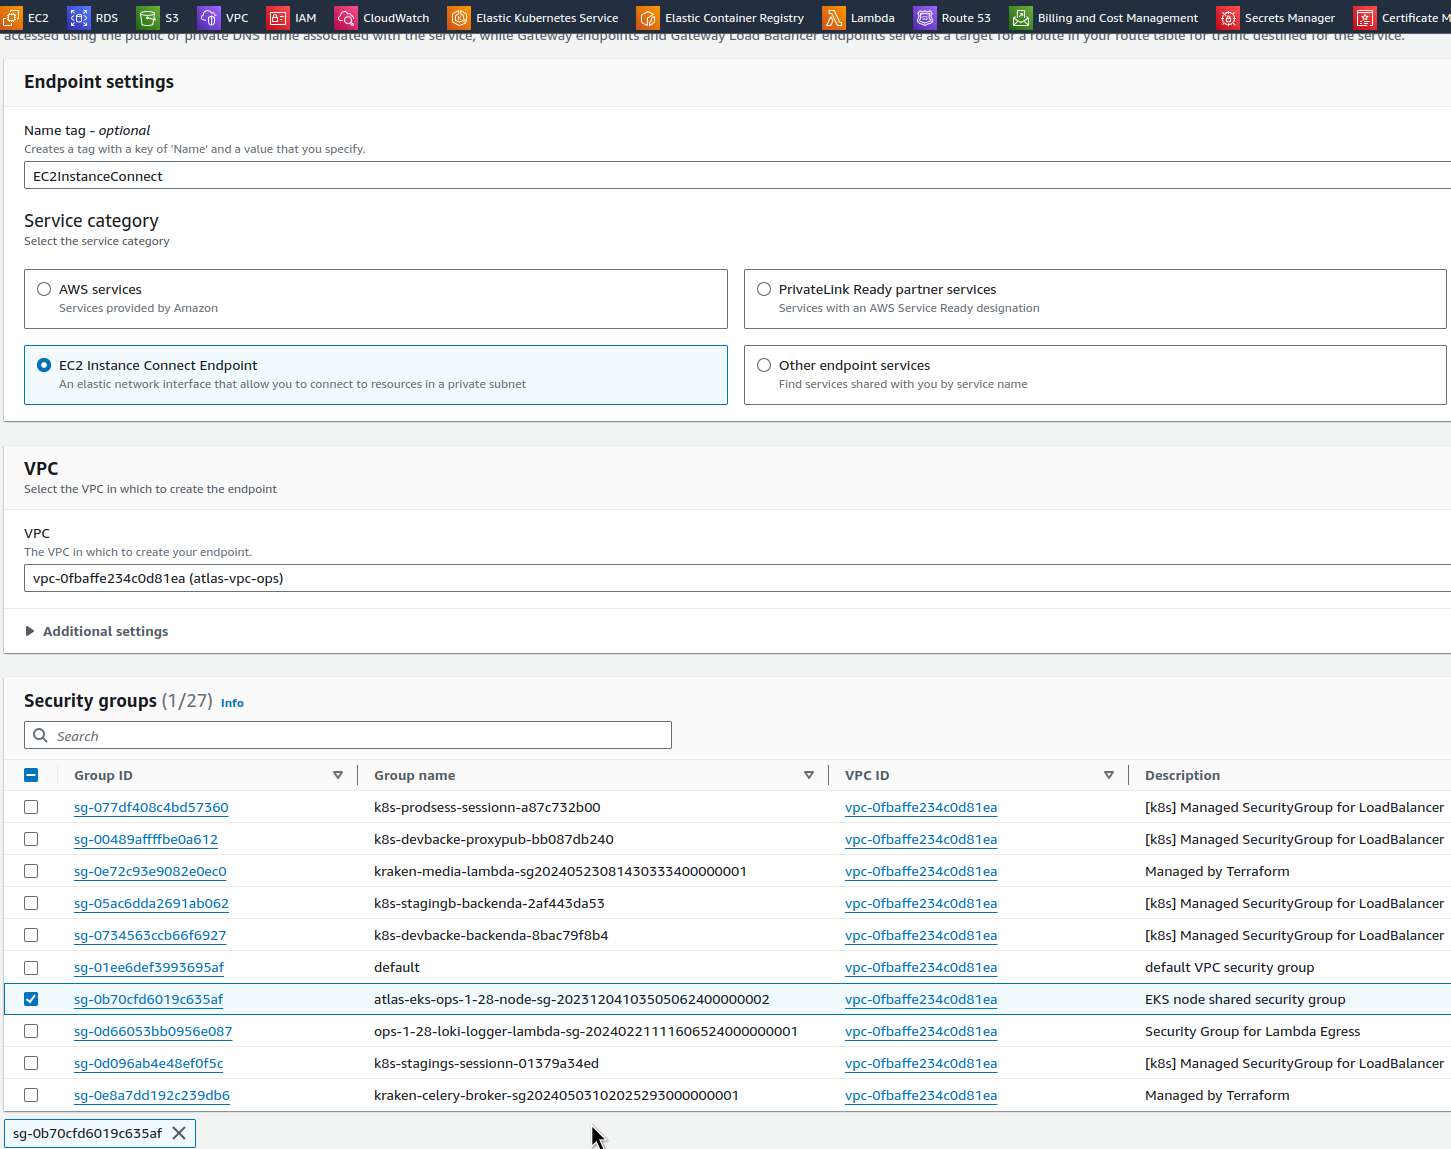
Select the EC2 Instance Connect Endpoint type, the VPC itself, and the SecurityGroup:
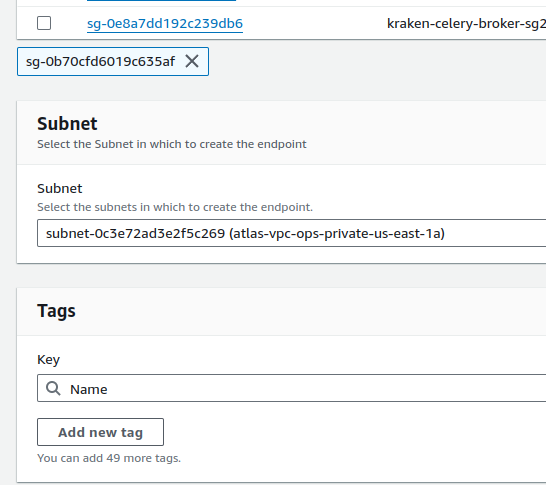
Choose a Subnet – we have most of the resources in us-east-1a, so we’ll use it to avoid unnecessary cross-AvailabilityZone traffic (see AWS: Cost optimization – services expenses overview and traffic costs in AWS):
Wait a few minutes for the Active status:
And connect using AWS CLI by specifying --connection-type eice, because the instances are on a private network:
$ aws --profile work ec2-instance-connect ssh --instance-id i-011b1c0b5857b0d92 --connection-type eice
...
[ec2-user@ip-10-0-34-239 ~]$
Terraform: EC2 Instance Connect, EKS, and VPC
For the Terraform, here you will need to add thenode_security_group_additional_rules in the EKS module for SSH access, and create an EC2 Instance Connect Endpoint for the VPC, as in my case we create VPC and EKS separately.
...
module "eks" {
  source  = "terraform-aws-modules/eks/aws"
  version = "~> 19.21.0"

  cluster_name    = local.env_name
  cluster_version = var.eks_version

  ...
      # allow SSM
      iam_role_additional_policies = {
        AmazonSSMManagedInstanceCore = "arn:aws:iam::aws:policy/AmazonSSMManagedInstanceCore"
      }
      ...
  }

  node_security_group_name    = "${local.env_name}-node-sg"
  cluster_security_group_name = "${local.env_name}-cluster-sg"

  # to use with EC2 Instance Connect
  node_security_group_additional_rules = {
    ingress_ssh_vpc = {
      description = "SSH from VPC"
      protocol    = "tcp"
      from_port   = 22
      to_port     = 22
      cidr_blocks      = [local.vpc_out.vpc_cidr]
      type        = "ingress"
    }
  }

  node_security_group_tags = {
    "karpenter.sh/discovery" = local.env_name
  }
  ...
}
...
If you created it manually, as described above, then remove the rule from SecurityGroup with SSH and deploy it from Terraform.
For the VPC EC2 Instance Connect Endpoint, I did not find how to do this through Anton Babenko’s module terraform-aws-modules/vpc, but you can make it a separate resource through aws_ec2_instance_connect_endpoint:
resource "aws_ec2_instance_connect_endpoint" "example" {
  subnet_id = module.vpc.private_subnets[0]
  security_group_ids = ["sg-0b70cfd6019c635af"]
}
However, here you need to pass the SecurityGroup ID from the cluster, and the cluster is created after the VPC, so there is a chicken-and-egg problem.
In general, the Instance Connect seems to be a little more complicated than SSM in the automation, because there are more changes in the code, and in different modules.
However, it is a working option, and if your automation allows it, you can use it.
Option 3: the old-fashioned way with SSH Public Key via EC2 User Data
And the oldest and perhaps the simplest option is to create an SSH key yourself and add its public part to EC2 when creating an instance.
The disadvantages here are that it will be difficult to add many keys in this way, and EC2 User Data can sometimes go sideways, but if you need to add only one key, a kind of “super-admin” in case of emergency, then this is a perfectly valid option.
Moreover, if you have a VPN to the VPC (see Pritunl: Launching a VPN in AWS on EC2 with Terraform), then the connection will be even easier.
Create a key:
$ ssh-keygen
Generating public/private ed25519 key pair.
Enter file in which to save the key (/home/setevoy/.ssh/id_ed25519): /home/setevoy/.ssh/atlas-eks-ec2
Enter passphrase (empty for no passphrase):
Enter same passphrase again:
Your identification has been saved in /home/setevoy/.ssh/atlas-eks-ec2
Your public key has been saved in /home/setevoy/.ssh/atlas-eks-ec2.pub
...
The public part can be stored in a repository – copy it:
$ cat ~/.ssh/atlas-eks-ec2.pub
ssh-ed25519 AAA***VMO setevoy@setevoy-wrk-laptop
Next, a few crutches: the EC2NodeClass in my case is created from the Terraform code through the kubectl_manifest resource. The easiest option that has come to mind so far is to add the public key to the variables, and then use it in the kubectl_manifest.
Later, I will probably move such resources to a dedicated Helm chart.
For now, let’s create a new variable:
variable "karpenter_nodeclass_ssh" {
  type        = string
  default = "ssh-ed25519 AAA***VMO setevoy@setevoy-wrk-laptop"
  description = "SSH Public key for EC2 created by Karpenter"
}
In the EC2NodeClass configuration, add the spec.userData:
resource "kubectl_manifest" "karpenter_node_class" {
  yaml_body = <<-YAML
    apiVersion: karpenter.k8s.aws/v1beta1
    kind: EC2NodeClass
    metadata:
      name: default
    spec:
      amiFamily: AL2
      role: ${module.eks.eks_managed_node_groups["${local.env_name_short}-default"].iam_role_name}
      subnetSelectorTerms:
        - tags:
            karpenter.sh/discovery: "atlas-vpc-${var.environment}-private"
      securityGroupSelectorTerms:
        - tags:
            karpenter.sh/discovery: ${local.env_name}
      tags:
        Name: ${local.env_name_short}-karpenter
        environment: ${var.environment}
        created-by: "karpneter"
        karpenter.sh/discovery: ${local.env_name}
      userData: |
        #!/bin/bash
        mkdir -p ~ec2-user/.ssh/
        touch ~ec2-user/.ssh/authorized_keys
        echo "${var.karpenter_nodeclass_ssh}" >> ~ec2-user/.ssh/authorized_keys
        chmod -R go-w ~ec2-user/.ssh/authorized_keys
        chown -R ec2-user ~ec2-user/.ssh
  YAML

  depends_on = [
    helm_release.karpenter
  ]
}
If you are using not Amazon Linux, then change the ec2-user to the desired one.
Important Note: Keep in mind that changes to EC2NodeClass will recreate all instances, and that your services are configured for stable operation, see Kubernetes: Providing High Availability for Pods.
Deploy it and check it:
$ kk get ec2nodeclass -o yaml
...
    userData: #!/bin/bash\nmkdir -p ~ec2-user/.ssh/\ntouch ~ec2-user/.ssh/authorized_keys\necho
      \"ssh-ed25519 AAA***VMO setevoy@setevoy-wrk-laptop\" >> ~ec2-user/.ssh/authorized_keys\nchmod -R go-w
      ~ec2-user/.ssh/authorized_keys\nchown -R ec2-user ~ec2-user/.ssh       \n
...
Wait for Karpenter to create a new WorkerNode and try SSH:
$ ssh -i ~/.ssh/hOS/atlas-eks-ec2 [email protected]
...
[ec2-user@ip-10-0-39-73 ~]$
Done.
Conclusions.
- AWS SessionManager: looks like the easiest option in terms of automation, recommended by AWS itself, but you need to think about how to use
scpthrough it (although it seems to be possible through additional moves, see .SSH and SCP with AWS SSM) - AWS EC2 Instance Connect: a cool feature from Amazon, but somehow more troublesome to automate, so not our option
- “grandfathered” SSH: well, the old one is tried and true 🙂 but I don’t really like User Data, because sometimes it can lead to problems with launching instances; however, it is also simple in terms of automation, and gives you the usual SSH without additional movements

