 OpenVPN Access Server is ready to use OpenVPN server which requires minimal configuration.
The free version allows you to have two clients. If you need more – you can buy additional licenses.
Contents
Infrastructure description
Currently to access our resources such as Jenkins, Nexus etc we are using Allow Rules in AWS Security Groups where each user has its own IP added.
This was not too bad approach while was a small team but as we are growing fast and there are more and more developers/QA – had to find a better solution.
In this post, we will set up an OpenVPN service using OpenVPN Access Server AWS AMI.
After all, everything will look like:
You can find documentation OpenVPN AS documentation here>>> and some VPC peering example will be shown in this post.
AWS: creating OpenVPN AS service
Running EC2
Find the AMI:
You can add license later so, for now, let’s use its Free version.
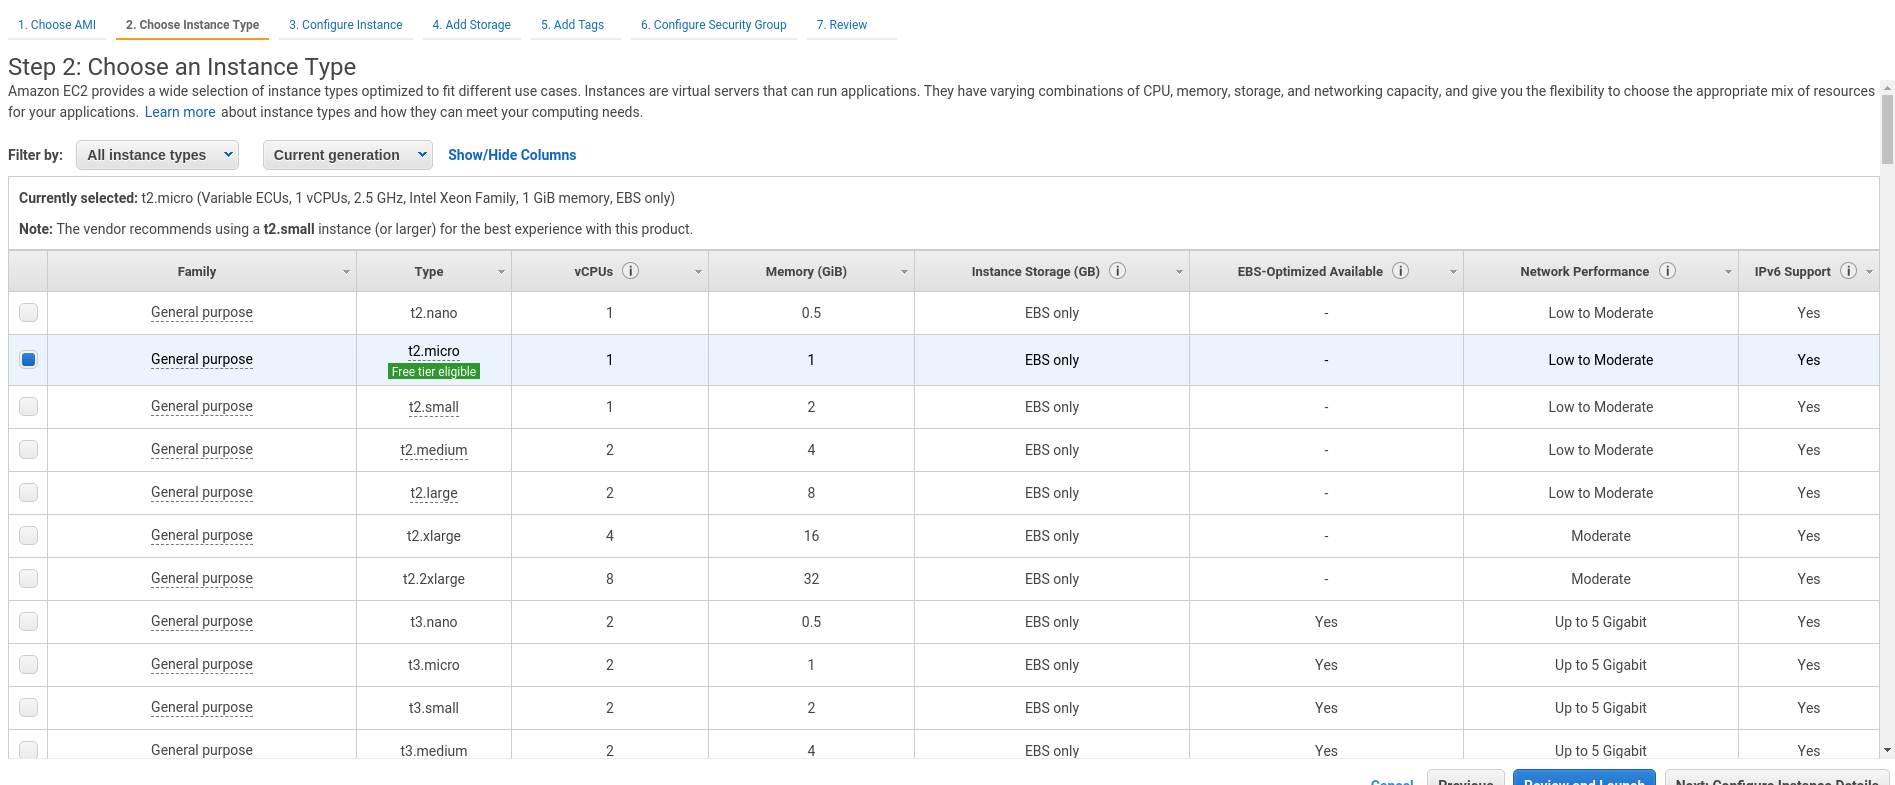
Take a t2.micro instance – it will be fair enough at this moment:
VPC
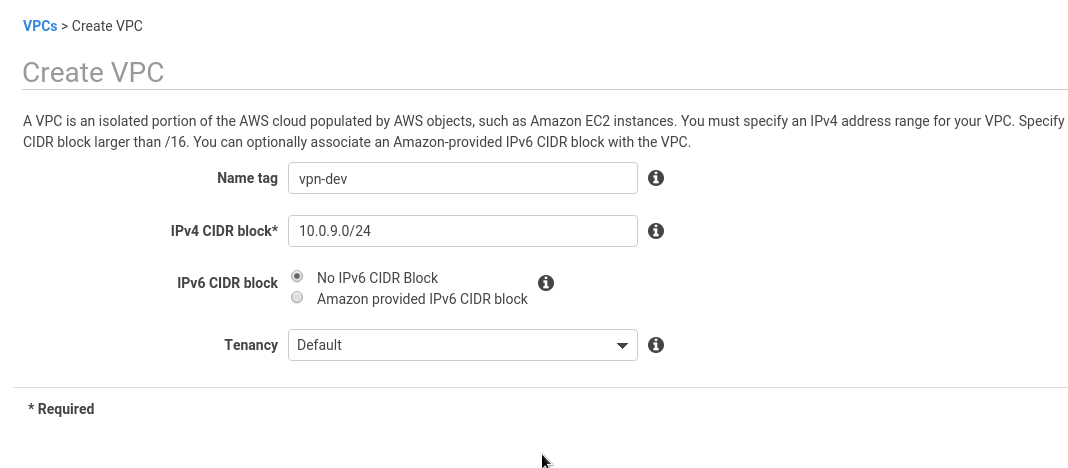
Create a new VPC for our VPN:
As we will use VPC peerings – make sure your networks aren’t overlapped.
In the current case – I have Jenkins VPC with the 10.0.4.0/24 CIDR and VPC VPN CIDR – 10.0.9.0/24:
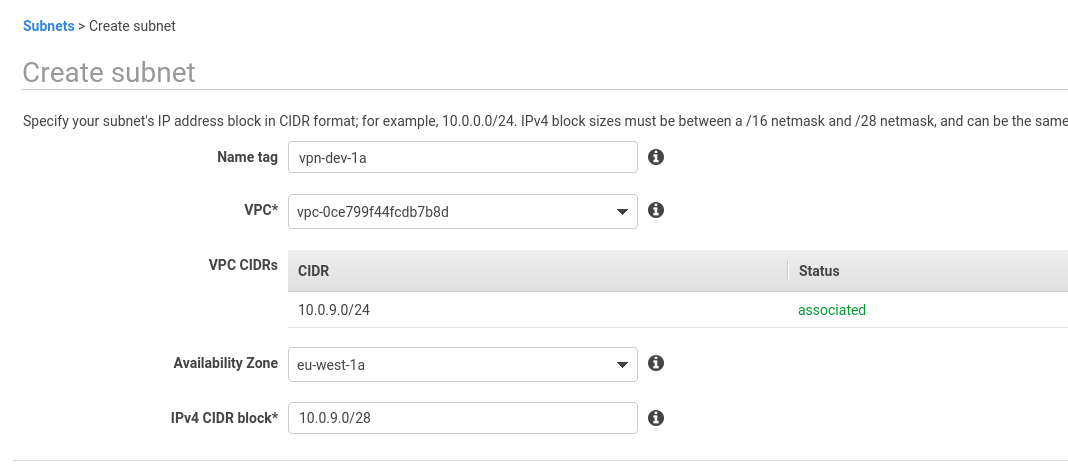
Create a new subnet in this VPC:
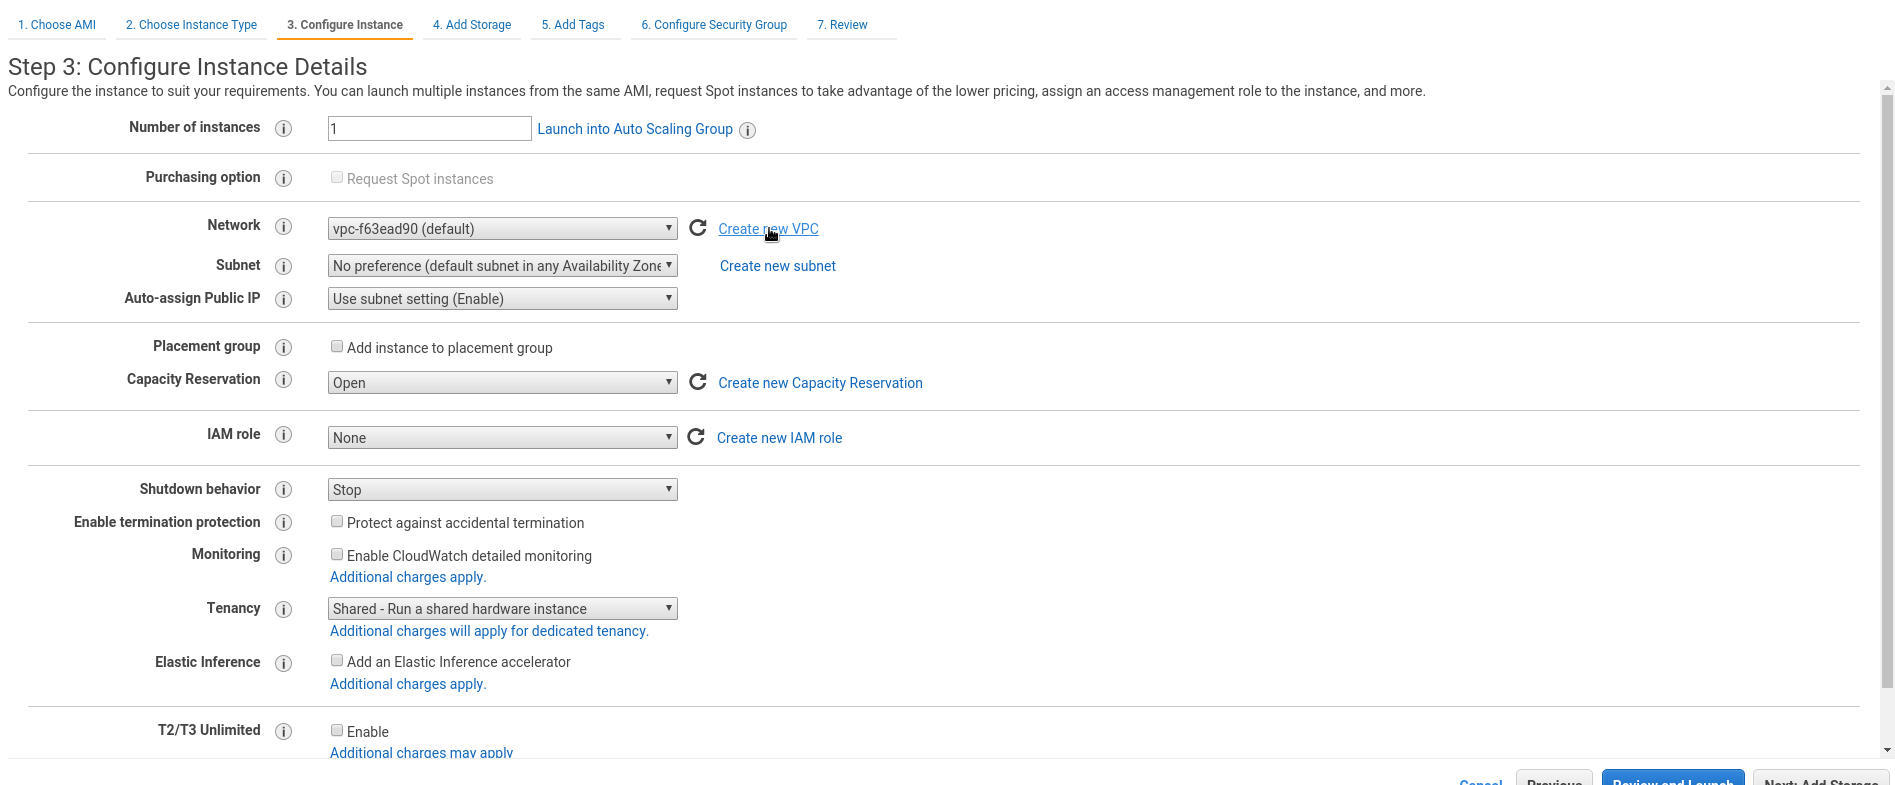
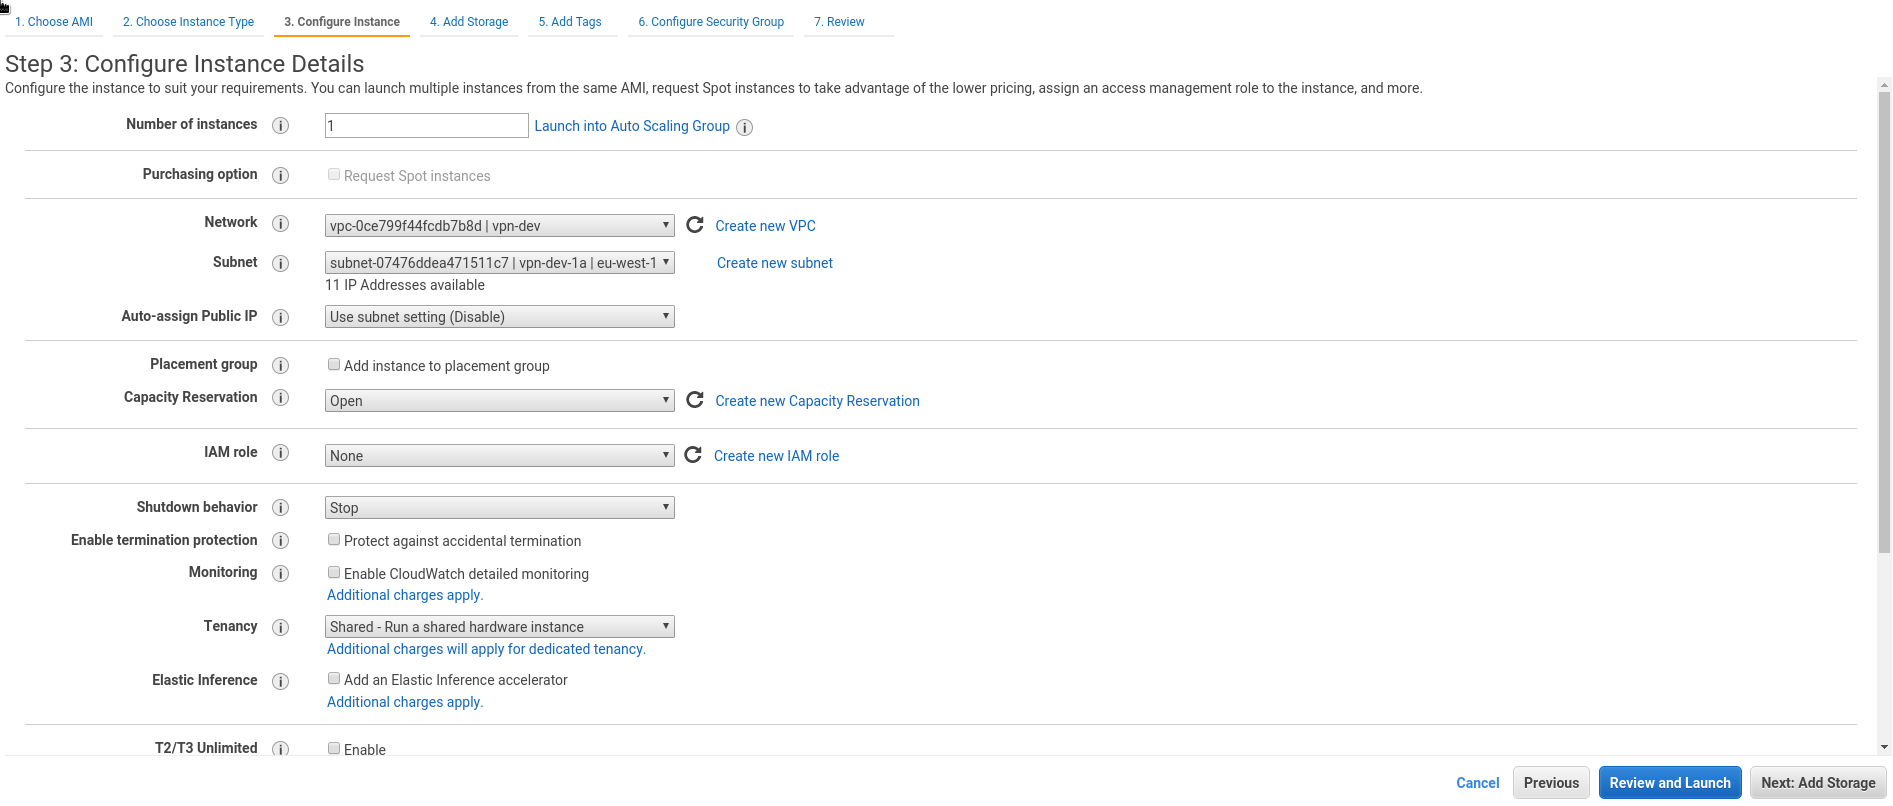
Configure new EC2 networking using those VPC and subnet:
Internet Gateway
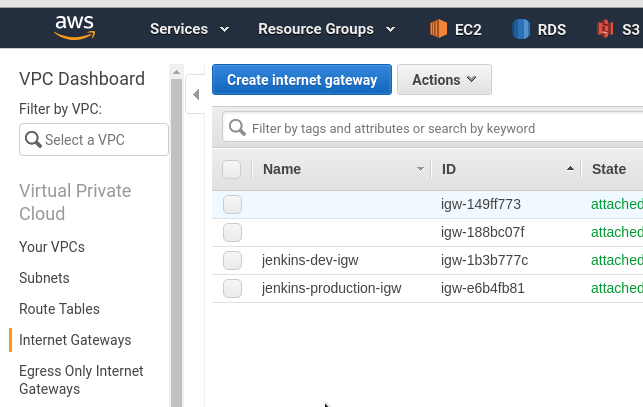
Create Internet Gateway (IGW) to access the Internet from your new VPC:
Attach this IGW to your VPC:
Route table
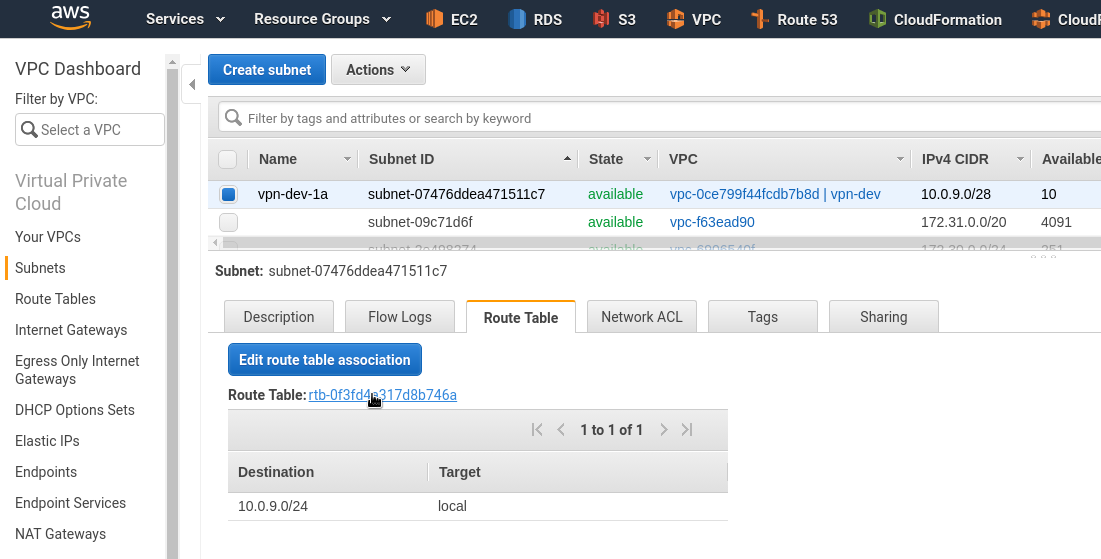
Next, have to update a Route Table to be used to route traffic to the 0.0.0.0/0 network (the Internet) via created IGW.
Go to your new subnet, find the Route Table tab, click on it:
Add a new route via IGW:
Security Group
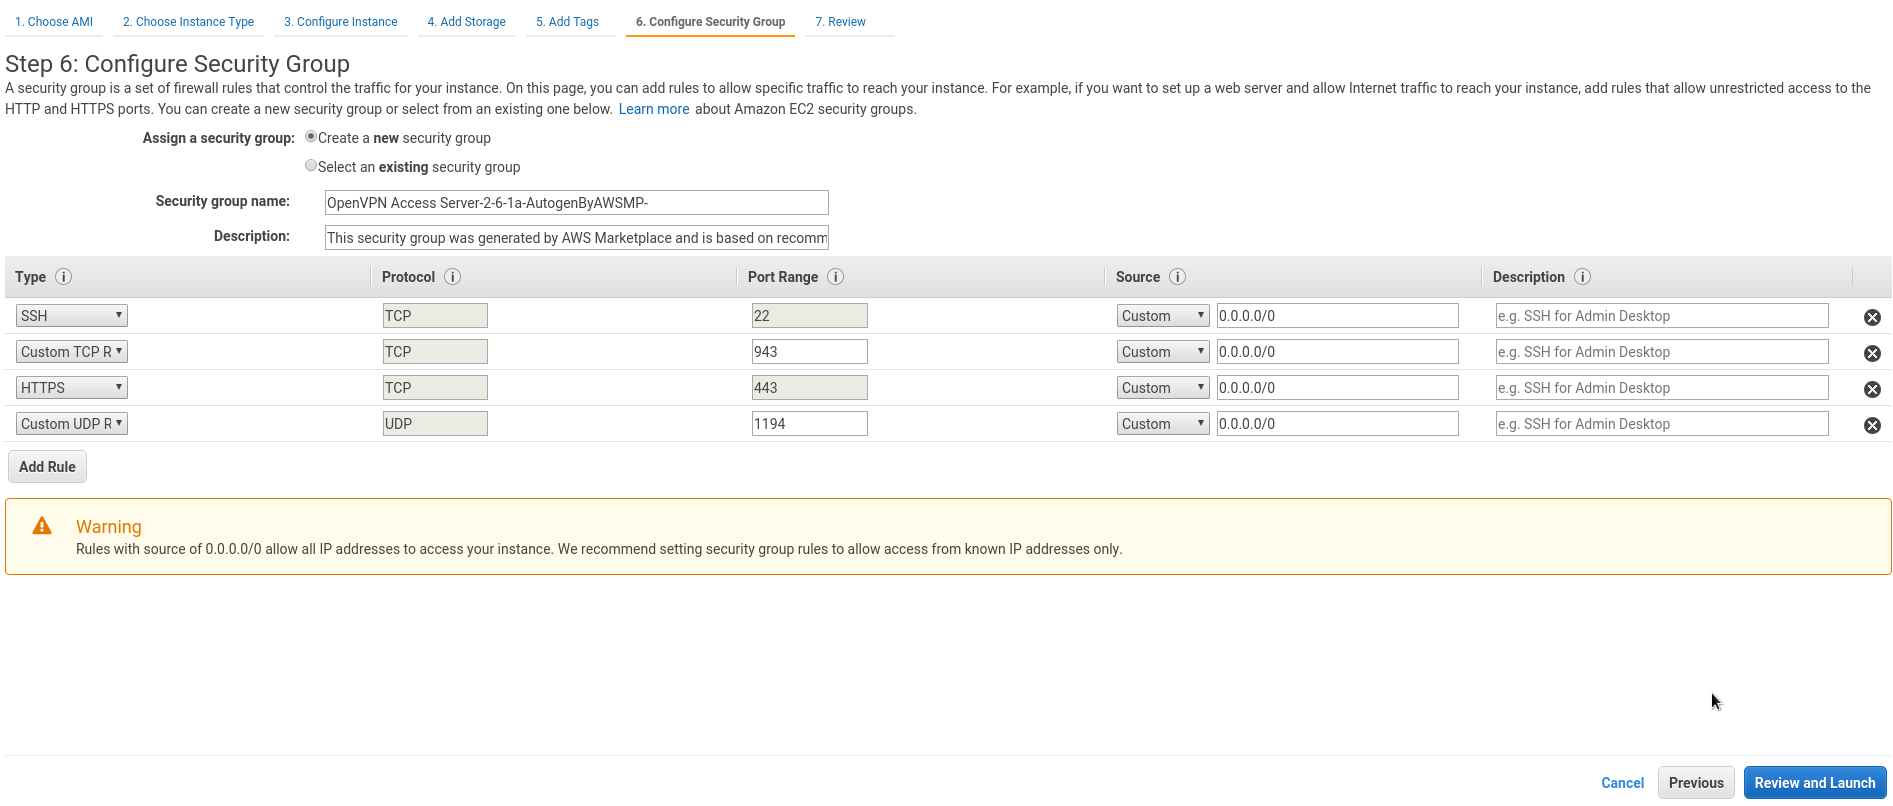
AWS will suggest you use a Security Group with already predefined set of rules.
As this is such a Proof of Concept – you can leave it as is:
- TCP 22 — SSH access
- TCP 943 — OpenVPN AS admin UI access port
- TCP 443 — OpenVPN AS users UI access port
- UDP 1194 — OpenVPN UDP for VPN clients
In kind of Production setup, you have to limit 943 and 22 by only trusted IPs.
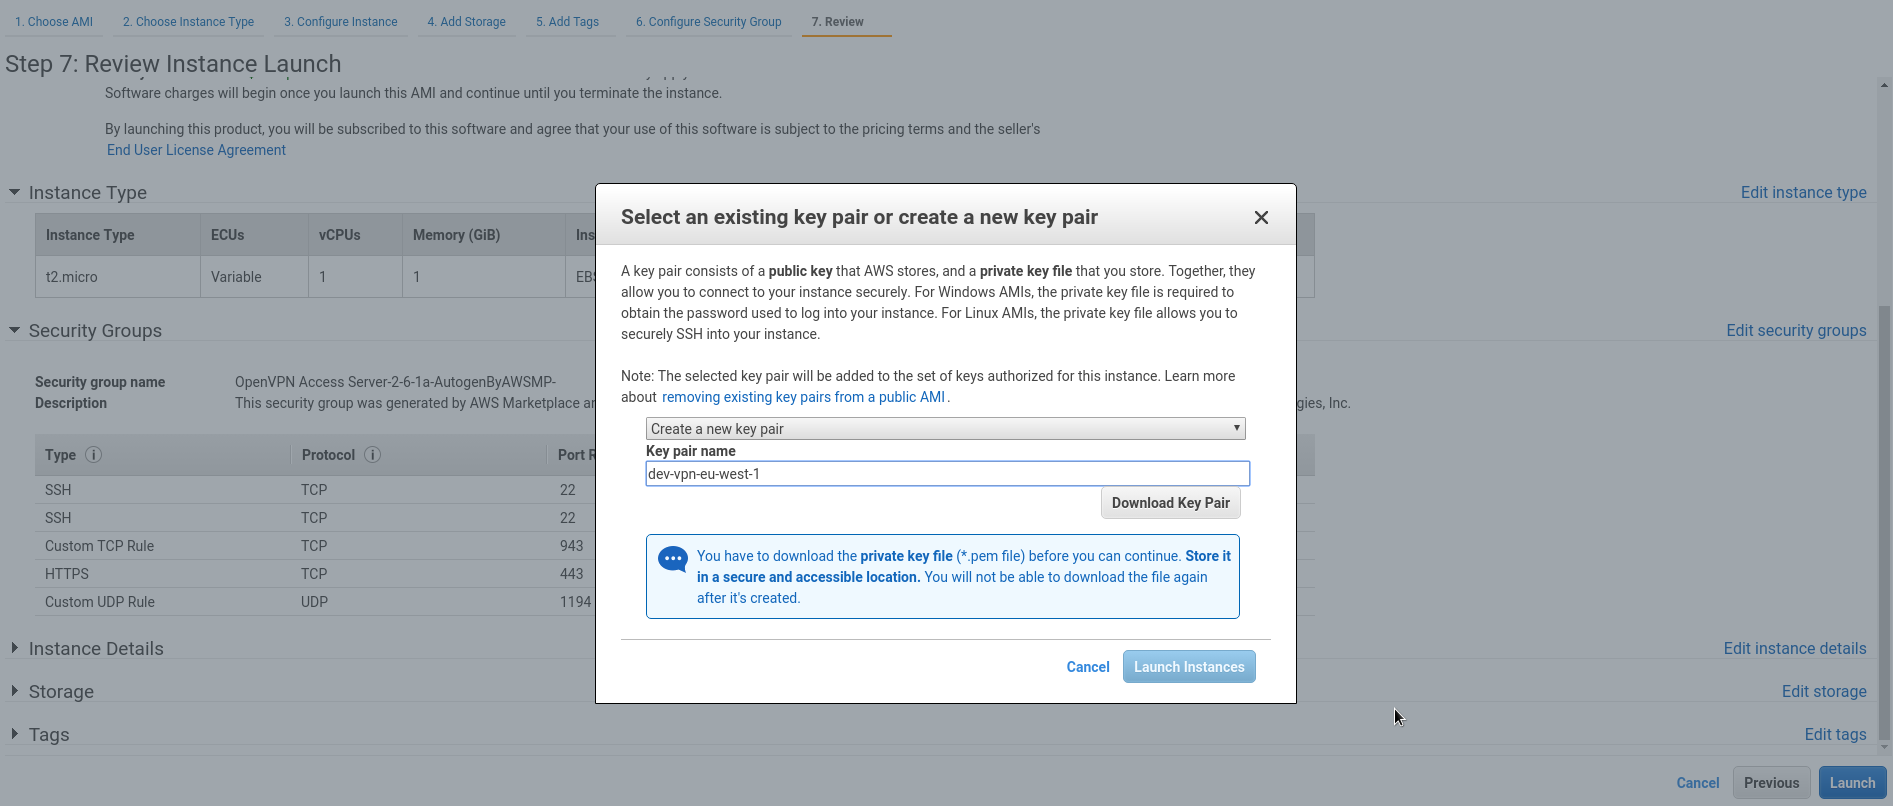
Start the instance, create new RSA key for access:
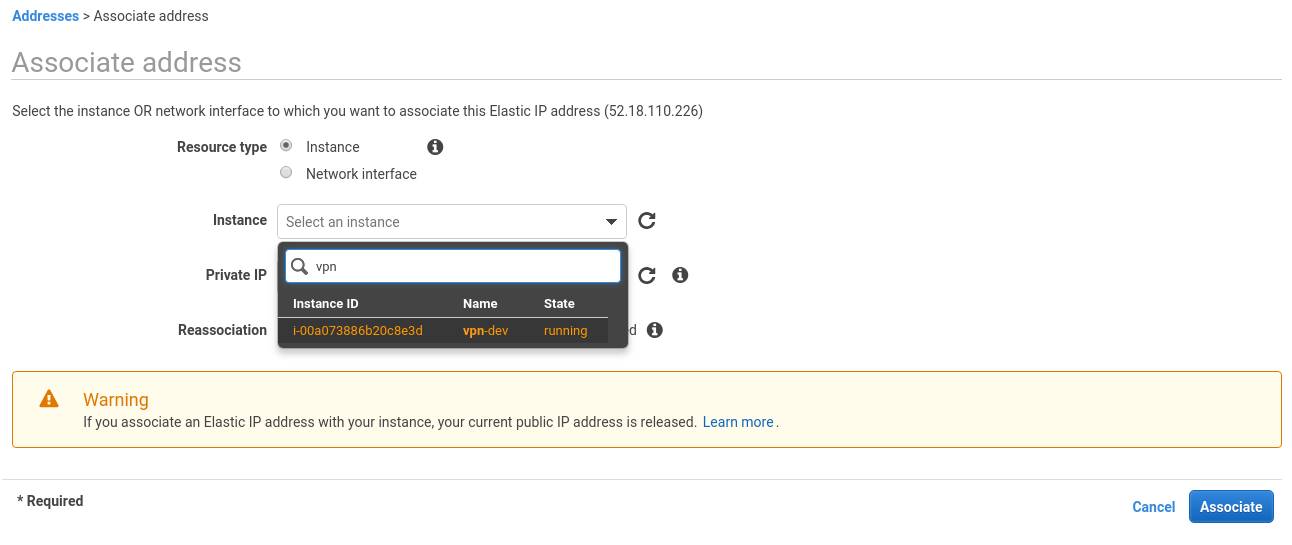
Elastic IP
Create an EIP to use it with your new host:
Attach it:
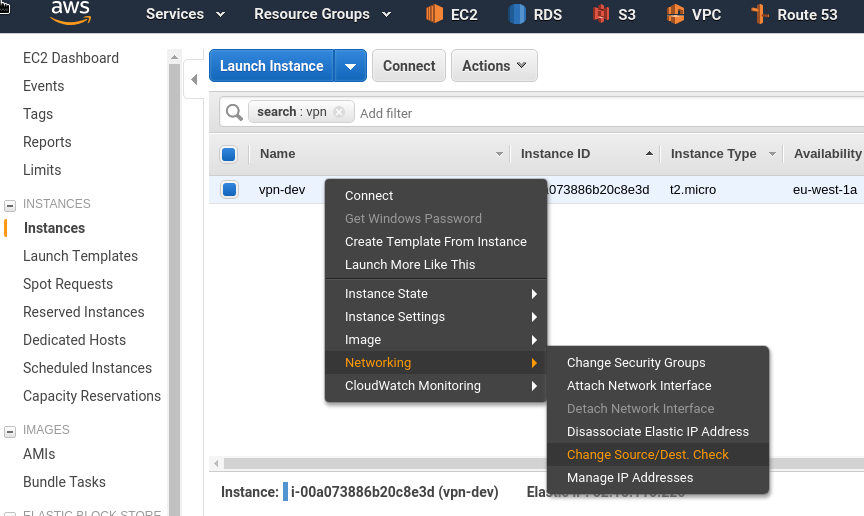
Source/Destination check disabling
For NAT’s correct work have to disable the Source/Dest check (see post AWS: миграция RTFM 2.5 — настройка NAT на Bastion EC2 как замена NAT Gateway и AWS: миграция RTFM 2.7 — CloudFormation и Ansible — наcтройка NAT):
And we are done with the EC2 now – let’s start configuring our new OpenVPN service.
OpenVPN AS set up
SSH to the host using the openvpnas login:
[simterm]
$ ssh -i dev-vpn-eu-west-1.pem [email protected]
[/simterm]
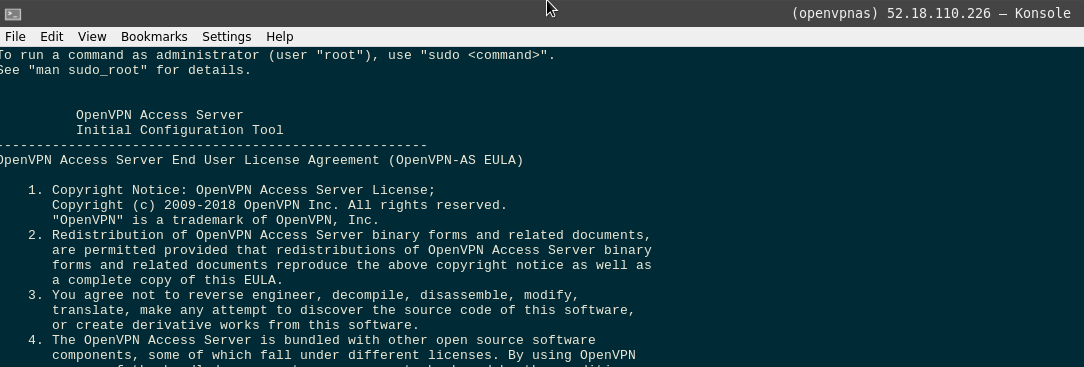
Read 🙂 the license, accept it:
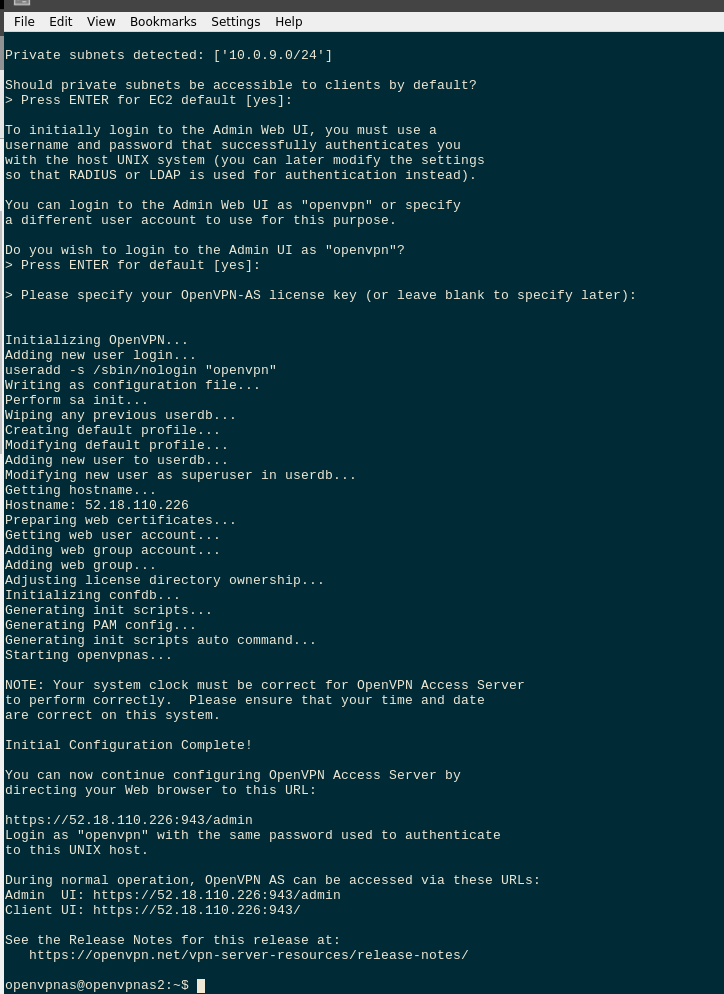
Initialization and the first configuration
On the first login, OpenVPN AS will start its wizard automatically.
You can run it later using the ovpn-init:
[simterm]
$ sudo ovpn-init --ec2
[/simterm]
For now, you can just answer Yes with default values for everything here:
- Will this be the primary Access Server node? // yes
- Please specify the network interface and IP address to be
used by the Admin Web UI:
(1) all interfaces: 0.0.0.0
(2) eth0: 10.0.9.8
// 2 - Please specify the port number for the Admin Web UI.
// yes – 943 - Please specify the TCP port number for the OpenVPN Daemon
// yes – 443 - Should client traffic be routed by default through the VPN?
// no – we will route only traffic to our own resources - Should client DNS traffic be routed by default through the VPN?
// no - Use local authentication via internal DB?
// yes - Private subnets detected: [‘10.0.9.0/24’]
Should private subnets be accessible to clients by default?
// yes - Do you wish to login to the Admin UI as “openvpn”?
// yes - > Please specify your OpenVPN-AS license key (or leave blank to specify later):
// leave blank
Set the openvpn user ‘s password:
[simterm]
openvpnas@openvpnas2:~$ sudo passwd openvpn
Enter new UNIX password:
Retype new UNIX password:
passwd: password updated successfully
[/simterm]
Now you can open your admin page using EIP created before – https://52.18.110.226:943/admin in this case.
As we didn’t configure a hostnames/URLs – just agree here:
Your connection is not private
Attackers might be trying to steal your information from 52.18.110.226 (for example, passwords, messages, or credit cards). Learn more
NET::ERR_CERT_AUTHORITY_INVALID
Login to the admin page using the openvpn user and password created with passwd:
VPN client connection
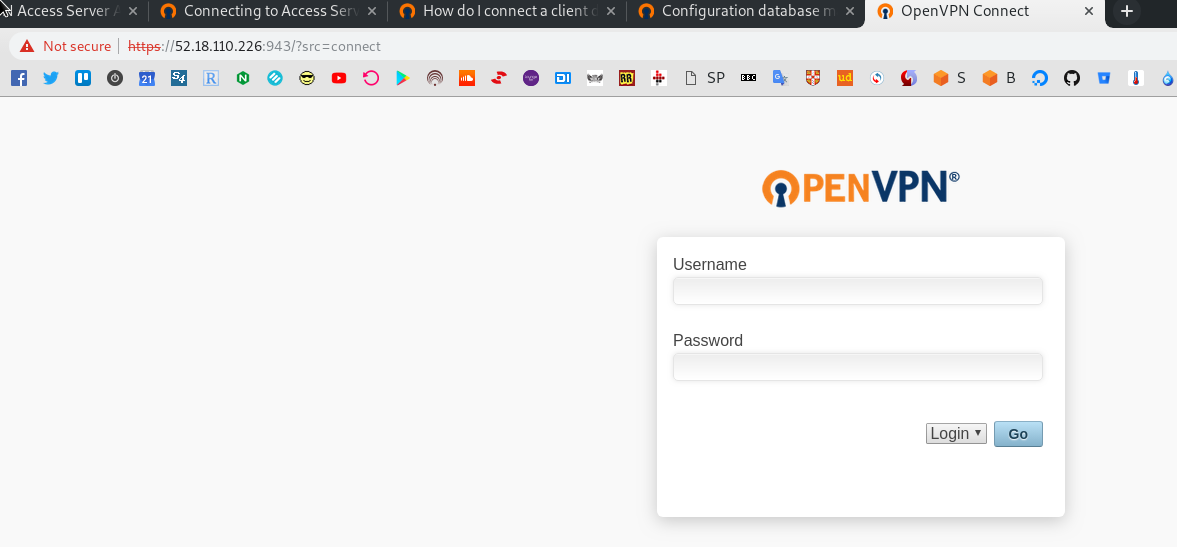
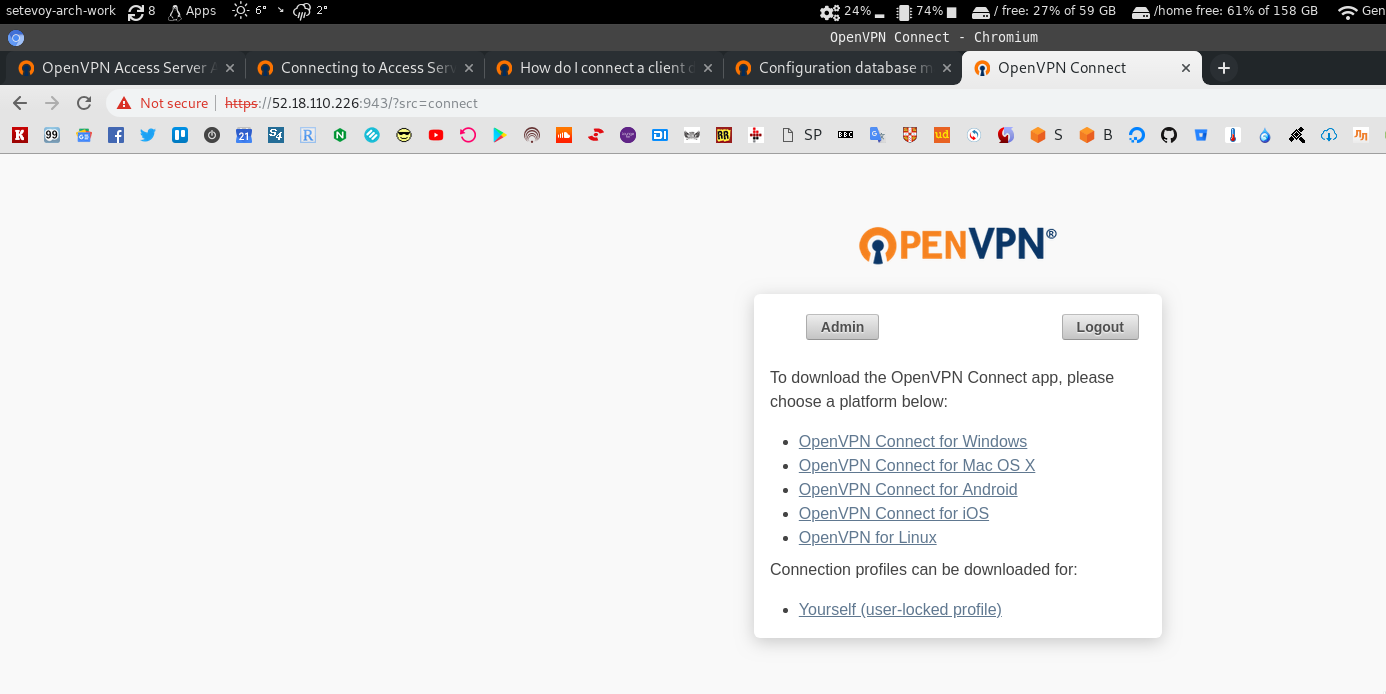
Go to the user’s UI (no /admin at the end) – https://52.18.110.226:943/?src=connect:
Click on the Yourself (user-locked profile) and download the client.ovpn file with settings for your local VPN client:
[simterm]
$ cat ~/.openvpn/client.ovpn
# Automatically generated OpenVPN client config file
# Generated on Wed Feb 20 15:19:38 2019 by openvpnas2

# Default Cipher
cipher AES-256-CBC
# Note: this config file contains inline private keys
#       and therefore should be kept confidential!
# Note: this configuration is user-locked to the username below
# OVPN_ACCESS_SERVER_USERNAME=openvpn
....
[/simterm]
Install openvpn on your local PC, here is Arch Linux used:
[simterm]
$ sudo pacman -S openvpn
[/simterm]
Start it with the --auth-user-pass option:
[simterm]
$ sudo openvpn --config ~/.openvpn/client.ovpn --auth-user-pass
Wed Feb 20 17:22:42 2019 OpenVPN 2.4.6 x86_64-pc-linux-gnu [SSL (OpenSSL)] [LZO] [LZ4] [EPOLL] [PKCS11] [MH/PKTINFO] [AEAD] built on Apr 24 2018
Wed Feb 20 17:22:42 2019 library versions: OpenSSL 1.1.1a  20 Nov 2018, LZO 2.10
Enter Auth Username: openvpn
Enter Auth Password: *******
...
Wed Feb 20 17:22:51 2019 ROUTE_GATEWAY 172.16.64.1/255.255.252.0 IFACE=wlp2s0 HWADDR=10:f0:05:64:0a:73
Wed Feb 20 17:22:51 2019 TUN/TAP device tun0 opened
Wed Feb 20 17:22:51 2019 TUN/TAP TX queue length set to 100
Wed Feb 20 17:22:51 2019 do_ifconfig, tt->did_ifconfig_ipv6_setup=0
Wed Feb 20 17:22:51 2019 /usr/bin/ip link set dev tun0 up mtu 1500
Wed Feb 20 17:22:51 2019 /usr/bin/ip addr add dev tun0 172.27.232.3/21 broadcast 172.27.239.255
Wed Feb 20 17:22:56 2019 ROUTE remote_host is NOT LOCAL
Wed Feb 20 17:22:56 2019 /usr/bin/ip route add 52.18.110.226/32 via 172.16.64.1
Wed Feb 20 17:22:56 2019 /usr/bin/ip route add 10.0.9.0/24 metric 101 via 172.27.232.1
Wed Feb 20 17:22:56 2019 /usr/bin/ip route add 172.27.224.0/20 metric 101 via 172.27.232.1
Wed Feb 20 17:22:56 2019 Initialization Sequence Completed
[/simterm]
Now – let’s check some routing.
First, let’s make a request to the CloudFlare – it must be passed via my office’s router/gateway:
[simterm]
$ traceroute 1.1.1.1
traceroute to 1.1.1.1 (1.1.1.1), 30 hops max, 60 byte packets
 1  _gateway (172.16.64.1)  3.109 ms  3.213 ms  3.428 ms
 2  ru-german.relc.com (194.183.169.25)  4.771 ms  5.148 ms  6.039 ms
 3  * * *
 4  ex4.thinx.pl (212.91.2.13)  16.468 ms  16.778 ms  17.277 ms
 5  cloudflare.thinx.pl (212.91.0.28)  23.842 ms  24.154 ms  24.386 ms
 6  one.one.one.one (1.1.1.1)  17.787 ms  15.023 ms  15.199 ms
[/simterm]
Yup, it is.
And now to the OpenVPN host – must go directly:
[simterm]
$ traceroute 10.0.9.8
traceroute to 10.0.9.8 (10.0.9.8), 30 hops max, 60 byte packets
 1  10.0.9.8 (10.0.9.8)  52.095 ms  52.149 ms  53.512 ms
[/simterm]
Nice.
VPN-tunnel traffic routing
For the testing purposes – let’s add a new EC2 in the same VPC where is our OpenVPN placed:
And let’s check routes again.
During local OpenVPN client start you have to notice a message with new routes to be added in your system:
Wed Feb 20 17:22:56 2019 /usr/bin/ip route add 172.27.224.0/20 metric 101 via 172.27.232.1
Check it – try SSH using Private IP of the new instance:
[simterm]
$ ssh -i dev-vpn-eu-west-1.pem [email protected]
The authenticity of host '10.0.9.6 (10.0.9.6)' can't be established.
ECDSA key fingerprint is SHA256:6ldjTtHvQJviBb/9aXwFvwh7nwKjOdpePCxO6TddAJA.
Are you sure you want to continue connecting (yes/no)? yes
Warning: Permanently added '10.0.9.6' (ECDSA) to the list of known hosts.
Welcome to Ubuntu 18.04.1 LTS (GNU/Linux 4.15.0-1021-aws x86_64)
...
ubuntu@ip-10-0-9-6:~$
[/simterm]
All good.
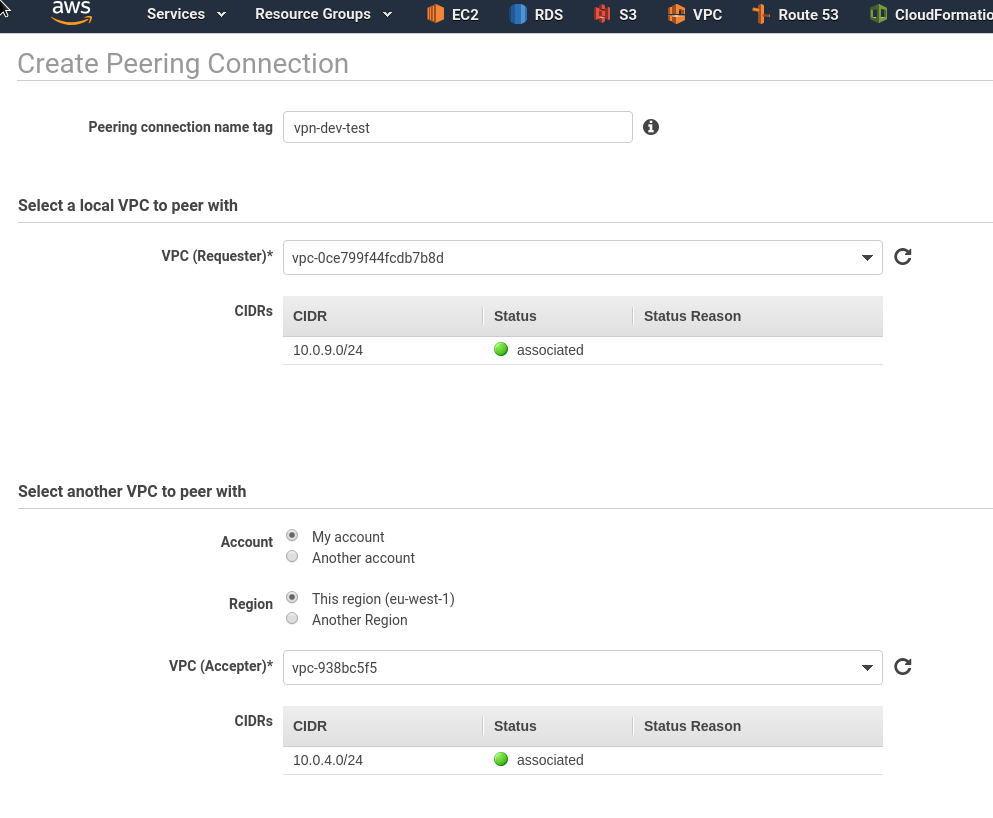
VPC peering
The next step is to configure VPC-peering and a traffic routing between our workstation, VPN-server, and the Jenkin’s VPC.
Read more about VPC-peering тут>>>,
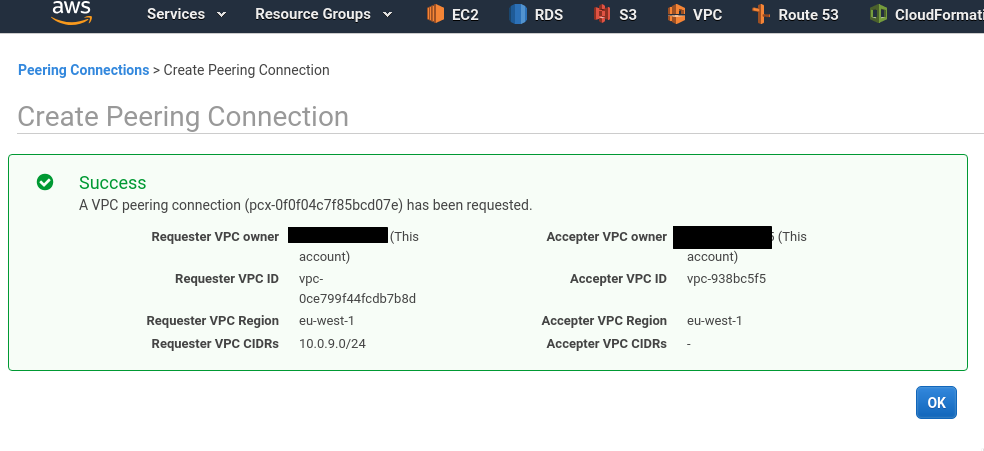
Create a new VPC peering connection:
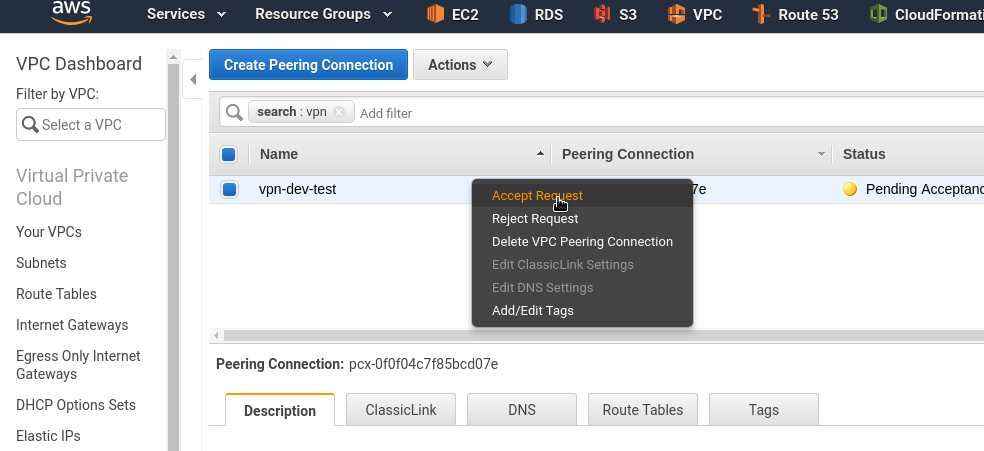
Accept its request:
VPC-peering routing
If you’ll try to connect to the Jenkins using its Private IP – this will not work now:
[simterm]
ubuntu@ip-10-0-9-6:~$ ssh [email protected]
ssh: connect to host 10.0.4.13 port 22: Connection timed out
[/simterm]
Because there are no routes added between the 10.0.9.0/24 (OpenVPN VPC) and the 10.0.4.0/24 (Jenkins VPC) networks.
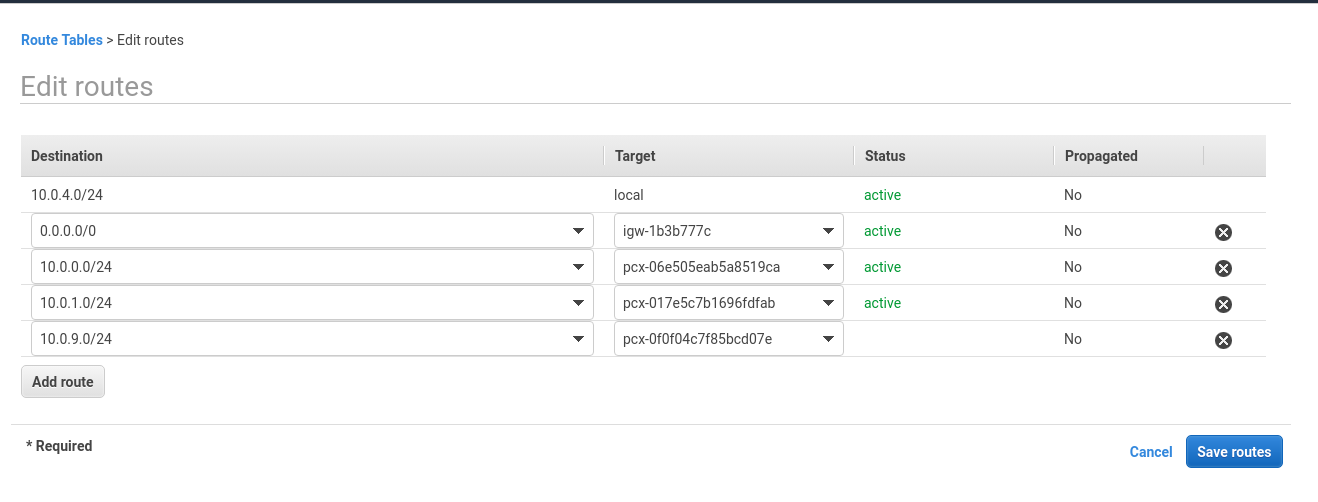
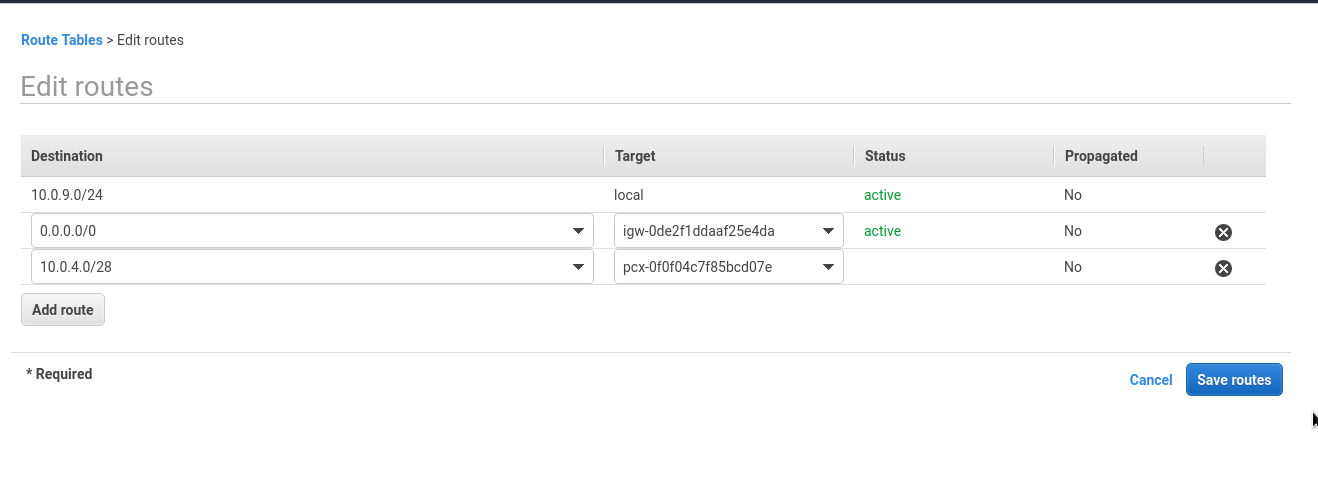
So now we have to add two new routes:
- in the Jenkins route table – 10.0.4.0/28 => 10.0.9.0/24 via VPC peering created above
- in the OpenVPN route table – 10.0.4.0/28 => 10.0.9.0/24 via VPC peering created above
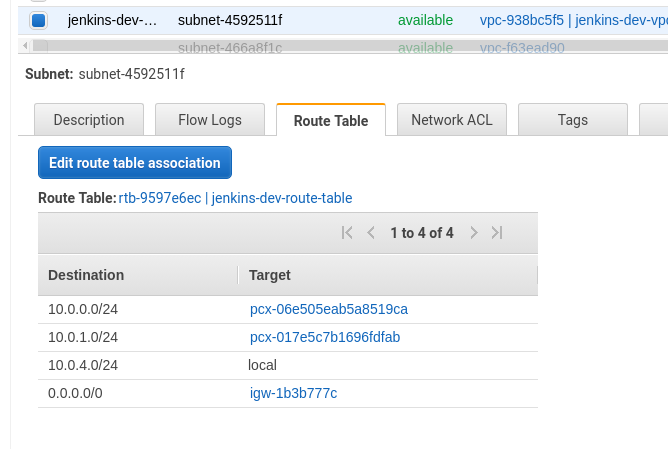
Edit the jenkins rtb-9597e6ec | jenkins-dev-route-table table:
Add the new route:
Repeat for the VPN’s route table:
Check from the VPN network:
[simterm]
ubuntu@ip-10-0-9-6:~$ ping 10.0.4.13
PING 10.0.4.13 (10.0.4.13) 56(84) bytes of data.
64 bytes from 10.0.4.13: icmp_seq=1 ttl=64 time=0.470 ms
64 bytes from 10.0.4.13: icmp_seq=2 ttl=64 time=0.483 ms
[/simterm]
And from the Jenkins host – back to the VPN’s network to any host:
[simterm]
admin@jenkins-dev:~$ ping 10.0.9.6
PING 10.0.9.6 (10.0.9.6) 56(84) bytes of data.
64 bytes from 10.0.9.6: icmp_seq=1 ttl=64 time=0.437 ms
64 bytes from 10.0.9.6: icmp_seq=2 ttl=64 time=0.914 ms
[/simterm]
Remember that Jenkins has its own Security Group – add new Allow rule there.
Check SSH from the VPN’s network:
[simterm]
ubuntu@ip-10-0-9-6:~$ ssh [email protected]
The authenticity of host '10.0.4.13 (10.0.4.13)' can't be established.
ECDSA key fingerprint is SHA256:+0LP1+neT4udq96jFLdLpjuvTrWCzlAt5GZZpfw2rKI.
Are you sure you want to continue connecting (yes/no)? yes
Warning: Permanently added '10.0.4.13' (ECDSA) to the list of known hosts.
[email protected]: Permission denied (publickey).
[/simterm]
And back:
[simterm]
admin@jenkins-dev:~$ ssh 10.0.9.6
The authenticity of host '10.0.9.6 (10.0.9.6)' can't be established.
ECDSA key fingerprint is SHA256:6ldjTtHvQJviBb/9aXwFvwh7nwKjOdpePCxO6TddAJA.
Are you sure you want to continue connecting (yes/no)? yes
Warning: Permanently added '10.0.9.6' (ECDSA) to the list of known hosts.
Permission denied (publickey).
[/simterm]
Good.
VPN routes
Go back to your workstation and check how traffic will be routed to the Jenkins host, using its Private IP:
[simterm]
$ traceroute 10.0.4.13
traceroute to 10.0.4.13 (10.0.4.13), 30 hops max, 60 byte packets
 1  _gateway (172.16.64.1)  3.243 ms  3.453 ms  3.656 ms
 2  ru-german.relc.com (194.183.169.25)  3.962 ms  4.221 ms  4.642 ms
...
[/simterm]
It is passed through the office’s router – and this is absolutely not what we want.
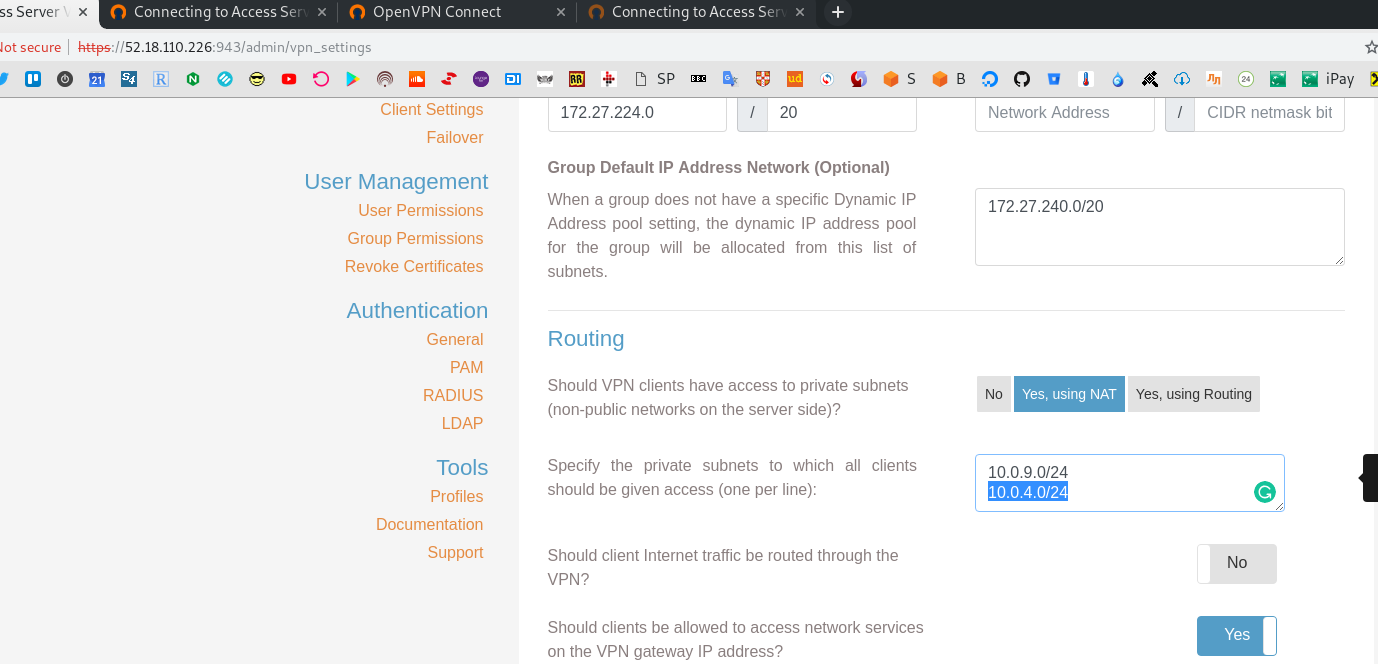
Go to the VPN admin => VPN Settings – https://52.18.110.226:943/admin/vpn_settings:
Add a new NAT-rule for the 10.0.4.0/24 subnet:
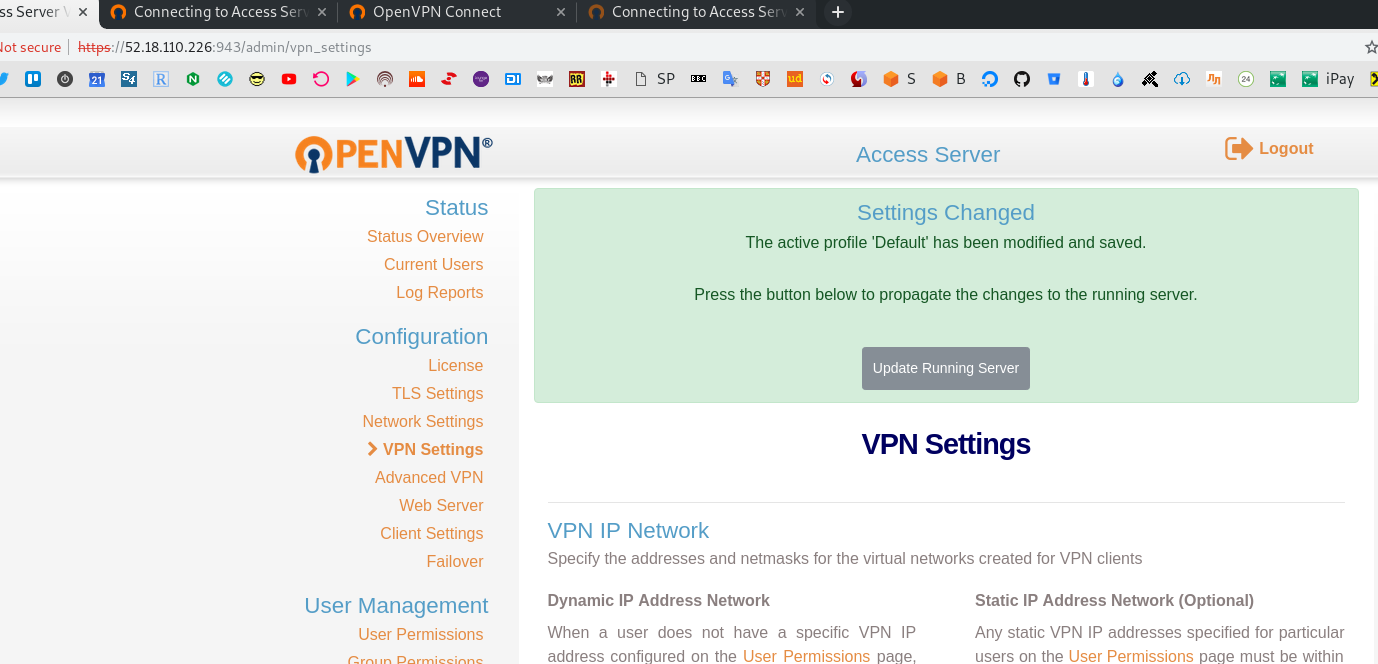
Save, press Update Running Server:
Restart local client:
[simterm]
$ sudo openvpn --config ~/.openvpn/client.ovpn --auth-user-pass
...
Wed Feb 20 18:25:37 2019 ROUTE remote_host is NOT LOCAL
Wed Feb 20 18:25:37 2019 /usr/bin/ip route add 52.18.110.226/32 via 172.16.64.1
Wed Feb 20 18:25:37 2019 /usr/bin/ip route add 10.0.4.0/24 metric 101 via 172.27.232.1
Wed Feb 20 18:25:37 2019 /usr/bin/ip route add 10.0.9.0/24 metric 101 via 172.27.232.1
Wed Feb 20 18:25:37 2019 /usr/bin/ip route add 172.27.224.0/20 metric 101 via 172.27.232.1
Wed Feb 20 18:25:37 2019 Initialization Sequence Completed
[/simterm]
Here is our new route – 10.0.4.0/24 metric 101 via 172.27.232.1.
Check your local routing table:
[simterm]
18:26:28 [setevoy@setevoy-arch-work ~]  $ route -n
Kernel IP routing table
Destination     Gateway         Genmask         Flags Metric Ref    Use Iface
0.0.0.0         172.16.64.1     0.0.0.0         UG    303    0        0 wlp2s0
10.0.4.0        172.27.232.1    255.255.255.0   UG    101    0        0 tun0
10.0.9.0        172.27.232.1    255.255.255.0   UG    101    0        0 tun0
52.18.110.226   172.16.64.1     255.255.255.255 UGH   0      0        0 wlp2s0
[/simterm]
Check trace again:
[simterm]
$ traceroute 10.0.4.13
traceroute to 10.0.4.13 (10.0.4.13), 30 hops max, 60 byte packets
 1  172.27.232.1 (172.27.232.1)  55.090 ms  55.207 ms  55.399 ms
...
[/simterm]
Now it went via OpenVPN IP as a gateway.
Check if SSH works via Private IP:
[simterm]
18:27:41 [setevoy@setevoy-arch-work ~]  $ ssh -i jenkins-dev-eu-west-1.pem [email protected]
...
admin@jenkins-dev:~$
[/simterm]
“It works!” (c) 🙂
DNS
The last thing to think about is the DNS settings.
As our Jenkins has to be accessible using its Public IP and domain dev.ci.example.com from a few addresses on the Internet and via its Private IP – using VPN connection – need to find a way resolve it to a different IPs.
Check the OpenVPN: DNS and dnsmasq configuration post for details.
Done.


