 The official documentation calls Helm as a “The package manager for Kubernetes“, but in fact, Helm is something bigger than just a package manager – it’s more an application controlling tool for their installation, managing, upgrading, configuration, etc.
In this post, we will take an overview of Helm in general, its Charts, templates, variables, and repositories.
The post is really more like an intro to the Help and doesn’t cover some aspects like release versioning, dependencies, etc.
In contrast to the Kubernetes itself – Helm has really good documentation.
Contents
Helm architecture
Helm operates with packages to run applications in Kubernetes, and in terms of Helm they are called chart, and helm allows to:
- create new charts
- pack charts into archives (tgz)
- work with shared charts using their repositories
- install and uninstall charts in a Kubernetes cluster
- manage charts releases in a cluster
Helm concepts
The main three concepts are:
- chart: information necessary to run an application in a Kubernetes cluster
- config: information about necessary configuration options to be used by such a chart to create an application instance and manage its releases
- release: работающий инстанс chart-а, связанный с определённым config-ом
Helm components
Helm can be divided into two main part – the client itself, and Helm libraries
- Helm client: is a command-line tool (Helm is written in Go), and is responsible for chart creation, working with repositories, releases management, etc
- Helm library: is logic part of Helm responsible for work with Kubernetes API to manage charts, their release, installation to a cluster, etc
Helm Charts
So, chart – is a collection of files, describing some Kubernetes resources which can be used to create a single-pod application – or a whole composite web-service, including a web-server, a frontend ap and backend applications, caching services, etc.
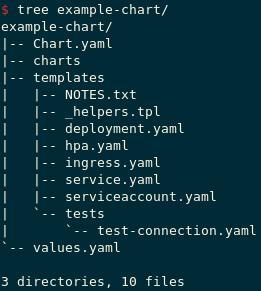
Files structure
Charts are organized as a directories and files tree, where the top-directory name is a chart-name.
For example:
[simterm]
$ tree example-chart/
example-chart/
|-- Chart.yaml
|-- charts
|-- templates
|   |-- NOTES.txt
|   |-- _helpers.tpl
|   |-- deployment.yaml
|   |-- hpa.yaml
|   |-- ingress.yaml
|   |-- service.yaml
|   |-- serviceaccount.yaml
|   `-- tests
|       `-- test-connection.yaml
`-- values.yaml
[/simterm]
Here:
example-chart: top-catalog, a chart nameChart.yaml: a chart’s metadata describing the chart’s purpose, its versions, dependencies, etccharts: a chart can contain multiply child-charts or subcharts – they’ll be stored heretemplates: contains template files to be applied for a Kubernetes cluster using Go templatingNOTES.txt– help-text to be displayed for usersdeployment.yaml– an example Kubernetes Deployment manifestservice.yaml– an example Kubernetes Service manifest
values.yaml– contains default values for templates
Well, enough for theory – let’s go to practice!
Preparing the environment
In this will use Minikube, kubectl, and Helm v3:
- minikube v1.9
- Kubernetes v1.18
- kubectl v1.18.2
- helm-3.2.0
Minikube – a Kubernetes cluster
[simterm]
$ sudo pacman -S minikube
[/simterm]
Create a cluster:
[simterm]
$ minikube start
😄  minikube v1.9.2 on Arch rolling
...
🌟  Enabling addons: default-storageclass, storage-provisioner
🏄  Done! kubectl is now configured to use "minikube"
[/simterm]
Check:
[simterm]
$ kubectl cluster-info
Kubernetes master is running at https://192.168.99.100:8443
KubeDNS is running at https://192.168.99.100:8443/api/v1/namespaces/kube-system/services/kube-dns:dns/proxy
[/simterm]
Its nodes:
[simterm]
$ kubectl get nodes
NAME       STATUS   ROLES    AGE     VERSION
minikube   Ready    master   4m16s   v1.18.0
[/simterm]
Installing Helm
Arch Linux – from a repository:
[simterm]
$ sudo pacman -S helm
[/simterm]
macOS – Homebrew:
[simterm]
$ brew install helm
[/simterm]
Debian, etc – with Snap:
[simterm]
$ sudo apt install snapd
$ sudo snap install helm --classic
[/simterm]
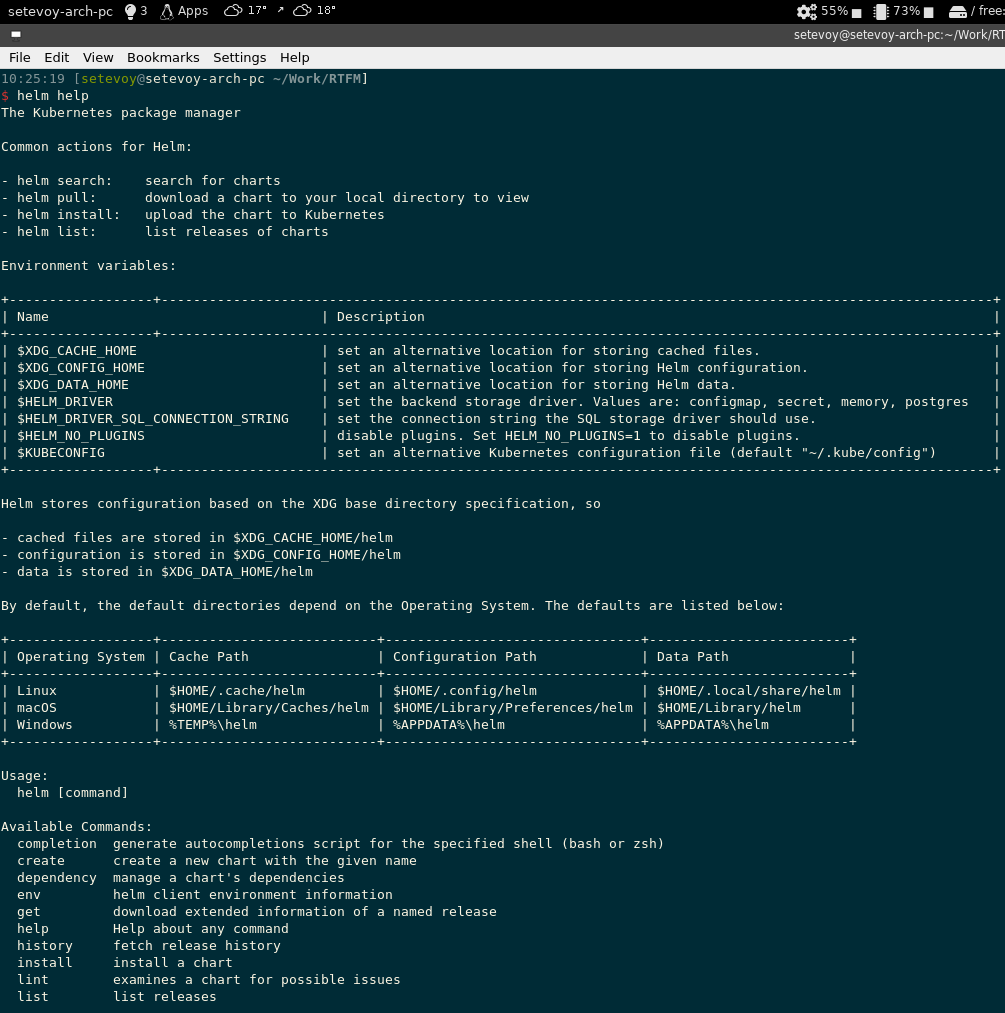
And really good HELP with helm help:
Creating a Helm Chart
Now, let’s create own chart with our template and try to deploy it into the Kubernetes cluster.
Create a new chart:
[simterm]
$ helm create example-chart
Creating example-chart
[/simterm]
We already saw its content:
[simterm]
$ tree example-chart/
example-chart/
|-- Chart.yaml
|-- charts
|-- templates
|   |-- NOTES.txt
|   |-- _helpers.tpl
|   |-- deployment.yaml
|   |-- hpa.yaml
|   |-- ingress.yaml
|   |-- service.yaml
|   |-- serviceaccount.yaml
|   `-- tests
|       `-- test-connection.yaml
`-- values.yaml

3 directories, 10 files
Let’s inspect its Deployment file:
[simterm]
$ cat example-chart/templates/deployment.yaml
apiVersion: apps/v1
kind: Deployment
metadata:
  name: {{ include "example-chart.fullname" . }}
  labels:
    {{- include "example-chart.labels" . | nindent 4 }}
spec:
{{- if not .Values.autoscaling.enabled }}
  replicas: {{ .Values.replicaCount }}
{{- end }}
...
[/simterm]
And Values:
[simterm]
$ cat example-chart/values.yaml
# Default values for example-chart.
# This is a YAML-formatted file.
# Declare variables to be passed into your templates.

replicaCount: 1
...
[/simterm]
Must be obvious enough – for the replicas: {{ .Values.replicaCount }} in the templates/deployment.yaml will be used the replicaCount: 1 value from the values.yaml.
But will not use those files – let’s create own chart.
Remove them:
[simterm]
$ rm -rf example-chart/templates/*
[/simterm]
And now add our ConfigMap.
Adding a template
Create a new file example-chart/templates/configmap.yaml, and here, for example, a content for an index.html file:
apiVersion: v1
kind: ConfigMap
metadata:
  name: nginx-configmap
data:
  index.html: "Hello, World
chart linter
Before installing a chart it’s good to check its syntax – use the helm lint for this:
[simterm]
$ helm lint example-chart/
==> Linting example-chart/
[INFO] Chart.yaml: icon is recommended

1 chart(s) linted, 0 chart(s) failed
[/simterm]
chart install
Check one more time which cluster is configured in your kubectl:
[simterm]
$ kubectl config current-context
minikube
[/simterm]
To install a chart use the helm install passing a release name as a first argument, then options, and a path to the chart’s files.
But again, before running real actions it will be good to make a test-run with --dry-run and add --debug to see more details:
[simterm]
$ helm install example-chart --dry-run --debug example-chart/
install.go:159: [debug] Original chart version: ""
install.go:176: [debug] CHART PATH: /home/setevoy/Work/RTFM/example-chart

NAME: example-chart
LAST DEPLOYED: Sun May  3 13:17:07 2020
NAMESPACE: default
STATUS: pending-install
REVISION: 1
TEST SUITE: None
USER-SUPPLIED VALUES:
{}

COMPUTED VALUES:
affinity: {}
autoscaling:
  enabled: false
  maxReplicas: 100
  minReplicas: 1
  targetCPUUtilizationPercentage: 80
fullnameOverride: ""
image:
  pullPolicy: IfNotPresent
  repository: nginx
  tag: ""
...
---
# Source: example-chart/templates/configmap.yaml
apiVersion: v1
kind: ConfigMap
metadata:
  name: nginx-configmap
data:
  index.html: "Hello, World"
[/simterm]
Okay – no errors, install it now:
[simterm]
$ helm install example-chart example-chart/
NAME: example-chart
LAST DEPLOYED: Sun May  3 13:20:52 2020
NAMESPACE: default
STATUS: deployed
REVISION: 1
TEST SUITE: None
[/simterm]
Check its status:
[simterm]
$ helm get manifest example-chart
---
# Source: example-chart/templates/configmap.yaml
apiVersion: v1
kind: ConfigMap
metadata:
  name: nginx-configmap
data:
  index.html: "Hello, World"
[/simterm]
And check with the kubectl:
[simterm]
$ kubectl describe cm nginx-configmap
Name:         nginx-configmap
Namespace:    default
Labels:       app.kubernetes.io/managed-by=Helm
Annotations:  meta.helm.sh/release-name: example-chart
              meta.helm.sh/release-namespace: default

Data
====
index.html:
----
Hello, World
[/simterm]
chart uninstall
In the same way, you can delete a chart – use helm uninstall and a release name:
[simterm]
$ helm uninstall example-chart
release "example-chart" uninstalled
[/simterm]
Template variables
Okay – everything seems to be working, but we have static data in our ConfgiMap with hardcoded values.
Let’s change it and apply the template engine.
For helm, you can use a set of pre-defined variables like Release.Name, see the full list in the documentation.
Редактируем шаблон нашего ConfigMap:
apiVersion: v1
kind: ConfigMap
metadata:
  name: {{ .Release.Name }}-configmap
data:
  index.html: "Hello, World"
Next, add own variables – remove the values.yaml:
[simterm]
$ rm example-chart/values.yaml
[/simterm]
And create it over but with the only one line – user: "Username":
user: "Username"
Now, you can use it in the template via .Values.user:
apiVersion: v1
kind: ConfigMap
metadata:
  name: {{ .Release.Name }}-configmap
data:
  index.html: "Hello, {{ .Values.user }}"
The .Values told to Helm to use the values,yaml to take the user variables’ value.
Apply:
[simterm]
$ helm install example-chart example-chart/
NAME: example-chart
LAST DEPLOYED: Sun May  3 13:35:49 2020
NAMESPACE: default
STATUS: deployed
REVISION: 1
TEST SUITE: None
[/simterm]
Check:
[simterm]
$ kubectl get cm
NAME                      DATA   AGE
example-chart-configmap   1      31s
[/simterm]
Content:
[simterm]
$ kubectl describe cm example-chart-configmap
Name:         example-chart-configmap
Namespace:    default
Labels:       app.kubernetes.io/managed-by=Helm
Annotations:  meta.helm.sh/release-name: example-chart
              meta.helm.sh/release-namespace: default

Data
====
index.html:
----
Hello, Username
[/simterm]
chart upgrade
Okay, but what if we want to change the Username string?
You can delete the whole release and redeploy it with changed value in the values.yaml, or specify it directly with the --set option:
[simterm]
$ helm uninstall example-chart
release "example-chart" uninstalled

$ helm install example-chart example-chart/ --set user=NewUser
[/simterm]
Check:
[simterm]
$ kubectl describe cm example-chart-configmap
...
Data
====
index.html:
----
Hello, NewUser
[/simterm]
Another way is to use the helm upgrade with the release name and new value:
[simterm]
$ helm upgrade example-chart example-chart/ --set user=AnotherOneUser
Release "example-chart" has been upgraded. Happy Helming!
...
[/simterm]
The result is:
[simterm]
$ kubectl describe cm example-chart-configmap
...
Data
====
index.html:
----
Hello, AnotherOneUser
[/simterm]
helm package
To be able to share our chart with colleagues we can pack it to a tgz-file.
Use the helm package, which will create a new file named chart-name-chart-verstion.tgz.
The version helm will get from the chart’s metadata:
[simterm]
$ cat example-chart/Chart.yaml | grep  version:
version: 0.1.0
[/simterm]
Pack it:
[simterm]
$ helm  package example-chart/
Successfully packaged chart and saved it to: /home/setevoy/Work/RTFM/example-chart-0.1.0.tgz
[/simterm]
Check the archive’s content:
[simterm]
$ tar tf example-chart-0.1.0.tgz
example-chart/Chart.yaml
example-chart/values.yaml
example-chart/templates/configmap.yaml
example-chart/.helmignore
[/simterm]
Helm repositories
To share our packed charts the Helm repositories are used.
Earlier, you could use the helm serve to create one, but it was removed in Helm v3.
Now to work with repositories use the helm repo.
By default you’ll have already added repo from Google:
[simterm]
$ helm repo list
NAME    URL
stable  https://kubernetes-charts.storage.googleapis.com/
[/simterm]
Running local Helm repo
To create own repository – it;’s enough to execute helm package for a chart, then generate the index.yaml file in a directory used to store the chart’s archive.
As a backend-storage you can use almost anything – starting with Github Pages, and to AWS S3, see The Chart Repository Guide.
Here is an example of how to run a local Helm repository.
Create a directory, move your archived chart into it:
[simterm]
$ mkdir helm-local-repo
$ mv example-chart-0.1.0.tgz helm-local-repo/
[/simterm]
Initialize the repository:
[simterm]
$ helm repo index helm-local-repo/
[/simterm]
Check its content:
[simterm]
$ tree helm-local-repo/
helm-local-repo/
|-- example-chart-0.1.0.tgz
`-- index.yaml
[/simterm]
To get access to it – run a web-server, for example, a common NGINX:
[simterm]
$ sudo docker run -ti -v $(pwd)/helm-local-repo/:/usr/share/nginx/html -p 80:80 nginx
[/simterm]
Check connection:
[simterm]
$ curl localhost/index.yaml
apiVersion: v1
entries:
  example-chart:
  - apiVersion: v2
    appVersion: 1.16.0
    created: "2020-05-03T14:04:44.896115358+03:00"
    description: A Helm chart for Kubernetes
    digest: afa314247a03c4c85f339bda665659f3ab13a5e8656336e14ed37ed7f31b5352
    name: example-chart
    type: application
    urls:
    - example-chart-0.1.0.tgz
    version: 0.1.0
generated: "2020-05-03T14:04:44.895678349+03:00"
[/simterm]
Add this repository to your local Helm:
[simterm]
$ helm repo add example-chart http://localhost
"example-chart" has been added to your repositories
[/simterm]
Check:
[simterm]
$ helm repo list
NAME            URL
stable          https://kubernetes-charts.storage.googleapis.com/
example-chart   http://localhost
[/simterm]
Try to search for a chart:
[simterm]
$ helm search repo example
NAME                            CHART VERSION   APP VERSION     DESCRIPTION
example-chart/example-chart     0.1.0           1.16.0          A Helm chart for Kubernetes
[/simterm]
Install it:
[simterm]
$ helm install example-chart-from-repo example-chart/example-chart
NAME: example-chart-from-repo
LAST DEPLOYED: Sun May  3 14:15:51 2020
NAMESPACE: default
STATUS: deployed
[/simterm]
Check in the Kubernetes cluster:
[simterm]
$ kubectl get cm
NAME                                DATA   AGE
example-chart-configmap             1      34m
example-chart-from-repo-configmap   1      22s
[/simterm]
That’s all in general.


