Another cool feature that Amazon showed back at the last re:Invent in November 2023 is changes in how AWS Elastic Kubernetes Service authenticates and authorizes users. And this applies not only to the cluster’s users, but also to its WorkerNodes.
I mean, it’s not really a new scheme (November 2023) – but I just now got around to upgrading the cluster from 1.28 to 1.30, and at the same time I will update the version of the terraform-aws-modules/eks with the EKS Access Management API changes, as we are currently on version 19 and the changes were added in version 20 (see v20.0.0 Release notes).
We will probably talk about Terraform in the next post, but today let’s see how the new system works and what it allows us to do. And knowing this, will go to the Terraform, and will think about how to organize work with IAM, considering the changes in the EKS Access Management API and EKS Pod Identities.
In general, you can still see old posts on authentication/authorization in Kubernetes:
- Kubernetes: part 4 – AWS EKS authentication, aws-iam-authenticator and AWS IAM
- AWS Elastic Kubernetes Service: RBAC Authorization via AWS IAM and RBAC Groups
- AWS: EKS, OpenID Connect, and ServiceAccounts
Contents
How does it work?
Previously, we had a special aws-auth ConfigMap that described WorkerNodes IAM Roles, all our users, roles, and groups.
From now on, we can manage access to EKS directly through the EKS API using AWS IAM as an authenticator. That is, the user logs in to AWS, AWS performs authentication – checks that it is the user he or she claims to be, and then, when the user connects to Kubernetes, the Kubernetes performs authorization – checking permissions to the cluster, and in the cluster itself.
At the same time, this scheme works perfectly with Kubernetes’ RBAC.
And another significant detail is that we can finally get rid of the “default root user” – the hidden cluster administrator on whose behalf it was created. And before, we couldn’t see or change it anywhere, which sometimes caused problems.
So, if earlier we had to manage the entries in the aws-auth ConfigMap ourselves, and God forbid it should be broken (that happened to me because a few times), now we can move access control to a dedicated Terraform code, and access control is much easier and less risky.
Changes in IAM and EKS
Since now, we have two new objects – Access entries and Access policies:
- Amazon EKS Access Entries – an entry in EKS about an object that is associated with an AWS IAM role or user
- describes the type (a regular user, EC2, etc.), Kubernetes RBAC Groups, or EKS Access Policy
- Amazon EKS Access Policy – a policy in EKS that describes the permissions for EKS Access Entries. And these are EKS policies – you won’t find them in IAM.
Currently, there are 4 EKS Access Policies that we can use, and they are similar to the default ones User-facing ClusterRoles в Kubernetes :
AmazonEKSClusterAdminPolicy– cluster-adminAmazonEKSAdminPolicy– adminAmazonEKSEditPolicy– editAmazonEKSViewPolicy– view
I guess that somewhere under the hood, these EKS Access Policies are simply mapped to Kubernetes ClusterRoles.
We connect these policies to the IAM Role or IAM user, and when connecting to the Kubernetes cluster, EKS Authorizer checks which permissions this user has.
Schematically, this can be represented as follows:
Or this scheme, from the AWS A deep dive into simplified Amazon EKS access management controls blog:
Instead of the default AWS managed IAM Policy, when creating an EKS Access Policy, we can specify a name of a Kubernetes RBAC Group, and then the Kubernetes RBAC mechanism will be used instead of the EKS Authorizer – we’ll see how it works is this post.
For Terraform, in the terraform-provider-aws version 5.33.0 were added two new corresponding resource types – aws_eks_access_entry and aws_eks_access_policy_association. But now we will do everything manually.
Configuring the Cluster access management API
We will check how it works on an existing cluster version 1.28.
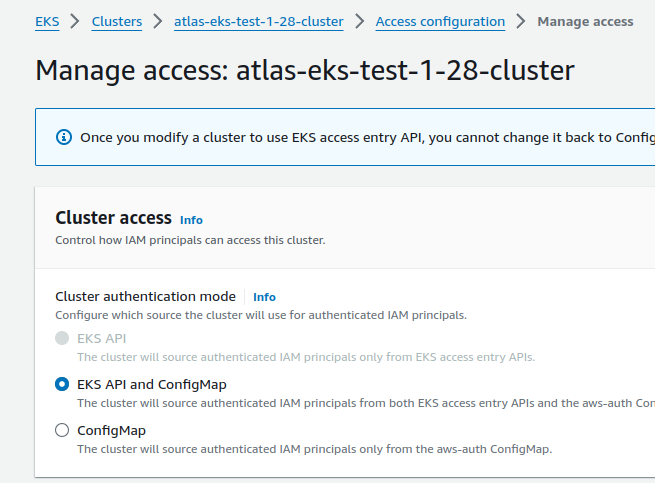
Open the cluster settings, the Access tab, click on the Manage access button:
Here, we have the ConfigMap enabled (the aws-auth) – change it to EKS API and ConfigMap. This way we will keep the old mechanism and can test the new one (you can also do this in Terraform):
Note the warning: “Once you modify a cluster to use the EKS access entry API, you cannot change it back to ConfigMap only“. But terraform-aws-modules/eks version 19.21 ignores these changes and works fine, so you can change it here.
Now, the cluster will authorize users from both aws-auth ConfigMap and EKS Access Entry API, with preference for the Access Entry API.
After switching to the EKS Access Entry API, we immediately have new EKS Access Entries:
And only now we can see the “hidden root user” mentioned above – the assumed-role/tf-admin in my case, because Terraform works by using that IAM role, and in my setup it was done exactly because of this AWS/EKS mechanism, which can now be removed.
But not everything is taken from the current aws-auth ConfigMap: the role for WorkerNodes is there, but the rest of the entries (users from mapUsers and roles from mapRoles) are not automatically added. Although when you change the API_AND_CONFIG_MAP parameter through Terraform, it seems to happen – we’ll check later.
Adding a new IAM User to the EKS cluster
You can check existing EKS Access Entries from the AWS CLI with the aws eks list-access-entries command:
$ aws --profile work eks list-access-entries --cluster-name atlas-eks-test-1-28-cluster
{
    "accessEntries": [
        "arn:aws:iam::492***148:role/test-1-28-default-eks-node-group-20240702094849283200000002",
        "arn:aws:iam::492***148:role/tf-admin"
    ]
}
Let’s add a new IAM User with access to the cluster.
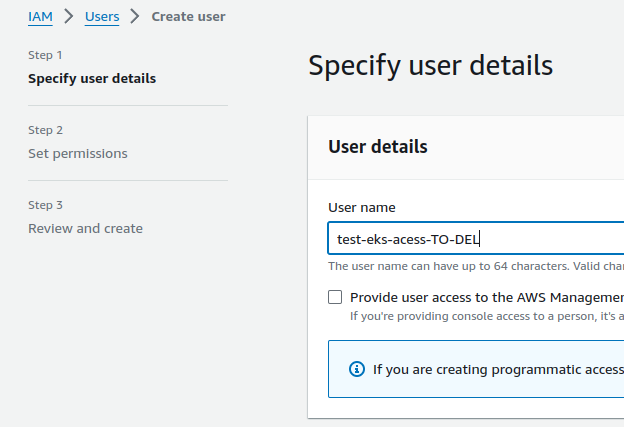
Create the user:
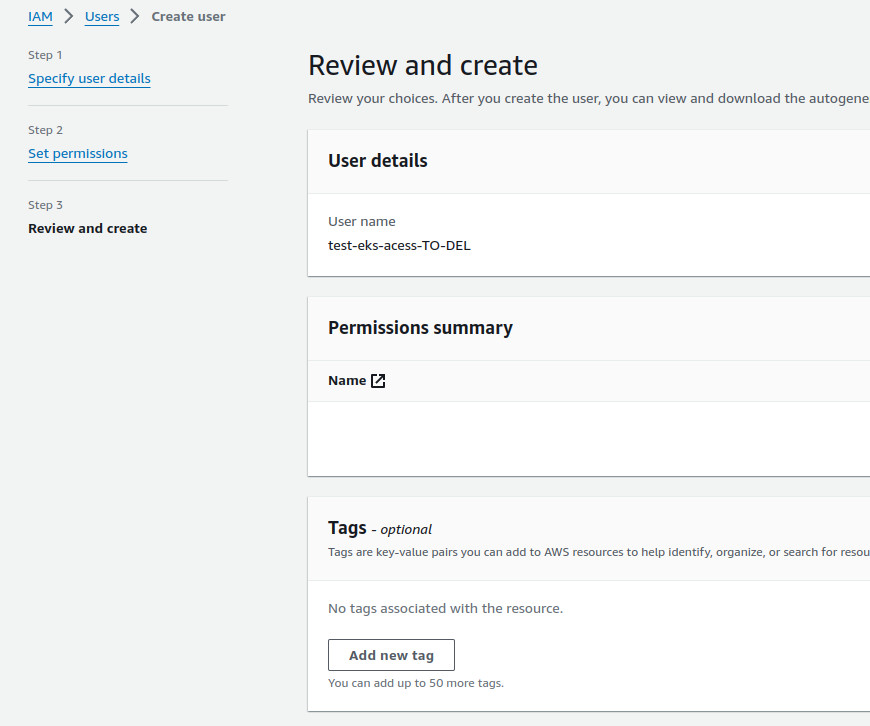
In Set permissions, don’t select anything, just click Next:
Create an Access Key – we will use this user from the AWS CLI to generate the kubectl config:
Add permission to eks:DescribeCluster:
{
  "Version": "2012-10-17",
  "Statement": [
    {
      "Sid": "Statement1",
      "Effect": "Allow",
      "Action": ["eks:DescribeCluster"],
      "Resource": ["*"]
    }
  ]
}
Save and create a new AWS CLI profile:
$ vim -p ~/.aws/config ~/.aws/credentials
Add the profile to ~/.aws/config:
[profile test-eks]
region = us-east-1
output = json
And the keys to the ~/.aws/credentials:
[test-eks]
aws_access_key_id = AKI***IMN
aws_secret_access_key = Kdh***7wP
Create a new kubectl context:
$ aws --profile test-eks eks update-kubeconfig --name atlas-eks-test-1-28-cluster --alias test-cluster-test-user
Updated context test-cluster-test-user in /home/setevoy/.kube/config
We’re done with the IAM User, and now we need to connect it to the EKS cluster.
EKS: adding an Access Entry
We can do it either through the AWS Console:
Or with the AWS CLI (with a working profile, not a new one, because it has no rights) and the aws eks create-access-entry command.
In the parameters, pass the cluster name and the ARN of the IAM User or IAM Role that we are connecting to the cluster (but it would probably be more correct to say “for which we are creating an entry point to the cluster“, because the entity is called Access Entry):
$ aws --profile work eks create-access-entry --cluster-name atlas-eks-test-1-28-cluster --principal-arn arn:aws:iam::492***148:user/test-eks-acess-TO-DEL
{
    "accessEntry": {
        "clusterName": "atlas-eks-test-1-28-cluster",
        "principalArn": "arn:aws:iam::492***148:user/test-eks-acess-TO-DEL",
        "kubernetesGroups": [],
        "accessEntryArn": "arn:aws:eks:us-east-1:492***148:access-entry/atlas-eks-test-1-28-cluster/user/492***148/test-eks-acess-TO-DEL/98c8398d-9494-c9f3-2bfc-86e07086c655",
        ...
        "username": "arn:aws:iam::492***148:user/test-eks-acess-TO-DEL",
        "type": "STANDARD"
    }
}
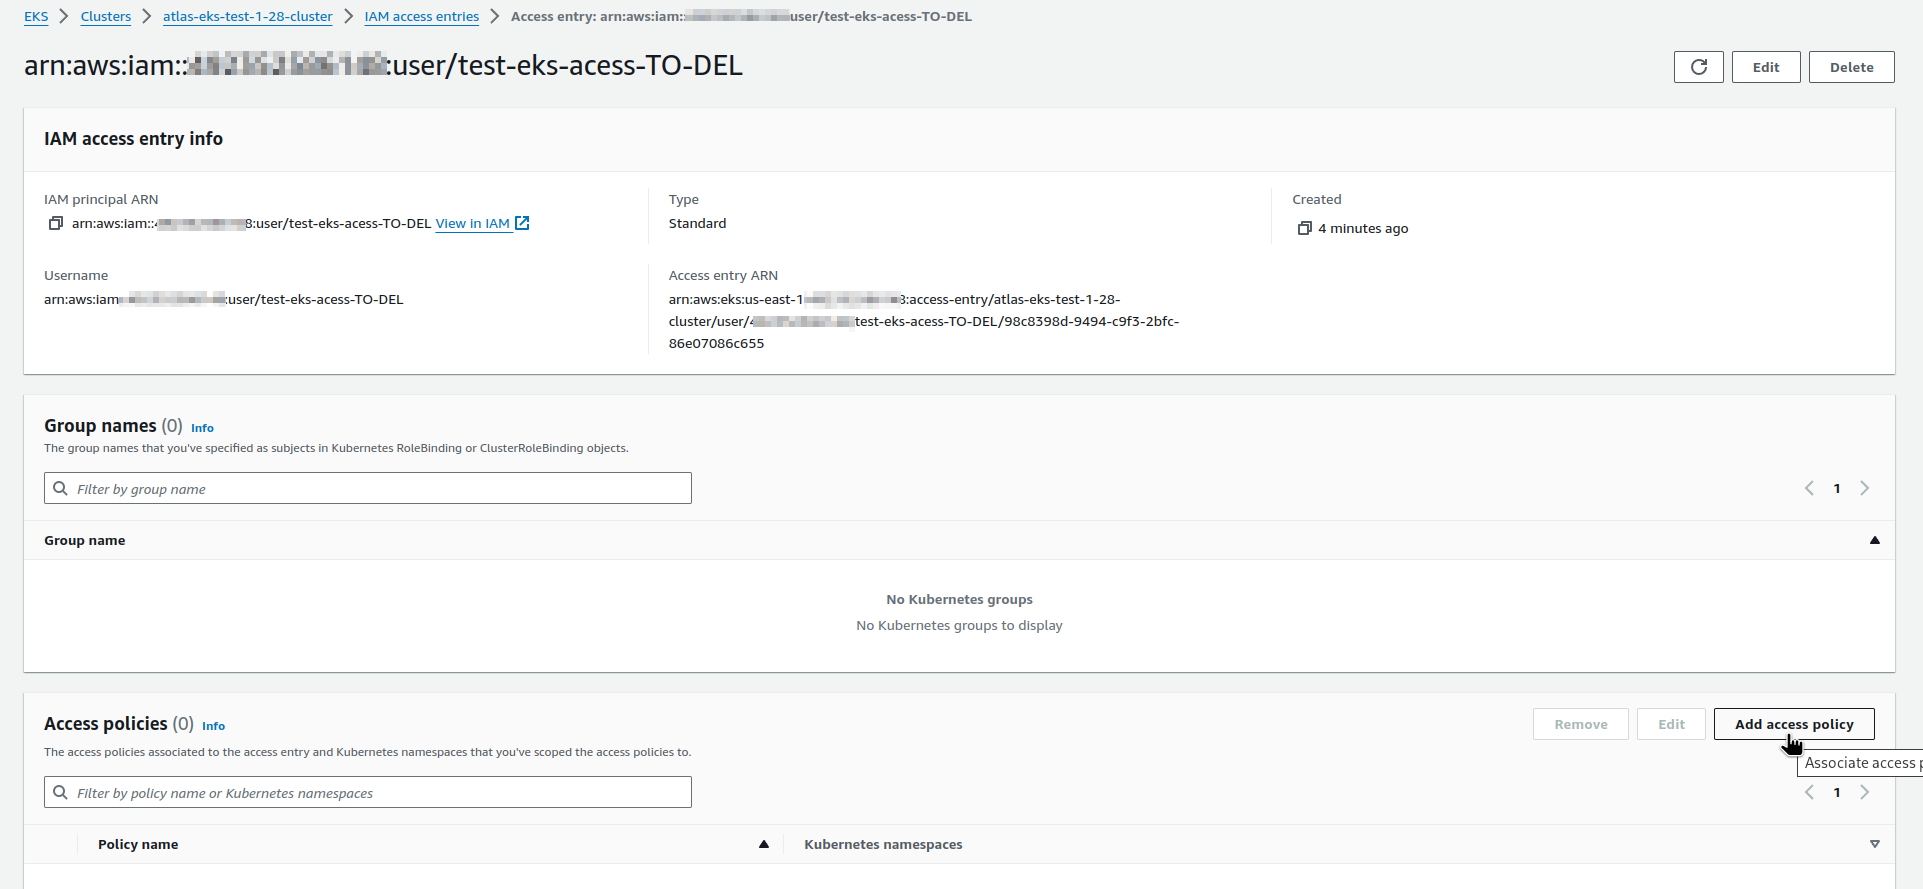
Let’s take another look at the AWS Console:
A new Entry is added, moving on.
Adding an EKS Access Policy
Now we still don’t have access to the cluster with the new user, because there is no EKS Policy connected to it – the Access policies field is empty.
Check with the kubectl auth can-i:
$ kubectl auth can-i get pod
no
You can add an EKS Access Policy in the AWS Console:
Or again, with the AWS CLI and the aws eks associate-access-policy command.
Let’s add the AmazonEKSViewPolicy for now:
$ aws --profile work eks associate-access-policy --cluster-name atlas-eks-test-1-28-cluster \
> --principal-arn arn:aws:iam::492***148:user/test-eks-acess-TO-DEL \
> --policy-arn arn:aws:eks::aws:cluster-access-policy/AmazonEKSViewPolicy \
> --access-scope type=cluster
{
    "clusterName": "atlas-eks-test-1-28-cluster",
    "principalArn": "arn:aws:iam::492***148:user/test-eks-acess-TO-DEL",
    "associatedAccessPolicy": {
        "policyArn": "arn:aws:eks::aws:cluster-access-policy/AmazonEKSViewPolicy",
        "accessScope": {
            "type": "cluster",
            "namespaces": []
        },
    ...
}
Pay attention to the --access-scope type=cluster – now we have granted the ReadOnly rights to the entire cluster, but we can limit it to a specific namespace(s), will try it later in this post.
Check the Policies in the AWS Console:
The Access Policy is added
Check with the kubectl:
$ kubectl auth can-i get pod
yes
But we can’t create a Kubernetes Pod because we have ReadOnly rights:
$ kubectl auth can-i create pod
no
Other useful commands for the AWS CLI:
Removing the EKS default root user
In the future, you can disable the creation of such a user when creating a cluster with aws eks create-cluster by setting bootstrapClusterCreatorAdminPermissions=false.
Now let’s replace it – give our test user admin permissions, and remove the default root user.
Run again aws eks associate-access-policy, but now in the --policy-arn we specify the AmazonEKSClusterAdminPolicy:
$ aws --profile work eks associate-access-policy --cluster-name atlas-eks-test-1-28-cluster \
> --principal-arn arn:aws:iam::492***148:user/test-eks-acess-TO-DEL \
> --policy-arn arn:aws:eks::aws:cluster-access-policy/AmazonEKSClusterAdminPolicy \
> --access-scope type=cluster
What about the permissions?
$ kubectl auth can-i create pod
yes
Good, we can anything.
Also, now we have two cluster-admins:
And we can delete the old one:
$ aws --profile work eks delete-access-entry --cluster-name atlas-eks-test-1-28-cluster --principal-arn arn:aws:iam::492***148:role/tf-admin
Namespaced EKS Access Entry
Instead of granting permissions to the entire cluster with the --access-scope type=cluster, we can make a user an admin only in specific namespaces.
Let’s take another regular IAM User and make him an admin in an only one Kubernetes Namespace.
Create a new namespace:
$ kk create ns test-ns
namespace/test-ns created
Create a new EKS Access Entry for my AWS IAM User:
$ aws --profile work eks create-access-entry --cluster-name atlas-eks-test-1-28-cluster --principal-arn arn:aws:iam::492***148:user/arseny
And connect the AmazonEKSEditPolicy, but in the --access-scope we set the type namespace and specify the name of the namespace:
$ aws --profile work eks associate-access-policy --cluster-name atlas-eks-test-1-28-cluster \
> --principal-arn arn:aws:iam::492***148:user/arseny \
> --policy-arn arn:aws:eks::aws:cluster-access-policy/AmazonEKSEditPolicy \
> --access-scope type=namespace,namespaces=test-ns
In the access-scope we can specify either clutser or namespace. Not very flexible – but for flexibility we have the Kubernetes RBAC.
Generate a new kubectl context from the --profile work, where profile work is my regular AWS User for which we created an EKS Access Entry with AmazonEKSEditPolicy:
$ aws --profile work eks update-kubeconfig --name atlas-eks-test-1-28-cluster --alias test-cluster-arseny-user
Updated context test-cluster-arseny-user in /home/setevoy/.kube/config
Check the active kubectl context:
$ kubectl config current-context
test-cluster-arseny-user
And check the permissions.
First in the default Namespace:
$ kubectl --namespace default auth can-i create pod
no
And in a testing namespace:
$ kubectl --namespace test-ns auth can-i create pod
yes
Nice!
“It works!” (c)
EKS Access Entry, and Kubernetes RBAC
Instead of connecting AWS’s EKS Access Policy, of which there are only four, we can use the common Kubernetes Role-Based Access Control, RBAC.
Then, it will look like the following:
- in EKS, create an Access Entry
- in the Access Entry parameters, specify the Kubernetes RBAC Group
- and then, as usual, we use RBAC Group and Kubernetes RoleBinding
Then we’ll authenticate with AWS, after which AWS will “pass us over” to Kubernetes, and it will perform authorization – checking our permissions in the cluster – based on our RBAC group.
Delete the created Access Entry for my IAM User:
$ aws --profile work eks delete-access-entry --cluster-name atlas-eks-test-1-28-cluster --principal-arn arn:aws:iam::492***148:user/arseny
Create it again, but now add the --kubernetes-groups parameter:
$ aws --profile work eks create-access-entry --cluster-name atlas-eks-test-1-28-cluster \
> --principal-arn arn:aws:iam::492***148:user/arseny \
> --kubernetes-groups test-eks-rbac-group
Check in the AWS Console:
Check the permissions with kubectl:
$ kubectl --namespace test-ns auth can-i create pod
no
Because we didn’t add an EKS Access Policy, and we didn’t do anything in RBAC.
Let’s create a manifest with a RoleBinding, and bind the RBAC group test-eks-rbac-group to the default Kubernetes edit ClusterRole:
apiVersion: rbac.authorization.k8s.io/v1
kind: RoleBinding
metadata:
  name: test-eks-rbac-binding
roleRef:
  apiGroup: rbac.authorization.k8s.io
  kind: ClusterRole
  name: edit
subjects:
- apiGroup: rbac.authorization.k8s.io
  kind: Group
  name: test-eks-rbac-group
Switch the kubectl context to our admin (I use kubectx for this):
$ kx
✔ Switched to context "test-cluster-test-user".
And create a RoleBinding in the test-ns namespace to give the Edit permissions for our user only in this namespace:
$ kubectl --namespace test-ns apply -f test-rbac.yml
rolebinding.rbac.authorization.k8s.io/test-eks-rbac-binding created
Switch to the arseny user:
$ kx
✔ Switched to context "test-cluster-arseny-user".
And again, check the permissions in two namespaces:
$ kubectl --namespace default auth can-i create pod
no

$ kubectl --namespace test-ns auth can-i create pod
yes
RBAC is working.
So now, we have seen how the Access Management API mechanism works, we have seen its main features in action, and now we can move on to Terraform. This will be my next post.


