 We got a new instance, a hardware server that will run our self-hosted LLMs.
The server will run NixOS – not my choice, but the system looks interesting. I’ve been hearing about it for a long time, and now I have a great opportunity to get familiar with it.
For now, my part is only to set up monitoring: the usual CPU/RAM/disks, NVIDIA metrics, and later the LLM runtime, which will most likely be SGLang.
And the first thing to figure out is how to install packages in NixOS and how to configure the system in general.
I won’t go deep into how all of this is organized in NixOS – this post is mostly practical, with examples, and also a HowTo for myself later.
What we’ll do:
- create a virtual machine in VirtualBox and install NixOS there
- take a look at the main configuration files and how to install new packages
- then write the configuration for our existing physical server
- and see how to deploy these changes over SSH
A quick spoiler – the system is actually pretty cool: keeping all configuration in GitHub, making every change through pull requests, and deploying to a remote host over SSH looks really nice. Kind of like “Ansible out of the box”, plus all sorts of rollback options.
Contents
NixOS on VirtualBox
Everything is standard here – download the ISO from the NixOS: the Linux distribution page and attach it to the virtual machine.
To access VirtualBox over SSH with NAT, add port forwarding:
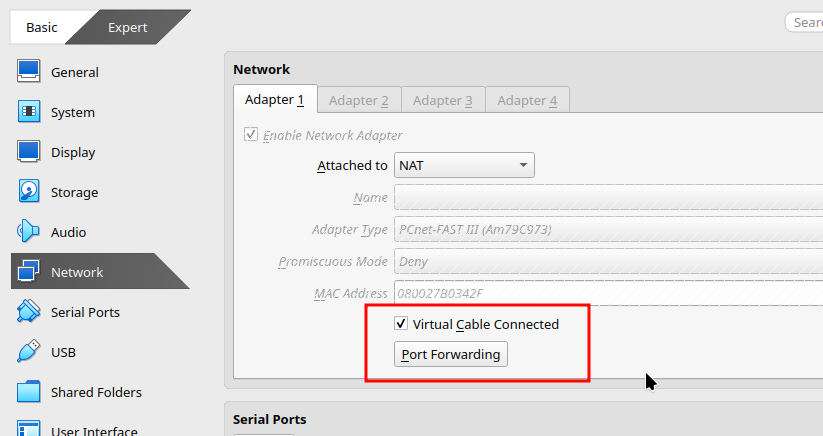
And add a rule forwarding port 2222 on the host to port 22 in the virtual machine:

Installing NixOS
The installation is very similar to Arch Linux – minimalistic, with no interactive installers, so we do everything manually.
Start the virtual machine and boot into the installer:
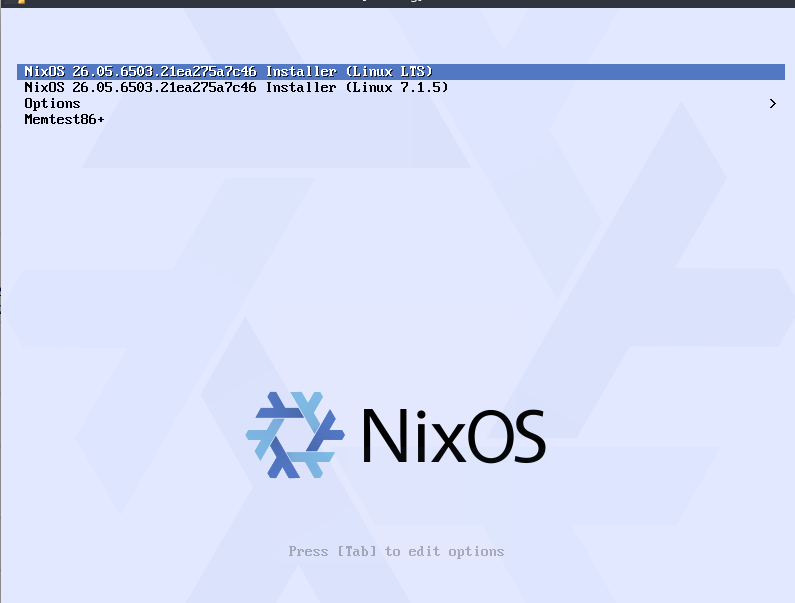
Boot into the Live environment, set the root password and enable SSH – everything is standard here, using systemd:
# passwd
# systemctl start sshd
# systemctl status sshd
Connect from the host:
[setevoy@setevoy-work ~] $ ssh -p 2222 root@localhost
...
(root@localhost) Password:

[root@nixos:~]#
Check the disks:
[root@nixos:~]# lsblk
NAME  MAJ:MIN RM  SIZE RO TYPE MOUNTPOINTS
loop0   7:0    0  1.5G  1 loop /nix/.ro-store
sda     8:0    0   20G  0 disk
sr0    11:0    1  1.6G  1 rom  /iso
Create a partition on /dev/sda:
[root@nixos:~]# parted /dev/sda -- mklabel msdos
Information: You may need to update /etc/fstab.


[root@nixos:~]# parted /dev/sda -- mkpart primary ext4 1MiB 100%
Information: You may need to update /etc/fstab.


[root@nixos:~]# parted /dev/sda -- set 1 boot on
Information: You may need to update /etc/fstab.
Create a filesystem on /dev/sda1:
[root@nixos:~]# mkfs.ext4 -L nixos /dev/sda1
Check it:
[root@nixos:~]# lsblk -f /dev/sda1
NAME FSTYPE FSVER LABEL UUID                                 FSAVAIL FSUSE% MOUNTPOINTS
sda1 ext4   1.0   nixos 2090a4d7-d0c3-42d8-bd3b-43e032906e9c
Mount it to /mnt:
[root@nixos:~]# mount /dev/disk/by-label/nixos /mnt
Use nixos-generate-config to generate the base system configuration:
[root@nixos:~]# nixos-generate-config --root /mnt
writing /mnt/etc/nixos/hardware-configuration.nix...
writing /mnt/etc/nixos/configuration.nix...
Check the contents of the hardware-configuration.nix file. The interesting part here is the fileSystems block, which NixOS uses to configure the system’s filesystems and mount points:
[root@nixos:~]# cat /mnt/etc/nixos/hardware-configuration.nix
# Do not modify this file!  It was generated by ‘nixos-generate-config’
# and may be overwritten by future invocations.  Please make changes
# to /etc/nixos/configuration.nix instead.
{ config, lib, pkgs, modulesPath, ... }:

{
  imports = [ ];

  boot.initrd.availableKernelModules = [ "ata_piix" "ohci_pci" "ehci_pci" "sd_mod" "sr_mod" ];
  boot.initrd.kernelModules = [ ];
  boot.kernelModules = [ "kvm-amd" ];
  boot.extraModulePackages = [ ];

  fileSystems."/" =
    { device = "/dev/disk/by-uuid/97f9af58-4659-40c3-ae99-5ecf780f499f";
      fsType = "ext4";
    };

  swapDevices = [ ];

  nixpkgs.hostPlatform = lib.mkDefault "x86_64-linux";
  virtualisation.virtualbox.guest.enable = true;
}
configuration.nix – GRUB, Users and Services
Edit the /mnt/etc/nixos/configuration.nix file and add the boot options if they are not already there.
You can find descriptions of all options on search.nixos.org, for example boot.loader.grub.enable.
For this virtual machine and MBR, enable GRUB and set grub.device to the root disk /dev/sda:
...

  boot.loader.grub.enable = true;
  boot.loader.grub.devices = [ "/dev/sda" ];

...
In the same file, we can define system users with users.users. Add this at the end of the file before the closing “}“. Indentation does not matter here; it is only for readability:
  users.users.setevoy = {
    isNormalUser = true;
    extraGroups = [ "wheel" ];
  };
Enable the SSH service:
  ..
  services.openssh.enable = true;
}
Start the installation:
# nixos-install
...
setting root password...
New password:
Retype new password:
passwd: password updated successfully
installation finished!
Set a password for the setevoy user, although we could have configured it directly with the initialPassword or initialHashedPassword options:
[root@nixos:~]# nixos-enter --root /mnt
setting up /etc...

[root@nixos:/]# passwd setevoy
New password:
Retype new password:
passwd: password updated successfully
Reboot the virtual machine, and the system is ready to use:
Installing packages – nixos-rebuild and nix-shell
I did not add vim to the configuration, so let’s install it separately and see how to add new packages to the system in general.
With nix-shell, we can start a separate temporary shell with the vim package available right away (although nix-shell seems to be legacy now, and we can use nix shell nixpkgs#vim instead):
[root@nixos:~]# nix-shell -p vim
these 2 paths will be fetched (12.4 MiB download, 43.2 MiB unpacked):
  /nix/store/b0ga0wazy69p0264ki9jaxd5wqxyvcm4-stdenv-linux
  /nix/store/39shwxhbkgnfr9qfysmwby7ma1rcckp0-vim-9.2.0541
copying path '/nix/store/b0ga0wazy69p0264ki9jaxd5wqxyvcm4-stdenv-linux' from 'https://cache.nixos.org'...
copying path '/nix/store/39shwxhbkgnfr9qfysmwby7ma1rcckp0-vim-9.2.0541' from 'https://cache.nixos.org'...

[nix-shell:~]#
Installing vim
To make vim permanently available in the system, edit /etc/nixos/configuration.nix and use environment.systemPackages to add everything we need:
environment.systemPackages = with pkgs; [
  vim
  git
  curl
];
Since we are working on an already installed system, apply the changes with nixos-rebuild. It will read all changes from the configuration files and install the packages:
[root@nixos:~]# nixos-rebuild switch
building the system configuration...
...
Done. The new configuration is /nix/store/q7m7yygrwgr710iyhhi7yq01hjm753r1-nixos-system-nixos-26.05.6503.21ea275a7c46
System change history and rollback
The switch option for nixos-rebuild creates a new system generation – a separate configuration set for every change we make to the system.
Use nix-env --list-generations to view the change history:
[root@nixos:~]# sudo nix-env --list-generations --profile /nix/var/nix/profiles/system
   1   2026-07-31 13:33:51
   2   2026-07-31 13:53:21
   3   2026-07-31 14:42:43   (current)
And use nixos-rebuild switch --rollback to roll back to the previous one.
Looks great, although I haven’t tested rollback yet.
Installing node_exporter
We installed vim with environment.systemPackages, but in this case Nix only installs the binary itself and adds it to $PATH.
To add a proper system service with systemd configuration, ports, firewall rules and autostart, Node Exporter has a dedicated services.prometheus.exporters.node submodule.
All Prometheus exporters are defined in exporters.nix, while node_exporter itself is imported from node.nix.
Nix will fetch the package from cache.nixos.org if a binary substitute is available, and you can search for other packages on search.nixos.org/packages.
Edit /etc/nixos/configuration.nix: enable node_exporter, allow access through the firewall, and for now enable one systemd collector (see Node Exporter > Collectors):
services.prometheus.exporters.node = {
  enable = true;
  port = 9100;
  openFirewall = true;
  enabledCollectors = [ "systemd" ];
};
Use nixos-option to check whether an option is enabled, for example the firewall:
[root@nixos:~]# nixos-option networking.firewall.enable
Value:
  true

Default:
  true
...
Run nixos-rebuild switch again, but this time the build fails with “SIGKILL 9“:
[root@nixos:~]# nixos-rebuild switch
building the system configuration...
evaluation warning: `boot.zfs.forceImportRoot` is using the default value of `true`. It is highly recommended to set it to `false`, the new default from 26.11 on, to reduce the risk of data loss. Alternatively, you can silence this warning by explicitly setting it to `true`.
Command 'nix-build '<nixpkgs/nixos>' --attr config.system.build.toplevel --no-out-link' died with <Signals.SIGKILL: 9>.
Check the logs:
[root@nixos:~]# journalctl -k -b | grep -iE 'out of memory|oom|killed process' | tail -20
Jul 31 13:35:49 nixos systemd[1]: Listening on Userspace Out-Of-Memory (OOM) Killer Socket.
...
Jul 31 13:42:56 nixos kernel: Out of memory: Killed process 1048 (nix-build) total-vm:1072896kB, anon-rss:876128kB, file-rss:292kB, shmem-rss:256kB, UID:0 pgtables:1912kB oom_score_adj:0
Add more memory to the virtual machine because I gave it 2 GB, and that wasn’t enough ¯\_(ツ)_/¯
After the installation, check the service:
[root@nixos:~]# systemctl status prometheus-node-exporter
● prometheus-node-exporter.service
     Loaded: loaded (/etc/systemd/system/prometheus-node-exporter.service; enabled; preset: ignored)
     Active: active (running) since Fri 2026-07-31 14:42:44 UTC; 44s ago
And the metrics:
[root@nixos:~]# curl -s http://localhost:9100/metrics | grep node_ | head
# HELP node_arp_entries ARP entries by device
# TYPE node_arp_entries gauge
node_arp_entries{device="enp0s3"} 2
# HELP node_boot_time_seconds Node boot time, in unixtime.
# TYPE node_boot_time_seconds gauge
node_boot_time_seconds 1.785505763e+09
# HELP node_context_switches_total Total number of context switches.
# TYPE node_context_switches_total counter
node_context_switches_total 344789
# HELP node_cooling_device_cur_state Current throttle state of the cooling device
That’s it for the virtual machine.
Now we can prepare the deployment to the real host.
NixOS Flakes and the real project
What we need to do is add Node Exporter to our real server and change the network settings, because it currently uses DHCP and I need a static configuration.
To understand where to make changes in the repository, here is a quick overview of its file structure:
[setevoy@setevoy-work ~] $ tree .
.
├── flake.lock
├── flake.nix
├── hosts
│   └── matrix
│       ├── default.nix
│       ├── disko.nix
│       ├── hardware.nix
│       ├── monitoring.nix
│       ├── networking.nix
│       └── nvidia.nix
This project uses a Flake – a structured format for files and the definitions inside them.
The files are:
flake.nix: the main entry point that defines dependencies and system configurationsflake.lock: dependency versionshosts/matrix/default.nix: configuration for a specific server (hostname=”matrix”)- other
*.nixfiles: modules for this server
The flake.nix file contains the inputs block with external dependencies such as Git repositories, while imports are used to include additional local modules where we will add our configuration.
We need to create the hosts/matrix/monitoring.nix file, include it in the imports of hosts/matrix/default.nix, validate everything and deploy it.
Creating monitoring.nix
Add the monitoring.nix file and define the same prometheus.exporters.node configuration we used in the tests above:
{...}: {
  services.prometheus.exporters.node = {
    enable = true;
    port = 9100;
    openFirewall = true;
    enabledCollectors = ["systemd"];
  };
}
Because this is a Flake with the git type, the new monitoring.nix file must be added to the Git index. Otherwise, Nix will return the error “error: Path ‘hosts/matrix/monitoring.nix’ … is not tracked by Git“.
Add it:
[setevoy@setevoy-work ~] $ git add hosts/matrix/monitoring.nix hosts/matrix/default.nix
default.nix and imports []
Add our new monitoring.nix file to the imports[] block in default.nix.
The order does not matter, but alphabetical is better:
imports = [
  ./disko.nix
  ./hardware.nix
  ./monitoring.nix
  ./networking.nix
  ./nvidia.nix
];
Nix on Arch Linux
This turned out to be really nice – you can install Nix on any Linux system and test and deploy directly from your own machine.
Here I used Arch Linux to test everything before pushing to GitHub. Later, there will also be an example with Amazon Linux.
On Arch Linux, install the nix package:
[setevoy@setevoy-work ~] $ sudo pacman -S nix
[setevoy@setevoy-work ~] $ sudo systemctl enable --now nix-daemon
Check the service:
[setevoy@setevoy-work ~] $ systemctl status nix-daemon.socket
○ nix-daemon.socket - Nix Daemon Socket
     Loaded: loaded (/usr/lib/systemd/system/nix-daemon.socket; disabled; preset: disabled)
To enable Nix Flakes, add this to /etc/nix/nix.conf:
experimental-features = nix-command flakes
Restart the service:
[setevoy@setevoy-work ~] $ sudo systemctl restart nix-daemon.service
Check that it works:
[setevoy@setevoy-work ~] $ nix store info
Store URL: daemon
Version: 2.35.1
Trusted: 0
And run a check of our configuration:
[setevoy@setevoy-work ~] $ nix flake check --no-build
warning: Git tree '/home/setevoy/Work/hOS/atlas-llm' is dirty
“Git tree .. is dirty” means I added the file to Git but did not commit it, so we can ignore this for now.
NixOS and Static IP configuration
Node Exporter is in place; now we need to change the network settings.
There is nothing particularly new here: find the current settings and update them in the existing networking.nix file.
On the real host, check the current network configuration. We need the interface name, Gateway IP and DNS address.
Find the current IP, MAC address and interface name:
[neo@matrix:~]$ ip -4 address show dev enp36s0f0
4: enp36s0f0: <BROADCAST,MULTICAST,UP,LOWER_UP> mtu 1500 qdisc mq state UP group default qlen 1000
    altname enx04421ae605fb
    inet 192.168.124.14/24 metric 1024 brd 192.168.124.255 scope global dynamic enp36s0f0
       valid_lft 5624sec preferred_lft 5624sec
Find the current Gateway, which is 192.168.124.1 here:
[neo@matrix:~]$ ip -4 route
default via 192.168.124.1 dev enp36s0f0 proto dhcp src 192.168.124.14 metric 1024
...
And the DNS server:
[neo@matrix:~]$ resolvectl dns enp36s0f0
Link 4 (enp36s0f0): 192.168.128.254
Edit hosts/matrix/networking.nix and update systemd.network.networks. See also systemd-networkd.
It currently contains one DHCP configuration named “10-x550-primary“, where “10” is the priority and “x550” is the card name (“Ethernet controller [0200]: Intel Corporation Ethernet Controller X550“):
networks."10-x550-primary" = {
  matchConfig = {
    Name = "enp36s0f0";
    PermanentMACAddress = "04:42:1a:e6:05:fb";
  };
  networkConfig = {
    DHCP = "yes";
    IPv6AcceptRA = true;
  };
  linkConfig.RequiredForOnline = "routable";
};
Now define the static configuration:
networks."10-x550-primary" = {
  matchConfig = {
    Name = "enp36s0f0";
    PermanentMACAddress = "04:42:1a:e6:05:fb";
  };

  address = [
    "192.168.124.14/24"
  ];

  routes = [
    {
      Gateway = "192.168.124.1";
    }
  ];

  networkConfig = {
    DHCP = "no";
    DNS = [
      "192.168.128.254"
    ];
    IPv6AcceptRA = true;
  };
And, jumping ahead a bit, after the deployment we check that the configuration is now actually static.
The easiest way is to check the routes; they should show static:
[root@matrix:~]# ip -4 route
default via 192.168.124.1 dev enp36s0f0 proto static
172.17.0.0/16 dev docker0 proto kernel scope link src 172.17.0.1 linkdown
192.168.124.0/24 dev enp36s0f0 proto kernel scope link src 192.168.124.14
...
Now, on to the deployment.
Nix on Amazon Linux and deployment over SSH
I will deploy from a separate EC2 instance in AWS because it has a WireGuard tunnel to our “data center” in the US.
Everything is basically the same as on Arch Linux: install Nix, validate the configuration and deploy it.
The only difference is that we did not deploy from Arch Linux, while here we will, and over SSH too.
The only catch was that I originally created a t3.micro instance because it was meant only for VPN/WG, but Nix works better with some memory to spare, so let’s resize it to t3.medium.
As for the installation, Fedora has a nix package that can be installed with dnf, but on Amazon Linux I used the official Nix installer.
Install the dependencies on EC2:
[ec2-user@ip-10-0-13-13 ~]$ sudo dnf install -y curl xz
Install Nix:
[ec2-user@ip-10-0-13-13 ~]$ curl -L https://nixos.org/nix/install | sh -s -- --daemon
...
~~> Setting up the nix-daemon systemd service
Created symlink /etc/systemd/system/nix-daemon.service → /nix/var/nix/profiles/default/lib/systemd/system/nix-daemon.service.
Created symlink /etc/systemd/system/nix-daemon.socket → /nix/var/nix/profiles/default/lib/systemd/system/nix-daemon.socket.
Created symlink /etc/systemd/system/sockets.target.wants/nix-daemon.socket → /nix/var/nix/profiles/default/lib/systemd/system/nix-daemon.socket.
Alright! We're done!
Log out, log back in and check it:
[ec2-user@ip-10-0-13-13 ~]$ nix --version
nix (Nix) 2.35.1
And the service:
[ec2-user@ip-10-0-13-13 ~]$ systemctl status nix-daemon --no-pager
● nix-daemon.service - Nix Daemon
     Loaded: loaded (/etc/systemd/system/nix-daemon.service; linked; preset: disabled)
     Active: active (running) since Tue 2026-08-04 09:48:45 UTC; 1min 8s ago
...
Edit /etc/nix/nix.conf and enable Flakes:
experimental-features = nix-command flakes
Restart the service:
[ec2-user@ip-10-0-13-13 ~]$ sudo systemctl restart nix-daemon
Clone the repository with our changes:
[ec2-user@ip-10-0-13-13 ~]$ cd atlas-llm/
[ec2-user@ip-10-0-13-13 atlas-llm]$ git status --short --branch
## master...origin/master
Run the configuration check:
[ec2-user@ip-10-0-13-13 atlas-llm]$ nix flake check --no-build
Stack size hard limit is 10485760, which is less than the desired 62914560. If possible, increase the hard limit, e.g. with 'ulimit -Hs 61440'.
[ec2-user@ip-10-0-13-13 atlas-llm]$ echo $?
0
It completes successfully, but we get a warning about the limits.
Linux ulimits for Nix
Edit /etc/security/limits.d/90-nix.conf and add user ulimits:
ec2-user soft stack 65536
ec2-user hard stack 65536
Log in again and check that the limits were applied:
[ec2-user@ip-10-0-13-13 ~]$ ulimit -Ss
65536
[ec2-user@ip-10-0-13-13 ~]$ ulimit -Hs
65536
Run the check again, now without warnings:
[ec2-user@ip-10-0-13-13 atlas-llm]$ nix flake check --no-build
[ec2-user@ip-10-0-13-13 atlas-llm]$ echo $?
0
SSH and Nix nixos-rebuild test
Run a test installation. Everything will be built and deployed, but the system will use the old configuration after the next reboot.
Very convenient.
For deployment over SSH, set the key options in the $NIX_SSHOPTS variable:
[ec2-user@ip-10-0-13-13 atlas-llm]$ export NIX_SSHOPTS="-i /home/ec2-user/.ssh/barn_self_llm"
Run the test deployment:
[ec2-user@ip-10-0-13-13 atlas-llm]$ nix run github:NixOS/nixpkgs/nixos-26.05#nixos-rebuild -- \
test \
--flake .#matrix \
--build-host [email protected] \
--target-host [email protected]
...
starting the following units: systemd-tmpfiles-resetup.service
the following new units were started: prometheus-node-exporter.service
Done. The new configuration is /nix/store/5x016qjx58fkq4dnk8k1vn54xz7fma5y-nixos-system-matrix-26.05.20260726.8623c4c
Check Node Exporter on the NixOS host:
[root@matrix:~]# systemctl status prometheus-node-exporter.service
● prometheus-node-exporter.service
     Loaded: loaded (/etc/systemd/system/prometheus-node-exporter.service; enabled; preset: ignored)
     Active: active (running) since Tue 2026-08-04 10:18:01 UTC; 50s ago
And the metrics:
[root@matrix:~]# curl -s localhost:9100/metrics | head
# HELP go_gc_duration_seconds A summary of the wall-time pause (stop-the-world) duration in garbage collection cycles.
# TYPE go_gc_duration_seconds summary
go_gc_duration_seconds{quantile="0"} 8.777e-06
go_gc_duration_seconds{quantile="0.25"} 1.09e-05
go_gc_duration_seconds{quantile="0.5"} 1.1713e-05
go_gc_duration_seconds{quantile="0.75"} 1.2955e-05
go_gc_duration_seconds{quantile="1"} 1.3205e-05
go_gc_duration_seconds_sum 5.755e-05
go_gc_duration_seconds_count 5
If everything looks good, run nixos-rebuild again, this time with switch instead of test:
[ec2-user@ip-10-0-13-13 atlas-llm]$ nix run github:NixOS/nixpkgs/nixos-26.05#nixos-rebuild -- switch --flake .#matrix --build-host [email protected] --target-host [email protected]
Then check that the service is enabled in systemd autostart:
[root@matrix:~]# systemctl is-enabled prometheus-node-exporter
enabled
Nix profiles and checking the current state
I got curious about how to make sure that the system is currently using the exact changes shown by nixos-rebuild -- switch.
At the end, nixos-rebuild prints the path to the configuration – /nix/store/ll36l8ml5znscmppa2rpwnp5s8k7rp86[...]:
...
restarting the following user units: nixos-activation.service
restarting sysinit-reactivation.target
Done. The new configuration is /nix/store/ll36l8ml5znscmppa2rpwnp5s8k7rp86-nixos-system-matrix-26.05.20260726.8623c4c
This is a directory with the generated configuration:
[root@matrix:~]# ll /nix/store/ll36l8ml5znscmppa2rpwnp5s8k7rp86-nixos-system-matrix-26.05.20260726.8623c4c
total 256
-r-xr-xr-x 1 root root   4977 Jan  1  1970 activate
dr-xr-xr-x 1 root root    110 Jan  1  1970 bin
-r--r--r-- 1 root root   1232 Jan  1  1970 boot.json
-r-xr-xr-x 1 root root   1971 Jan  1  1970 dry-activate
lrwxrwxrwx 1 root root     51 Jan  1  1970 etc -> /nix/store/z8jq92jch9rk9r354rj598q52rdf4b9b-etc/etc
...
There we can find the /nix/store/ll36l8[...]/etc/systemd/network/10-x550-primary.network file containing the changes we defined above:
[root@matrix:~]# cat /nix/store/ll36l8ml5znscmppa2rpwnp5s8k7rp86-nixos-system-matrix-26.05.20260726.8623c4c/etc/systemd/network/10-x550-primary.network
[Match]
Name=enp36s0f0
PermanentMACAddress=04:42:1a:e6:05:fb

[Link]
RequiredForOnline=routable

[Network]
DHCP=no
DNS=192.168.128.254
IPv6AcceptRA=true
Address=192.168.124.14/24

[Route]
Gateway=192.168.124.1
We can also check the generations:
[root@matrix:~]# nix-env --profile /nix/var/nix/profiles/system --list-generations
   1   2026-07-27 12:39:58
   2   2026-07-27 12:58:50
   3   2026-07-27 13:56:07
   4   2026-07-27 14:12:35
   5   2026-07-27 14:23:59
   6   2026-07-31 13:04:34
   7   2026-08-04 13:32:35
   8   2026-08-04 13:44:05   (current)
Here, Current == 8, so use that number to check the profiles in /nix/var/nix/profiles/:
[root@matrix:~]# ll /nix/var/nix/profiles/system-8-link/
total 256
-r-xr-xr-x 1 root root   4977 Jan  1  1970 activate
dr-xr-xr-x 1 root root    110 Jan  1  1970 bin
-r--r--r-- 1 root root   1232 Jan  1  1970 boot.json
-r-xr-xr-x 1 root root   1971 Jan  1  1970 dry-activate
...
The /nix/var/nix/profiles/system-8-link file is a symlink to /nix/store/:
[root@matrix:~]# readlink -f /nix/var/nix/profiles/system-8-link
/nix/store/ll36l8ml5znscmppa2rpwnp5s8k7rp86-nixos-system-matrix-26.05.20260726.8623c4c
“ll36l8ml5znscmppa2rpwnp5s8k7rp86” is the hash part of the Nix store path used by generation 8 in /nix/store/ll36l8ml5znscmppa2rpwnp5s8k7rp86-nixos-system-matrix-26.05.20260726.8623c4c (Closures – A Nix package’s dependency tree):
[root@matrix:~]# nix-store --query --requisites \
  /nix/store/ll36l8ml5znscmppa2rpwnp5s8k7rp86-nixos-system-matrix-26.05.20260726.8623c4c \
  | grep y4abaz675xl40vw09700b7ma50cl5ks8
/nix/store/y4abaz675xl40vw09700b7ma50cl5ks8-unit-10-x550-primary.network
And if we inspect the actual systemd file, it is also a symlink to that exact file:
[root@matrix:~]# readlink -f /run/current-system/etc/systemd/network/10-x550-primary.network
/nix/store/y4abaz675xl40vw09700b7ma50cl5ks8-unit-10-x550-primary.network/10-x550-primary.network
And of course, it contains the same settings we defined:
[root@matrix:~]# cat /run/current-system/etc/systemd/network/10-x550-primary.network
[Match]
Name=enp36s0f0
PermanentMACAddress=04:42:1a:e6:05:fb

[Link]
RequiredForOnline=routable

[Network]
DHCP=no
DNS=192.168.128.254
IPv6AcceptRA=true
Address=192.168.124.14/24

[Route]
Gateway=192.168.124.1
VictoriaMetrics and metrics
And the last step is to verify that VMAgent collects the metrics into our VictoriaMetrics.
Add inlineScrapeConfig to the VMAgent Helm chart values:
- job_name: matrix-node-exporter
  metrics_path: /metrics
  static_configs:
    - targets: ["matrix.neoc.vpn.ops.example.co:9100"]
Deploy it and check the targets:

And the metrics themselves:
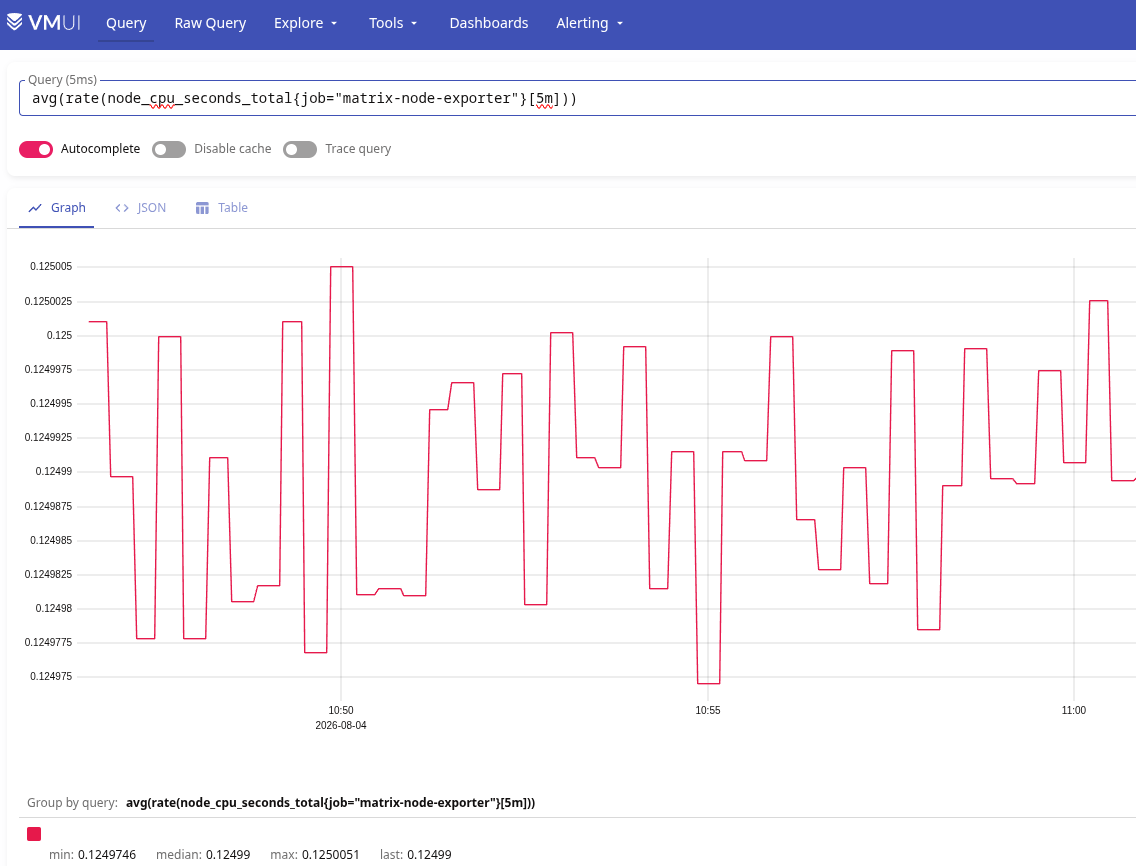
Done.
Next, we still need to configure NVIDIA monitoring and SGLang metrics, build dashboards and alerts, and do a lot more. So this story will most likely continue in future posts 🙂
