![]()
I’ve already written a little about Pritunl before – Pritunl: Running a VPN in Kubernetes.
Let’s return to this topic again, but this time on EC2 in AWS, without Kubernetes.
So, what we need to do is to run some kind of VPN service for the project to have access to Kubernetes APIs/Kubernetes WorkerNodes/AWS RDS/etc in private networks.
There are a lot of choice here – AWS VPN, vanilla OpenVPN, and much more.
But I’ve already used Pritunl in several projects, it has a nice interface, the basic VPN features are available in the Free version – so no problem.
Contents
What is Pritunl?
In fact, Pritunl is a wrapper over a regular OpenVPN server. It is fully compatible, uses the same configurations, and so on.
It can integrate with AWS VPC – https://pritunl.com/vpc, but I don’t really want someone to automatically change routing tables.
Our network setup in AWS is very basic, and so far, we can manage everything ourselves – more control, more understanding of what can go wrong.
Plus, this integration seems to be available only in Enterprise – Pritunl Pricing.
The Pritunl has two main concepts – an Organization and a Server:
- a Server describes the configuration for OpenVPN – ports, routers, DNS
- an Organization describes users
- an Organization connects to Server
Next, a user downloads the .ovpn file and connects with any VPN client. As far as I remember, even the default client on macOS worked with it without any problems.
Pritunl and Terraform
On my previous project, we had Pritunl in Kubernetes, but I don’t really like this idea, because, in my opinion, VPN should be a separate service.
Speaking of Terraform, there’s an interesting Pritunl Provider, but it requires an API key, which is only available in Pritunl Enterprise.
There is also a ready-made code from Terraform here – Pritunl VPN, but for me, it’s easier to create my own EC2 in my own VPC.
I also googled this ready-made module – AWS VPN (Pritunl) Terraform Module, which looks like a working solution.
However, we are going to do it in a more grandfatherly way:
- there is a regular AWS VPC with several private subnets
- in a public subnet with Terraform we will launch a common EC2
- via AWS EC2
user_datawe will install and run Pritunl - and will manually configure users, servers, and routers for it
The network routing should be the next: all packets that go to the VPC are sent through the VPN, and the rest are sent through a regular connection, so the user can have this VPN always running on his workstation without affecting other traffic.
Terraform: creating an AWS EC2 instance
So, first, we need to launch an EC2 instance which will run Pritunl.
For this instance, we need to have an AWS AMI, an SSH Key, a Security Group, a VPC ID, and we will create an AWS Route53 record.
Getting an VPC ID
In my case, the VPC ID we are getting with terraform_remote_state, see more detailed description in the Terraform: terraform_remote_state – getting Outputs from other state-files:
data "terraform_remote_state" "vpc" {
  backend = "s3"
  config = {
    bucket         = "tf-state-backend-atlas-vpc"
    key            = "${var.environment}/atlas-vpc-${var.environment}.tfstate"
    region         = var.aws_region
    dynamodb_table = "tf-state-lock-atlas-vpc"
  }
}
In this output we have the VPC ID and the IDs of the public subnets:
$ terraform output
...
vpc_id = "vpc-0fbaffe234c0d81ea"
...
vpc_public_subnets_cidrs = tolist([
  "10.0.0.0/20",
  "10.0.16.0/20",
])
vpc_public_subnets_ids = [
  "subnet-01de26778bea10395",
  "subnet-0efd3937cadf669d4",
]
And then we use this data resource in the locals:
locals {
  # get VPC info
  vpc_out = data.terraform_remote_state.vpc.outputs
}
Although, you can also do it with data "aws_vpc".
An EC2 SSH Key
Use the key_pair Terraform resource.
Create the key itself:
$ ssh-keygen
Generating public/private ed25519 key pair.
Enter file in which to save the key (/home/setevoy/.ssh/id_ed25519): /home/setevoy/.ssh/atlas-vpn
...
The public part can be stored in a repository – create a directory and copy it:
$ mkdir ssh
$ cp /home/setevoy/.ssh/atlas-vpn.pub ssh/
Describe the aws_key_pair resource:
resource "aws_key_pair" "vpn_key" {
  key_name   = "atlas-vpn-key"
  public_key = file("${path.module}/ssh/atlas-vpn.pub")
}
An AWS Security Group
Find the home/work IP:
$ curl ifconfig.me
178.***.***.52
Define a SecurityGroup – allow SSH only from this IP, and use local.vpc_out.vpc_id in vpc_id.
Add ports – 80 for Let’s Encrypt, which is used by Pritunl, 443 for access to the Pritunl’s admin page, also only from my IP, and port 10052 UPD for VPN clients:
resource "aws_security_group" "allow_ssh" {
  name        = "allow_ssh"
  description = "Allow SSH inbound traffic"
  vpc_id      = local.vpc_out.vpc_id

  ingress {
    description = "SSH Arseny home"
    from_port   = 22
    to_port     = 22
    protocol    = "tcp"
    cidr_blocks = ["178.***.***.52/32"]
  }

  ingress {
    description = "Pritunl Admin Arseny home"
    from_port   = 443
    to_port     = 443
    protocol    = "tcp"
    cidr_blocks = ["178.***.***.52/32"]
  }

  ingress {
    description = "Pritunl Lets Encrypt"
    from_port   = 80
    to_port     = 80
    protocol    = "tcp"
    cidr_blocks = ["0.0.0.0/0"]
  }

  ingress {
    description = "Pritunl VPN port"
    from_port   = 10052
    to_port     = 10052
    protocol    = "udp"
    cidr_blocks = ["0.0.0.0/0"]
  }

  egress {
    from_port   = 0
    to_port     = 0
    protocol    = "-1"
    cidr_blocks = ["0.0.0.0/0"]
  }

  tags = {
    Name = "${var.project_name}-${var.environment}-allow_ssh"
  }
}
An AWS AMI
Using data "aws_ami", we will find the AWS AMI from Ubuntu.
At first, I tried to run Pritunl on Amazon Linux, but that yum and its repositories are a pain sometimes, but on Ubuntu it ran without any problems:
data "aws_ami" "ubuntu" {
  most_recent = true

  filter {
    name   = "name"
    values = ["ubuntu/images/hvm-ssd/ubuntu-*-22.04-amd64-server-*"]
  }

  filter {
    name   = "virtualization-type"
    values = ["hvm"]
  }

  owners = ["099720109477"]  # Canonical's official AWS account ID for Ubuntu AMIs
}
But when using data "aws_ami", keep in mind that when an update is released, AWS will create a new AMI, and the next time you run your Terraform code, it will pull up a new ID and will suggest to recreate the corresponding EC2.
Therefore, it may be better to just find the AMI ID manually and put it into variables. See Find an AMI and Amazon EC2 AMI Locator.
An AWS Elastic IP
To always have the same address, we’ll make it as a dedicated resource:
resource "aws_eip" "vpn_eip" {
  domain = "vpc"
}
An AWS Route53 VPN record
Let’s create a DNS record right away.
In variables.tf, set the zone ID in Route53 and its name:
variable "route53_ops_zone" {
  type = object({
    name = string
    id = string
  })
  default = {
    name = "ops.example.co"
    id = "Z02***OYY"
  }
}
And in the main.tf describe the record itself:
resource "aws_route53_record" "vpn_dns" {
  zone_id  = var.route53_ops_zone.id
  name     = "vpn.${var.route53_ops_zone.name}"
  type     = "A"
  ttl      = 300
  records = [aws_eip.vpn_eip.public_ip]
}
Now we will have an entry like “vpn.ops.example.co IN A <EC2_EIP>.
The AWS EC2 and Pritunl installation
And finally, we describe EC2 itself, using the resources we created above:
ami– taken from thedata.aws_ami.amazon_linukey_name– taken from theaws_key_pair.vpn_key.key_name-
vpc_security_group_ids– from the SG, which we create above -
subnet_id, where to create EC2 – take from thelocal.vpc_out.vpc_public_subnets_ids
Add the Pritunl installation here – see the documentation [Other Providers] Ubuntu 22.04, but it’s a bit broken in places, so it might be better to do the installation manually after creating the instance.
Well, or add it to user_data – at least at the time of writing, it worked with the code below.
In case of problems with EC2 user_data – check the log /var/log/cloud-init.log, and try running the script manually – it should be in a file like /var/lib/cloud/instance/scripts/part-001.
Keep in mind that user_data is called only when creating an instance – not when restarting it:
resource "aws_instance" "vpn" {
  ami           = data.aws_ami.ubuntu.id
  instance_type = var.vpn_ec2_instance_type
  key_name      = aws_key_pair.vpn_key.key_name

  vpc_security_group_ids = [aws_security_group.allow_ssh.id]
  subnet_id     = local.vpc_out.vpc_public_subnets_ids[0]

  user_data = <<-EOF
              #!/bin/bash
              echo 'deb http://repo.pritunl.com/stable/apt jammy main' > /etc/apt/sources.list.d/pritunl.list
              echo 'deb https://repo.mongodb.org/apt/ubuntu jammy/mongodb-org/6.0 multiverse' > /etc/apt/sources.list.d/mongodb-org-6.0.list
              apt-key adv --keyserver hkp://keyserver.ubuntu.com --recv 7568D9BB55FF9E5287D586017AE645C0CF8E292A
              wget -qO - https://www.mongodb.org/static/pgp/server-6.0.asc | sudo apt-key add -
              apt update
              apt --assume-yes upgrade
              apt -y install wireguard wireguard-tools
              ufw disable
              apt -y install pritunl mongodb-org
              systemctl enable mongod pritunl
              systemctl start mongod pritunl
              EOF

  tags = {
    Name = "Pritunl VPN"
  }
}
Add the Elastic IP connection to this instance:
resource "aws_eip_association" "vpn_eip_assoc" {
  instance_id   = aws_instance.vpn.id
  allocation_id = aws_eip.vpn_eip.id
}
Terraform Outputs
Let’s add outputs to make it easier to search for all kinds of IDs later:
output "vpn_ec2_id" {
  value = aws_instance.vpn.id
}

output "vpn_eip" {
  value = aws_eip.vpn_eip.public_ip
}

output "aws_ami_id" {
  value = data.aws_ami.ubuntu.id
}

output "vpn_dns" {
  value = aws_route53_record.vpn_dns.name
}
Run terraform init, terraform plan, terraform apply:
...
Apply complete! Resources: 2 added, 0 changed, 0 destroyed.

Outputs:

ec2_public_ip = "3.83.69.105"
vpn_ec2_id = "i-0ea1407cb7ff8690f"
Check the instance:
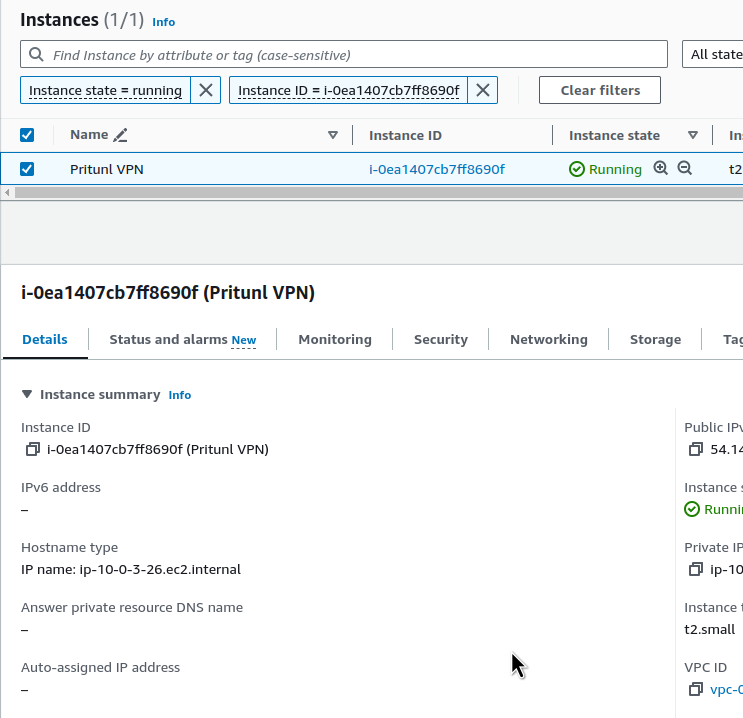
Check SHS access t oit:
$ ssh -i ~/.ssh/atlas-vpn [email protected]
...
[ec2-user@ip-10-0-3-26 ~]$ sudo -s
[root@ip-10-0-3-26 ec2-user]#
Check the Pritunl itself on the server:
root@ip-10-0-1-25:/home/ubuntu# systemctl status pritunl
● pritunl.service - Pritunl Daemon
     Loaded: loaded (/etc/systemd/system/pritunl.service; enabled; vendor preset: enabled)
     Active: active (running) since Fri 2024-05-31 13:04:08 UTC; 55s ago
   Main PID: 3812 (pritunl)
      Tasks: 19 (limit: 2328)
     Memory: 99.7M
        CPU: 1.318s
     CGroup: /system.slice/pritunl.service
             ├─3812 /usr/lib/pritunl/usr/bin/python3 /usr/lib/pritunl/usr/bin/pritunl start
             └─4174 pritunl-web

May 31 13:04:08 ip-10-0-1-25 systemd[1]: Started Pritunl Daemon.
Now you can start setting it up.
Pritunl: the initial setup
Documentation – Configuration.
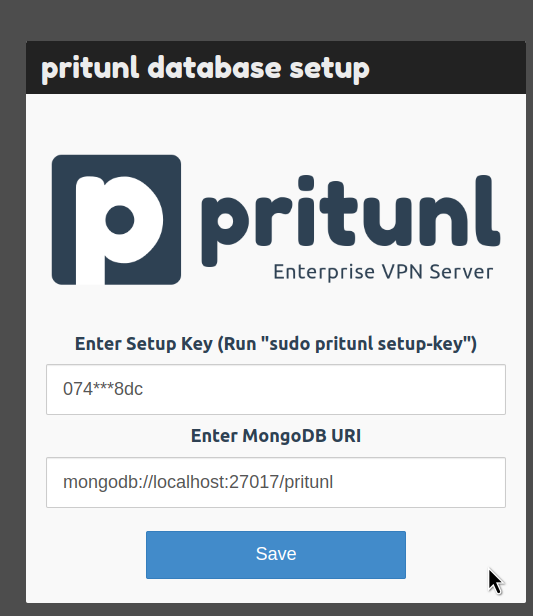
Connect to the EC2, run pritunl setup-key:
root@ip-10-0-1-25:/home/ubuntu# pritunl setup-key
074d9be70f1944d7a77374cca09ff8dc
Open vpn.ops.example.co:443, do not pay attention to the error ERR_CERT_AUTHORITY_INVALID – Let’s Encrypt will generate the certificate after Pritunl configuration.
Pass the setup-key, the MongoDB address can be left by default:
Waiting for the MongoDB update:
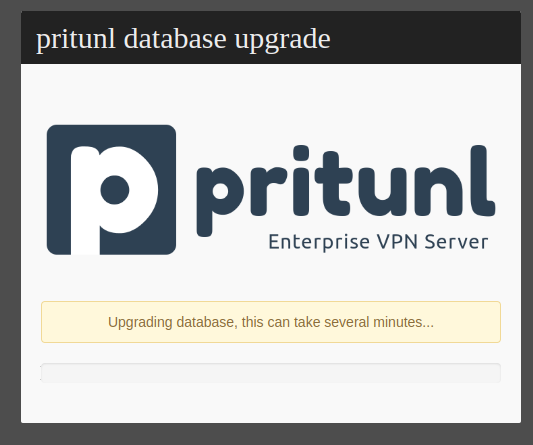
When the login window opens, run the pritunl default-password command on the server:
root@ip-10-0-1-25:/home/ubuntu# pritunl default-password
[local][2024-05-31 13:12:41,687][INFO] Getting default administrator password
Administrator default password:
  username: "pritunl"
  password: "1rueBHeV9LIj"
And log in:

Generate a new password that we will use all the time:
$ pwgen 12 1
iBai1Aisheat
And set the basic parameters of Pritunl – only login/password and addresses:
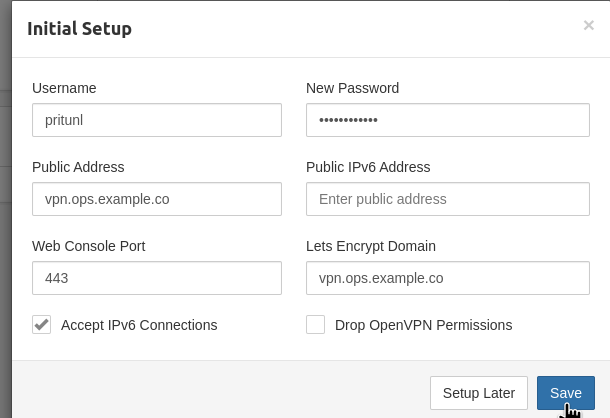
If you forget your new password, you can reset it with pritunl reset-password.
The “Error getting Lets Encrypt certificate, check the logs for more information” error
If you have problems with the Let’s Encrypt certificate, check the /var/log/pritunl.log log:
root@ip-10-0-1-25:/home/ubuntu# tail -f /var/log/pritunl.log
  File "/usr/lib/pritunl/usr/lib/python3.9/site-packages/pritunl/handlers/settings.py", line 1112, in settings_put
    acme.update_acme_cert()
  File "/usr/lib/pritunl/usr/lib/python3.9/site-packages/pritunl/acme.py", line 73, in update_acme_cert
    cert = get_acme_cert(settings.app.acme_key, csr, cmdline)
  File "/usr/lib/pritunl/usr/lib/python3.9/site-packages/pritunl/acme.py", line 45, in get_acme_cert
    certificate = acmetiny.get_crt(
  File "/usr/lib/pritunl/usr/lib/python3.9/site-packages/pritunl/acmetiny.py", line 138, in get_crt
    raise ValueError("Challenge did not pass for {0}: {1}".format(domain, authorization))
ValueError: Challenge did not pass for vpn.ops.example.co: {'identifier': {'type': 'dns', 'value': 'vpn.ops.example.co'}, 'status': 'invalid', 'expires': '2024-06-07T13:32:30Z', 'challenges': [{'type': 'http-01', 'status': 'invalid', 'error': {'type': 'urn:ietf:params:acme:error:dns', 'detail': 'DNS problem: NXDOMAIN looking up A for vpn.ops.example.co - check that a DNS record exists for this domain; DNS problem: NXDOMAIN looking up AAAA for vpn.ops.example.co - check that a DNS record exists for this domain', 'status': 400}, 'url': 'https://acme-v02.api.letsencrypt.org/acme/chall-v3/357864308812/RHhMwA', 'token': 'KZLx4dUxDmow5uMvfJdwbgz5bY4HG0tTQOW2m4UvFBg', 'validated': '2024-05-31T13:32:30Z'}]}
  acme_domain = "vpn.ops.example.co"
The domain is new – Let’s Encrypt doesn’t know about it yet.
Wait a few minutes and try again.
A successful certificate registration in the logs should look like this:
[INFO] Found domains: vpn.ops.example.co
[INFO] Getting directory...
[INFO] Directory found!
[INFO] Registering account...
[INFO] Registered!
[INFO] Creating new order...
[INFO] Order created!
[INFO] Verifying vpn.ops.example.co...
[INFO] vpn.ops.example.co verified!
[INFO] Signing certificate...
[INFO] Certificate signed!
[INFO] Settings changed, restarting server...
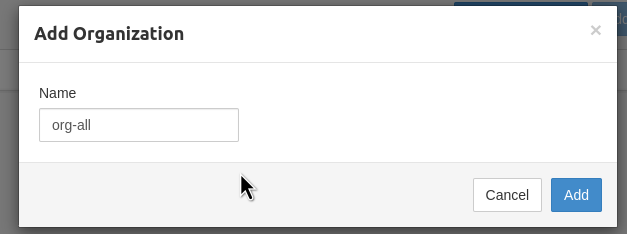
Creating a Pritunl Organization and users
Add an organization – we’ll use it to group users, because Groups are not available in the Pritunl Free version:

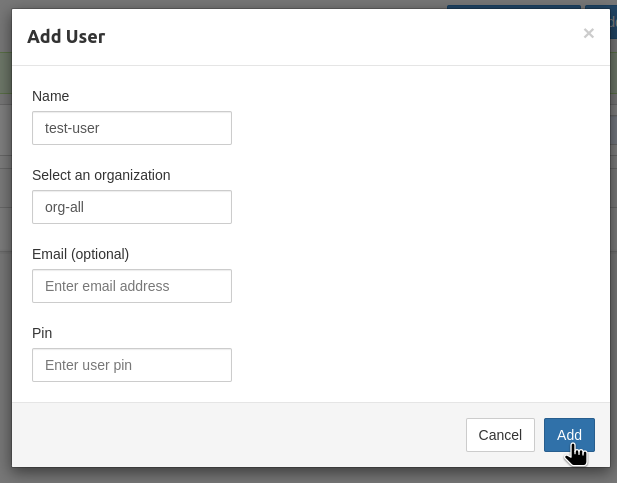
Add a user:

Email and Pin are optional, not required at the moment:
Creating a Pritunl Server and routing
See Server configuration.
Go to the Servers, add a new one:

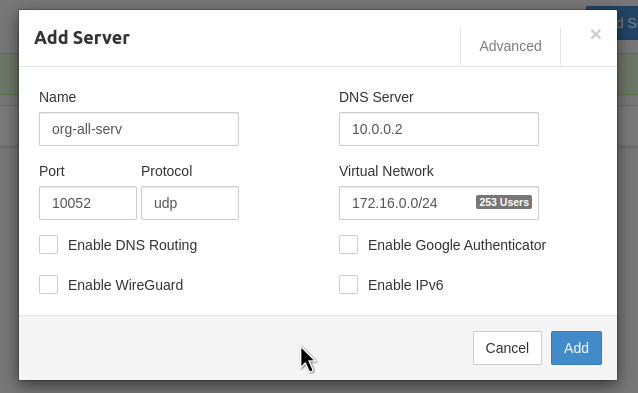
In the DNS Server field, set the DNS address of our VPC.
In the Port, specify the port that was opened on AWS EC2 SecurityGroup, the UPD 10052 in this case.
The Virtual Network – the pool from which addresses will be allocated to clients. I’m using 172.* here because it’s easier to distinguish it from others – at home I have 192.*, in the AWS VPC – 10.*.
Connect the previously created Organization:
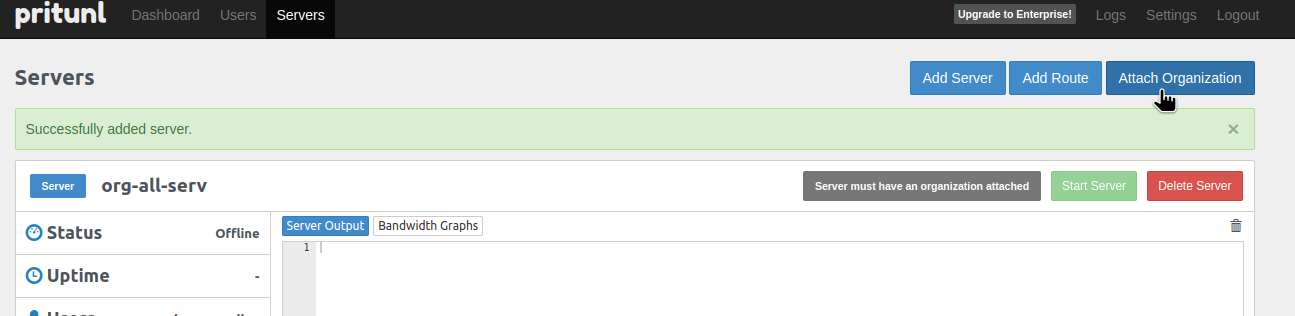

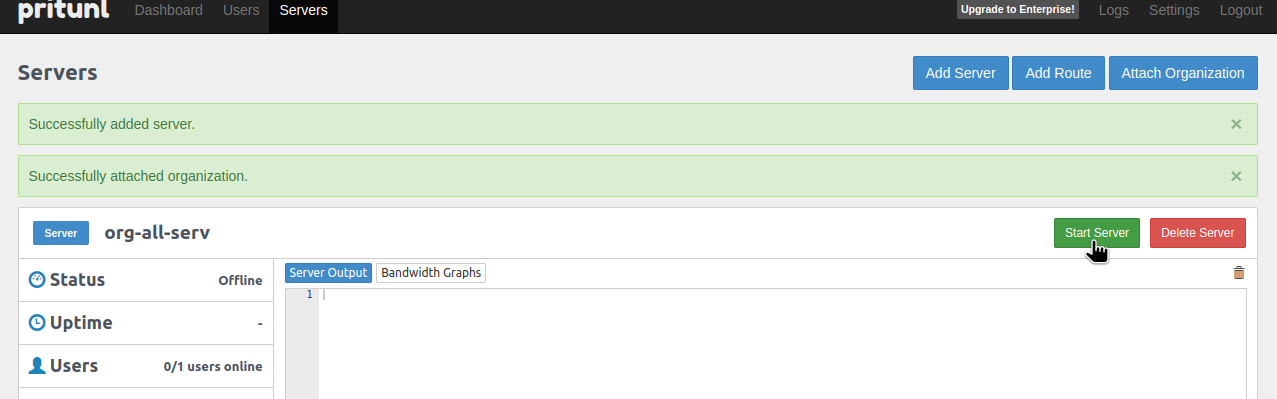
Start the server:
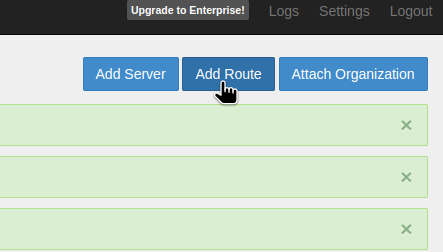
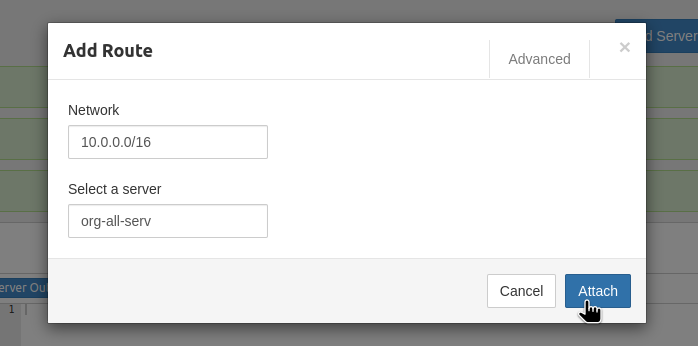
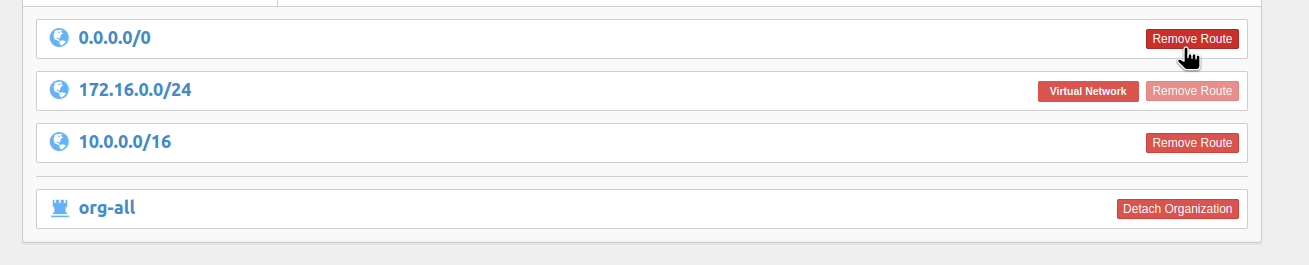
Set up Routes, so that only VPC requests will go through the VPN:
And remove the default route to the 0.0.0.0/0:
Linux OpenVPN – connecting to the Pritunl server
Go to Users, click on the Download profile:

Unpack it:
$ tar xfpv test-user.tar
org-all_test-user_org-all-serv.ovpn
And connect using a common OpenVPN client:
$ sudo openvpn --config org-all_test-user_org-all-serv.ovpn
In the case of the error “ERROR: Cannot open TUN/TAP dev /dev/net/tun: No such device” on Linux, try rebooting. My kernel was updated, and I haven’t rebooted for a long time.
Check the local routes:
$ route -n
Kernel IP routing table
Destination     Gateway         Genmask         Flags Metric Ref    Use Iface
0.0.0.0         192.168.3.1     0.0.0.0         UG    600    0        0 wlan0
0.0.0.0         192.168.3.1     0.0.0.0         UG    1002   0        0 enp2s0f0
10.0.0.0        172.16.0.1      255.255.0.0     UG    0      0        0 tun0
172.16.0.0      0.0.0.0         255.255.255.0   U     0      0        0 tun0
...
Everything is fine – we go to the Internet, the 0.0.0.0, via the old route, through the home router, and to the VPC, 10.0.0.0, via 172.16.0.1, our VPN.
Let’s try it:
$ traceroute 1.1.1.1
traceroute to 1.1.1.1 (1.1.1.1), 30 hops max, 60 byte packets
 1  _gateway (192.168.3.1)  1.617 ms  1.550 ms  1.531 ms
 ...
 9  one.one.one.one (1.1.1.1)  17.265 ms  17.246 ms  18.600 ms
Okay, through the home router.
And to some server in the AWS VPC:
$ traceroute 10.0.42.95
traceroute to 10.0.42.95 (10.0.42.95), 30 hops max, 60 byte packets
 1  172.16.0.1 (172.16.0.1)  124.407 ms  124.410 ms  124.417 ms
 ...
Via the VPN connection.
And even SSH to instances on a private network works:
$ ssh -i test-to-del.pem [email protected]
...
ubuntu@ip-10-0-45-127:~$
Nice!
Linux Systemd, and Pritunl/OpenVPN autostart
Let’s make sure that the connection is always running.
Create a directory:
$ sudo mkdir /etc/pritunl-client
Move the config file:
$ sudo mv org-all_test-user_org-all-serv.ovpn /etc/pritunl-client/work.ovpn
Create a simple /etc/systemd/system/pritunl-org.service:
[Unit]
Description=Pritunl Work

[Service]
Restart=always
WorkingDirectory=/etc/pritunl-client/

ExecStart=/usr/bin/openvpn --config work.ovpn

ExecStop=killall openvpn

[Install]
WantedBy=multi-user.target
Check it:
$ systemctl start pritunl-org.service
==== AUTHENTICATING FOR org.freedesktop.systemd1.manage-units ====
Authentication is required to start 'pritunl-org.service'.
And routes once again:
$ route -n
Kernel IP routing table
Destination     Gateway         Genmask         Flags Metric Ref    Use Iface
0.0.0.0         192.168.3.1     0.0.0.0         UG    100    0        0 enp2s0f0
0.0.0.0         192.168.3.1     0.0.0.0         UG    600    0        0 wlan0
0.0.0.0         192.168.3.1     0.0.0.0         UG    1002   0        0 enp2s0f0
10.0.0.0        172.16.0.1      255.255.0.0     UG    0      0        0 tun0
Everything is there.
Add to auto start:
$ systemctl enable pritunl-org.service
==== AUTHENTICATING FOR org.freedesktop.systemd1.manage-unit-files ====
Authentication is required to manage system service or unit files.
Authenticating as: root
Password:
==== AUTHENTICATION COMPLETE ====
Created symlink /etc/systemd/system/multi-user.target.wants/pritunl-org.service -> /etc/systemd/system/pritunl-org.service.
Done.


