![]() In the previous part of the Okta series we set up SSO for Grafana (see Okta: configuring Grafana SSO with OIDC and Role mapping) – now for a more interesting task: configuring SSO for AWS, with not just login but also user provisioning.
In the previous part of the Okta series we set up SSO for Grafana (see Okta: configuring Grafana SSO with OIDC and Role mapping) – now for a more interesting task: configuring SSO for AWS, with not just login but also user provisioning.
Okta has a ready-made AWS IAM Identity Center App that lets you configure login with SAML (see also What is: SAML – overview, structure and request tracing using Jenkins and Okta SAML SSO) and user provisioning via SCIM.
On the AWS side, we’ll configure IAM Identity Center itself, and also create an AWS Organization.
On Terraform: deliberately doing this without it, because we currently share the Okta account with another project and will be splitting it and reworking the setup later. Also, I haven’t touched Okta configuration since around 2020, so it’s better to “clickops” through things first to get a feel for what’s changed.
Same story with Terraform for AWS – while things like VPC/EKS are already done with Terraform, account management settings I’m doing by hand for now, because we’ll 100% be either migrating to a new account or splitting the current one, and it’s not yet clear what that will look like.
But once we migrate – there will definitely be posts on Terraform with Okta and AWS.
Contents
AWS services for User Management
Before starting the Okta configuration – a quick overview of what AWS has in terms of services related to user and access management:
- AWS IAM: the foundational service – users, groups, roles, policies
- IAM Identity Providers: for example, for configuring OIDC for GitHub or OIDC for AWS Elastic Kubernetes Service
- AWS IAM Identity Center (formerly AWS Single Sign-On): what we’ll use for Okta – centralized access management across multiple AWS Accounts, integration with Identity Providers (IdP – Okta, Azure Active Directory, etc.)
- AWS Organizations: centralized management of multiple AWS Accounts – Service Control Policies (SCP), shared CloudTrail, Config, GuardDuty, centralized billing
- AWS Control Tower: automated setup of AWS Organizations, IAM Identity Center, common compliance and security
AWS SSO and Okta integration options
There are two approaches to integrating Okta with AWS:
- AWS Account Federation (legacy):
- direct SAML between Okta and each AWS account separately via IAM Identity Providers – for each account you need to separately create IAM Roles with a Trust Policy on Okta, and separately configure SAML
- with 10 accounts – repeat the same setup 10 times
- SCIM (provisioning) from Okta is not supported – users and groups don’t sync automatically
- IAM Identity Center:
- centralized approach – Okta connects once via SAML, users and groups sync automatically via SCIM
- Permission Sets (essentially IAM Policies for users and groups) – permissions defined once and assigned to any number of accounts
- when adding a new account to the AWS Organization – just pick existing groups and Permission Sets, no additional SAML configuration needed
We’ll go with the modern approach, using IAM Identity Center:
- Okta: will be our Identity Provider – users are created there, login only through Okta
- IAM Identity Center: will receive authenticated users from Okta and handle authorization via Permission Sets
Documentation: Configure SAML and SCIM with Okta and IAM Identity Center and Configure AWS accounts and roles for SAML SSO.
About AWS Organization
AWS Organizations gives us centralized management of multiple AWS accounts – organizes accounts into a hierarchy (Organizational Unit, OU – brings back nostalgia for OpenLDAP) with unified billing, and is the foundation for multi-account management and a prerequisite for full IAM Identity Center with multi-account SSO.
What AWS Organizations provides
Billing: single consolidated billing across all accounts. Reserved Instances and Savings Plans can also be shared across all accounts in the organization.
Security / Governance
A single management point for various security services:
- SCPs (Service Control Policies): restriction policies at the account or OU level that override any IAM permissions and cannot be bypassed even with AdministratorAccess – for example, “nobody can disable CloudTrail” or “only allow resource creation in specified AWS Regions“
- AWS Config aggregator: collects resource configuration data from all accounts into one place – you can see whether all resources comply with defined rules, for example “all S3 buckets must be encrypted” or “all EC2 instances must have certain tags“
- CloudTrail organization trail: a single CloudTrail for all accounts, no need to configure it separately in each
- GuardDuty, Security Hub, Macie: centralized management of all security services
Networking: RAM (Resource Access Manager): allows sharing resources between accounts without having to configure this for every pair of accounts.
Account isolation (the main reason for multi-account):
- you can (and should) keep the Production account completely isolated from Dev – an accidental
terraform destroyin Dev won’t touch Prod- it’s also recommended to have a separate account with restricted access for security services
- limit blast radius to a single account: if ACCESS/SECRET keys get pushed to GitHub – only one account is exposed
- though it’s better not to use keys at all
What happens when you create an Organization
Nothing breaks: all existing IAM Users, IAM Roles, IAM Policies, and all services (EKS, RDS, S3) keep working. The current account becomes the management account, and a root OU appears.
The one thing to keep in mind: the management account cannot be changed afterward. So verify you’re creating the Organization from the right account – the one with billing and root access.
Creating the AWS Organization
Go to AWS Organization, click Create an organization:

AWS recommends creating the Organization from a dedicated account – but for us, as a small startup, the current account where all our services live will do fine:

After creating the Organization, AWS suggests enabling Centralize root access for member accounts – disable root accounts and perform all administrative actions only from the management account.
Not relevant for us right now since we only have one account, but it’s a useful security feature in general:

On to the interesting part.
Creating the Okta App – AWS IAM Identity Center
First add the Okta App – IAM Identity Center, because AWS IAM Identity Center will need the SAML parameters from Okta:

Get the SAML metadata link:

We’re using an Okta custom domain, the browser complains about the certificate, and due to HSTS there’s no way to bypass the error:

So just download it with curl:
$ curl -k https://okta.example.co/app/***/sso/saml/metadata -o metadata.xml
Verify the file has content:
$ head metadata.xml
<?xml version="1.0" encoding="UTF-8"?><md:EntityDescriptor entityID="http://www.okta.com/***" xmlns:md="urn:oasis:names:tc:SAML:2.0:metadata"><md:IDPSSODescriptor WantAuthnRequestsSigned="false" protocolSupportEnumeration="urn:oasis:names:tc:SAML:2.0:protocol"><md:KeyDescriptor use="signing"><ds:KeyInfo xmlns:ds="http://www.w3.org/2000/09/xmldsig#"><ds:X509Data><ds:X509Certificate>MII
...
Now that we have the AWS Organization and the Okta App – we can configure IAM Identity Center.
Configuring AWS IAM Identity Center
Documentation – What is IAM Identity Center?
What IAM Identity Center will give us, and what we’ll be configuring:
- AWS Access Portal: a single sign-in page for all accounts in the organization
- Identity Source: configure the source of truth for users – in our case an External Identity Provider, Okta
- Account Assignments: bind User Groups in IAM Identity Center (synced from Okta) to a Permission Set for a specific AWS account – i.e. “Okta Group named org-DevOps has AdministratorAccess in account <accountName>“
- Permission Sets: a set of IAM policies that IAM Identity Center automatically creates as an IAM Role (with a name starting with AWSReservedSSO_) in the target AWS account when a User Group is attached to Permission Sets; at login the user assumes this role
Before starting, read IAM Identity Center prerequisites and considerations, paying attention to:
IAM Identity Center creates IAM roles to give users permissions to account resources. For more information, see IAM roles created by IAM Identity Center.
AWS Organizations is recommended, but not required, for use with IAM Identity Center. If you haven’t set up an organization, you do not have to. If you’ve already set up AWS Organizations and are going to add IAM Identity Center to your organization, make sure that all AWS Organizations features are enabled. For more information, see IAM Identity Center and AWS Organizations.
Let’s go – navigate to IAM Identity Center, click Enable:

If there’s no AWS Organization yet – AWS offers to create one, or you can enable IAM Identity Center in account instance mode without an Organization:

If an Organization already exists – enable it directly as an organization instance:

Click Enable and start configuration.
Configuring the Identity Source with Okta

Go to Settings > Identity Source, in Actions select Change Identity Source:

Select External type:

Get the URLs and save them:
- IAM Identity Center Assertion Consumer Service (ACS) URL
- IAM Identity Center issuer URL
In Identity Provider Metadata, upload the metadata.xml file downloaded from the Okta App:

When changing the Identity Source, IAM Identity Center shows a warning about changes for users – but this only applies to IAM Identity Center users, of which we have none yet. Login for regular IAM Users continues to work as before:

Configuring SAML in the Okta AWS IAM Identity Center App
Type ACCEPT, click Change – get the SAML configuration settings for the Okta App:

Go back to the Okta App, switch to Sign On, click Edit and set the addresses:
- AWS SSO ACS URL: this is the IAM Identity Center Assertion Consumer Service (ACS) URL from AWS IAM Identity Center
- AWS SSO issuer URL: this is the IAM Identity Center issuer URL from AWS IAM Identity Center

That’s it for authentication.
Users can’t log in yet though – we’ll configure that a bit further on.
First let’s set up User and Group provisioning – syncing groups and users from Okta to AWS IAM Identity Center.
Configuring Provisioning from Okta to IAM Identity Center
Go back to IAM Identity Center > Settings, click Enable in Automatic Provisioning:

Get the URL and Access Token.
Save the token immediately – you won’t see it again:

Go back to Okta > Provisioning > Configure API Integration:

We don’t need groups from IAM Identity Center in Okta – we’ll only sync from Okta to IAM Identity Center, so uncheck it and accept the warning:

Enter the URL and token, click Test API Credentials:

Contact established!

Save, click Edit, enable user sync, attribute sync, and user deactivation (disable in Okta – disable in AWS):

Now the App header is all green – all integrations in place:

Assigning Okta Users and Okta Groups to the Okta IAM Identity Center App
Go to Assign and add this App to the Okta Group:

Leave all default attributes:

And users already appear in IAM Identity Center:

But not groups – still empty here:

Creating Permission Sets for IAM Identity Center User Groups
Documentation – Create, manage, and delete permission sets.
Permission Sets define what access rights a user or group will have in an AWS Account:
- in Okta we have an Okta Group (org-DevOps)
- Okta pushes the group to IAM Identity Center (more on this below)
- in IAM Identity Center we get a new group org-DevOps
- we add this group to an AWS Account
- in the AWS Account, an IAM Role is created with the name AWSReservedSSO_<Permission_Set_name>
- at login the user performs an Assume Role on this role
Create a new Permission Set:

In Custom Permission Set you can choose custom policies, write an inline policy, or use pre-built sets.
For DevOps we go with AdministratorAccess:

Session duration can be set a bit longer:

Save the new Permission Set – Provisioned status shows Not provisioned for now, since this Permission Set hasn’t been assigned to anyone yet:

Syncing Okta Groups with Okta Push Groups
To sync Okta Groups to AWS IAM Identity Center – go to Push Groups, select a group – note that it doesn’t have to be Assigned to this App:

Select the Okta Group:

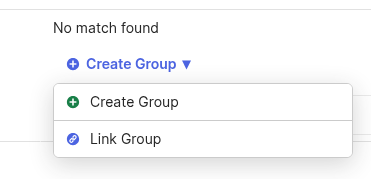
The group is ready to push to IAM Identity Center, with two options – Create Group if the group doesn’t exist in AWS yet, or Link Group to associate the Okta group with an existing group in AWS:

Click Save, the sync process begins:

Done:

Check the groups in IAM Identity Center – a new group with two users:

You can later disable sync from Okta if needed:

Assigning IAM Identity Center User Groups to AWS Accounts
For users in this group to be able to log in to the AWS Account – perform the Assign in IAM Identity Center itself:

Select the group:

Select the Permission Set created earlier:

The AWS Accounts list now shows the attached Permission Set:

And in the AWS Account itself, in IAM Roles, a new role appears:

Final: SSO login via AWS Access Portal
Find the URL of our AWS Access Portal – this will be the single entry point for all users:

Or click the App in Okta.
We land on the account selection page and immediately see the Permission Set we can log in with:

Log in, and we have access to all our services:

And that’s it.
SSO and user provisioning are configured, login works.
For the AWS Access Portal we can configure a custom URL – but only in the awsapps.com zone – click Edit:

Set a custom name:

And from now on access via https://example.awsapps.com/start.
Configuring the AWS CLI with SSO
All old access with ACCESS/SECRET keys still works, but let’s configure the new SSO login right away.
Documentation – Configuring IAM Identity Center authentication with the AWS CLI.
Run aws configure sso, with --profile specifying which account this SSO login is for:
$ aws configure sso --profile work
SSO session name (Recommended): org-sso
SSO start URL [None]: https://example.awsapps.com/start
SSO region [None]: us-east-1
SSO registration scopes [sso:account:access]:
Attempting to automatically open the SSO authorization page in your default browser.
...
A browser will open – allow access:

And in the terminal we see the message that SSO for the work profile is configured:
...
The only AWS account available to you is: 492***148
Using the account ID 492***148
The only role available to you is: DevOps-AdministratorAccess
Using the role name "DevOps-AdministratorAccess"
Default client Region [us-east-1]:
CLI default output format (json if not specified) [None]:
To use this profile, specify the profile name using --profile, as shown:

aws sts get-caller-identity --profile work
Check who we’re logged in as – we get our own UserId with assumed-role/AWSReservedSSO_DevOps-AdministratorAccess:
$ aws sts get-caller-identity --profile work
{
    "UserId": "ARO***ORD:[email protected]",
    "Account": "492***148",
    "Arn": "arn:aws:sts::492***148:assumed-role/AWSReservedSSO_DevOps-AdministratorAccess_66a4ead4b037e25f/[email protected]"
}
And in ~/.aws/config we now have an sso_session for the user plus the SSO config itself:
$ cat .aws/config
...
[profile work]
region = us-east-1
output = json
sso_session = org-sso
sso_account_id = 492***148
sso_role_name = DevOps-AdministratorAccess

...
[sso-session org-sso]
sso_start_url = https://example.awsapps.com/start
sso_region = us-east-1
sso_registration_scopes = sso:account:access
Done.
![]()