In the previous part, AWS: Getting Started with OpenSearch Service as a Vector Store, we looked at AWS OpenSearch Service in general, figured out how data is organized in it, what shards and nodes are, and what types of instances we actually need for data nodes.
The next step is to create a cluster and look at authentication, which, in my opinion, is even more complicated than AWS EKS. Although, maybe it’s just a matter of habit.
What we’re going to do today is manually create an AWS OpenSearch Service cluster, look at the main options for creating a cluster, and then dive into the settings for accessing the cluster and OpenSearch Dashboards with AWS IAM and Fine-grained access control of OpenSearch itself and its Security plugin.
And in the next part, if I have time to write it, we’ll get to Terraform.
Contents
Manually creating a cluster in AWS Console
We will do a minimal PoC to play around, i.e., with t3 instances in one Availability Zone and without Master Nodes.
In Production, we also plan to have one small cluster with three dev/staging/prod indexes as a vector store for AWS Bedrock Knowledge Base.
Documentation from AWS – Creating OpenSearch Service domains.
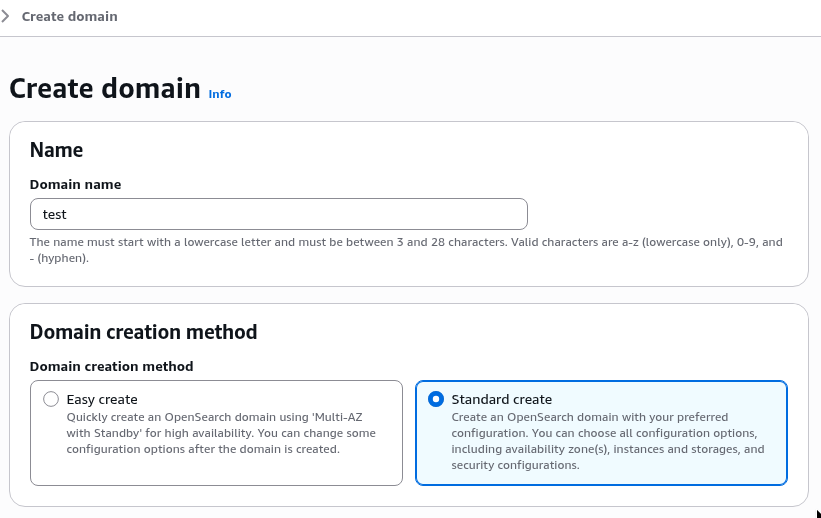
Go to Amazon OpenSearch Service > Domains, click “Create domain”.
Set a name, select “Standard create” to have access to all options:
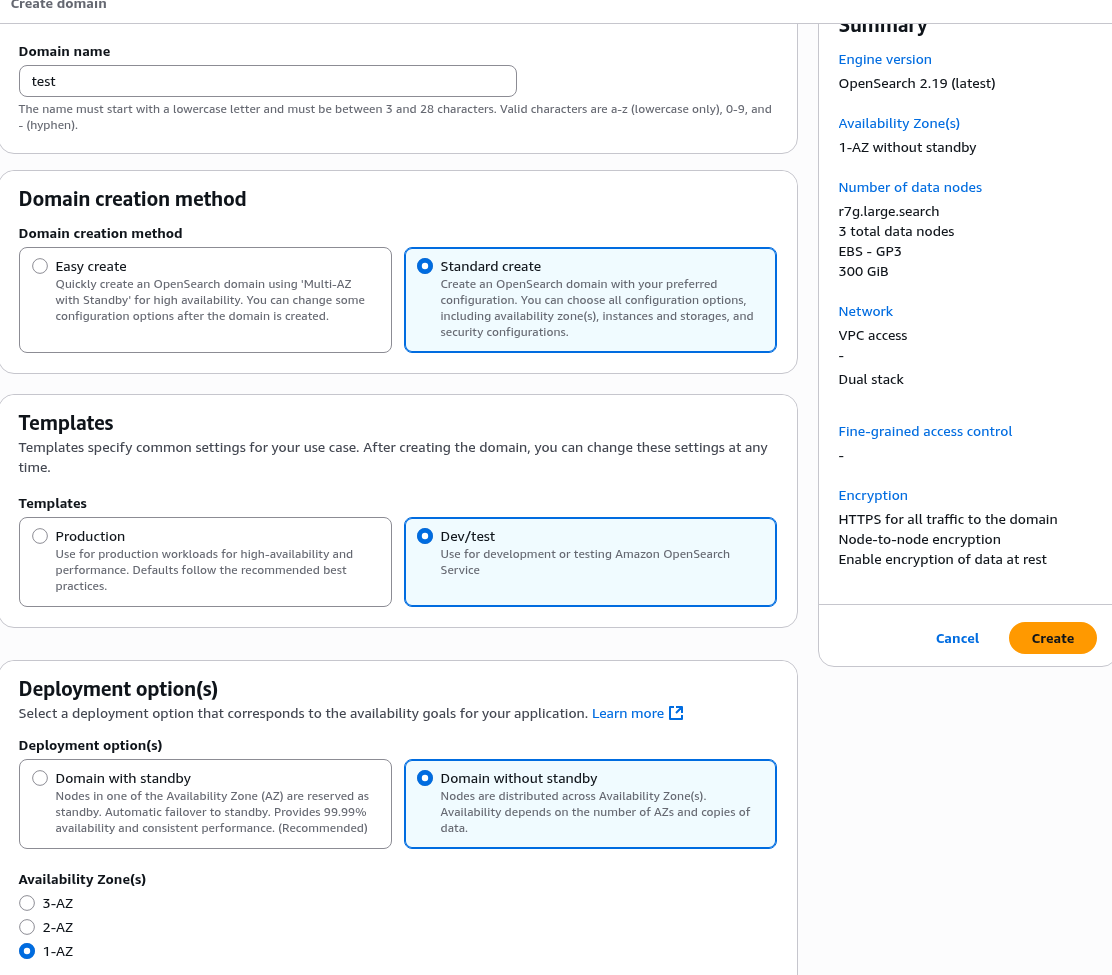
In “Templates”, select “Dev/test” – then you can choose a configuration without Master Nodes and deploy in a single Availability Zone.
In “Deployment option(s)”, select “Domain without standby” – then you will have access to t3instances:
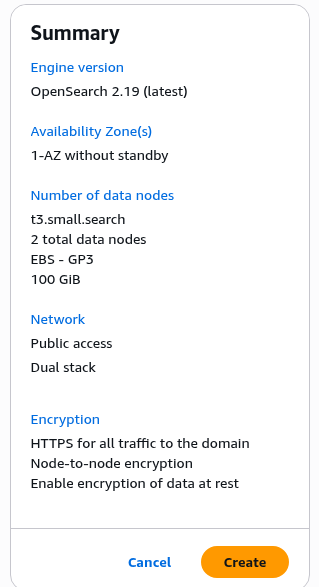
The case conveniently shows us the entire setup right away.
Storage
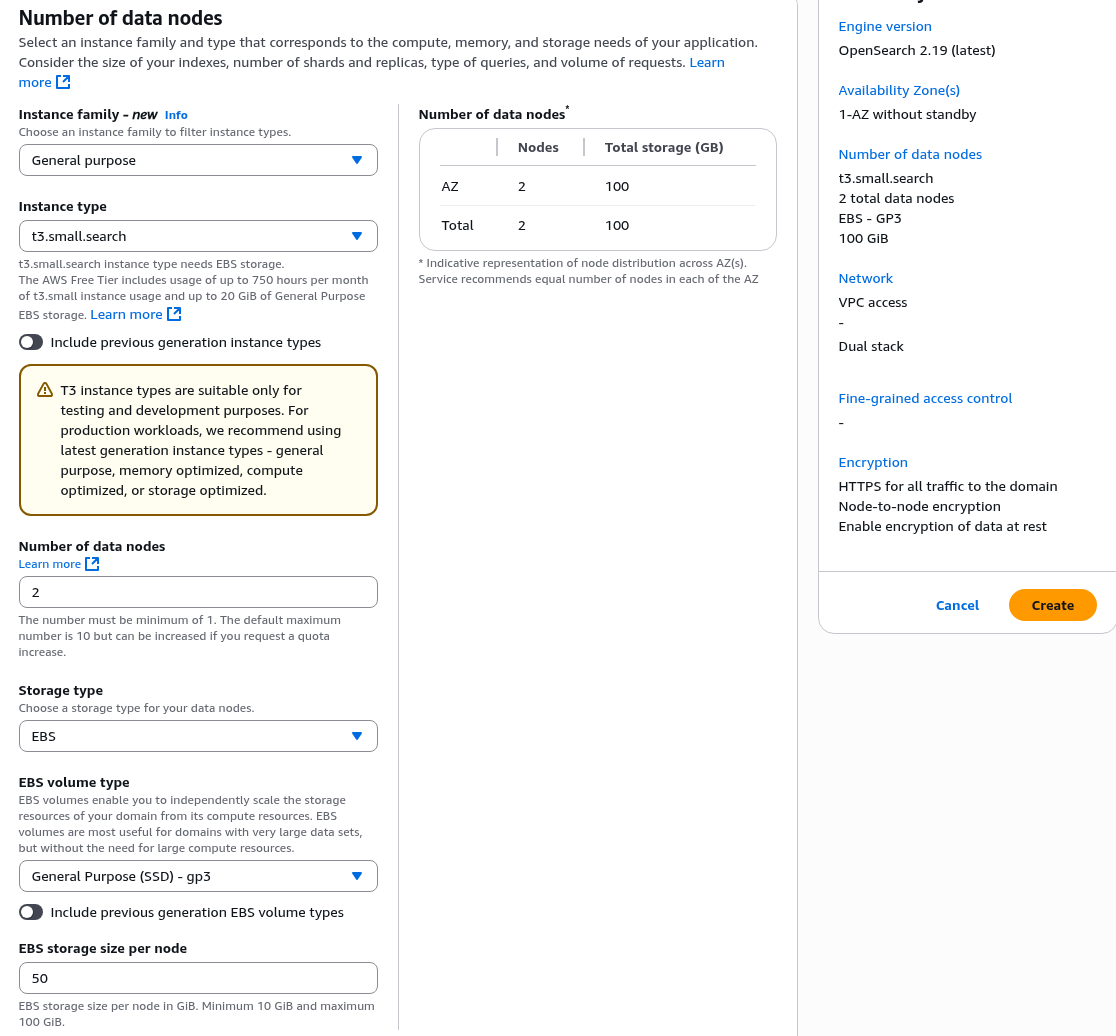
We discussed the number of shards per cluster in the previous post. Let’s assume that we plan to have a maximum of 20-30 GiB of data, so we will create 1 primary shard and 1 replica. But the shards will be configured later, when we create indexes with Terraform and opensearch_index_template.
And for these two shards, we will create two Data Nodes – one for the primary shard and one for the replica.
“Engine options” are described in Features by engine version in Amazon OpenSearch Service. Just leave the default value, the latest version.
For “Instance family” select “General purpose”, and for “Instance type,” select t3.small.search.
For the “EBS storage size per node” we will take 50 GiB – 20-30 gigabytes for data and a little extra for the operating system itself:
Nodes
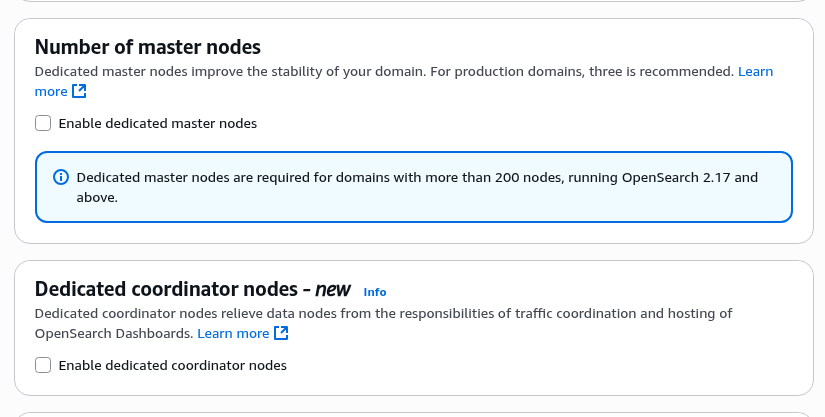
Leave “Number of master nodes” and “Dedicated coordinator nodes” unchanged, i.e. without them:
Network
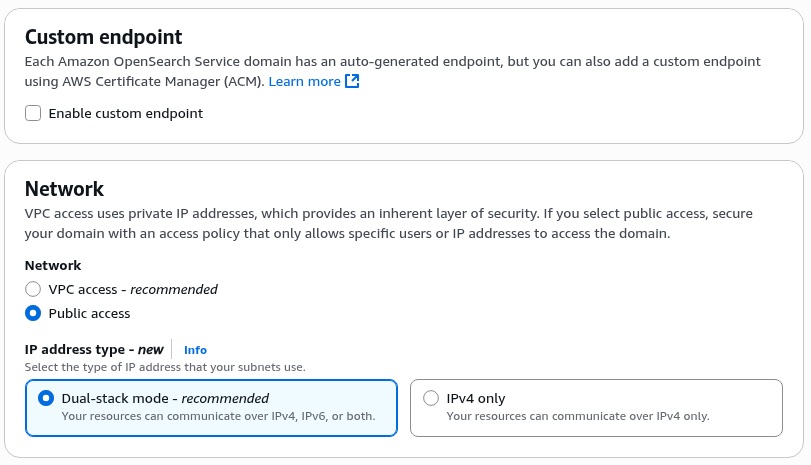
We are not changing anything in “Custom endpoint” yet, but later you can add your own domain from Route53 with a certificate from AWS Certificate Manager to access the cluster, see Creating a custom endpoint for Amazon OpenSearch Service.
In the “Network”, we are going with the simplest option for now, “Public access”, but for Production, we will do it inside the VPC:
However, you will need to test access to Dashboards, because if the cluster is created in VPC subnets, IP-based policies cannot be applied to it, see About access policies on VPC domains. We will discuss IP-based policies further here.
Access && permissions
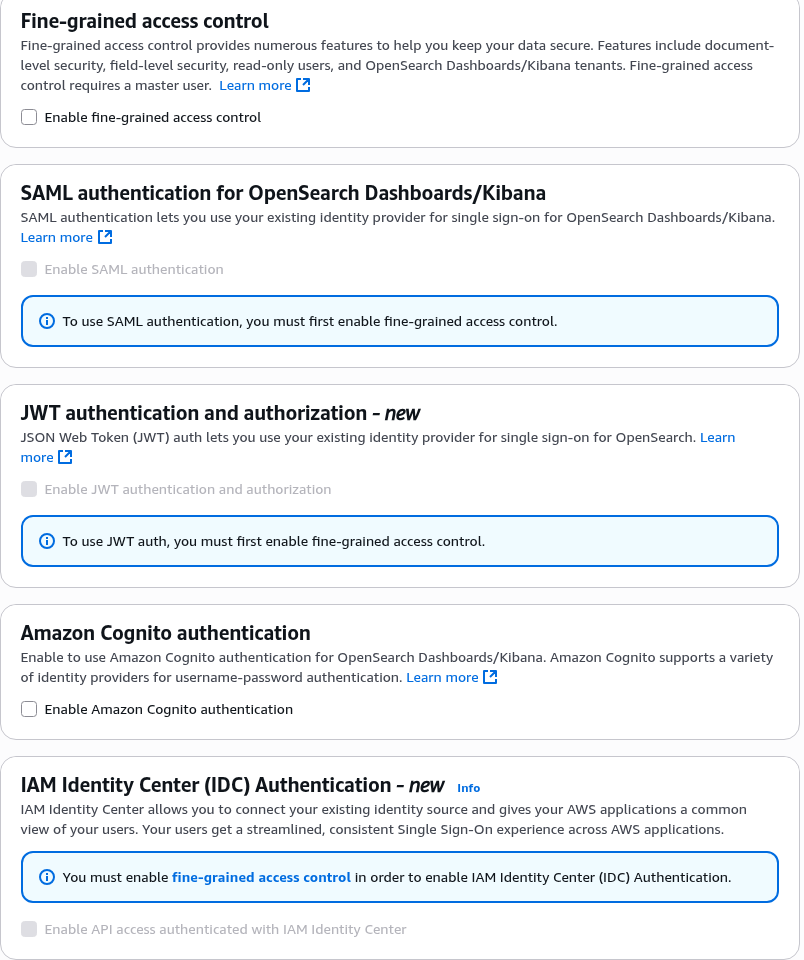
Fine-grained access control (FGAC) – we’ll disable it for now and take a closer look at this mechanism later. Although I’m not sure it will be necessary, because you can easily divide access to different indexes in a single cluster using IAM.
SAML, JWT, and IAM Identity Center depend on FGAC, so we’ll skip them too, and I don’t plan to use them in the future, as they are not relevant to our case.
Cognito is also out of the question – we don’t use it (although later, I may look into integrating with Auth0 or Cognito for Dashboards):
“Access policy”” can be compared to S3 Access Policy, or to IAM Policy for EKS, which allows IAM users to access the cluster.
We will discuss this in more detail in the section on authentication. For now, let’s just leave the default “Do not set domain level access policy” option selected:
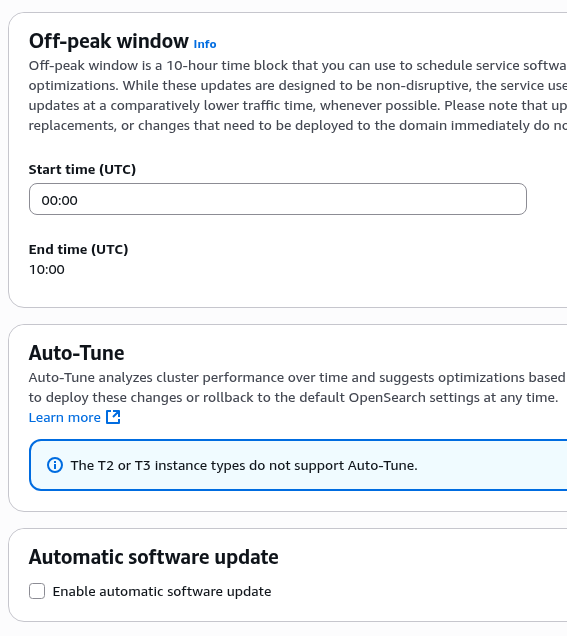
The “Off-peak window” is the time of lowest load for installing updates and performing Auto-tune operations.
Our off-peak time will be at night in the US, so Production will be Central Time (CT) 05:00 UTC.
But since this is a test PoC, we’ll skip that too.
Auto-Tune is also well described and unavailable for our t3instances.
Automatic software update is a useful feature for Production and will be performed at the time specified in the Off-peak window:
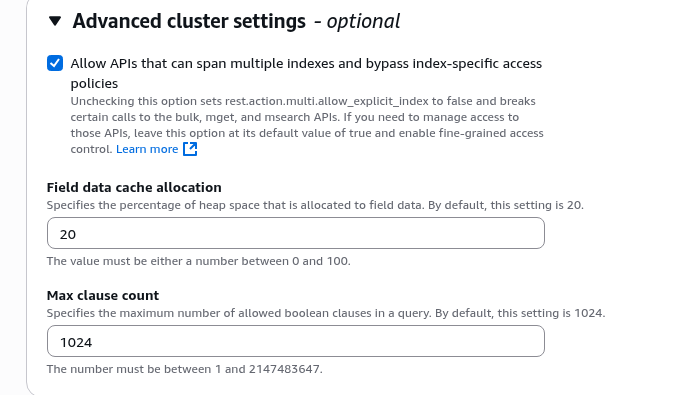
In the “Advanced cluster settings” you can disable rest.action.multi.allow_explicit_index, but I don’t know how our queries will be built, and I think I read somewhere that it can break the Dashboard, so let’s leave the default enabled:
And that’s it, as a result we have the following setup:
Click “Create” and go have some tea, because creating a cluster takes a long time – longer than EKS, and creating OpenSearch took about 20 minutes.
Authentication and authorization
Now, perhaps, the most interesting part – users and access.
After creating a cluster, by default we have limited access rights to the OpenSearch API itself:
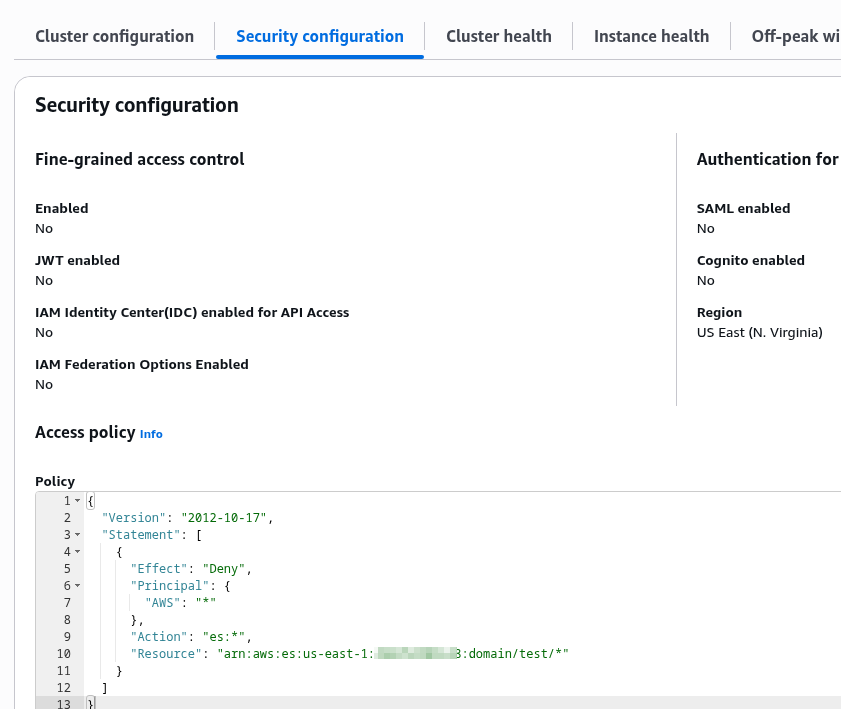
Because in the “Security Configuration” we have an explicit Deny:
Access to AWS OpenSearch Service has three “levels” – network, IAM, and OpenSearch’s own Security Plugin.
In IAM, we have two entities – Domain Access Policy, which we see in Security Configuration > Access Policy (attribute access_policies in Terraform), and Identity-based policies – which are regular AWS IAM Policies.
If we talk about these levels in more detail, they look something like this:
- Network: Network > VPC access or Public access parameter: we set the access limit at the network level (see Launching your Amazon OpenSearch Service domains within a VPC)
- or, if we take an analogy with EKS, these are Public and Private API endpoints, or with RDS, creating an instance in public or private subnets
- AWS IAM:
- Domain Access Policies:
- Resource-based policies: policies that are described directly in the cluster settings
- access is set for IAM Role, IAM User, AWS Accounts to a specific OpenSearch domain
- IP-based policies: essentially the same as Resource-based policies, but with the ability to allow access without authentication for specific IPs (only if the access type is Public, see VPC versus public domains)
- Resource-based policies: policies that are described directly in the cluster settings
- Identity-based policies: if Resource-based policies are part of the cluster’s security policy settings, then Identity-based policies are regular AWS IAM Policies that are added to a specific user or role
- Domain Access Policies:
- Fine-grained access control (FGAC): OpenSearch’s own Security Plugin – the
advanced_security_optionsattribute in Terraform- if in Resource-based policies and Identity-based policies we set rules at the cluster (domain) and index levels, then in FGAC we can additionally describe restrictions on specific documents or fields
- and even if Resource-based policies and Identity-based policies allow access to a resource in the cluster, it can be “trimmed” through Fine-grained access control
That is, the authentication and authorization flow will be as follows:
- AWS API receives a request from the user, for example
es:ESHttpGet- AWS IAM performs authentication – checks ACCESS:SECRET keys or Session token
- AWS IAM performs authorization:
- checks the user’s IAM Policy (Identity-based policy), if there is explicit permission here – we skip
- checks the Domain Access Policy (Resource-based policy) of the cluster, if there is explicit permission here – we skip
- The request comes to OpenSearch itself
- If Fine-grained access control is not enabled, we allow it
- If Fine-grained access control is configured, we check internal roles, and if the user is allowed, we execute the request
Let’s make some accesses and see how it all works.
Configuring Domain Access policy
The basic option is to add IAM User access to the cluster.
Resource-based policy
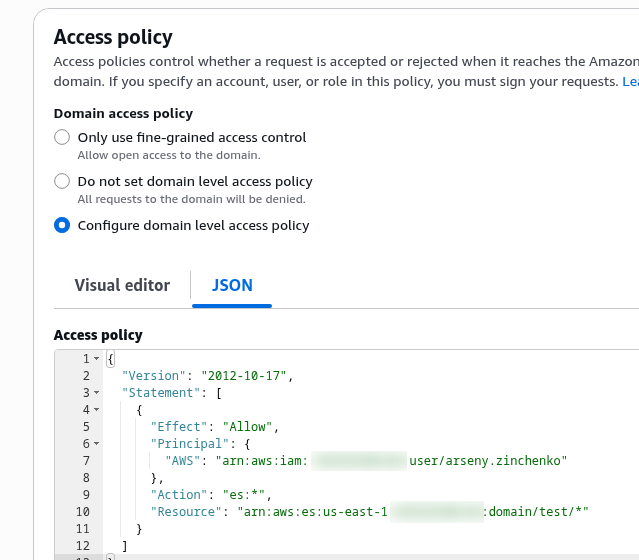
Edit the “Access policy” and specify your user, API operation types, and domain:
{
  "Version": "2012-10-17",
  "Statement": [
    {
      "Effect": "Allow",
      "Principal": {
        "AWS": "arn:aws:iam::492***148:user/arseny.zinchenko"
      },
      "Action": "es:*",
      "Resource": "arn:aws:es:us-east-1:492***148:domain/test/*"
    }
  ]
}
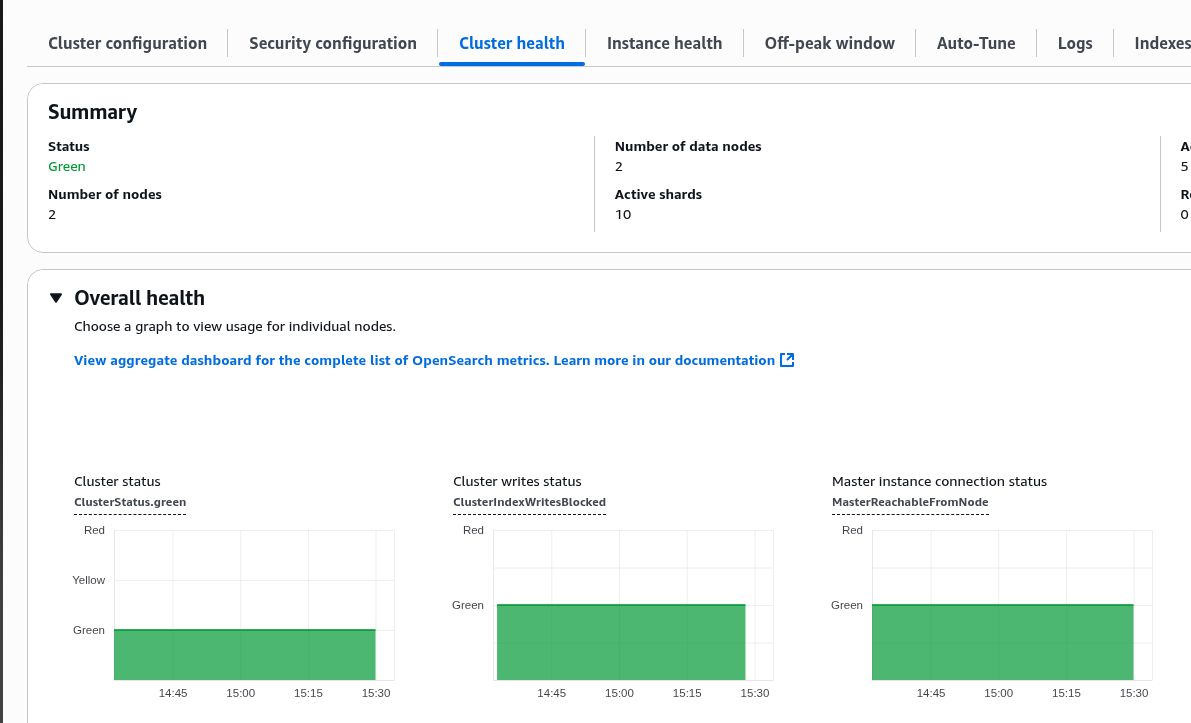
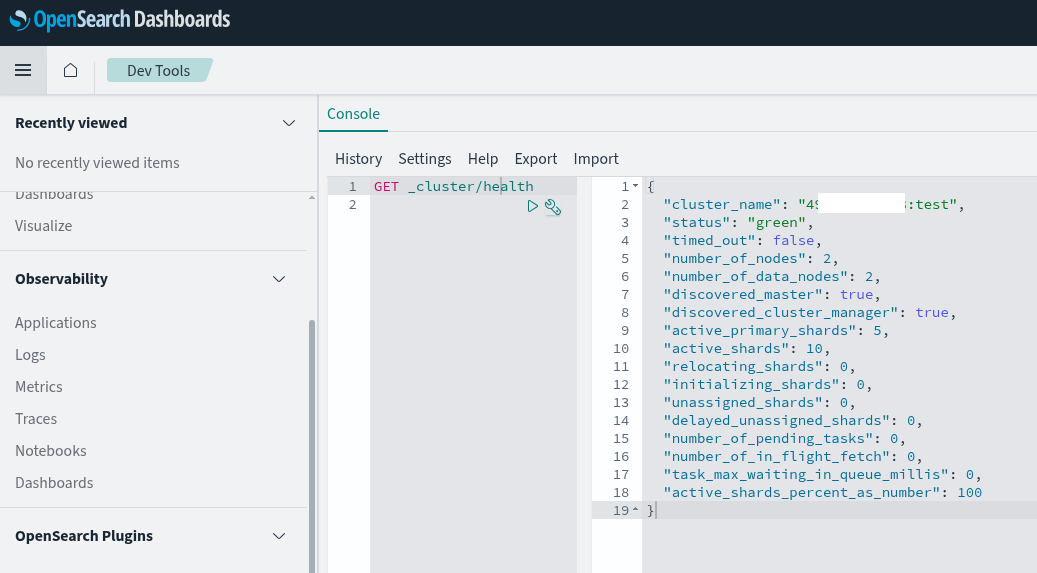
Wait a minute, and now we have access to the OpenSearch API (because Cluster health in the AWS Console is obtained from OpenSearch – see Cluster Health API):
And now we can use curl and --aws-sigv4 to access the cluster (see Authenticating Requests (AWS Signature Version 4)):
$ curl --aws-sigv4 "aws:amz:us-east-1:es" \
>  --user "AKI***B7A:pAu***2gW" \
> https://search-test-***.us-east-1.es.amazonaws.com/_cluster/health?pretty
{
  "cluster_name" : "492***148:test",
  "status" : "green",
  "timed_out" : false,
  "number_of_nodes" : 2,
  "number_of_data_nodes" : 2,
  "discovered_master" : true,
  "discovered_cluster_manager" : true,
  "active_primary_shards" : 5,
  "active_shards" : 10,
  "relocating_shards" : 0,
  "initializing_shards" : 0,
  "unassigned_shards" : 0,
  "delayed_unassigned_shards" : 0,
  "number_of_pending_tasks" : 0,
  "number_of_in_flight_fetch" : 0,
  "task_max_waiting_in_queue_millis" : 0,
  "active_shards_percent_as_number" : 100.0
}
IP-based policies and access to the OpenSearch Dashboards
Similarly, through Domain Access Policy, we can open access to Dashboards – the simplest option, but it only works with Public domains. If the cluster is in VPC, additional authentication will be required, see Controlling access to Dashboards.
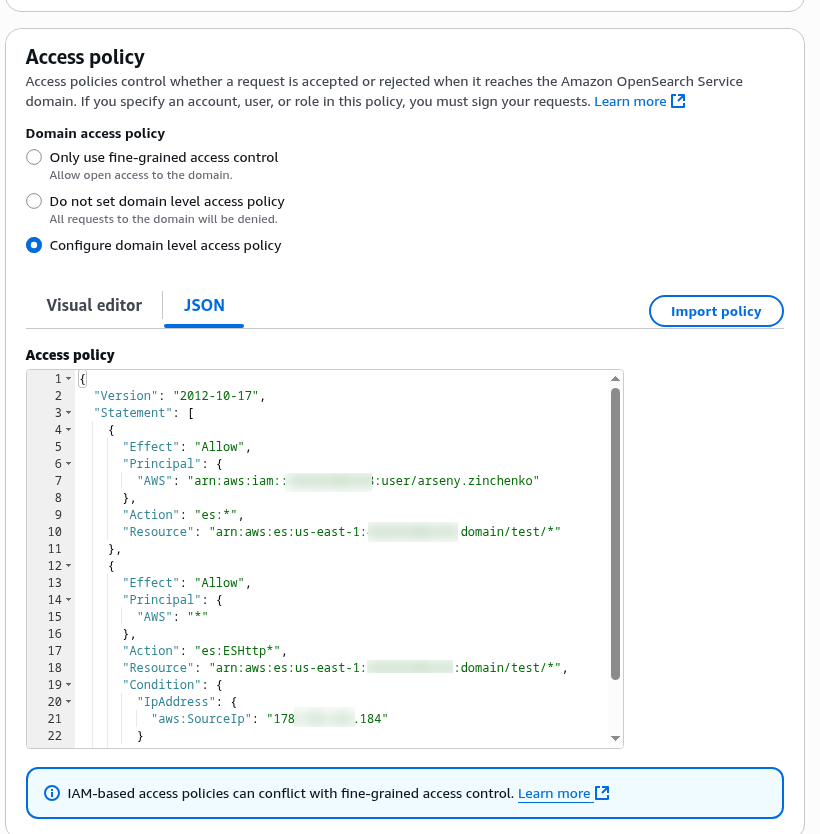
Edit the policy, add condition IpAddress.aws:SourceIp:
{
  "Version": "2012-10-17",
  "Statement": [
    {
      "Effect": "Allow",
      "Principal": {
        "AWS": "arn:aws:iam::492***148:user/arseny.zinchenko"
      },
      "Action": "es:*",
      "Resource": "arn:aws:es:us-east-1:492***148:domain/test/*"
    },
    {
      "Effect": "Allow",
      "Principal": {
        "AWS": "*"
      },
      "Action": "es:ESHttp*",
      "Resource": "arn:aws:es:us-east-1:492***148:domain/test/*",
      "Condition": {
        "IpAddress": {
          "aws:SourceIp": "178.***.***.184"
        }
      }
    }
  ]
}
And now we have access to the Dashboards:
Identity-based policy
Now, the second option is to create a separate IAM User and connect a separate IAM Policy to it.
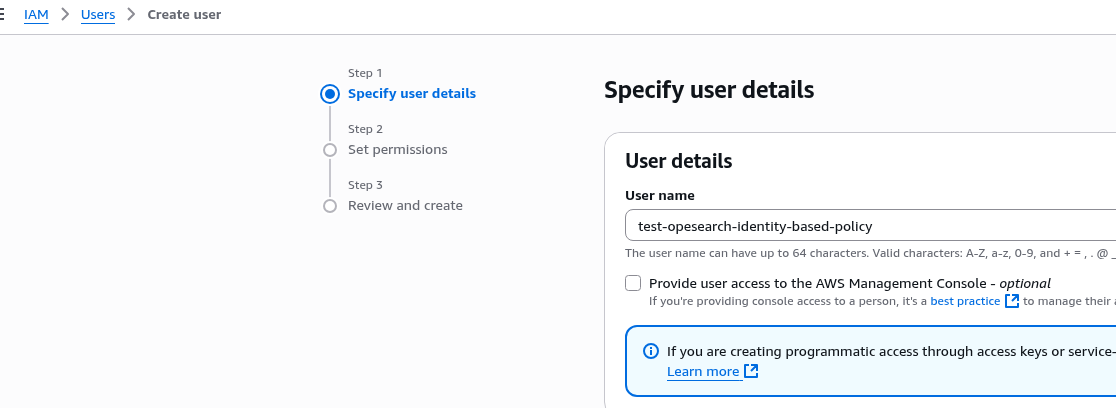
Add a user in AWS IAM:
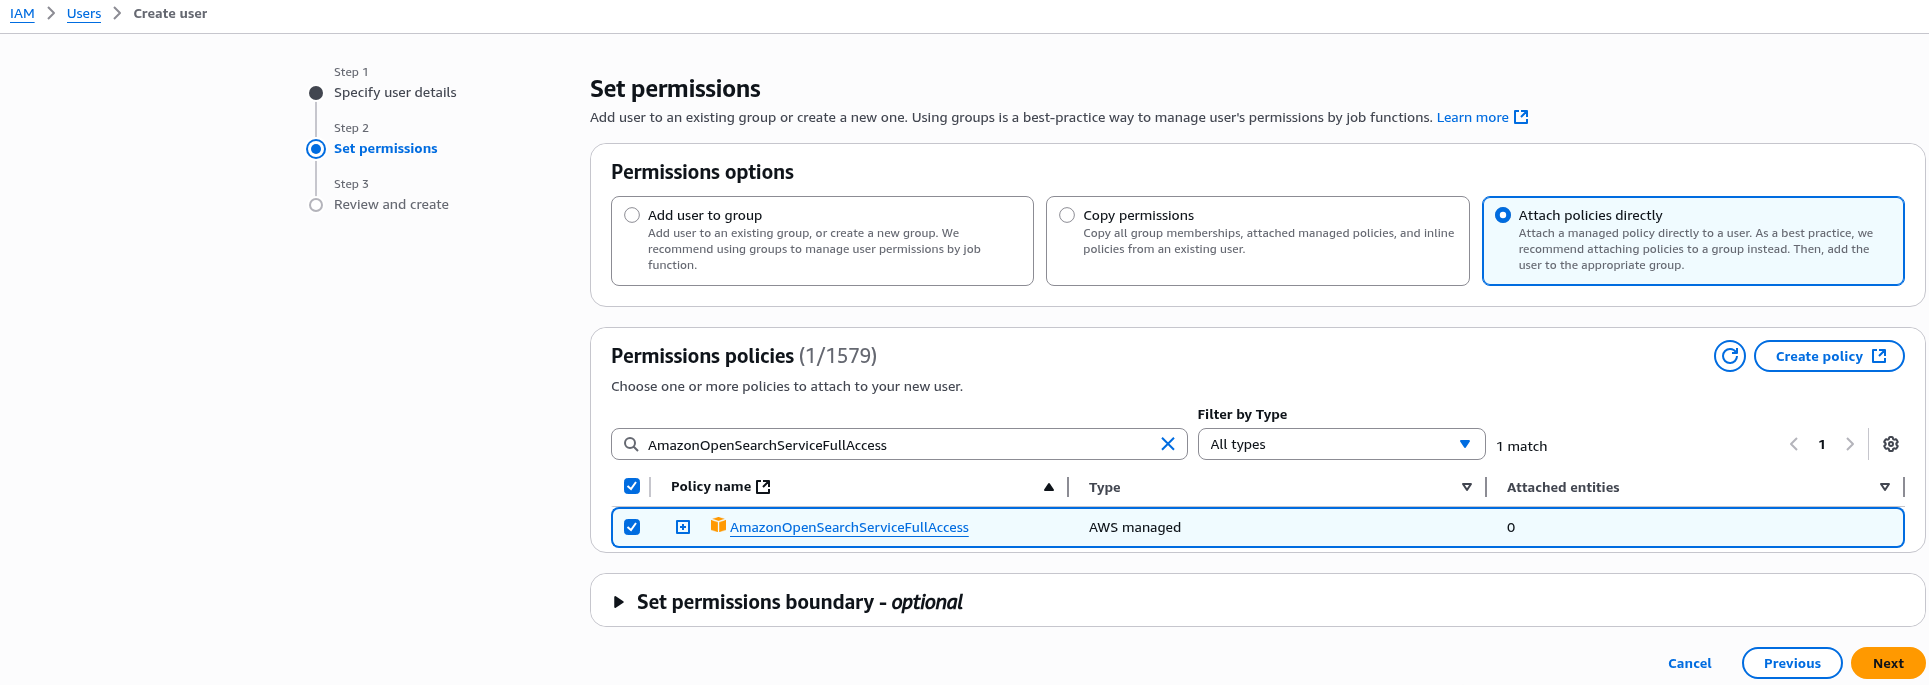
We can just take a ready-made AWS managed policies for Amazon OpenSearch Service:
Next, we simply create access keys for the Command Line Interface (CLI) and, without changing anything in the cluster’s Access policy, check access:
$ curl --aws-sigv4 "aws:amz:us-east-1:es" --user "AKI***YUK:fXV***34I" https://search-test-***.us-east-1.es.amazonaws.com/_cluster/health?pretty
{
  "cluster_name" : "492***148:test",
  "status" : "green",
  "timed_out" : false,
  "number_of_nodes" : 2,
  "number_of_data_nodes" : 2,
  "discovered_master" : true,
  "discovered_cluster_manager" : true,
  "active_primary_shards" : 5,
  "active_shards" : 10,
  "relocating_shards" : 0,
  "initializing_shards" : 0,
  "unassigned_shards" : 0,
  "delayed_unassigned_shards" : 0,
  "number_of_pending_tasks" : 0,
  "number_of_in_flight_fetch" : 0,
  "task_max_waiting_in_queue_millis" : 0,
  "active_shards_percent_as_number" : 100.0
}
So now we have a Domain Access Policy that grants access specifically to my user, and there is a separate IAM Policy – an identity-based policy – that grants access to the test user.
But there is one important point here: in the IAM Policy, we specify either the entire domain or only its subresources.
That is, if instead of the AmazonOpenSearchServiceFullAccess policy, we create our own policy in which we specify "Resource":***:domain/test/*":
{
    "Version": "2012-10-17",
    "Statement": [
        {
            "Effect": "Allow",
            "Action": [
                "es:*"
            ],
            "Resource": "arn:aws:es:us-east-1:492***148:domain/test/*"
        }
    ]
}
So we can execute es:ESHttpGet (GET _cluster/health) – but we cannot execute cluster-level operations, such as es:AddTags, even though we have permission for all calls in the Actions of the IAM policy – es:*:
 $ aws --profile test-os opensearch add-tags --arn arn:aws:es:us-east-1:492***148:domain/test --tag-list Key=environment,Value=test

An error occurred (AccessDeniedException) when calling the AddTags operation: User: arn:aws:iam::492***148:user/test-opesearch-identity-based-policy is not authorized to perform: es:AddTags on resource: arn:aws:es:us-east-1:492***148:domain/test because no identity-based policy allows the es:AddTags action
If we want to allow all operations with the cluster, we need to set "Resource" to "arn:aws:es:us-east-1:492***148:domain/test", and then we can add tags.
See all API actions in Actions, resources, and condition keys for Amazon OpenSearch Service.
Fine-grained access control
Documentation – Fine-grained access control in Amazon OpenSearch Service.
The basic idea is very similar to Kubernetes RBAC.
In OpenSearch, there are three main concepts:
- users – like Kubernetes Users and ServiceAccounts
- roles – like Kubernetes RBAC Roles
- mappings – like Kubernetes Role Bindings
Users can be from both AWS IAM and the internal OpenSearch database.
As in Kubernetes, OpenSearch has a set of default roles – see Predefined roles.
At the same time, roles, as in Kubernetes, can be cluster-wide or index-specific – analogous to ClusterRoleBinding and simply namespaced RoleBinding in Kubernetes, plus in OpenSearch FGAC you can additionally have document level or field level permissions.
Configuring the Fine-grained access control
Important note: once FGAC is enabled, you will not be able to revert to the old scheme. However, all accesses from IAM will remain, even if you switch to the internal database.
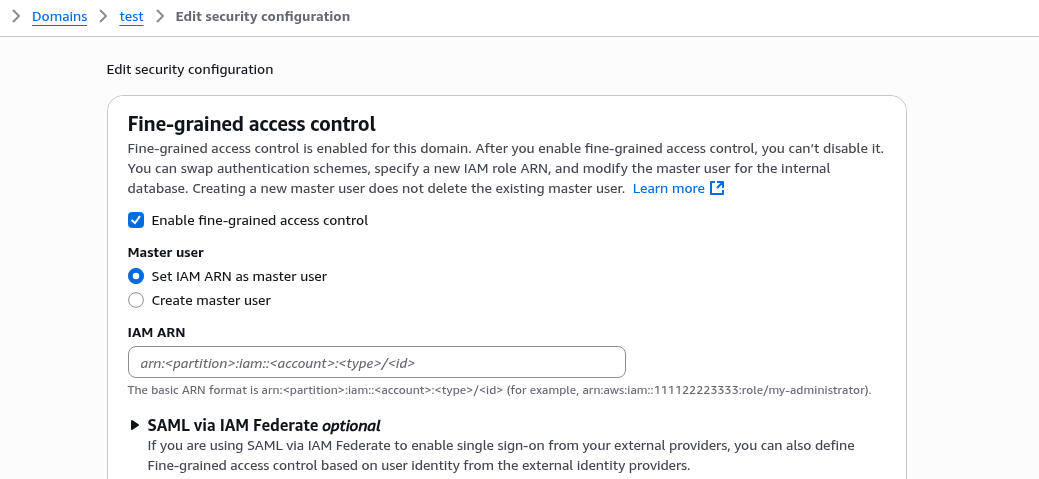
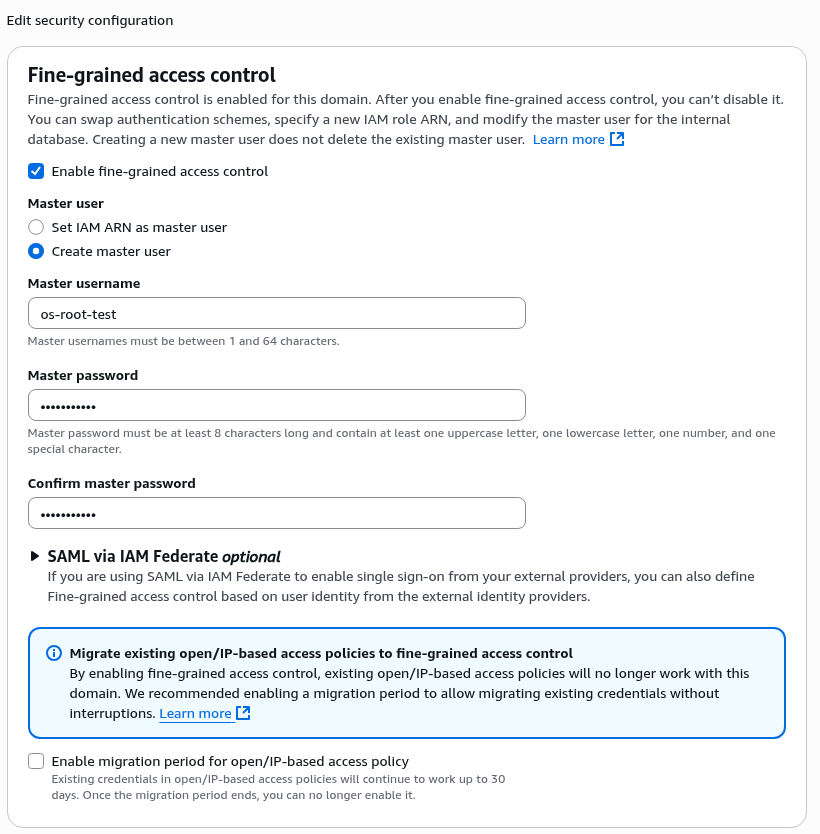
Edit “Security configuration” and enable “Fine-grained access control”:
First, we need to set up a Master user, which can be specified from IAM or created locally in OpenSearch.
If we create a user via the “Create master user” option, we specify a regular login:password, and in this case, OpenSearch will connect to the internal user database (internal_user_database_enabled in Terraform).
If we use the internal OpenSearch database, we can have regular users and perform HTTP basic authentication. See the AWS documentation – Tutorial: Configure a domain with the internal user database and HTTP basic authentication and Defining users and roles in the OpenSearch documentation itself, as these are its internal mechanisms.
This makes sense if you don’t want to use Cognito or SAML, and if each cluster will have its own user settings.
If you set an IAM user, the scheme will be similar to AIM authentication for RDS and IAM database authentication – access to the cluster is controlled by AWS IAM, but internal access to schemas and databases is controlled by PostgreSQL or MariaDB roles, see AWS: RDS with IAM database authentication, EKS Pod Identities, and Terraform.
In this case, AWS IAM will only perform user authentication, while authorization (access rights verification) will be handled by the Security plugin and OpenSearch roles.
Let’s try a local database, and I think we’ll use this scheme in Production as well:
We can leave “Access Policy” as it is:
Switching to the internal database will take some time because it will trigger a blue/green deployment of the new cluster, see Making configuration changes in Amazon OpenSearch Service.
And it took a long time, more than an hour, even though there is no data of ours in the cluster.
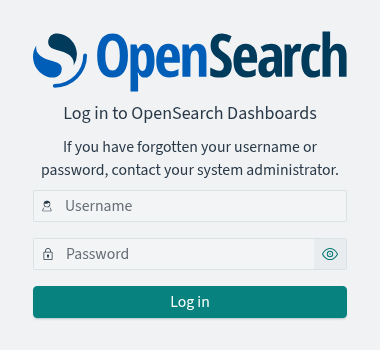
Once the changes are applied, Dashboards will now ask for a login and password. Use our Master user:
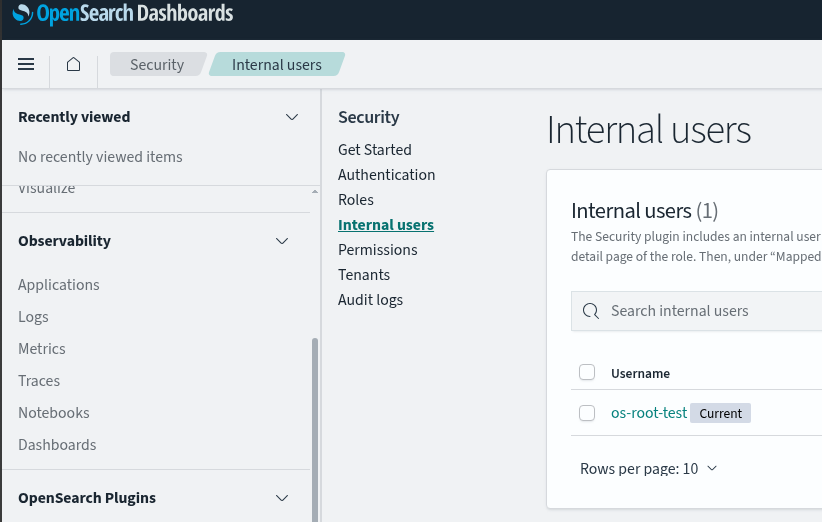
The master user receives two connected roles: all_access and security_manager.
It is security_manager that provides access to the Security and Users sections in the dashboard:
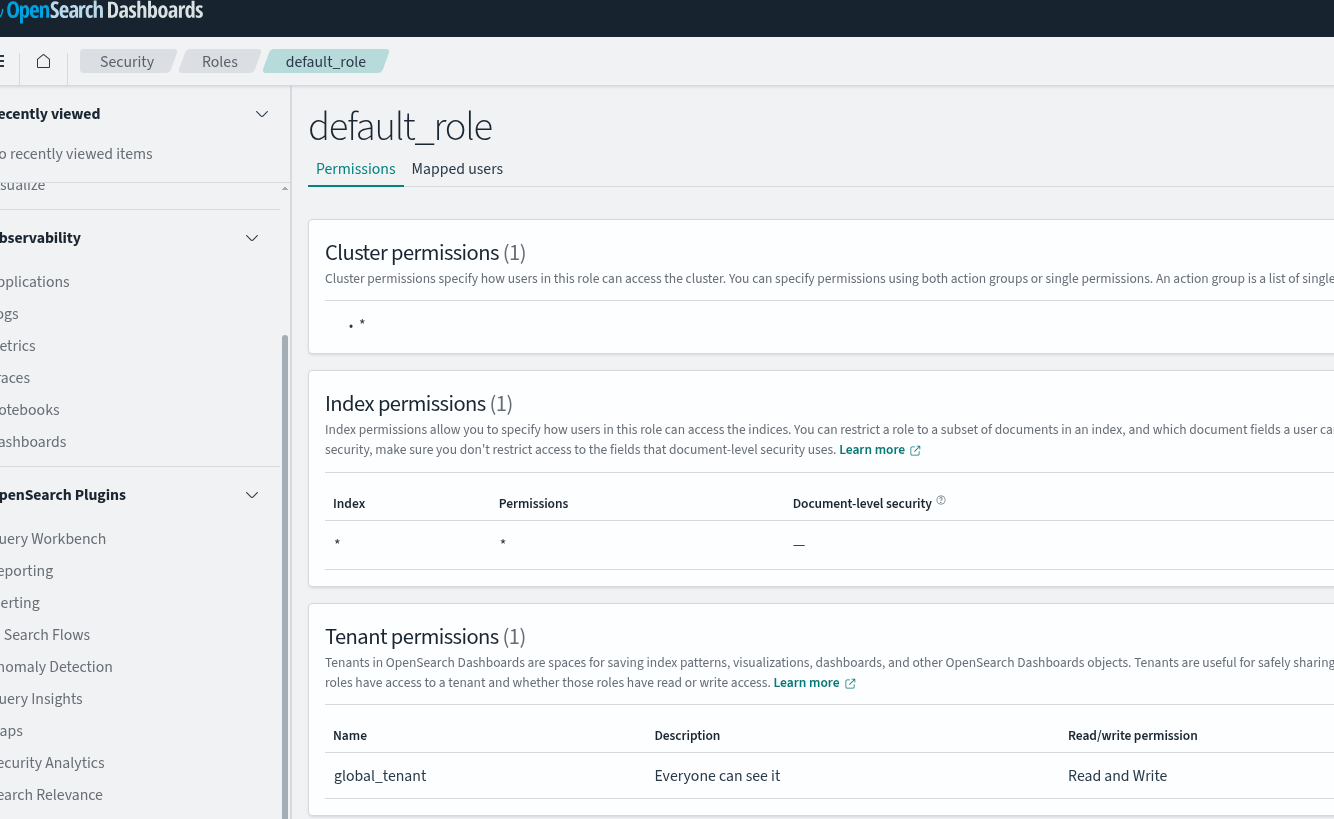
At the same time, we still have access to our AIM users, and we can continue to use curl: IAM users will be mapped to the default_role, which allows GET/PUT on all indexes – see About the default_role:
Let’s check our test user’s access now:
$ curl --aws-sigv4 "aws:amz:us-east-1:es" --user "AKI***YUK:fXV***34I" https://search-test-***.us-east-1.es.amazonaws.com/_cluster/health?pretty
{
  "cluster_name" : "492***148:test",
  "status" : "green",
  "timed_out" : false,
  "number_of_nodes" : 2,
...
Now let’s cut off access to all IAM users.
Creating an OpenSearch Role
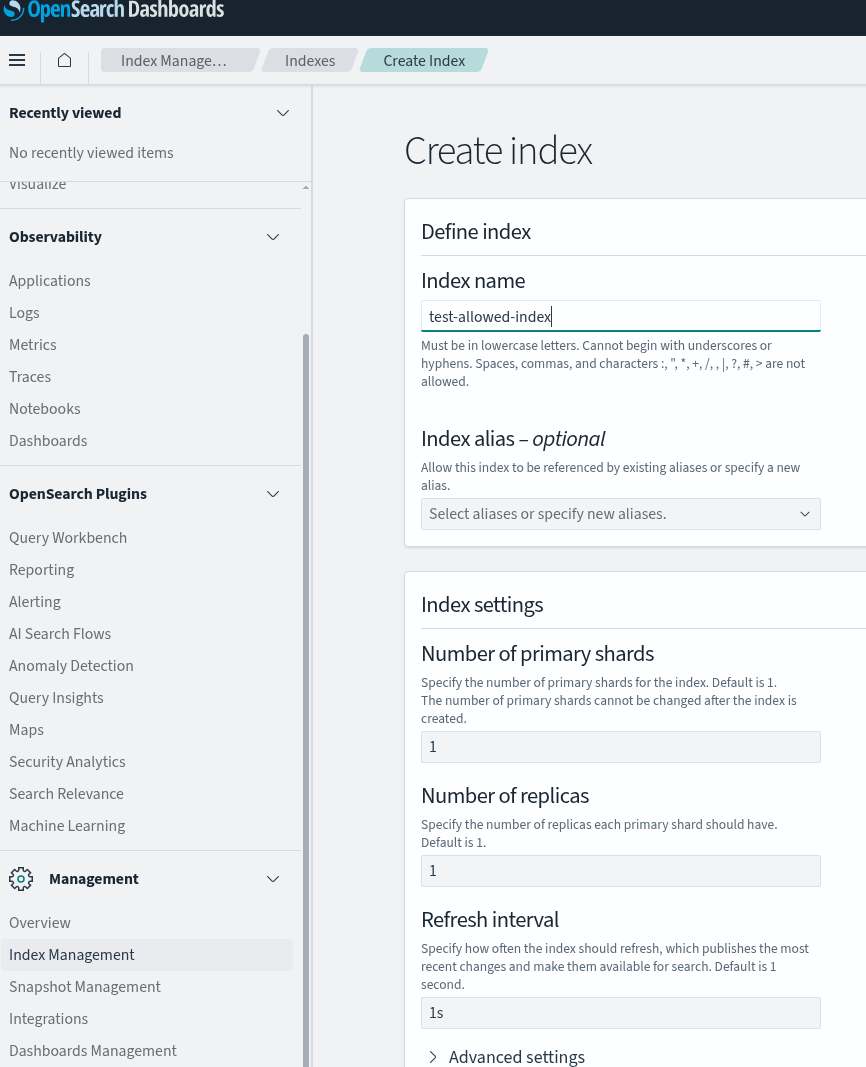
To see how it works, let’s add a test index and map our test user with access to this index.
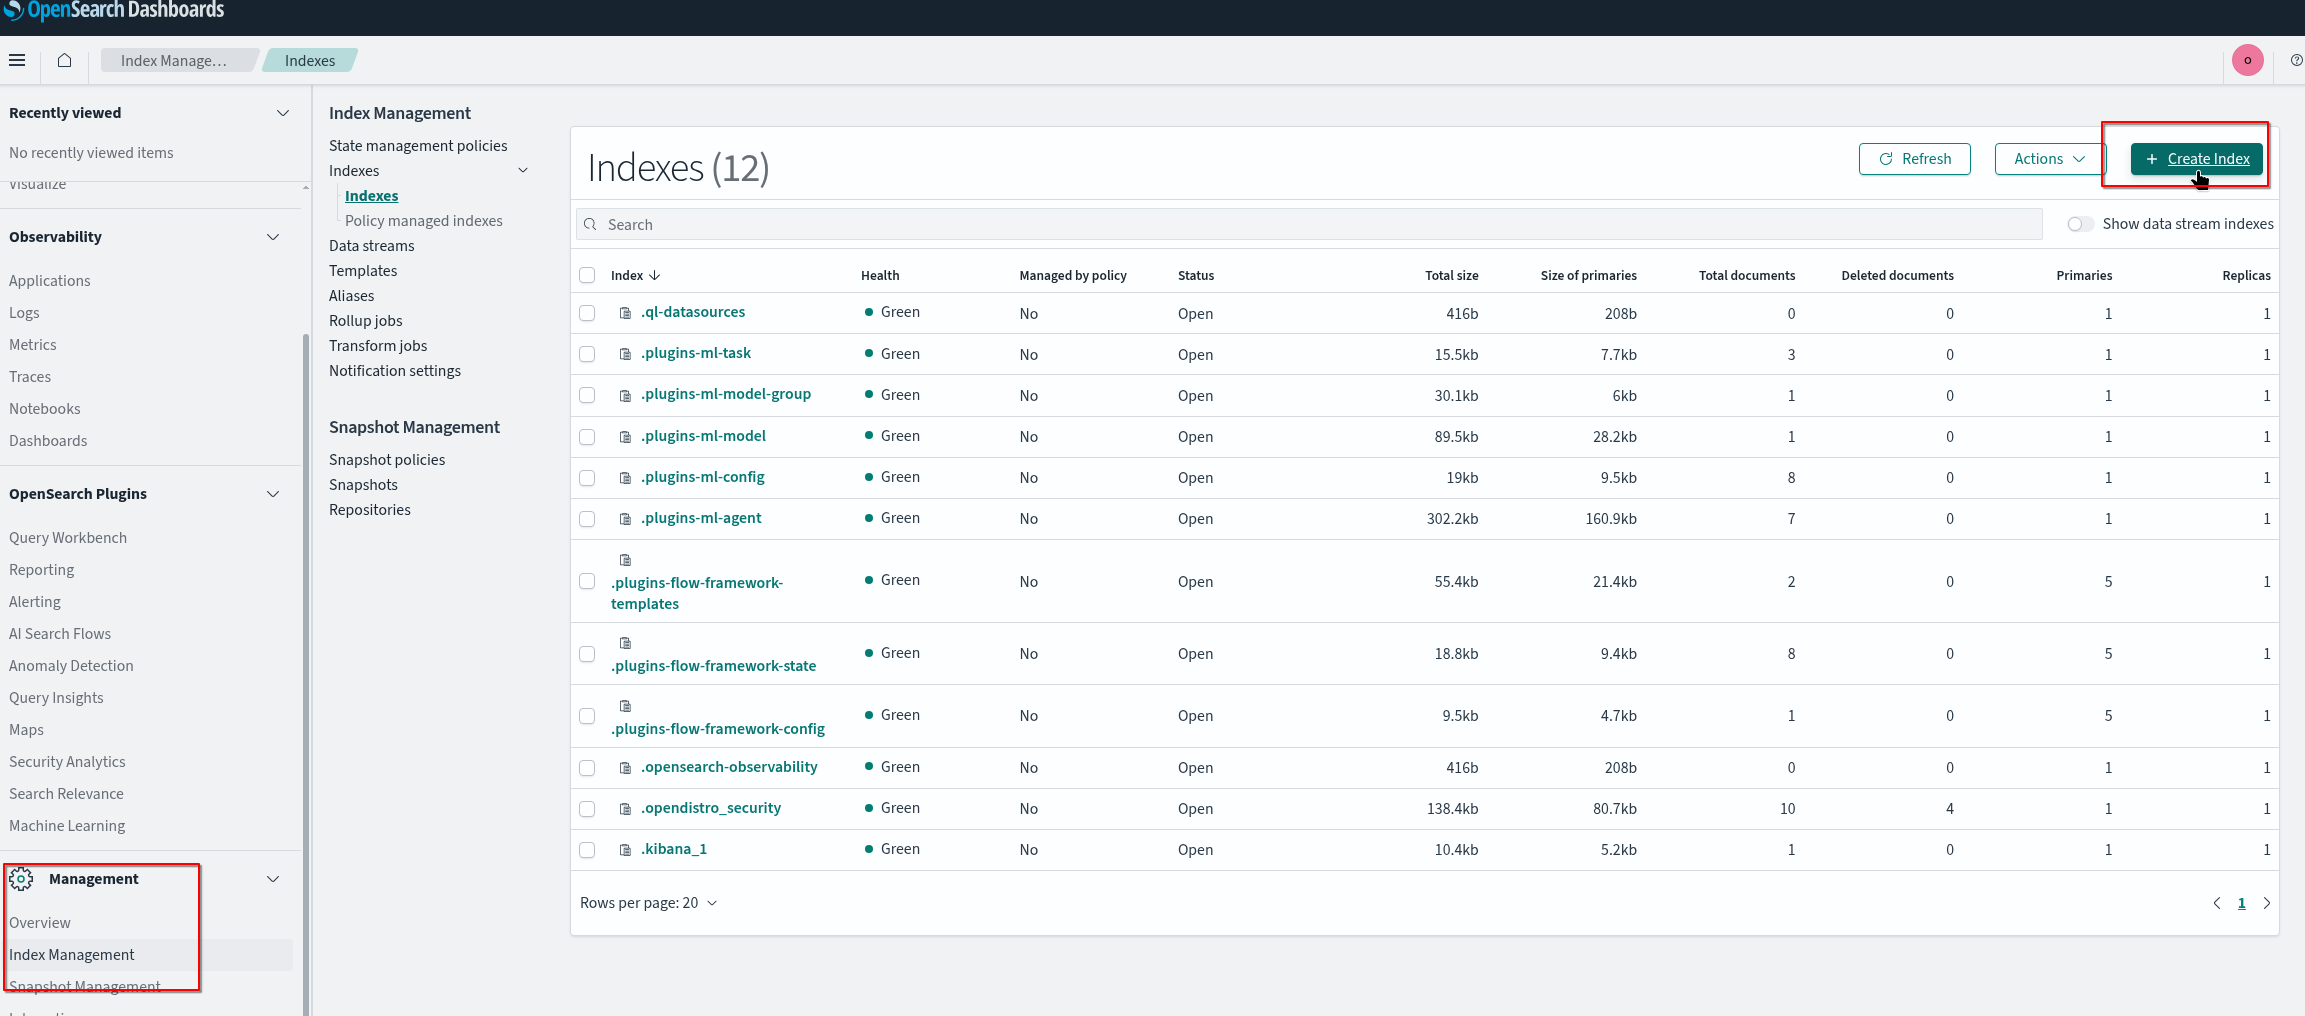
Add the index:
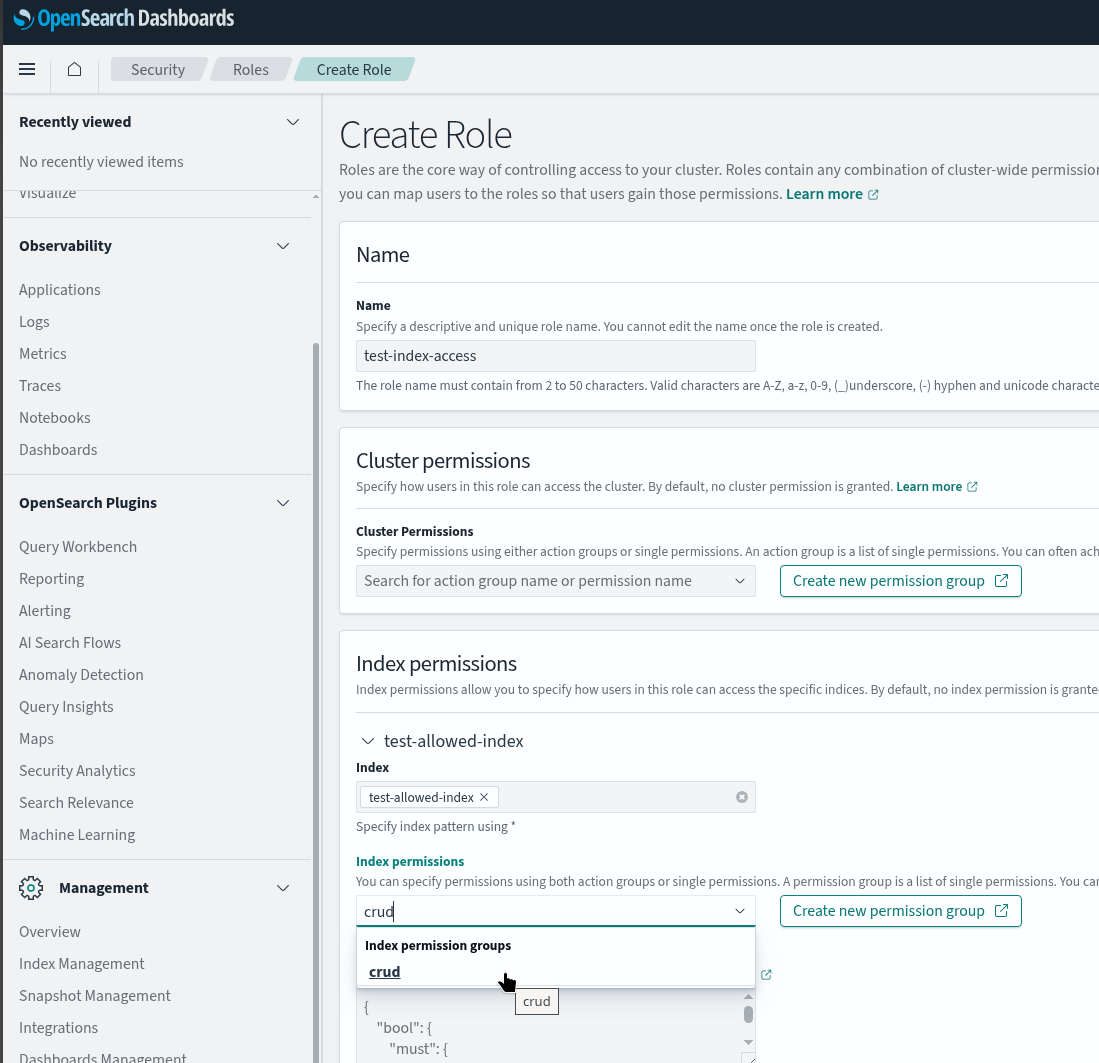
Go to Security > Roles, add a role:
Set Index permissions – full access to the index (crud):
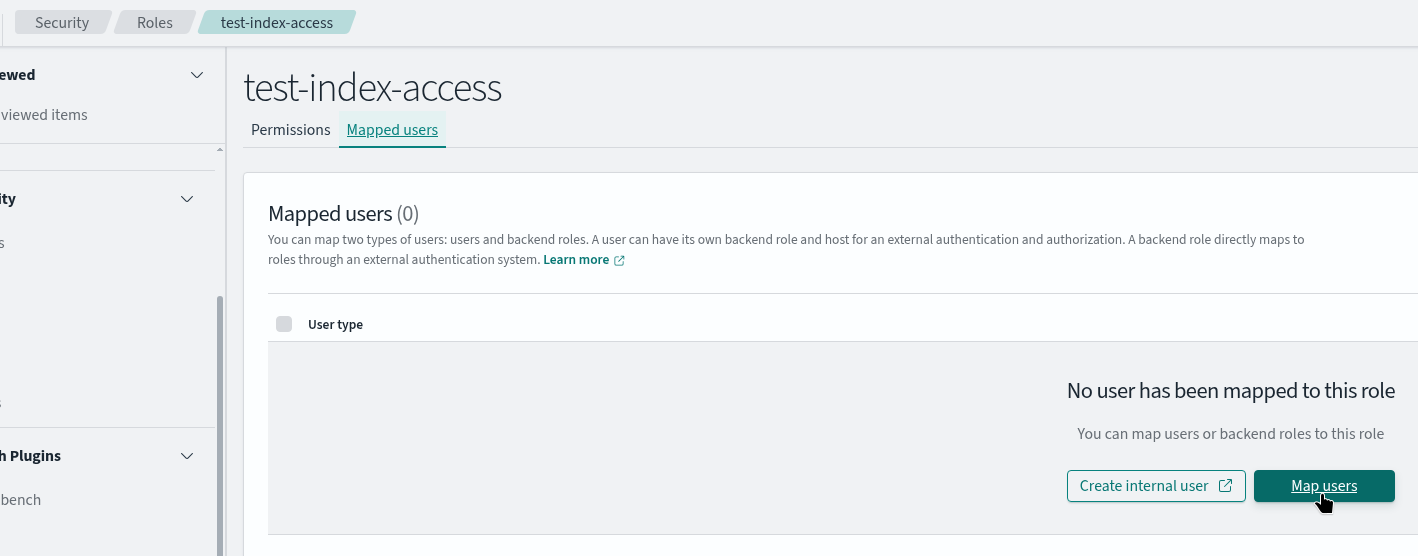
Next, in this role, we move on to Mapped users > Map users:
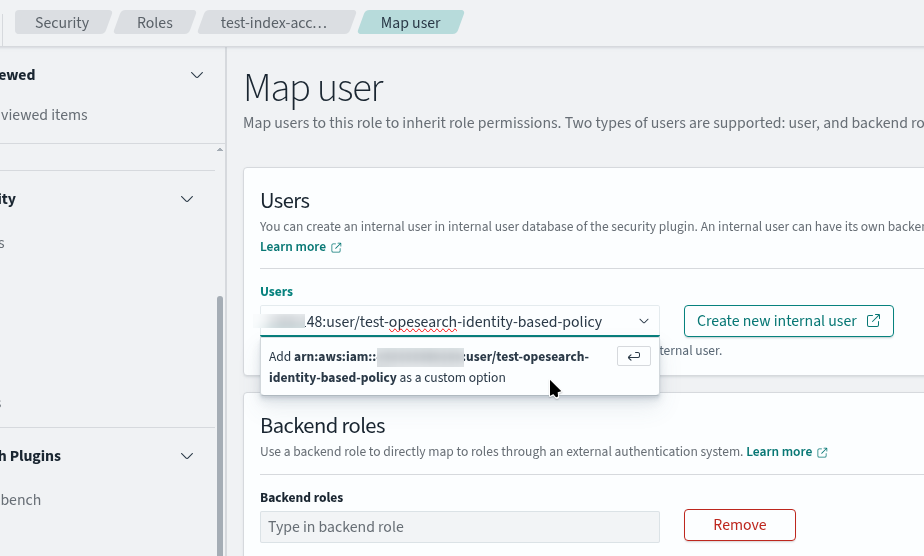
And add the ARN of our test user:
Delete the default role:
Now our user does not have access to GET _cluster/health – here we get an error 403, no permissions:
$ curl --aws-sigv4 "aws:amz:us-east-1:es" --user "AKI***YUK:fXV***34I" https://search-test-***.us-east-1.es.amazonaws.com/_cluster/health?pretty
{
  "error" : {
    ...
    "type" : "security_exception",
    "reason" : "no permissions for [cluster:monitor/health] and User [name=arn:aws:iam::492***148:user/test-opesearch-identity-based-policy, backend_roles=[], requestedTenant=null]"
  },
  "status" : 403
}
But has access to the test index:
$ curl --aws-sigv4 "aws:amz:us-east-1:es" --user "AKI***YUK:fXV***34I" https://search-test-***.us-east-1.es.amazonaws.com/test-allowed-index/_search?pretty   -d '{
    "query": {
      "match_all": {}
    }
  }' -H 'Content-Type: application/json'
{
  "took" : 78,
  "timed_out" : false,
  "_shards" : {
    "total" : 1,
    "successful" : 1,
    "skipped" : 0,
    "failed" : 0
  },
  "hits" : {
    "total" : {
      "value" : 0,
      "relation" : "eq"
    },
    "max_score" : null,
    "hits" : [ ]
  }
}
Done.
![]()
