 Задача – развернуть CloudFromation стек с одним EC2 интансом и примонтировать Elastic Block Store (EBS) с данными Jenkins.
Потом с помощью Ansible – установить там Docker и запустить Jenkins.
Содержание
Подготовка
Сначала – вручную создадим EBS, который будет хранить данные Jenkins и далее будет подключаться к создаваемому EC2 интансу.
Создаём именованный профиль AWS CLI для RTFM:
[simterm]
$ aws configure --profile rtfm
AWS Access Key ID [None]: AKI***2PA
AWS Secret Access Key [None]: P6o***2VR
Default region name [None]: eu-west-1
Default output format [None]: json
[/simterm]
EBS
Создаём EBS раздел.
Тип раздела – стандартный Magnetic (standard), ибо дешёво и сердито – для Jenkins достаточно.
Стоимость EBS разделов – тут>>>, описание – тут>>>.
Создаём с помощью create-volume:
[simterm]
$ aws ec2 --profile rtfm create-volume --availability-zone eu-west-1a --size 8 --volume-type standard --tag-specifications 'ResourceType=volume,Tags=[{Key=Name,Value=jenkins-workspaces},{Key=Env,Value=production}]'
{
    "AvailabilityZone": "eu-west-1a",
    "CreateTime": "2017-09-30T11:47:30.863Z",
    "Encrypted": false,
    "Size": 8,
    "SnapshotId": "",
    "State": "creating",
    "VolumeId": "vol-0085149b3a0a45d0c",
    "Tags": [
        {
            "Key": "Name",
            "Value": "jenkins-workspaces"
        },
        {
            "Key": "Env",
            "Value": "production"
        }
    ],
    "VolumeType": "standard"
}
[/simterm]
Elastic IP (EIP) будет добавляться во время создания стека, что бы не тратить деньги, когда стек будет удаляться (держать Jenkins запущенным постоянно я не планирую, ибо деньги – проще обновить IN A запись домена при обновлении стека и EIP).
Домены со временем тоже планируется вынести в AWS Route 53, пока управление – через панель регистратора.
Key pair
Создаём ключ для доступа с помощью create-key-pair, сохраняем в файл ~/.ssh/rtfm_jenkins.pem:
[simterm]
$ aws ec2 --profile rtfm create-key-pair --key-name rtfm_jenkins --query 'KeyMaterial' --output text > ~/.ssh/rtfm_jenkins.pem
[/simterm]
Права:
[simterm]
$ chmod 400 ~/.ssh/rtfm_jenkins.pem
[/simterm]
CloudFormation
Теперь приступаем к созданию шаблона.
Шаблон очень простой:
- Security Group
- EC2
- подключить к нему созданный выше EBS
Примеры шаблонов для создания EC2 есть тут>>> и тут>>>.
AMI ID
Находим Debian AMI ID с помощью describe-images:
[simterm]
$ aws ec2 --profile rtfm describe-images --filters "Name=name,Values=debian-stretch*" "Name=root-device-type,Values=ebs" "Name=image-type,Values=machine" "Name=manifest-location,Values=aws-marketplace*"
{
    "Images": [
        {
            "Architecture": "x86_64",
            "CreationDate": "2017-09-01T05:55:19.000Z",
            "ImageId": "ami-cc5aa0b5",
            "ImageLocation": "aws-marketplace/debian-stretch-hvm-x86_64-gp2-2017-08-31-64407-572488bb-fc09-4638-8628-e1e1d26436f4-ami-ac5e55d7.4",
...
[/simterm]
Создание шаблона
Теперь – создаём шаблон.
Сначала – параметры:
- InstanceType: тип инстанса, по умолчанию самый мелкий –
t2.nano, типы инстансов смотрим тут>>> - JenkinsAMIID: AMI ID Debian 9, который нашли выше
- KeyName: ключ, созданный ранее
- HomeAllowLocation: домашний IP, откуда разрешён доступ, позже можно будет добавить ещё один, для доступа с рабочей сети, передавать будем через параметры при создании стека
Ресурсы:
- EC2Instance: параметры EC2
- InstanceSecurityGroup: описание Security Group
Собственно – это всё, что требуется для минимального стека с EC2.
Полностью шаблон выглядит так:
{
  "AWSTemplateFormatVersion" : "2010-09-09",

  "Description" : "AWS CloudFormation Template EC2",

  "Parameters" : {

    "InstanceType": {
      "Description": "Jenkins EC2 instance type",
      "Type": "String",
      "Default": "t2.nano",
      "AllowedValues": [
        "t2.nano",
        "t2.micro",
        "t2.small"
      ],
      "ConstraintDescription": "Must be a valid EC2 instance type."
    },

    "AMIID": {
      "Description": "Debian AMI ID",
      "Type": "String",
      "Default": "ami-cc5aa0b5"
    },

    "KeyName": {
      "Description": "Name of an existing EC2 KeyPair to enable SSH access to the instance",
      "Type": "AWS::EC2::KeyPair::KeyName",
      "ConstraintDescription": "must be the name of an existing EC2 KeyPair.",
      "Default": "rtfm_jenkins"
    },

    "HomeAllowLocation": {
      "Description": "The IP address range that can be used to SSH to the EC2 instances",
      "Type": "String",
      "MinLength": "9",
      "MaxLength": "18",
      "AllowedPattern": "(\\d{1,3})\\.(\\d{1,3})\\.(\\d{1,3})\\.(\\d{1,3})/(\\d{1,2})",
      "ConstraintDescription": "must be a valid IP CIDR range of the form x.x.x.x/x."
    }
  },

  "Resources" : {
    "EC2Instance" : {
      "Type" : "AWS::EC2::Instance",
      "Properties" : {
        "Tags" : [
          {
            "Key" : "Name", "Value" : "rtfm_jenkins"
          }
        ],
        "InstanceType" : { "Ref" : "InstanceType" },
        "SecurityGroups" : [
          {
            "Ref" : "InstanceSecurityGroup"
          }
        ],
        "KeyName" : { "Ref" : "KeyName" },
        "ImageId" : { "Ref" : "AMIID"  }
      }
    },

    "InstanceSecurityGroup" : {
      "Type" : "AWS::EC2::SecurityGroup",
      "Properties" : {
        "Tags" : [
          {
            "Key" : "Name", "Value" : "rtfm_jenkins"
          }
        ],
        "GroupDescription" : "Enable SSH access via port 22",
        "SecurityGroupIngress" : [

          {
            "IpProtocol" : "tcp",
            "FromPort" : "22",
            "ToPort" : "22",
            "CidrIp" : { "Ref" : "HomeAllowLocation"}
          },

          {
            "IpProtocol" : "tcp",
            "FromPort" : "80",
            "ToPort" : "80",
            "CidrIp" : { "Ref" : "HomeAllowLocation"}
          },

          {
            "IpProtocol" : "tcp",
            "FromPort" : "443",
            "ToPort" : "443",
            "CidrIp" : { "Ref" : "HomeAllowLocation"}
          }

        ]
      }
    }
  },

  "Outputs" : {
    "InstanceId" : {
      "Description" : "InstanceId of the newly created EC2 instance",
      "Value" : { "Ref" : "EC2Instance" }
    },
    "AZ" : {
      "Description" : "Availability Zone of the newly created EC2 instance",
      "Value" : { "Fn::GetAtt" : [ "EC2Instance", "AvailabilityZone" ] }
    },
    "PublicDNS" : {
      "Description" : "Public DNSName of the newly created EC2 instance",
      "Value" : { "Fn::GetAtt" : [ "EC2Instance", "PublicDnsName" ] }
    },
    "PublicIP" : {
      "Description" : "Public IP address of the newly created EC2 instance",
      "Value" : { "Fn::GetAtt" : [ "EC2Instance", "PublicIp" ] }
    }
  }
}
validate-template
Проверяем шаблон с помощью validate-template:
[simterm]
$ cd PycharmProjects/rtfm_jenkins_stack/
$ ls -l
total 4
-rw-r--r-- 1 setevoy setevoy 2988 Sep 30 16:09 jenkins_ec2.template
$ aws cloudformation --profile rtfm validate-template --template-body file://jenkins_ec2.template
{
    "Parameters": [
        {
            "ParameterKey": "AMIID",
            "DefaultValue": "ami-cc5aa0b5",
            "NoEcho": false,
            "Description": "Debian AMI ID"
        },
        {
            "ParameterKey": "KeyName",
            "DefaultValue": "rtfm_jenkins",
            "NoEcho": false,
            "Description": "Name of an existing EC2 KeyPair to enable SSH access to the instance"
        },
        {
            "ParameterKey": "HomeAllowLocation",
            "NoEcho": false,
            "Description": "The IP address range that can be used to SSH to the EC2 instances"
        },
        {
            "ParameterKey": "InstanceType",
            "DefaultValue": "t2.nano",
            "NoEcho": false,
            "Description": "Jenkins EC2 instance type"
        }
    ],
    "Description": "AWS CloudFormation Template EC2"
}
[/simterm]
create-stack
И создаём стек с помощью create-stack, передавая параметром IP:
[simterm]
aws cloudformation --profile rtfm create-stack --stack-name rtfm-jenkins --disable-rollback --template-body file://jenkins_ec2.template --parameters ParameterKey=HomeAllowLocation,ParameterValue=188.***.***.114/32
{
    "StackId": "arn:aws:cloudformation:eu-west-1:264418146286:stack/rtfm-jenkins/59633cf0-a5e1-11e7-b8cc-503ac9e74cc5"
}
[/simterm]
Проверяем статус:
[simterm]
$ aws cloudformation --profile rtfm describe-stacks --stack-name rtfm-jenkins --query 'Stacks[*].StackStatus'
[
    "CREATE_COMPLETE"
]
[/simterm]
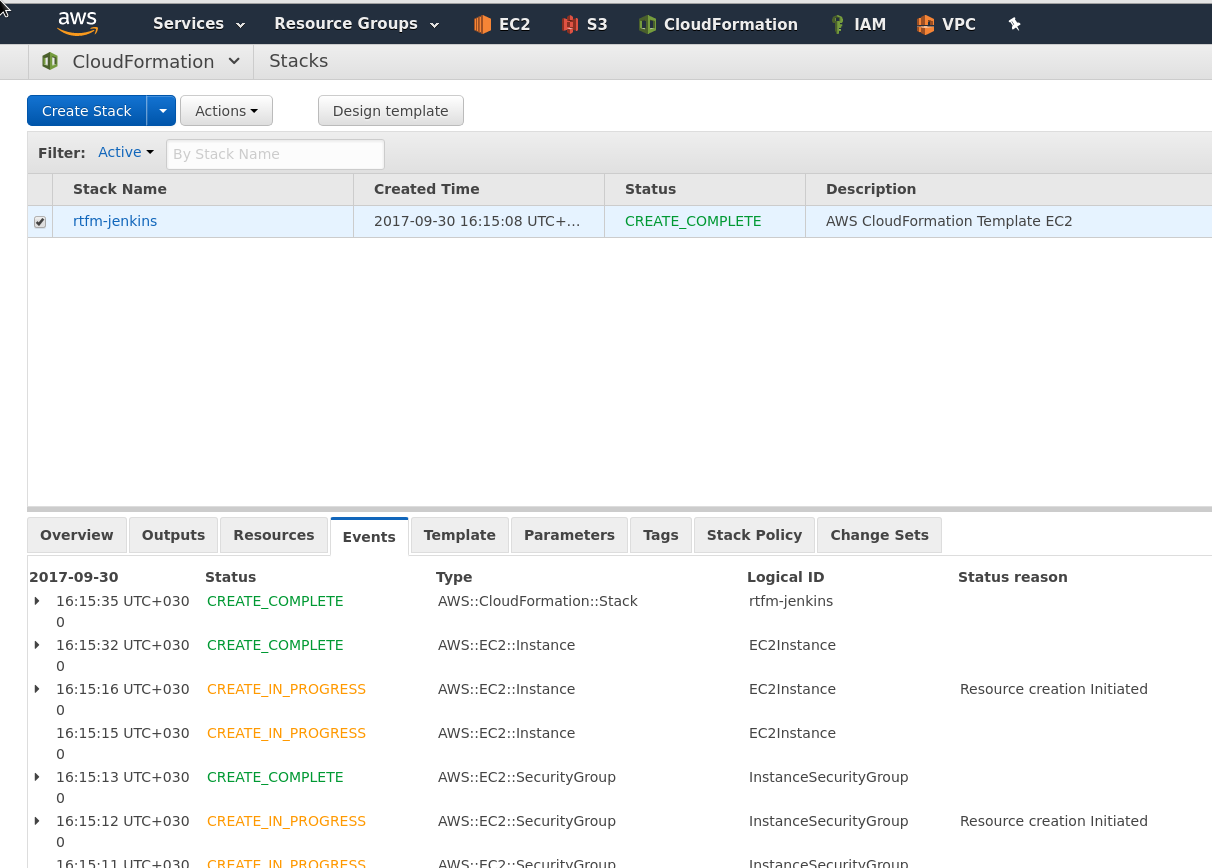
В консоли AWS:
update-stack
Надо было имя для EC и Security Group сразу задать, через теги…
Обновим шаблон, ресурс EC2Instance:
...
  "Resources" : {
    "EC2Instance" : {
      "Type" : "AWS::EC2::Instance",
      "Properties" : {
        "Tags" : [
          {
            "Key" : "Name", "Value" : "rtfm_jenkins"
          }
        ],
...
И InstanceSecurityGroup:
...
    "InstanceSecurityGroup" : {
      "Type" : "AWS::EC2::SecurityGroup",
      "Properties" : {
        "Tags" : [
          {
            "Key" : "Name", "Value" : "rtfm_jenkins"
          }
        ],
...
Выполняем update-stack:
[simterm]
$ aws cloudformation --profile rtfm update-stack --stack-name rtfm-jenkins --template-body file://jenkins_ec2.template --parameters ParameterKey=HomeAllowLocation,ParameterValue=188.***.***
.114/32
{
    "StackId": "arn:aws:cloudformation:eu-west-1:264418146286:stack/rtfm-jenkins/59633cf0-a5e1-11e7-b8cc-503ac9e74cc5"
}
[/simterm]
Проверяем статус:
[simterm]
$ aws cloudformation --profile rtfm describe-stacks --stack-name rtfm-jenkins --query 'Stacks[*].StackStatus'
[
    "UPDATE_COMPLETE"
]
[/simterm]
Проверяем инстанс:
[simterm]
$ aws ec2 --profile rtfm describe-instances --filters Name=tag-value,Values=rtfm_jenkins
{
    "Reservations": [
        {
            "Groups": [],
            "Instances": [
                {
                    "AmiLaunchIndex": 0,
                    "ImageId": "ami-cc5aa0b5",
                    "InstanceId": "i-06cb3e0a8ce7a8e59",
                    "InstanceType": "t2.nano",
                    "KeyName": "rtfm_jenkins",
...
[/simterm]
Замечательно.
Attach EBS
Следующим шагом – добавим подключение созданного в самом начале EBS раздела.
Обновляем шаблон, в параметры добавляем ID EBS раздела:
...
    "JenkinsWorkspacesEBSID": {
      "Description": "Existing EBS volume with Jenkins worspaces",
      "Type": "String",
      "Default": "vol-0085149b3a0a45d0c"
    }
...
В ресурсах – обновляем EC2, добавляем в Property – Volume:
...
  "Resources" : {
    "EC2Instance" : {
      "Type" : "AWS::EC2::Instance",
      "Properties" : {
        "Tags" : [
          {
            "Key" : "Name", "Value" : "rtfm_jenkins"
          }
        ],
        "InstanceType" : { "Ref" : "InstanceType" },
        "SecurityGroups" : [
          {
            "Ref" : "InstanceSecurityGroup"
          }
        ],
        "KeyName" : { "Ref" : "KeyName" },
        "ImageId" : { "Ref" : "AMIID"  },
       "Volumes" : [
          {
           "VolumeId" : { "Ref" : "JenkinsWorkspacesEBSID" },
           "Device" : "/dev/xvdb"
          }
        ]
      }
    },
...
Проверяем шаблон:
[simterm]
$ aws cloudformation --profile rtfm validate-template --template-body file://jenkins_ec2.template
[/simterm]
Обновляем стек:
[simterm]
$ aws cloudformation --profile rtfm update-stack --stack-name rtfm-jenkins --template-body file://jenkins_ec2.template --parameters ParameterKey=HomeAllowLocation,ParameterValue=188.***.***.114/32
[/simterm]
И апдейт падает с ошибкой “The volume ‘vol-0085149b3a0a45d0c’ is not in the same availability zone as instance ‘i-06cb3e0a8ce7a8e59’“.
ОК, забыл.
В параметры – добавляем Availability Zone:
...
    "JenkinsAvailabilityZone": {
      "Description": "AZ for Jenkins EC2, must be same as Workspaces EBS",
      "Type": "String",
      "Default": "eu-west-1a"
    }
...
В Properties ресурса EC2 – добавляем указание “AvailabilityZone“:
...
 "Resources" : {
    "EC2Instance" : {
      "Type" : "AWS::EC2::Instance",
      "Properties" : {
        "AvailabilityZone" : { "Ref" : "JenkinsAvailabilityZone" },
        "Tags" : [
          {
            "Key" : "Name", "Value" : "rtfm_jenkins"
          }
        ],
...
Обновляем:
[simterm]
$ aws cloudformation --profile rtfm update-stack --stack-name rtfm-jenkins --template-body file://jenkins_ec2.template --parameters ParameterKey=HomeAllowLocation,ParameterValue=188.***.***.114/32
[/simterm]
В Консоли:
Проверяем разделы интанса:
[simterm]
$ aws ec2 --profile rtfm describe-instances --filters Name=tag-value,Values=rtfm_jenkins --query 'Reservations[*].Instances[*].BlockDeviceMappings' --output text
xvda
EBS     2017-09-30T13:52:50.000Z        True    attached        vol-0edd79eb7741a3bd7
/dev/xvdb
EBS     2017-09-30T13:56:12.000Z        False   attached        vol-0085149b3a0a45d0c
[/simterm]
Логинимся на сервер, проверяем разделы:
[simterm]
$ ssh [email protected] -i ~/.ssh/rtfm_jenkins.pem
admin@ip-172-31-20-149:~$ lsblk
NAME    MAJ:MIN RM SIZE RO TYPE MOUNTPOINT
xvda    202:0    0   8G  0 disk
└─xvda1 202:1    0   8G  0 part /
xvdb    202:16   0   8G  0 disk
[/simterm]
Jenkins
Дальше установка Jenkins будет выполнятся с помощью Ansbile – а сейчас выполним это руками, что бы иметь готовый EBS с worskpaces.
xvdb
Форматируем раздел xvdb.
Будьте осторожны с sfdisk – синтаксис немного… Неудобный.
Выглядит команда так:
sfdisk /dev/xvdb << EOF
;
EOF
Выполняем:
[simterm]
root@ip-172-31-20-149:/home/admin# sfdisk /dev/xvdb << EOF
> ;
> EOF
Checking that no-one is using this disk right now ... OK

Disk /dev/xvdb: 8 GiB, 8589934592 bytes, 16777216 sectors
Units: sectors of 1 * 512 = 512 bytes
Sector size (logical/physical): 512 bytes / 512 bytes
I/O size (minimum/optimal): 512 bytes / 512 bytes
Disklabel type: dos
Disk identifier: 0x7feabcd9

Old situation:

>>> Created a new DOS disklabel with disk identifier 0x1f89d3bd.
/dev/xvdb1: Created a new partition 1 of type 'Linux' and of size 8 GiB.
/dev/xvdb2: Done.

New situation:

Device     Boot Start      End  Sectors Size Id Type
/dev/xvdb1       2048 16777215 16775168   8G 83 Linux

The partition table has been altered.
Calling ioctl() to re-read partition table.
Syncing disks.
[/simterm]
Проверяем:
[simterm]
root@ip-172-31-20-149:/home/admin# lsblk
NAME    MAJ:MIN RM SIZE RO TYPE MOUNTPOINT
xvda    202:0    0   8G  0 disk
└─xvda1 202:1    0   8G  0 part /
xvdb    202:16   0   8G  0 disk
└─xvdb1 202:17   0   8G  0 part
[/simterm]
Создаём файловую систему:
[simterm]
root@ip-172-31-20-149:/home/admin# mkfs.ext4 /dev/xvdb1
mke2fs 1.43.4 (31-Jan-2017)
Creating filesystem with 2096896 4k blocks and 524288 inodes
Filesystem UUID: 3818cfb8-c1ac-46d1-87ac-55700dc0f473
Superblock backups stored on blocks:
        32768, 98304, 163840, 229376, 294912, 819200, 884736, 1605632

Allocating group tables: done
Writing inode tables: done
Creating journal (16384 blocks): done
Writing superblocks and filesystem accounting information: done
[/simterm]
Монтируем /dev/xvdb1 в каталог /jenkins:
[simterm]
root@ip-172-31-20-149:/home/admin# mkdir /jenkins
root@ip-172-31-20-149:/home/admin# mount /dev/xvdb1 /jenkins/
[/simterm]
Docker
Устанавливаем Docker:
[simterm]
root@ip-172-31-20-149:/home/admin# apt update && apt -y install curl
root@ip-172-31-20-149:/home/admin# curl https://get.docker.com/ | bash
[/simterm]
Проверяем:
[simterm]
root@ip-172-31-20-149:/home/admin# docker --version
Docker version 17.09.0-ce, build afdb6d4
[/simterm]
Запуск Jenkins
Запускаем Docker контейнер с Jenkins, монтируем каталог /jenkins с хост-машины в каталог /jenkins контейнера, и указываем переменную JENKINS_HOME=/jenkins:
[simterm]
# docker run -ti -u 0 -p 80:8080 -v /jenkins/:/jenkins -v /var/run/docker.sock:/var/run/docker.sock -e JENKINS_HOME='/jenkins' jenkins
...
Sep 30, 2017 2:38:18 PM hudson.model.AsyncPeriodicWork$1 run
INFO: Finished Download metadata. 9,353 ms
--> setting agent port for jnlp
--> setting agent port for jnlp... done
[/simterm]
Собственно – всё.
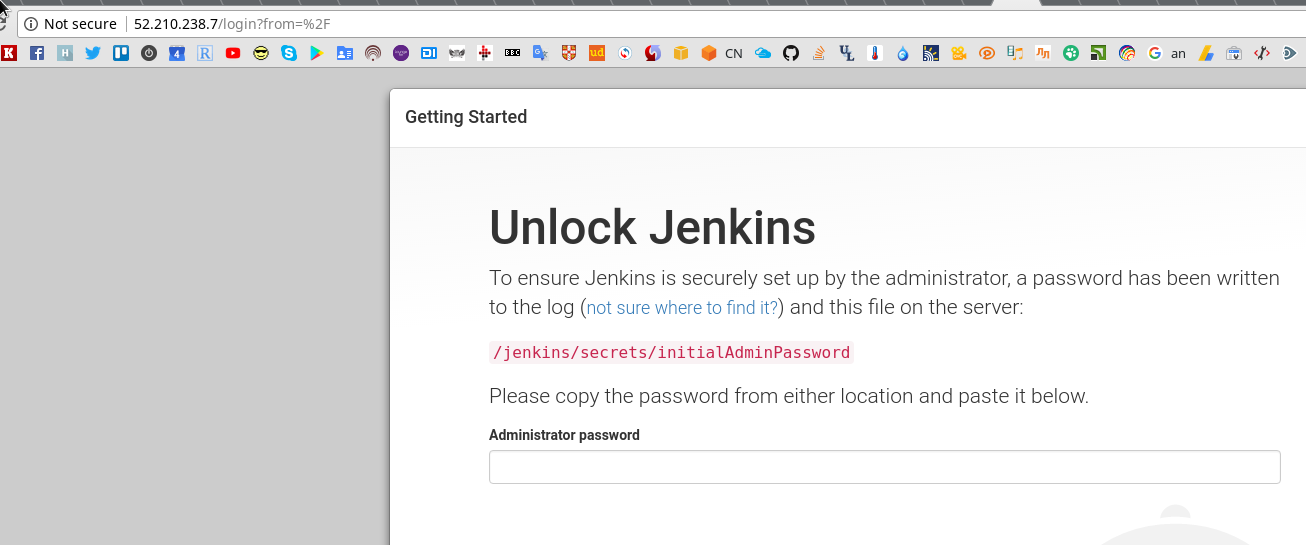
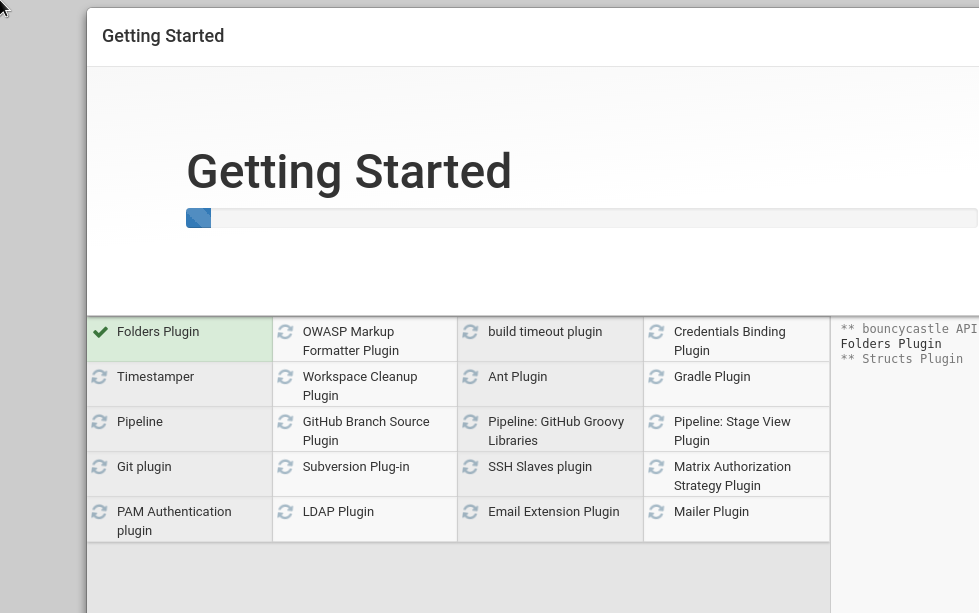
Активируем Jenkins в UI:

 Проверяем содержимое
 /dev/xvdb1:
[simterm]
admin@ip-172-31-20-149:~$ ls -l /jenkins/
total 100
-rw-r--r--  1 root root  1592 Sep 30 14:38 config.xml
-rw-r--r--  1 root root   159 Sep 30 14:38 hudson.model.UpdateCenter.xml
-rw-r--r--  1 root root   370 Sep 30 14:40 hudson.plugins.git.GitTool.xml
-rw-------  1 root root  1712 Sep 30 14:38 identity.key.enc
...
drwxr-xr-x  3 root root  4096 Sep 30 14:38 users
drwxr-xr-x 10 root root  4096 Sep 30 14:38 war
drwxr-xr-x  2 root root  4096 Sep 30 14:40 workflow-libs
[/simterm]
Пересоздание стека
Для полноты картины – теперь можно всё удалить – и создать заново:
[simterm]
$ aws cloudformation --profile rtfm delete-stack --stack-name rtfm-jenkins
[/simterm]
Проверяем состояние EBS:
[simterm]
$ aws ec2 --profile rtfm  describe-volumes --volume-ids vol-0085149b3a0a45d0c --query 'Volumes[*].State' --output text
available
[/simterm]
Пересоздаём стек:
[simterm]
$ aws cloudformation --profile rtfm create-stack --stack-name rtfm-jenkins --disable-rollback --template-body file://jenkins_ec2.template --parameters ParameterKey=HomeAllowLocation,ParameterValue=188.***.***.114/32
[/simterm]
Подключаемся к новому инстансу, проверяем разделы:
[simterm]
$ ssh [email protected] -i ~/.ssh/rtfm_jenkins.pem
...
admin@ip-172-31-31-164:~$ lsblk
NAME    MAJ:MIN RM SIZE RO TYPE MOUNTPOINT
xvda    202:0    0   8G  0 disk
└─xvda1 202:1    0   8G  0 part /
xvdb    202:16   0   8G  0 disk
└─xvdb1 202:17   0   8G  0 part
[/simterm]
Монтируем, проверяем данные:
[simterm]
root@ip-172-31-31-164:/home/admin# mkdir /jenkins
root@ip-172-31-31-164:/home/admin# mount /dev/xvdb1 /jenkins/
root@ip-172-31-31-164:/home/admin# ls -l /jenkins/
total 108
-rw-r--r--  1 root root  1592 Sep 30 14:38 config.xml
-rw-r--r--  1 root root   159 Sep 30 14:38 hudson.model.UpdateCenter.xml
-rw-r--r--  1 root root   370 Sep 30 14:40 hudson.plugins.git.GitTool.xml
...
drwxr-xr-x 10 root root  4096 Sep 30 14:38 war
drwxr-xr-x  2 root root  4096 Sep 30 14:40 workflow-libs
[/simterm]
Устанавливаем Docker:
[simterm]
root@ip-172-31-31-164:/home/admin# apt update && apt -y install curl && curl https://get.docker.com/ | bash
[/simterm]
Повторяем запуск Jenkins:
[simterm]
# docker run -ti -u 0 -p 80:8080 -v /jenkins/:/jenkins -v /var/run/docker.sock:/var/run/docker.sock -e JENKINS_HOME='/jenkins' jenkins
[/simterm]
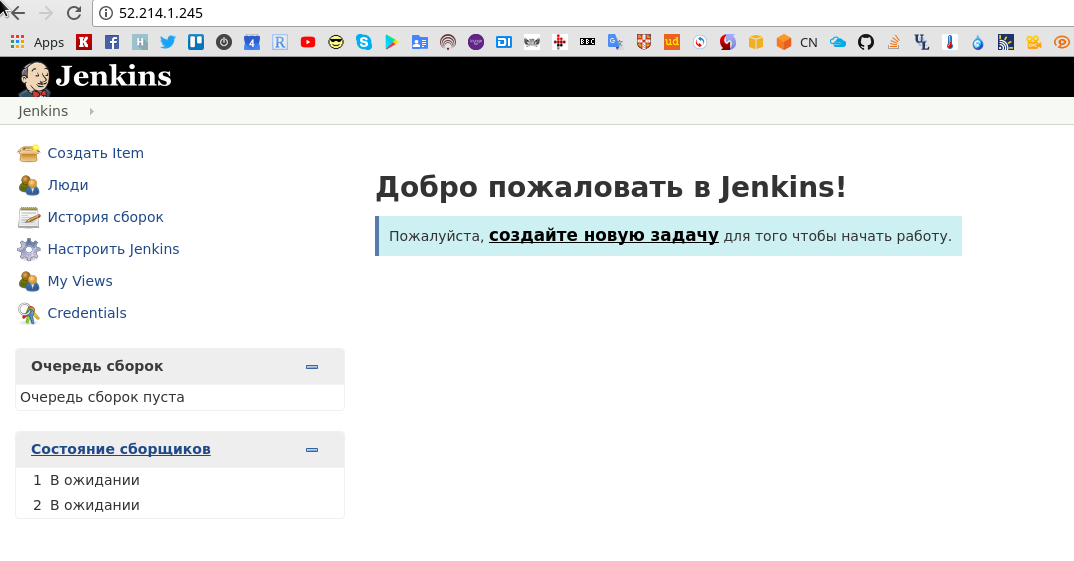
Всё на месте:
Готово.
Шаблон доступен в Github тут>>>.
Ссылки по теме
Собственно – все ссылки на этот же блог, ибо всё уже делалось ранее:
AWS: CloudFormation – создание шаблона для VPC, EC2, NAT и Internet Gateway
AWS: миграция RTFM, часть #3: CloudFormation – инфрастуктура
Docker: AWS [China] – Jenkins в Docker
Azure: Azure Resource Manager provisioning и Jenkins в Docker


