![]() Краткое описание, ссылки на документацию и установка Terraform описаны тут>>>.
Краткое описание, ссылки на документацию и установка Terraform описаны тут>>>.
Ниже приведён пример создание простого проекта и запуск AWC EC2 инстанса с его помощью.
Создаём каталог проекта:
$ mkdir -p ~/Work/Projects/BP/terra_1
Создаём файл с расширением .tf, который будет файлом конфигурации нашей «инфраструктуры»:
$ vim test_1.tf
Добавляем данные в файл:
provider "aws" {
    access_key = "AKI***7QQ"
    secret_key = "Gru***P3R"
    region = "us-west-2"
}

resource "aws_instance" "setevoy_test1" {
    ami = "ami-1b471c2b"
    instance_type = "t1.micro"
}
Блок provider описывает провайдера, в данном случае — это Amazon Web Service, в котором мы будем поднимать EC2 сервер.
Блок resource определяет ресурсы, которые будут существовать в нашей архитектуре. Тут могут быть AWS EC2 сервера — или какое-то приложение, например Heroku.
Находясь внутри созданной директории — выполняем terraform plan, который отобразит все изменения, которые должны будут быть выполнены в соответствии с файлом конфигурации проекта, который мы только что создали. При этом — файлов .tf может быть несколько (с описанием отдельных сервисов, глобальных переменных и т.д.) — Terraform прочитает каждый из них.
plan так же сообщит, если в файлах есть некорректные параметры, ошибки синтаксиса и так далее. При этом — он не будет обращаться к AWS аккаунту, и проверять, например, наличие AMI — это будет выполнено позже:
$ terraform plan
Refreshing Terraform state prior to plan...

The Terraform execution plan has been generated and is shown below.
Resources are shown in alphabetical order for quick scanning. Green resources
will be created (or destroyed and then created if an existing resource
exists), yellow resources are being changed in-place, and red resources
will be destroyed.

Note: You didn't specify an "-out" parameter to save this plan, so when
"apply" is called, Terraform can't guarantee this is what will execute.

+ aws_instance.setevoy_test1
    ami:                      "" => "ami-1b471c2b"
    availability_zone:        "" => "<computed>"
    ebs_block_device.#:       "" => "<computed>"
    ephemeral_block_device.#: "" => "<computed>"
    instance_type:            "" => "t1.micro"
    key_name:                 "" => "<computed>"
    placement_group:          "" => "<computed>"
    private_dns:              "" => "<computed>"
    private_ip:               "" => "<computed>"
    public_dns:               "" => "<computed>"
    public_ip:                "" => "<computed>"
    root_block_device.#:      "" => "<computed>"
    security_groups.#:        "" => "<computed>"
    source_dest_check:        "" => "1"
    subnet_id:                "" => "<computed>"
    tenancy:                  "" => "<computed>"
    vpc_security_group_ids.#: "" => "<computed>"


Plan: 1 to add, 0 to change, 0 to destroy.
Кроме того — Terraform в каталоге проекта (из точки запуска plan) создаст файл terraform.tfstate, в котором в JSON-формате будут записаны все планируемые изменения:
$ ls -la
total 20
drwxrwxr-x 2 setevoy setevoy 4096 жов 29 12:54 .
drwxrwxr-x 3 setevoy setevoy 4096 жов 29 12:13 ..
-rw-rw-r-- 1 setevoy setevoy  197 жов 29 12:54 terraform.tfstate
-rw-rw-r-- 1 setevoy setevoy  197 жов 29 12:54 terraform.tfstate.backup
-rw-rw-r-- 1 setevoy setevoy  245 жов 29 12:21 test_1.tf
После того, как plan показал корректность данных в файле конфигурации — запускаем apply, после чего Terraform начнёт выполнение всех необходимых действий.
При этом — могут появится ошибки, связанные уже с самой AWS инфраструктурой, например:
$ terraform apply
aws_instance.setevoy_test1: Creating...
  ami:                      "" => "ami-1b471c2b"
  availability_zone:        "" => "<computed>"
  ebs_block_device.#:       "" => "<computed>"
  ephemeral_block_device.#: "" => "<computed>"
  instance_type:            "" => "t1.micro"
  key_name:                 "" => "<computed>"
  placement_group:          "" => "<computed>"
  private_dns:              "" => "<computed>"
  private_ip:               "" => "<computed>"
  public_dns:               "" => "<computed>"
  public_ip:                "" => "<computed>"
  root_block_device.#:      "" => "<computed>"
  security_groups.#:        "" => "<computed>"
  source_dest_check:        "" => "1"
  subnet_id:                "" => "<computed>"
  tenancy:                  "" => "<computed>"
  vpc_security_group_ids.#: "" => "<computed>"
Error applying plan:

1 error(s) occurred:

* aws_instance.setevoy_test1: Error launching source instance: VPCIdNotSpecified: No default VPC for this user
        status code: 400, request id:

Terraform does not automatically rollback in the face of errors.
Instead, your Terraform state file has been partially updated with
any resources that successfully completed. Please address the error
above and apply again to incrementally change your infrastructure.
Находим подходящую подсеть:
$ aws ec2 describe-subnets
...
SUBNETS us-west-2a      251     10.0.1.0/24     False   False   available       subnet-07d59170 vpc-6991c10c
...
В файл test_1.tf, в блок:
resource "aws_instance" "setevoy_test1" {
    ami = "ami-1b471c2b"
    instance_type = "t1.micro"
}
добавляем:
subnet_id = "subnet-07d59170"
Запускаем ещ раз:
$ terraform apply
aws_vpc.default: Refreshing state... (ID: vpc-6b9ac60e)
aws_vpc.default: Destroying...
aws_instance.setevoy_test1: Creating...
  ami:                      "" => "ami-1b471c2b"
  availability_zone:        "" => "<computed>"
  ebs_block_device.#:       "" => "<computed>"
  ephemeral_block_device.#: "" => "<computed>"
  instance_type:            "" => "t1.micro"
  key_name:                 "" => "<computed>"
  placement_group:          "" => "<computed>"
  private_dns:              "" => "<computed>"
  private_ip:               "" => "<computed>"
  public_dns:               "" => "<computed>"
  public_ip:                "" => "<computed>"
  root_block_device.#:      "" => "<computed>"
  security_groups.#:        "" => "<computed>"
  source_dest_check:        "" => "1"
  subnet_id:                "" => "subnet-07d59170"
  tenancy:                  "" => "<computed>"
  vpc_security_group_ids.#: "" => "<computed>"
aws_vpc.default: Destruction complete
Error applying plan:

1 error(s) occurred:

* aws_instance.setevoy_test1: Error launching source instance: InvalidParameterCombination: Non-Windows instances with a virtualization type of 'hvm' are currently not supported for this instance type.
        status code: 400, request id:

Terraform does not automatically rollback in the face of errors.
Instead, your Terraform state file has been partially updated with
any resources that successfully completed. Please address the error
above and apply again to incrementally change your infrastructure.
Теперь проблема с хранилищем. AMI ID был взят из одного из наших старых файлов настроек, потому — находим новый. Для Ubuntu можно найти список AMI по регионам тут — https://cloud-images.ubuntu.com/locator/ec2/
Описание хранилищ для разных типов инстансов можно найти тут — https://aws.amazon.com/ec2/instance-types/
К примеру:
| us-west-2 | trusty | 14.04 LTS | amd64 | ebs | 20151019 | ami-96e605a5 | aki-fc8f11cc |
Обновляем AMI ID в файле test_1.tf, и ещё раз проверяем:
$ terraform plan
Refreshing Terraform state prior to plan...

The Terraform execution plan has been generated and is shown below.
Resources are shown in alphabetical order for quick scanning. Green resources
will be created (or destroyed and then created if an existing resource
exists), yellow resources are being changed in-place, and red resources
will be destroyed.

Note: You didn't specify an "-out" parameter to save this plan, so when
"apply" is called, Terraform can't guarantee this is what will execute.

+ aws_instance.setevoy_test1
    ami:                      "" => "ami-96e605a5"
    availability_zone:        "" => "<computed>"
    ebs_block_device.#:       "" => "<computed>"
    ephemeral_block_device.#: "" => "<computed>"
    instance_type:            "" => "t1.micro"
    key_name:                 "" => "<computed>"
    placement_group:          "" => "<computed>"
    private_dns:              "" => "<computed>"
    private_ip:               "" => "<computed>"
    public_dns:               "" => "<computed>"
    public_ip:                "" => "<computed>"
    root_block_device.#:      "" => "<computed>"
    security_groups.#:        "" => "<computed>"
    source_dest_check:        "" => "1"
    subnet_id:                "" => "subnet-07d59170"
    tenancy:                  "" => "<computed>"
    vpc_security_group_ids.#: "" => "<computed>"


Plan: 1 to add, 0 to change, 0 to destroy.
Выполняем apply:
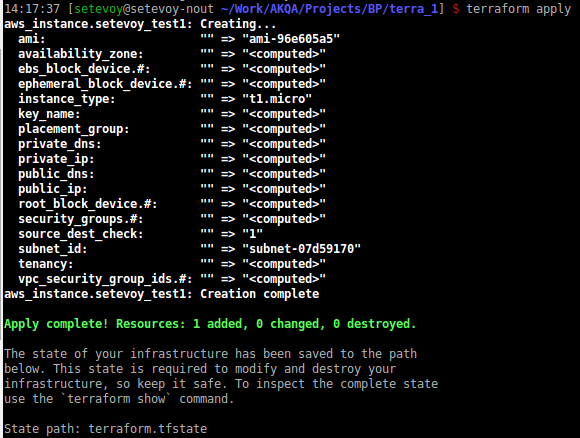
$ terraform apply
aws_instance.setevoy_test1: Creating...
  ami:                      "" => "ami-96e605a5"
  availability_zone:        "" => "<computed>"
  ebs_block_device.#:       "" => "<computed>"
  ephemeral_block_device.#: "" => "<computed>"
  instance_type:            "" => "t1.micro"
  key_name:                 "" => "<computed>"
  placement_group:          "" => "<computed>"
  private_dns:              "" => "<computed>"
  private_ip:               "" => "<computed>"
  public_dns:               "" => "<computed>"
  public_ip:                "" => "<computed>"
  root_block_device.#:      "" => "<computed>"
  security_groups.#:        "" => "<computed>"
  source_dest_check:        "" => "1"
  subnet_id:                "" => "subnet-07d59170"
  tenancy:                  "" => "<computed>"
  vpc_security_group_ids.#: "" => "<computed>"
aws_instance.setevoy_test1: Creation complete

Apply complete! Resources: 1 added, 0 changed, 0 destroyed.

The state of your infrastructure has been saved to the path
below. This state is required to modify and destroy your
infrastructure, so keep it safe. To inspect the complete state
use the `terraform show` command.

State path: terraform.tfstate
Просмотреть текущие параметры проекта можно с помощью show:
$ terraform show
aws_instance.setevoy_test1:
  id = i-962adf4f
  ami = ami-96e605a5
  availability_zone = us-west-2a
  ebs_block_device.# = 0
  ebs_optimized = false
  ephemeral_block_device.# = 0
  iam_instance_profile =
  instance_type = t1.micro
  monitoring = false
  private_dns = ip-10-0-1-35.us-west-2.compute.internal
  private_ip = 10.0.1.35
  public_dns =
  root_block_device.# = 1
  root_block_device.0.delete_on_termination = true
  root_block_device.0.iops = 0
  root_block_device.0.volume_size = 8
  root_block_device.0.volume_type = standard
  security_groups.# = 0
  source_dest_check = true
  subnet_id = subnet-07d59170
  tags.# = 0
  tenancy = default
  vpc_security_group_ids.# = 1
  vpc_security_group_ids.3881542415 = sg-b50277d1
Данные, как говорилось, сохарняются в файл terraform.tfstate:
{
    "version": 1,
    "serial": 3,
    "modules": [
        {
            "path": [
                "root"
            ],
            "outputs": {},
            "resources": {
                "aws_instance.setevoy_test1": {
                    "type": "aws_instance",
                    "primary": {
                        "id": "i-962adf4f",
                        "attributes": {
                            "ami": "ami-96e605a5",
                            "availability_zone": "us-west-2a",
                            "ebs_block_device.#": "0",
                            "ebs_optimized": "false",
                            "ephemeral_block_device.#": "0",
                            "iam_instance_profile": "",
                            "id": "i-962adf4f",
                            "instance_type": "t1.micro",
                            "monitoring": "false",
                            "private_dns": "ip-10-0-1-35.us-west-2.compute.internal",
                            "private_ip": "10.0.1.35",
                            "public_dns": "",
                            "root_block_device.#": "1",
                            "root_block_device.0.delete_on_termination": "true",
                            "root_block_device.0.iops": "0",
                            "root_block_device.0.volume_size": "8",
                            "root_block_device.0.volume_type": "standard",
                            "security_groups.#": "0",
                            "source_dest_check": "true",
                            "subnet_id": "subnet-07d59170",
                            "tags.#": "0",
                            "tenancy": "default",
                            "vpc_security_group_ids.#": "1",
                            "vpc_security_group_ids.3881542415": "sg-b50277d1"
                        },
                        "meta": {
                            "schema_version": "1"
                        }
                    }
                }
            }
        }
    ]
}
Проверяем наличие инстанса:
$ aws ec2 describe-instances --filters "Name=instance-id, Values=i-962adf4f" | grep INSTANCES
INSTANCES       0       x86_64          False   xen     ami-96e605a5    i-962adf4f      t1.micro        aki-fc8f11cc    2015-10-29T12:17:45.000Z        ip-10-0-1-35.us-west-2.compute.internal10.0.1.35                /dev/sda1       ebs     True            subnet-07d59170 paravirtual     vpc-6991c10c
Что бы включить ведение лога работы — установите две переменные:
$ export TF_LOG=TRACE
$ export TF_LOG_PATH=/home/setevoy/Logs/terraform.log
Пример записей в логе:
$ tail /home/setevoy/Logs/terraform.log
var.region
var.secret_key
var.server_count
var.vpc_cidr
2015/10/29 16:36:44 [DEBUG] waiting for all plugin processes to complete...
2015/10/29 16:36:44 [DEBUG] /opt/terraform/terraform-provisioner-chef: plugin process exited
2015/10/29 16:36:44 [DEBUG] /opt/terraform/terraform-provisioner-file: plugin process exited
2015/10/29 16:36:44 [DEBUG] /opt/terraform/terraform-provisioner-local-exec: plugin process exited
2015/10/29 16:36:44 [DEBUG] /opt/terraform/terraform-provisioner-remote-exec: plugin process exited
2015/10/29 16:36:44 [DEBUG] /opt/terraform/terraform-provider-aws: plugin process exited
Готово.
![]()