Click to rate this post!
[Total: 0 Average: 0]
![]() Домашняя страница проекта — тут>>>.
Домашняя страница проекта — тут>>>.
Содержание
Установка web2py
Создаём директорию:
# mkdir /var/www && cd /var/www
Загружаем архив:
# wget http://web2py.com/examples/static/web2py_src.zip
Устанавливаем:
# unzip web2py_src.zip && rm -rf web2py_src.zip
# ls -l
total 4
drwxr-xr-x 9 root root 4096 Nov  8 20:12 web2py
# curl --output /var/www/web2py/scripts/sessions2trash.py http://web2py.googlecode.com/hg/scripts/sessions2trash.py
# chown -R nginx:nginx web2py
# cp -p web2py/handlers/wsgihandler.py web2py/
Устанавливаем пароль администратора:
# cd web2py
# sudo -u nginx python -c "from gluon.main import save_password; save_password(raw_input('admin password: '),443)"
admin password:
Запускаем:
# python web2py.py -a '<ask>' -i 192.168.1.114 -p 8080
web2py Web Framework
Created by Massimo Di Pierro, Copyright 2007-2014
Version 2.9.11-stable+timestamp.2014.09.15.23.35.11
Database drivers available: SQLite(sqlite3), MySQL(pymysql), PostgreSQL(pg8000), IMAP(imaplib)
WARNING:web2py:GUI not available because Tk library is not installed
choose a password:

please visit:
http://192.168.1.114:8080/
use "kill -SIGTERM 3595" to shutdown the web2py server
Проверяем:
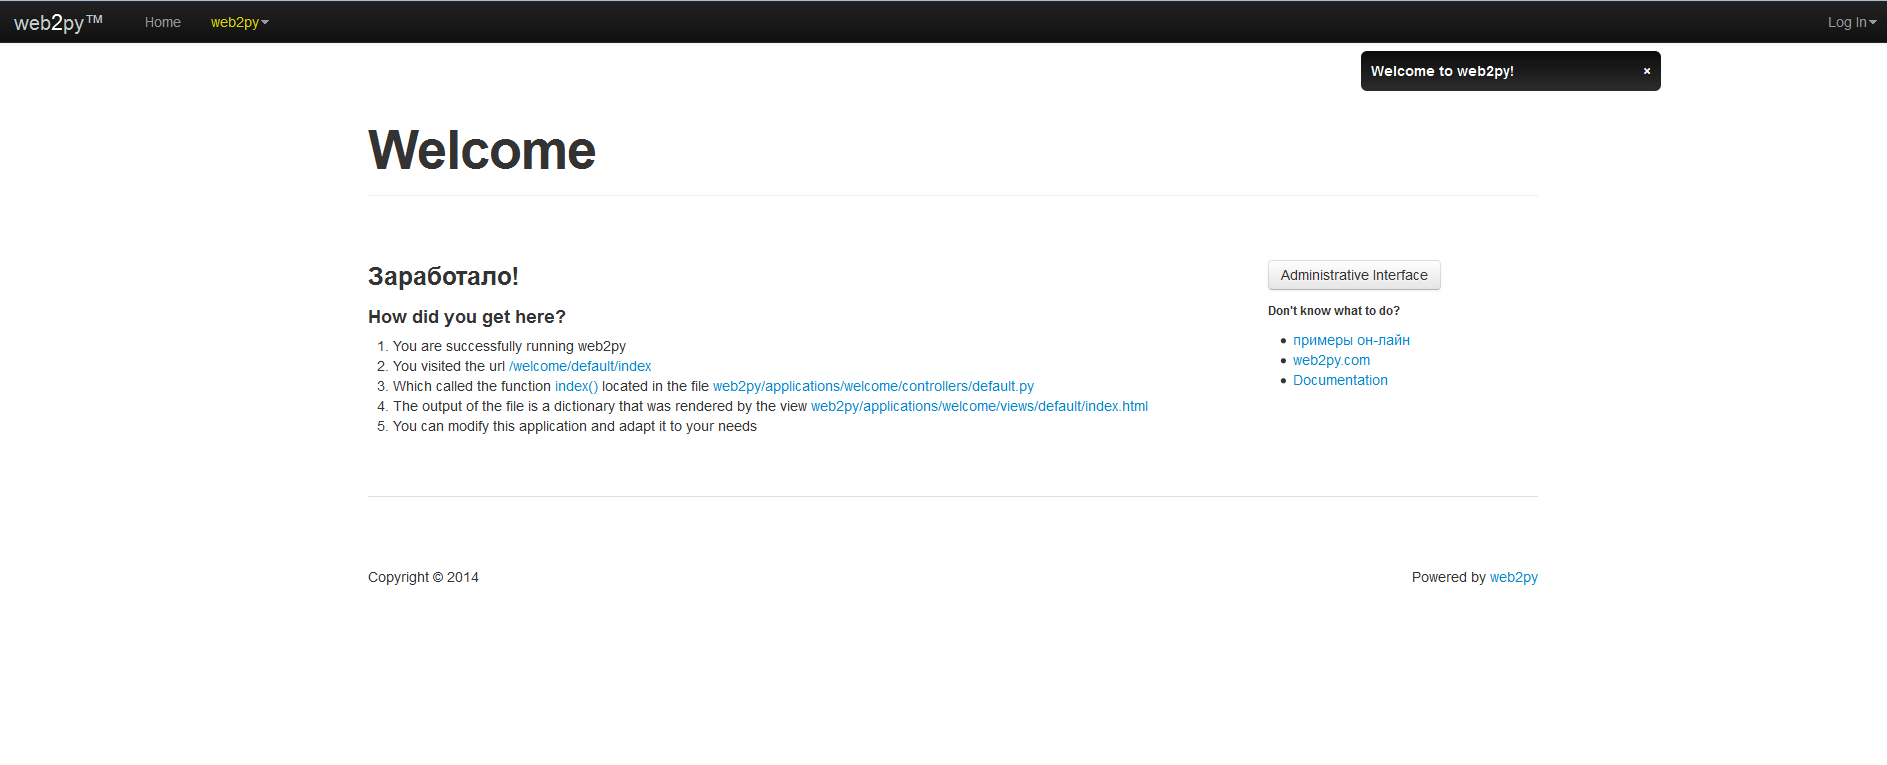
Проверили, работает. Останавливаем по Ctrl+С.
Предполагается, что NGINX и uWSGI уже установлены по этой>>> статье.
Настройка NGINX
# cd /etc/nginx/conf.d
Создаём файл web2py.conf:
server {

    listen        80 default_server;
    server_name   web2py.com  www.web2py.com;
    access_log    /var/log/nginx/web2py-access.log;
    error_log     /var/log/nginx/web2py-error.log;

    location ~* /(w+)/static/ {
        root /var/www/web2py/applications/;
    }

    location / {
        uwsgi_pass 127.0.0.1:9091;
        include         /etc/nginx/uwsgi_params;
        uwsgi_param     UWSGI_SCHEME $scheme;
        uwsgi_param     SERVER_SOFTWARE    nginx/$nginx_version;
    }
}
# SSL требуется для работы админ-панели
server {
    listen 443 ssl;
    server_name     web2py.com  www.web2py.com;
    ssl_certificate         /etc/nginx/ssl/web2py.crt;
    ssl_certificate_key     /etc/nginx/ssl/web2py.key;
    ssl_prefer_server_ciphers on;
    ssl_session_cache shared:SSL:10m;
    ssl_session_timeout 10m;
    ssl_ciphers ECDHE-RSA-AES256-SHA:DHE-RSA-AES256-SHA:DHE-DSS-AES256-SHA:DHE-RSA-AES128-SHA:DHE-DSS-AES128-SHA;
    ssl_protocols SSLv3 TLSv1;
    keepalive_timeout    70;
    location / {
        root /var/www/web2py/applications/;
        uwsgi_pass 127.0.0.1:9091;
        include         /etc/nginx/uwsgi_params;
        uwsgi_param     UWSGI_SCHEME $scheme;
        uwsgi_param     SERVER_SOFTWARE    nginx/$nginx_version;
    }
}
Создаём сертификаты:
# mkdir /etc/nginx/ssl/
# cd /etc/nginx/ssl/
# openssl genrsa -out server.key 2048
Generating RSA private key, 2048 bit long modulus
.......................................................................+++
................................+++
e is 65537 (0x10001
Так как установка тестовая — просто жмём Enter:
# openssl req -new -key server.key -out server.csr
You are about to be asked to enter information that will be incorporated
into your certificate request.
What you are about to enter is what is called a Distinguished Name or a DN.
There are quite a few fields but you can leave some blank
For some fields there will be a default value,
If you enter '.', the field will be left blank.
-----
Country Name (2 letter code) [XX]:
State or Province Name (full name) []:
Locality Name (eg, city) [Default City]:
Organization Name (eg, company) [Default Company Ltd]:
Organizational Unit Name (eg, section) []:
Common Name (eg, your name or your server's hostname) []:
Email Address []:

Please enter the following 'extra' attributes
to be sent with your certificate request
A challenge password []:
An optional company name []:
# openssl x509 -req -days 365 -in server.csr -signkey server.key -out server.crt
Signature ok
subject=/C=XX/L=Default City/O=Default Company Ltd
Getting Private key
# ls -l
total 12
-rw-r--r-- 1 root root 1103 Nov  8 20:44 server.crt
-rw-r--r-- 1 root root  952 Nov  8 20:44 server.csr
-rw-r--r-- 1 root root 1679 Nov  8 20:44 server.key
Проверяем, перезапускаем:
# nginx -t
nginx: the configuration file /etc/nginx/nginx.conf syntax is ok
nginx: configuration file /etc/nginx/nginx.conf test is successful
# service nginx restart
Stopping nginx:                                            [  OK  ]
Starting nginx:                                            [  OK  ]
Настройка uWSGI
# mkdir /etc/uwsgi
Создаём файл настроек /etc/uwsgi/web2py.ini:
[uwsgi]
socket = 127.0.0.1:9091
pythonpath = /var/www/web2py/
mount = /=wsgihandler:application
processes = 4
master = true
harakiri = 60
reload-mercy = 8
cpu-affinity = 1
max-requests = 2000
limit-as = 512
reload-on-as = 256
reload-on-rss = 192
uid = nginx
gid = nginx
cron = 0 0 -1 -1 -1 python /var/www/web2py/web2py.py -Q -S welcome -M -R scripts/sessions2trash.py -A -o
no-orphans = true
Создаём пользователя:
# useradd -M -r --shell /bin/sh --home-dir /opt/uwsgi uwsgi
Создаём файл лога:
# touch /var/log/uwsgi.log
# chown uwsgi /var/log/uwsgi.log
Создаём файл управления uWSGI /etc/init.d/uwsgi:
#!/bin/bash

### BEGIN INIT INFO
# Provides:          uwsgi
# Required-Start:    $syslog $remote_fs
# Should-Start:      $time ypbind smtp
# Required-Stop:     $syslog $remote_fs
# Should-Stop:       ypbind smtp
# Default-Start:     3 5
# Default-Stop:      0 1 2 6
### END INIT INFO

# Source function library.
. /etc/rc.d/init.d/functions

# Check for missing binaries (stale symlinks should not happen)
UWSGI_BIN=`which uwsgi`
test -x $UWSGI_BIN || { echo "$UWSGI_BIN not installed";
        if [ "$1" = "stop" ]; then exit 0;
        else exit 5; fi; }

UWSGI_EMPEROR_MODE=true
UWSGI_VASSALS="/etc/uwsgi/"
UWSGI_OPTIONS="--enable-threads --logto /var/log/uwsgi.log"
lockfile=/var/lock/subsys/uwsgi

UWSGI_OPTIONS="$UWSGI_OPTIONS --autoload"

if [ "$UWSGI_EMPEROR_MODE" = "true" ] ; then
    UWSGI_OPTIONS="$UWSGI_OPTIONS --emperor $UWSGI_VASSALS"
fi

case "$1" in
    start)
        echo "Starting uWSGI "
        daemon $UWSGI_BIN $UWSGI_OPTIONS &
        ;;
    stop)
        echo "Shutting down uWSGI "
        killproc $UWSGI_BIN
        ;;
    restart)
        $0 stop
        $0 start
        ;;
    status)
        echo "Checking for service uWSGI "
        status $UWSGI_BIN
        ;;
    *)
        echo "Usage: $0 {start|stop|status|restart}"
        exit 1
        ;;
esac
exit 0
# chmod +x /etc/init.d/uwsgi
# chkconfig uwsgi on
# chkconfig nginx on
Запускаем:
# service uwsgi start
Starting uWSGI
Проверяем:
# service uwsgi status
Checking for service uWSGI
uwsgi (pid 3834 3833 3832 3831 3815 3813) is running...
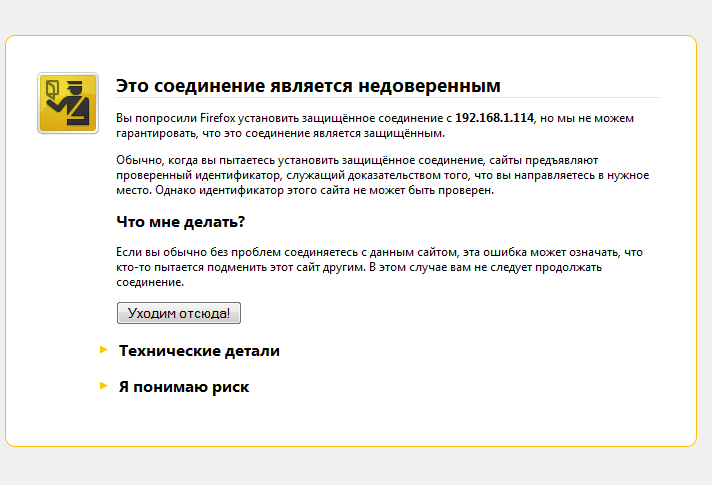
Заходим по адресу https://<ВАШ_IP>/, соглашаемся с риском :-):
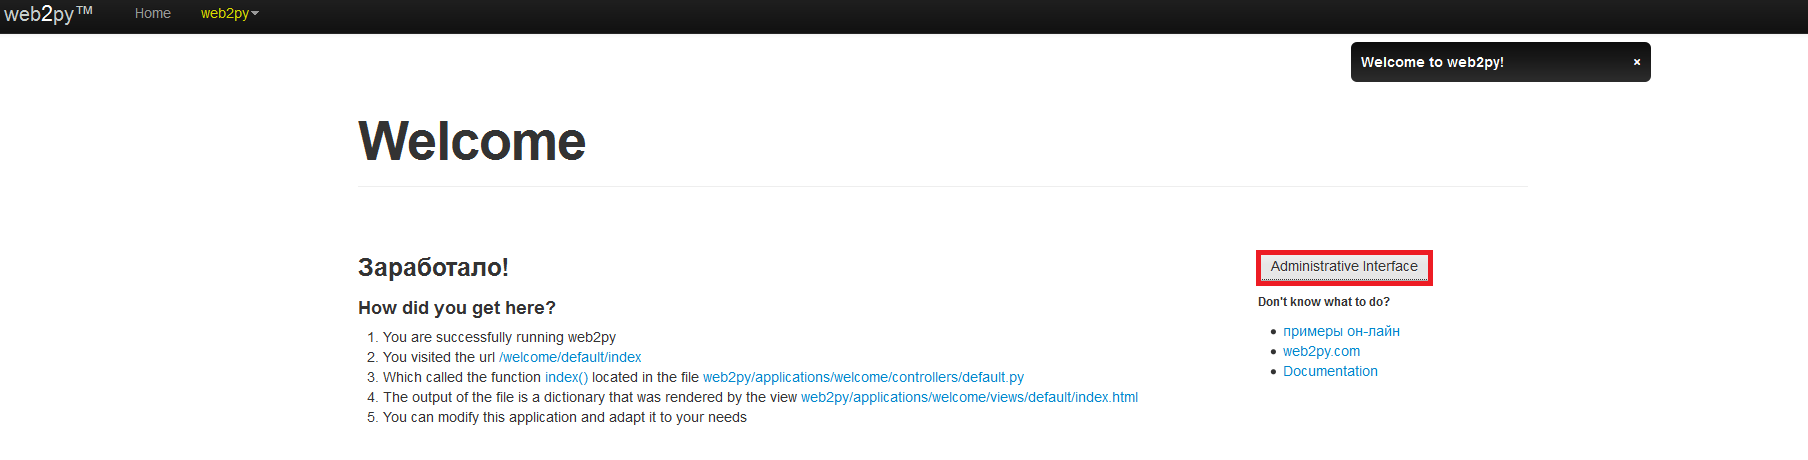
И переходим в панель администрирования:
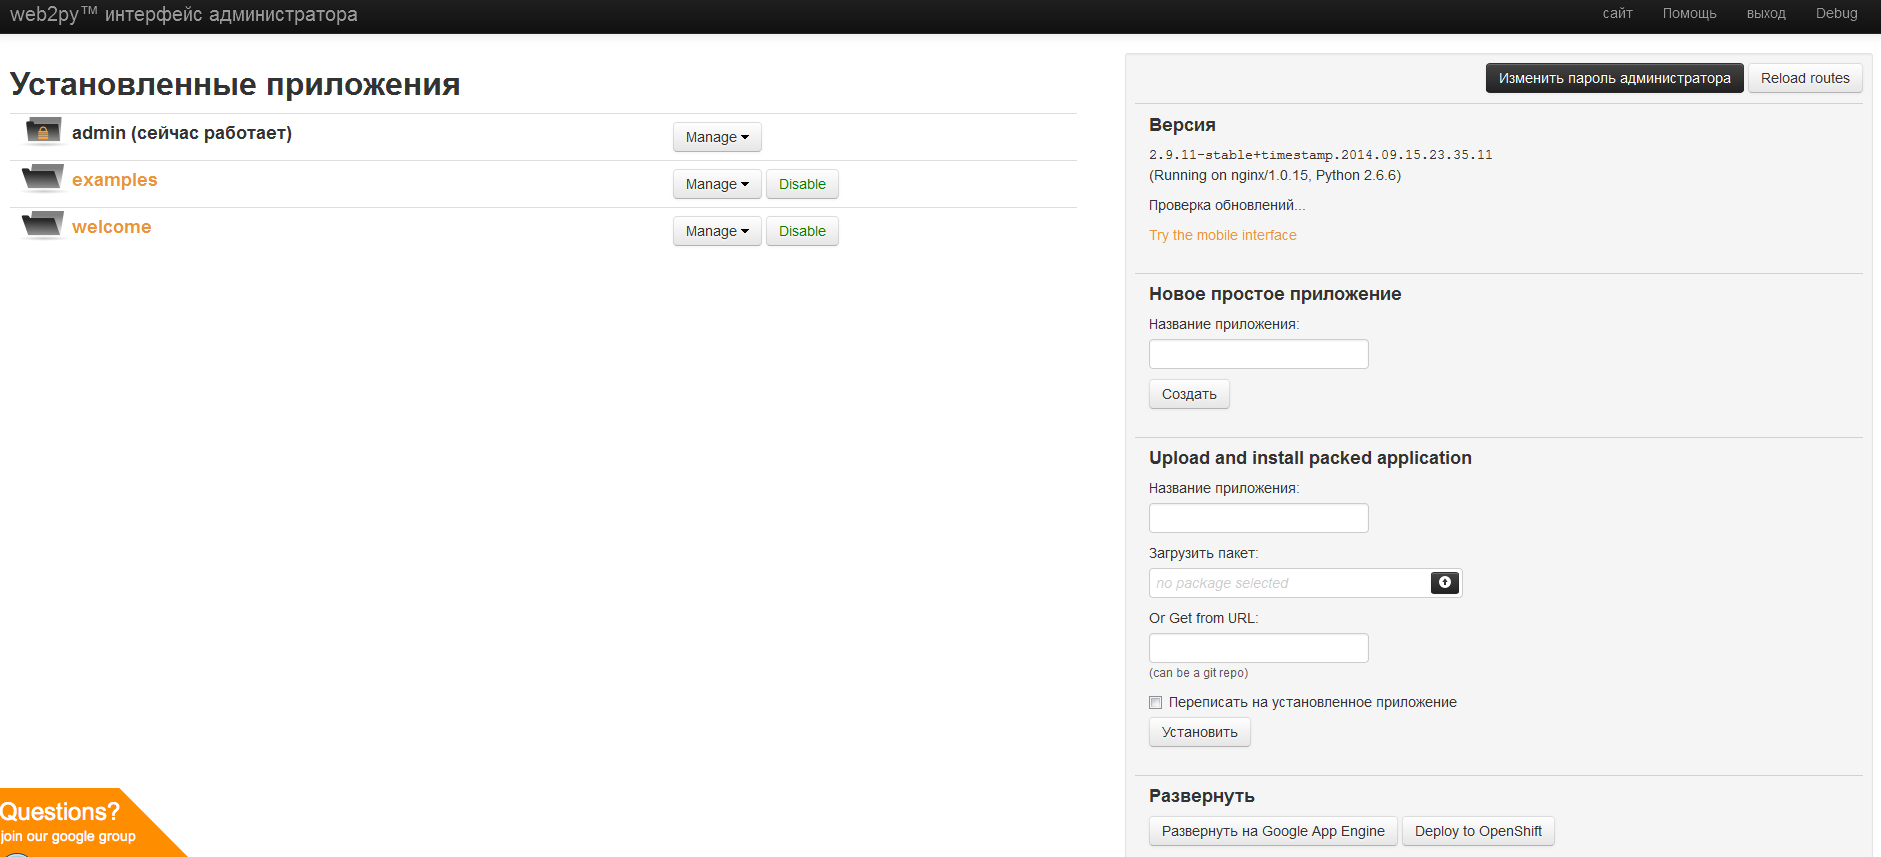
Указываем пароль, который мы вводили в начале установки:

Готово:
![]()